Tuna Kimchi Jjigae (참치김치찌개 — Chamchi Kimchi Jjigae)
Canned tuna, aged Stage 3 kimchi, and a classic anchovy-kelp stock, simmered into a thick, deep-red broth in just 30 minutes. This is the easiest and fastest recipe in the entire KimchiGuide Kimchi Jjigae family — no searing, no braising, just pantry staples and one rule: the tuna goes in last.


What Is Tuna Kimchi Jjigae?
Tuna kimchi jjigae — 참치김치찌개, chamchi kimchi jjigae — is a Korean stew built around canned tuna instead of meat: aged Stage 3 kimchi sauteed in the tuna’s own reserved oil, simmered in a classic anchovy-kelp stock with tofu, then finished by folding in the drained tuna in the last 2-3 minutes so it stays tender rather than turning rubbery. Two things decide whether a home version tastes right: choosing oil-packed tuna over water-packed when you can, and adding the tuna last, not first. It’s the fastest, cheapest, and most forgiving recipe in the whole KimchiGuide Jjigae family — no searing, no braising, just pantry staples. Serves 4 in 30 minutes at approximately 260 calories and 24g protein per serving.
The Pantry Staples & Gear This Recipe Actually Uses
This is the lowest-equipment recipe in the whole family, so the list is short and genuinely useful rather than padded — the two Korean pantry staples every version shares, the tuna itself, and the handful of tools that make canned-tuna prep easier. As an Amazon Associate, KimchiGuide earns from qualifying purchases.
Prices and availability change on Amazon’s end, not ours — always check the current price before buying. As an Amazon Associate, KimchiGuide.com earns from qualifying purchases at no extra cost to you.
Why This Recipe Works — Canned Tuna, Explained
Canned tuna behaves completely differently from every other protein in this family, and most online recipes don’t explain why the technique changes as a result. Here’s what’s actually happening in the pot.
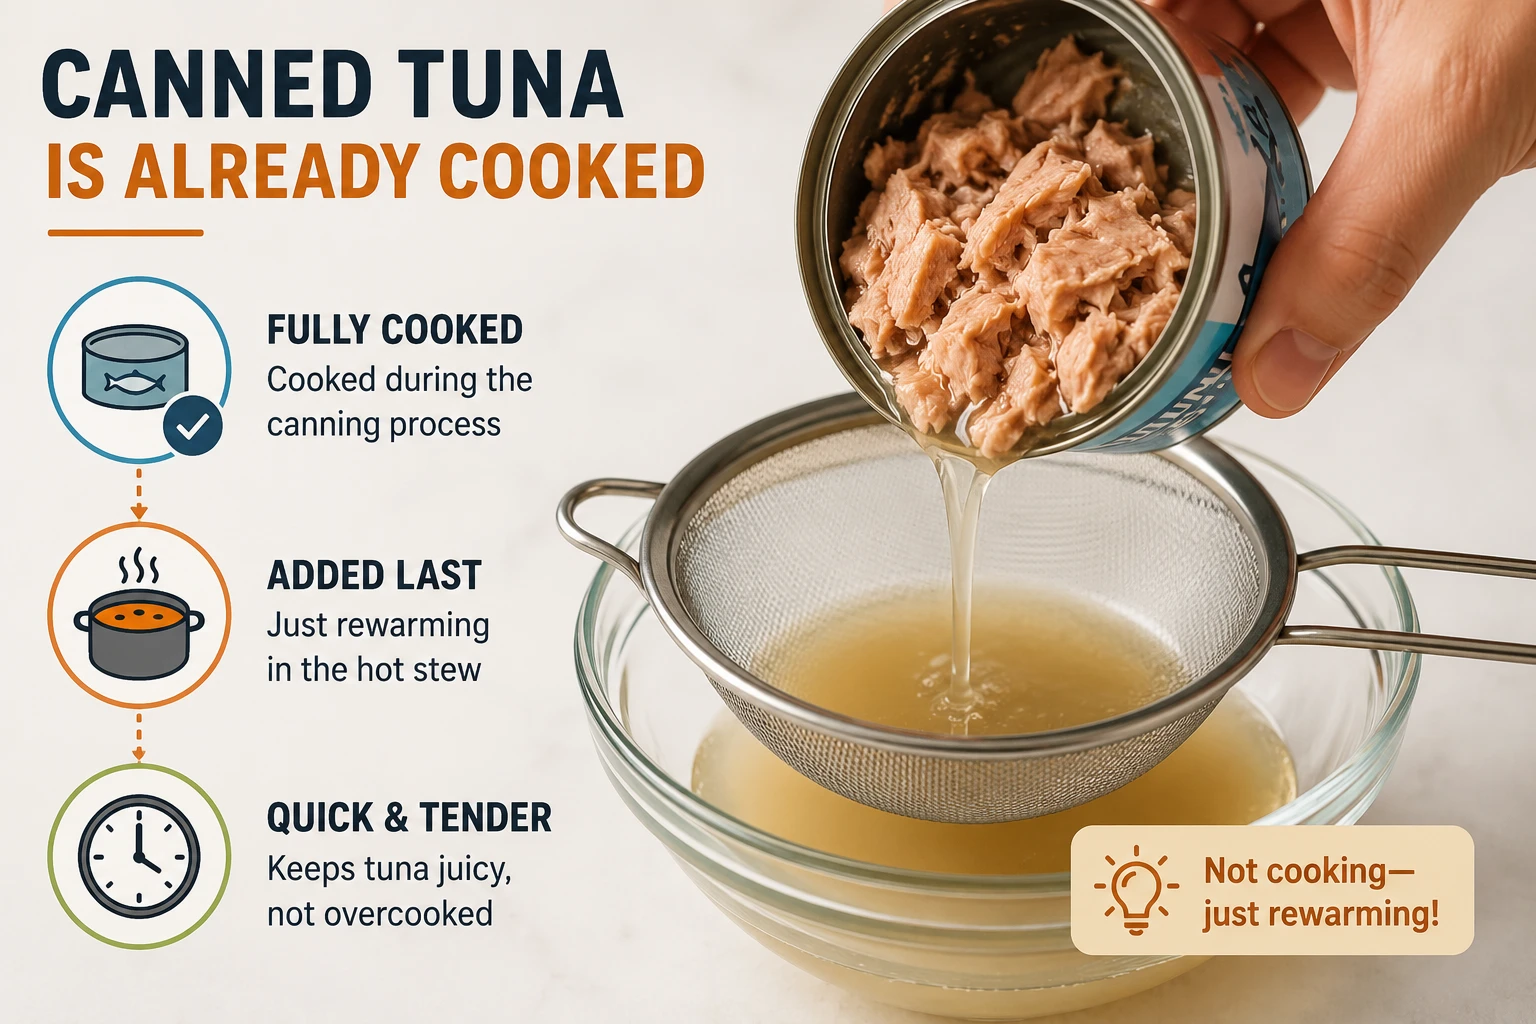
Unlike pork belly, chicken, or beef, canned tuna is fully cooked during the canning (retort) process before it ever reaches your kitchen. That means this recipe isn’t cooking the tuna at all — it’s just rewarming it, which is exactly why it goes in last instead of first.
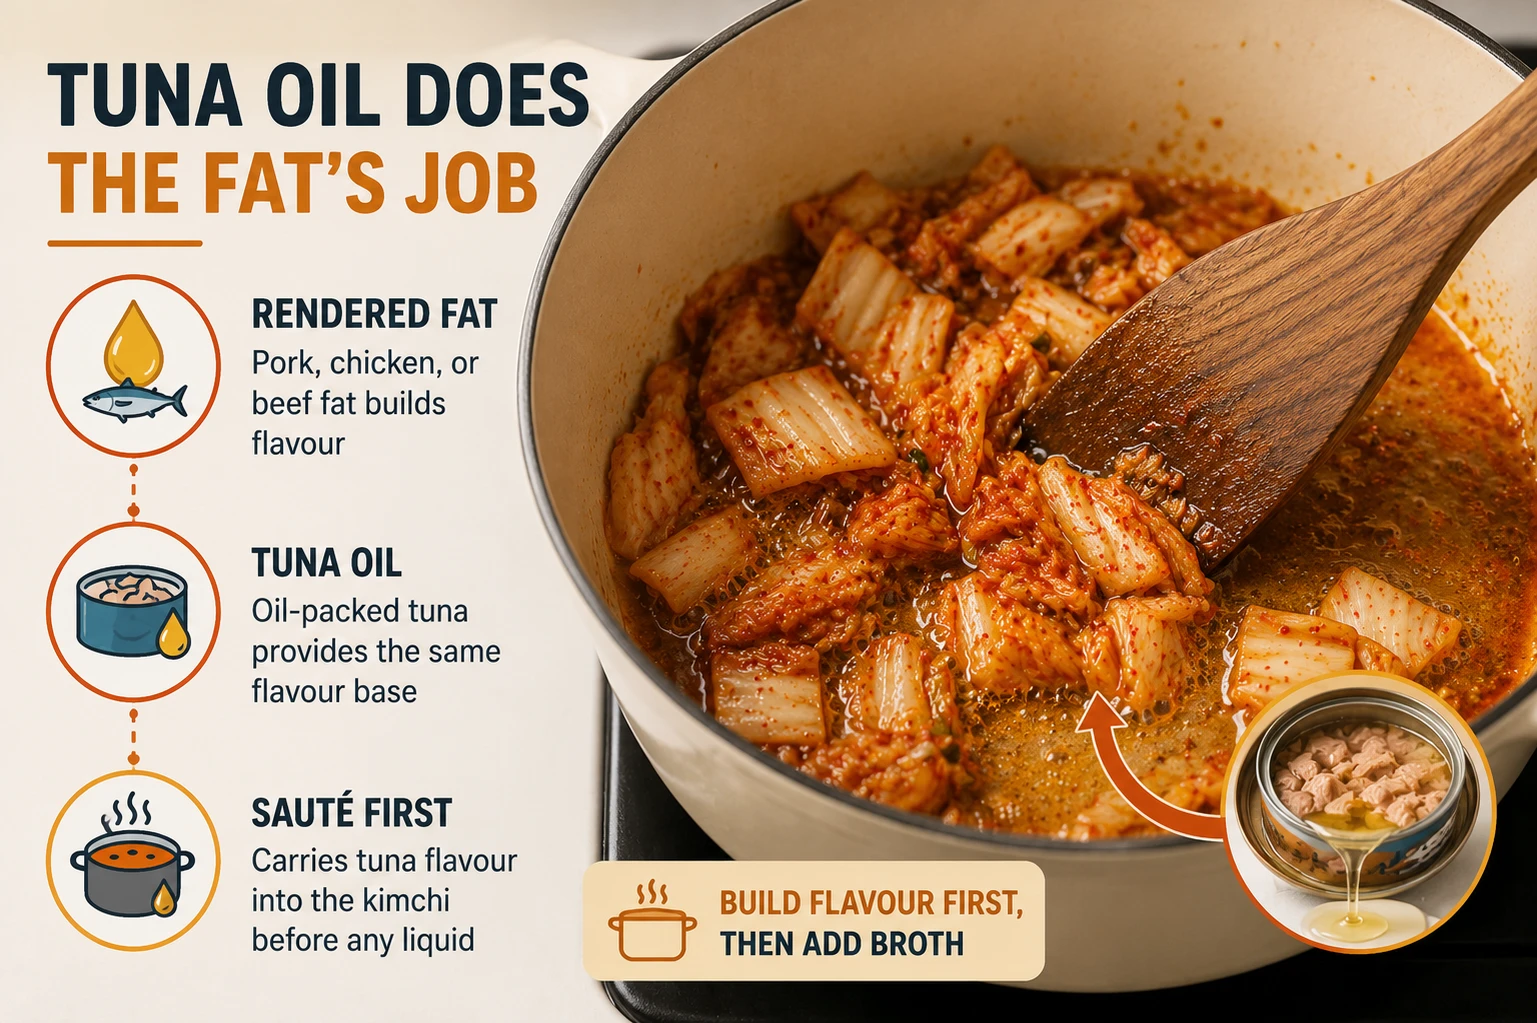
Every variation in this family builds flavour by sauteing kimchi in a rendered fat — pork fat, chicken fat, beef fat. If you use oil-packed tuna, its reserved oil does the exact same job here, carrying tuna flavour into the kimchi before any liquid touches the pot.
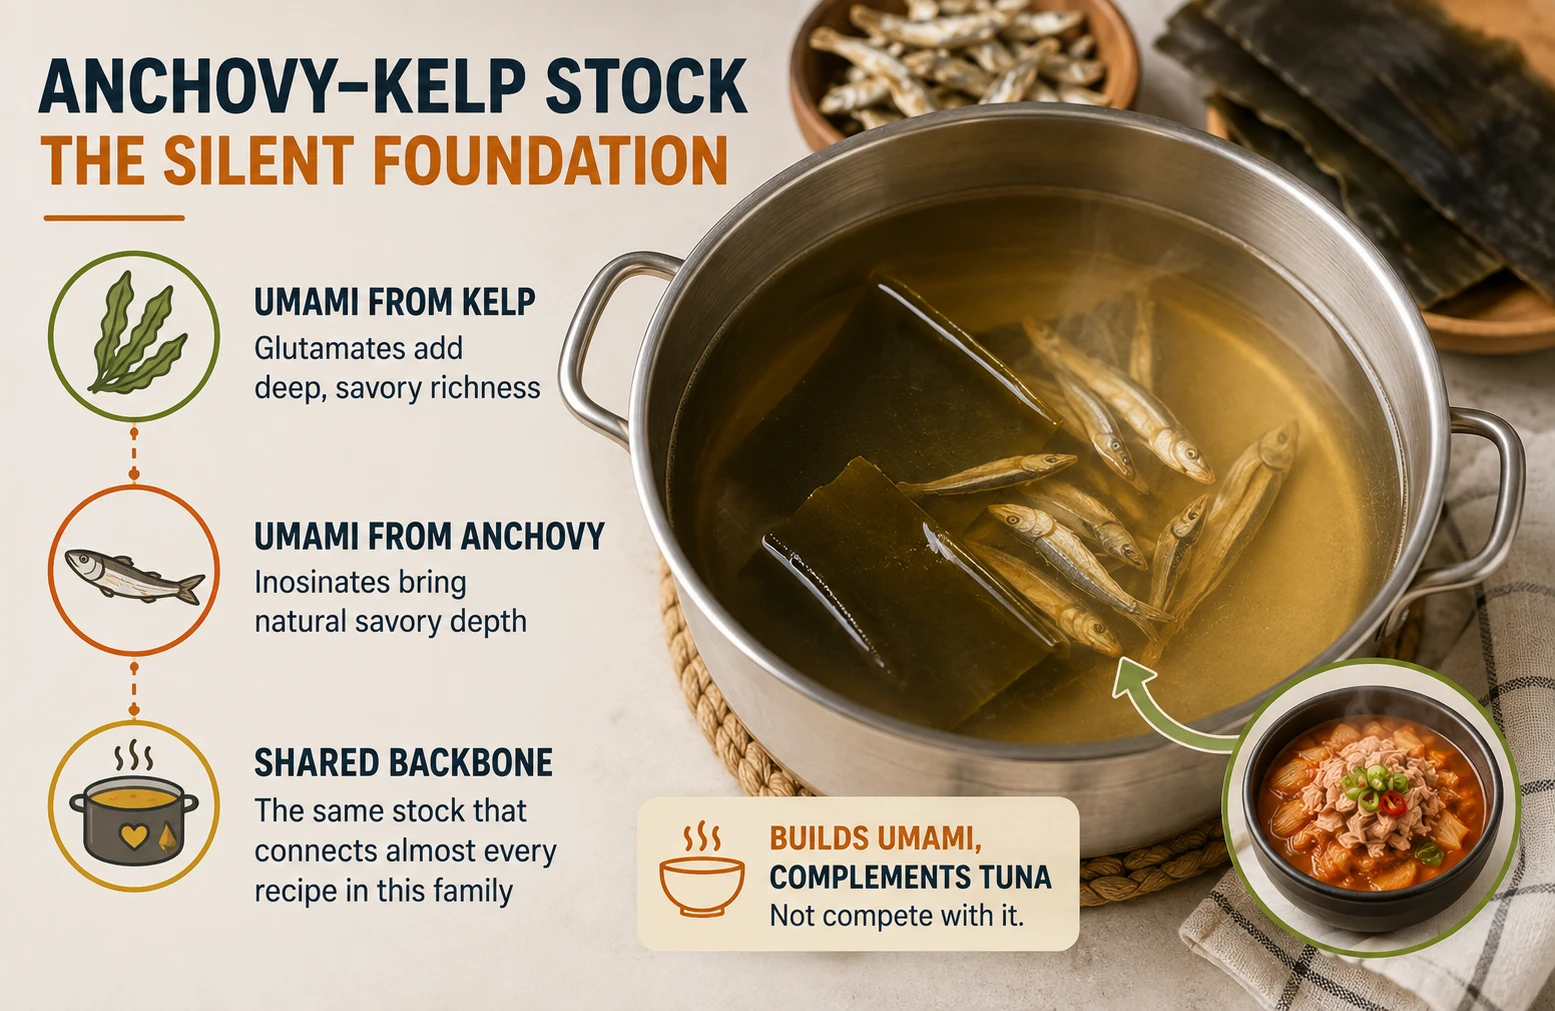
Myeolchi yuksu adds a layer of umami — glutamates from the kelp, inosinates from the dried anchovy — that pairs naturally with tuna’s own savoury depth rather than competing with it. This exact stock is the shared backbone of nearly every recipe in the family.
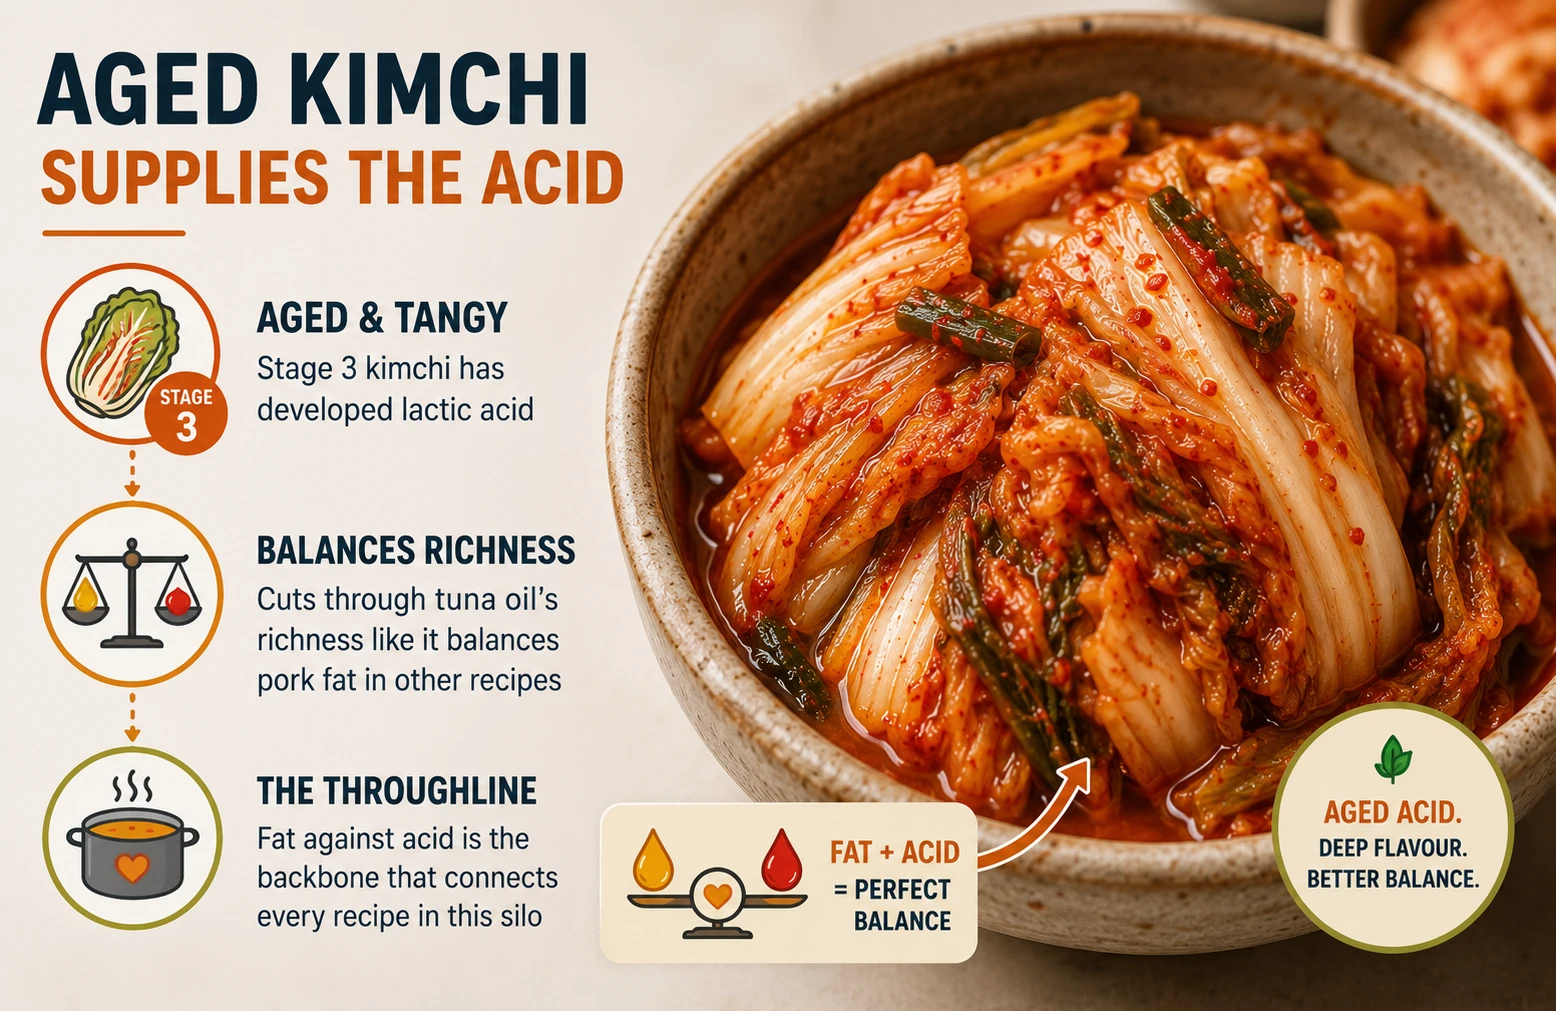
Stage 3 kimchi’s developed lactic acid cuts through the tuna oil’s richness the same way it balances pork fat elsewhere in the family — that fat-against-acid balance is the throughline connecting every recipe in this silo, whatever the protein.
The Origin of Kimchi Jjigae — and Where Tuna Fits In
Kimchi-jjigae itself is centuries old; canned tuna’s place in it is a much more modern story.
Kimchi-jjigae as a dish is generally understood to have emerged in the mid-to-late Joseon era, once chili-spiced, well-fermented kimchi existed as an everyday pantry staple — cooking it down into a hearty stew with whatever protein a household had on hand was a natural next step. Pork, and to a lesser extent seafood, were the traditional proteins available to most households for most of that history. If you’re curious how that everyday kimchi got made in the first place, see the full guide to making kimchi from scratch, or the full origin and etymology breakdown on the Classic recipe page for the complete history.
Canned tuna’s role in Korean home cooking is a considerably more recent development. Domestic Korean tuna canning only became widespread from the late 1960s onward, once companies like Dongwon Industries (founded 1969) made shelf-stable canned tuna affordable and widely available in Korean pantries. Chamchi kimchi jjigae grew out of that same convenience — a way to make a satisfying kimchi stew without needing fresh meat or a trip to the butcher, using a can that was probably already in the cupboard.
That same convenience is also why this version has a strong association with camping and picnics in Korean home cooking. Reference sources on kimchi-jjigae specifically call out the tuna version as a popular choice for camping trips, precisely because it needs no fresh meat, no butcher run, and no cooler space for raw protein — just a couple of shelf-stable cans, a jar of kimchi, and a single pot over a portable burner.
Oil-Packed vs Water-Packed Tuna — Compared
This is the single biggest variable competing recipes disagree on, and almost none of them actually explain the trade-off. Here’s the real difference, tested side by side.
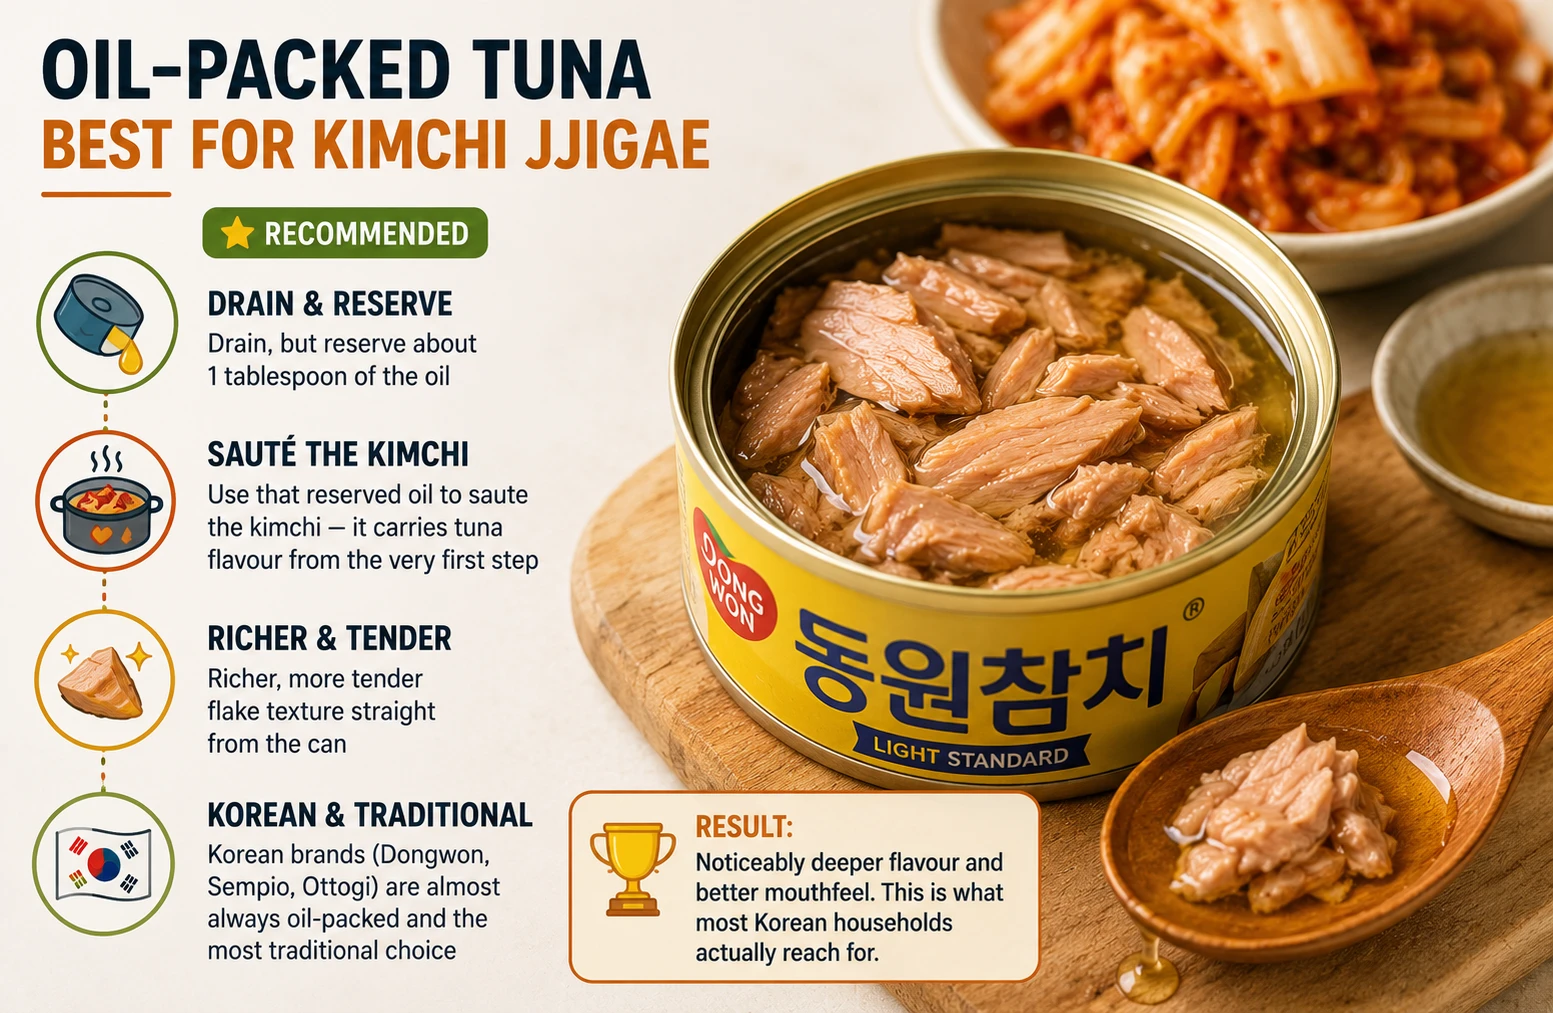
- Drain, but reserve about 1 tablespoon of the oil
- Use that reserved oil to saute the kimchi — it carries tuna flavour into the broth from the very first step
- Richer, more tender flake texture straight from the can
- Korean brands (Dongwon, Sempio, Ottogi) are almost always oil-packed and the most traditional choice
Result: Noticeably deeper flavour and better mouthfeel. This is what most Korean households actually reach for.

- Drain fully — there’s no usable fat to reserve
- Add 1 teaspoon neutral oil (or sesame oil) to saute the kimchi instead
- Firmer, drier flake texture; more neutral flavour on its own
- Meaningfully lower in fat and calories if that matters to you
Result: Perfectly good, genuinely leaner. The broth carries slightly less depth without the reserved oil, but it’s a small difference.
Tuna Type at a Glance
| Type | Texture | Cooking Fat Use | Richness | Verdict |
|---|---|---|---|---|
| Oil-Packed ⭐ | Tender, moist, flakes cleanly | Reserved oil sautes the kimchi | Highest | The traditional, most authentic choice |
| Water-Packed | Firmer, drier | Needs 1 tsp added oil | Lower | Good leaner alternative |
Key Terms — Language & Food Science Entities
The core terms used throughout this recipe and the wider family it belongs to. For the broader landscape of kimchi styles this dish draws on, see the Types of Kimchi guide.
The Whole Family — How 13 Versions Differ
Every recipe below starts from the same base technique on the Classic (Pork) page — saute the aromatics and kimchi in fat, build the broth, simmer, finish. What changes is the protein, the format, or the diet. This Tuna version is the fastest and most forgiving way into the whole family.
| Version | What Changes | Simmer Time | Best For |
|---|---|---|---|
| Classic (Pork) | The original base technique | 15-20 min | Everyone — the reference point for the whole family |
| Chicken | Chicken thigh, browned skin-first | 18-20 min | Leaner, highest protein of the meat versions |
| Beef | Short rib or chuck, longer braise | 30-35 min | Richest, most indulgent broth |
| Seafood | Shrimp, mussels, clams added last | 5-8 min (seafood only) | Leanest jjigae-format option, alongside Tuna |
| Soondubu | Silken tofu replaces firm, no draining | 10-12 min | Soft, custardy texture, highest search demand |
| Vegetarian | Mushroom + tofu + egg replace meat | 12-15 min | Meatless, egg and dairy still allowed |
| Vegan | Mushroom + tofu, no egg, fish-sauce-free kimchi required | 12-15 min | Fully plant-based |
| Tuna (Chamchi) ← This Page | Canned tuna, added in the final 2-3 minutes only | 15-20 min broth + 2-3 min tuna | The fastest, cheapest recipe in the family |
| Spam | Pan-seared Spam cubes replace pork | 10-12 min | Simple comfort food, distinct from Budae |
| Budae Jjigae | Spam, sausages, baked beans, instant noodles, cheese | 15 min | Korean War-era army-base combo stew |
| Mackerel (Godeungeo) | Oily canned fish replaces pork | 10-12 min | Niche but authentic canned-fish alternative to Tuna |
| Kimchi Guk | Thinner broth, less salt, soup format | 12-15 min | Lighter everyday side, not a main-dish jjigae |
| Instant Pot & Slow Cooker | Classic pork-belly recipe, hands-off appliance methods | Varies by method | Weeknight convenience, minimal supervision |
Household Techniques — Early-Add vs Late-Add vs Layered Broth
Unlike most of this family, where regional variation is the main source of difference, tuna kimchi jjigae’s real disagreement across home cooks is technique — specifically, when the tuna goes in. Here are the documented approaches.
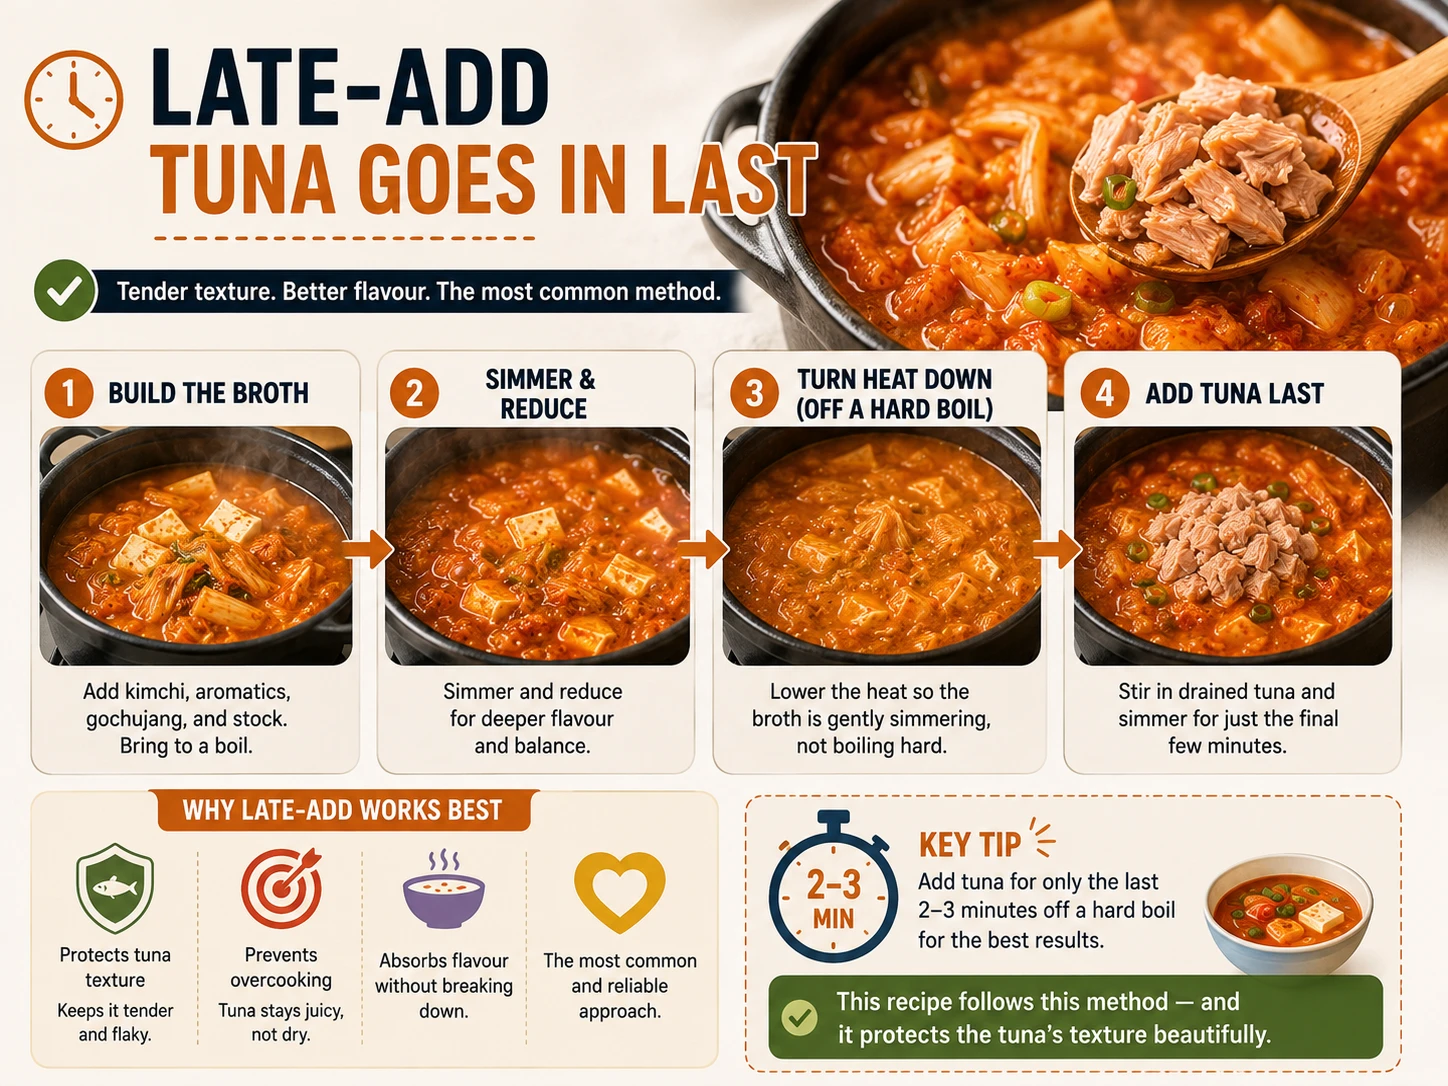
Build the broth completely, simmer it down, and stir in the drained tuna for only the final few minutes off a hard boil. This recipe follows this method — it’s the most common approach and protects the tuna’s texture.
This Recipe’s Method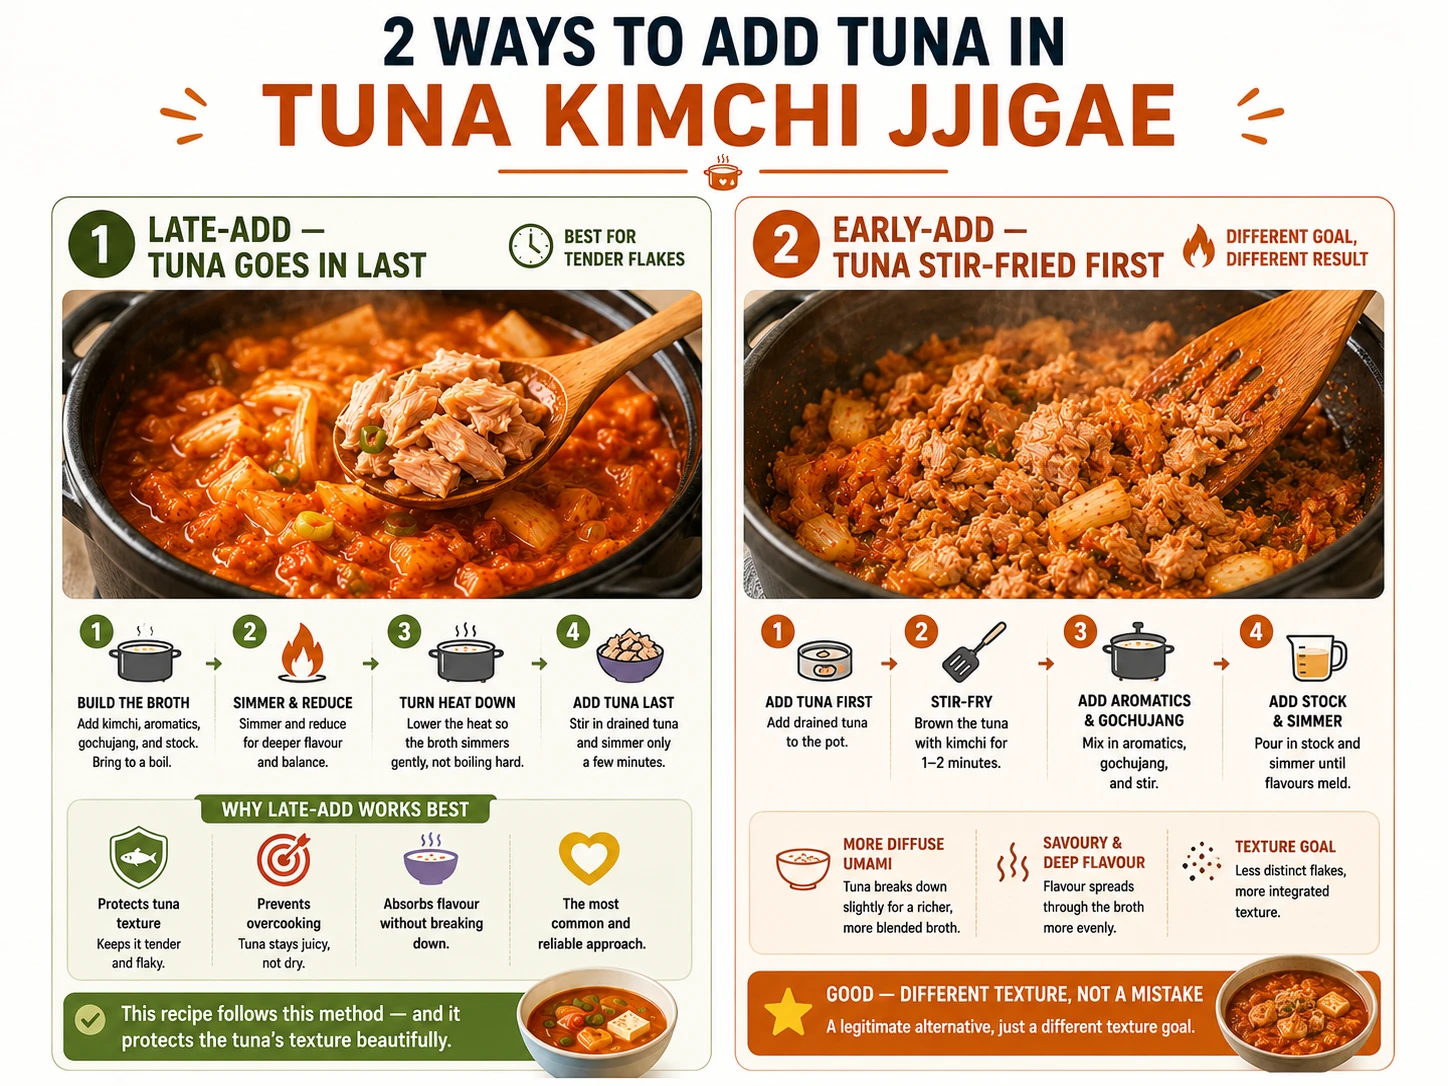
Some households brown the tuna briefly with the kimchi at the very start, letting it partly break down into the broth for a more diffuse, savoury flavour rather than distinct flakes. A legitimate alternative, just a different texture goal.
Good — Different Texture, Not a Mistake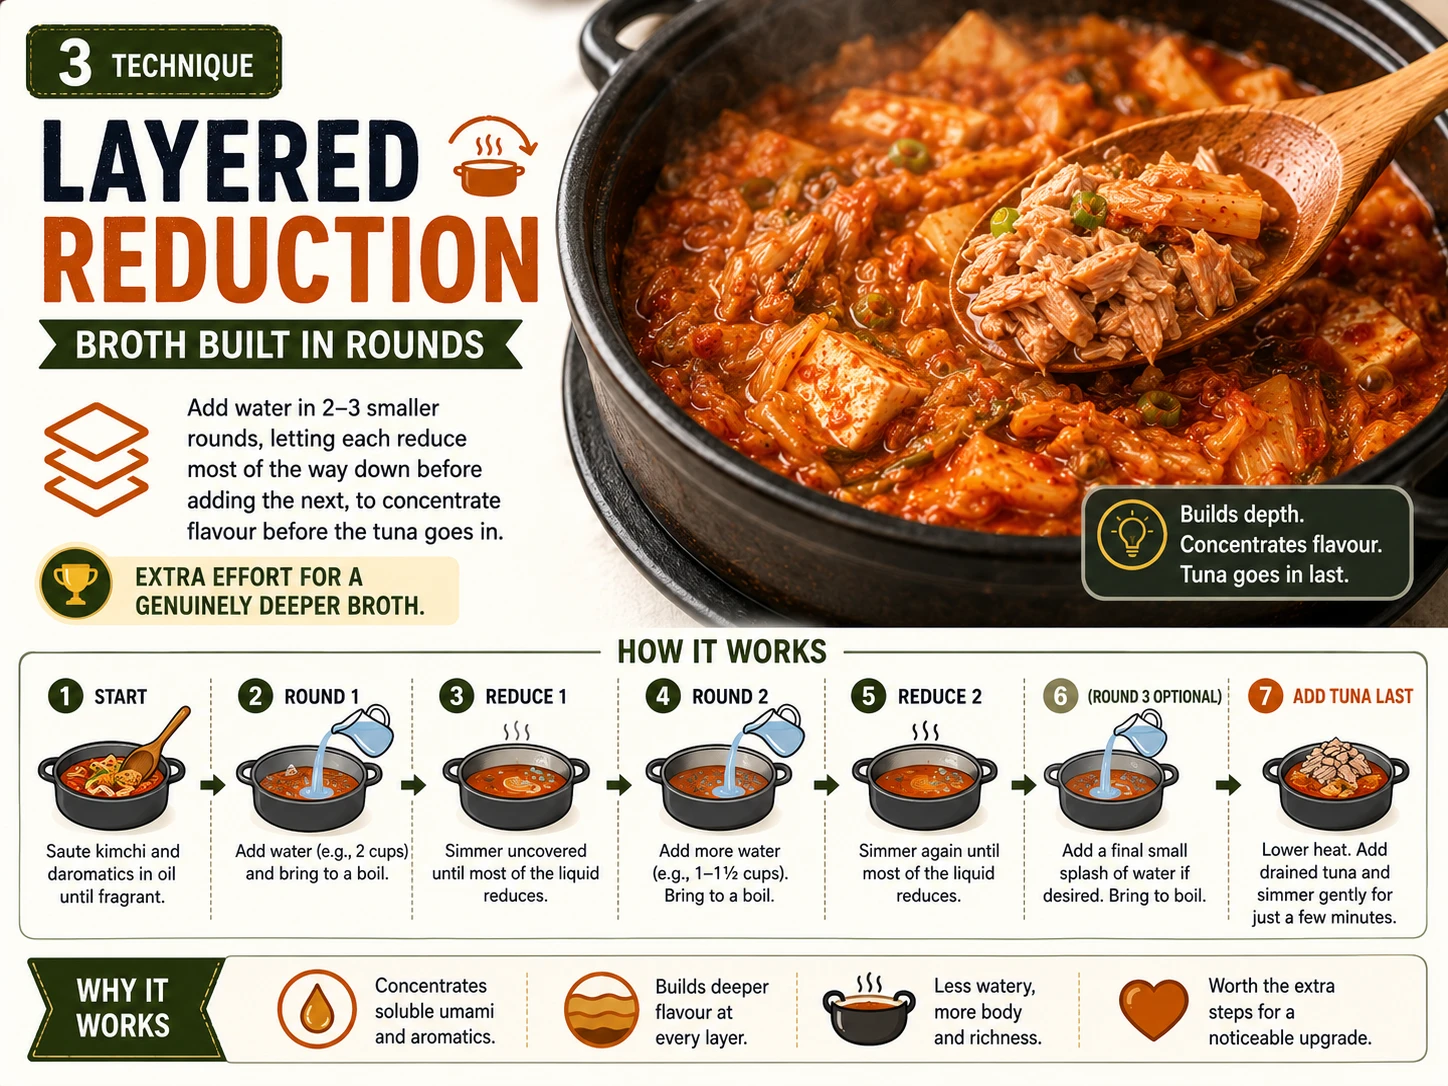
A more advanced household technique: add water in two or three smaller rounds, letting each reduce most of the way down before adding the next, to concentrate flavour before the tuna goes in. Extra effort for a genuinely deeper broth.
Advanced — Worth Trying Once You Know the Basics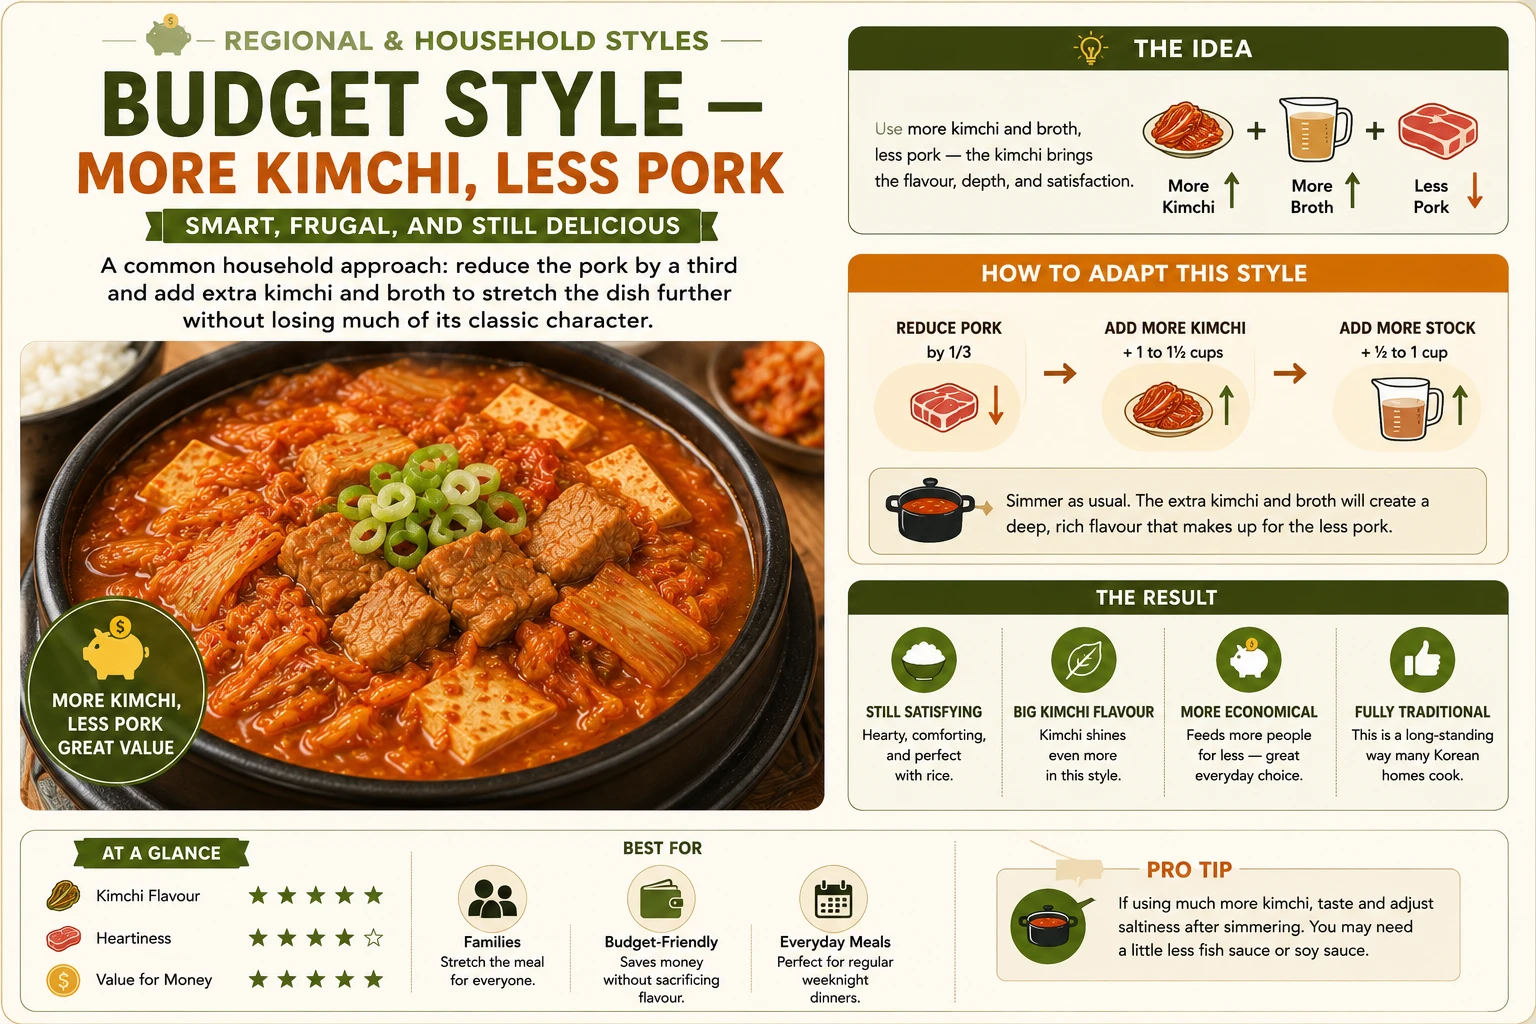
A common frugal approach when stretching a single can further: increase the kimchi and broth slightly and rely on the tuna oil alone for richness, rather than using two full cans.
Genuinely Good, More EconomicalKimchi Fermentation — The Complete 4-Stage Guide
Every variation page on this site links back to this exact section for the full picture — here it is in full, not the shortened quick-reference version used elsewhere in the family. If you’re comparing what you have on hand against a fresher jar, the Fresh vs Aged Kimchi guide covers the same ground from a shopping angle.
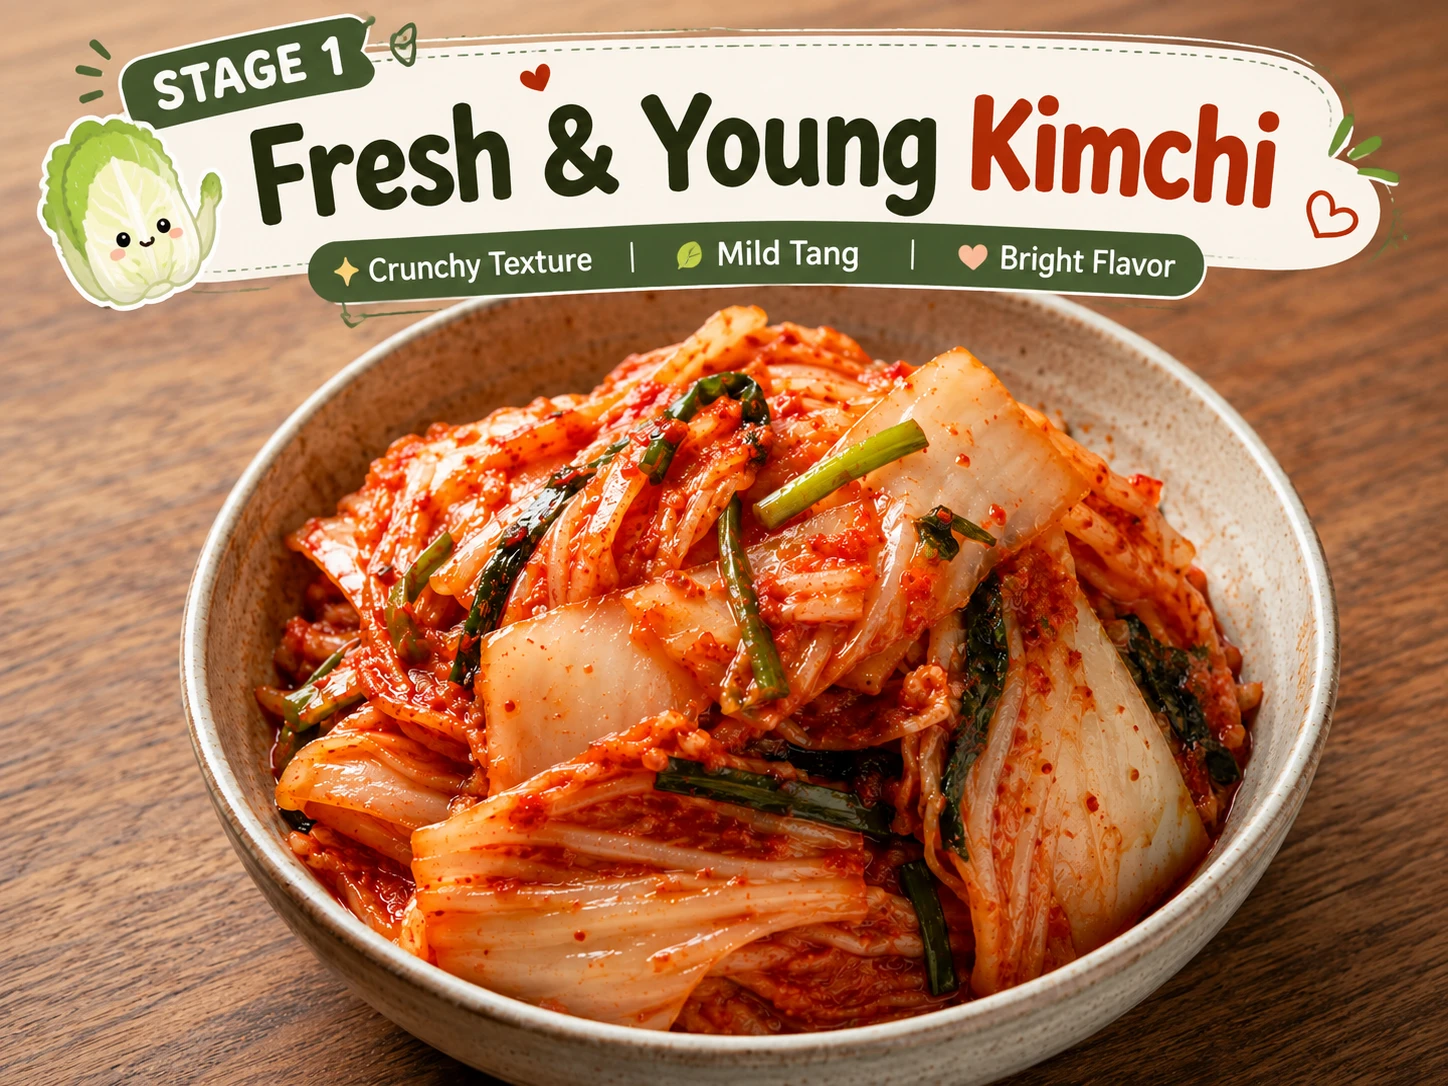
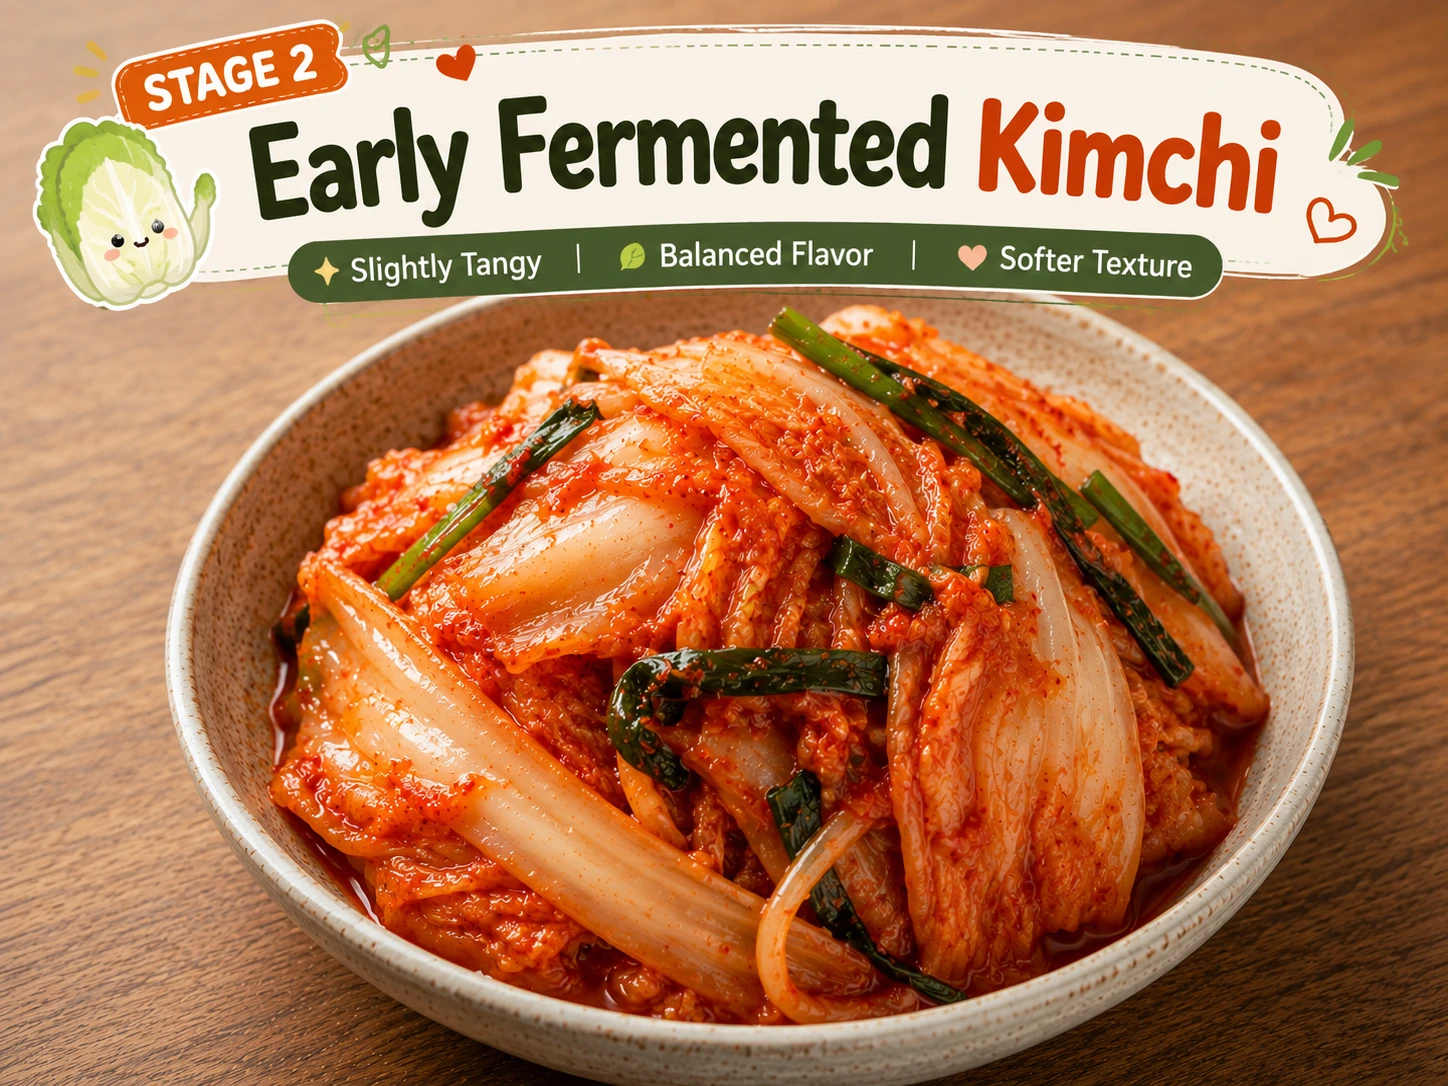
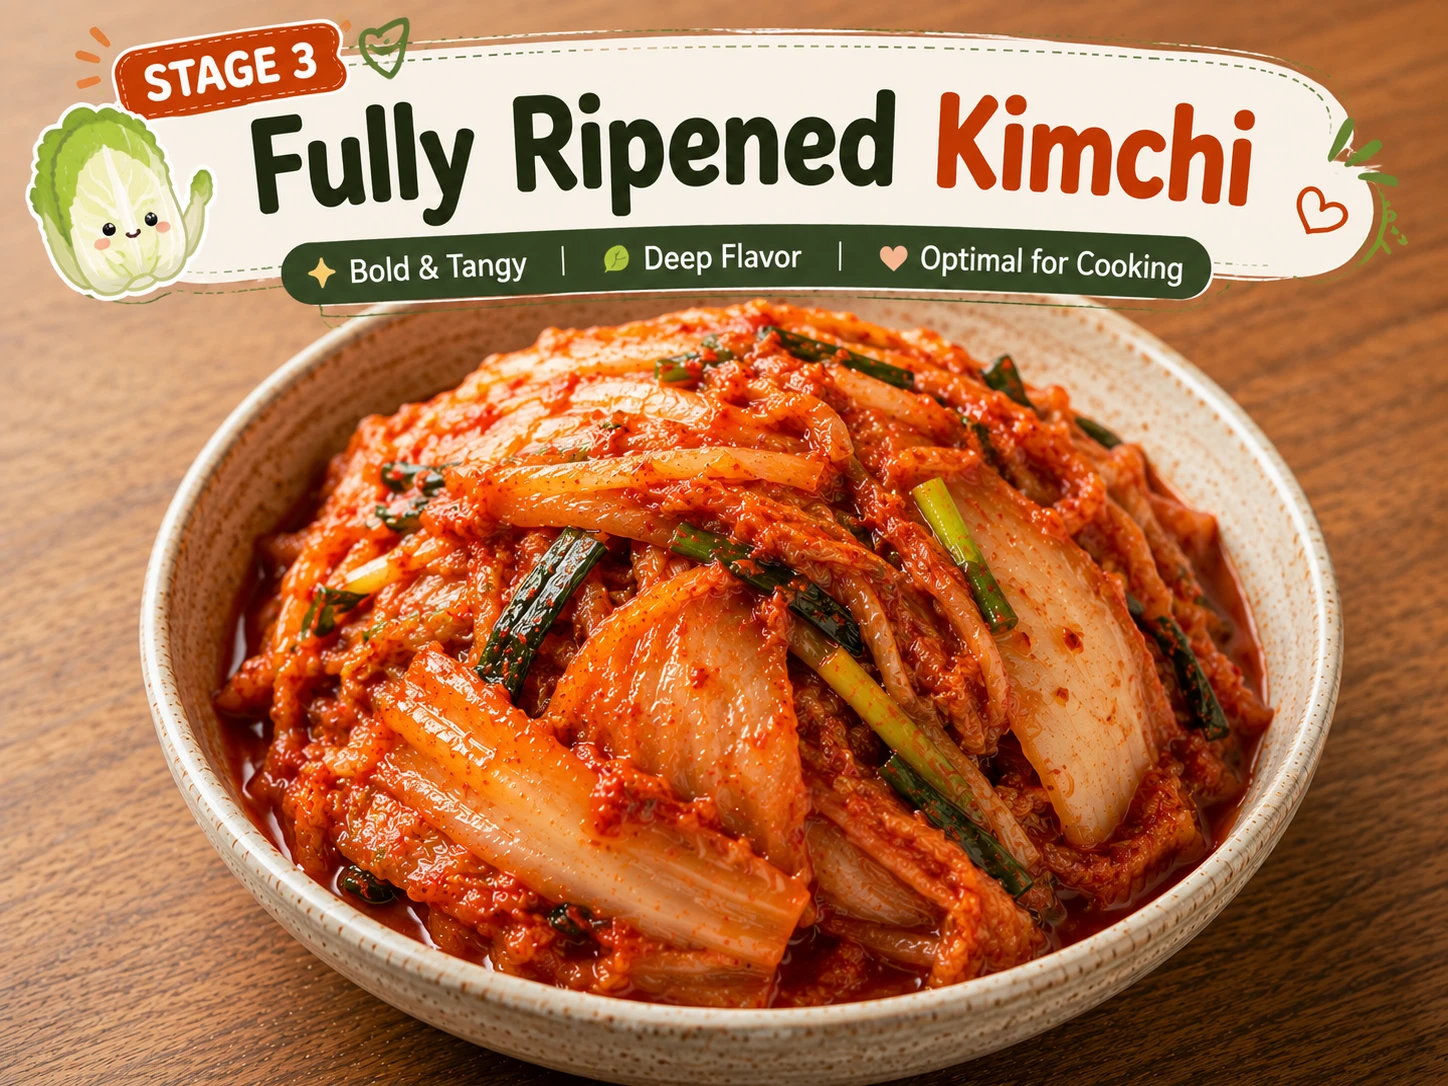
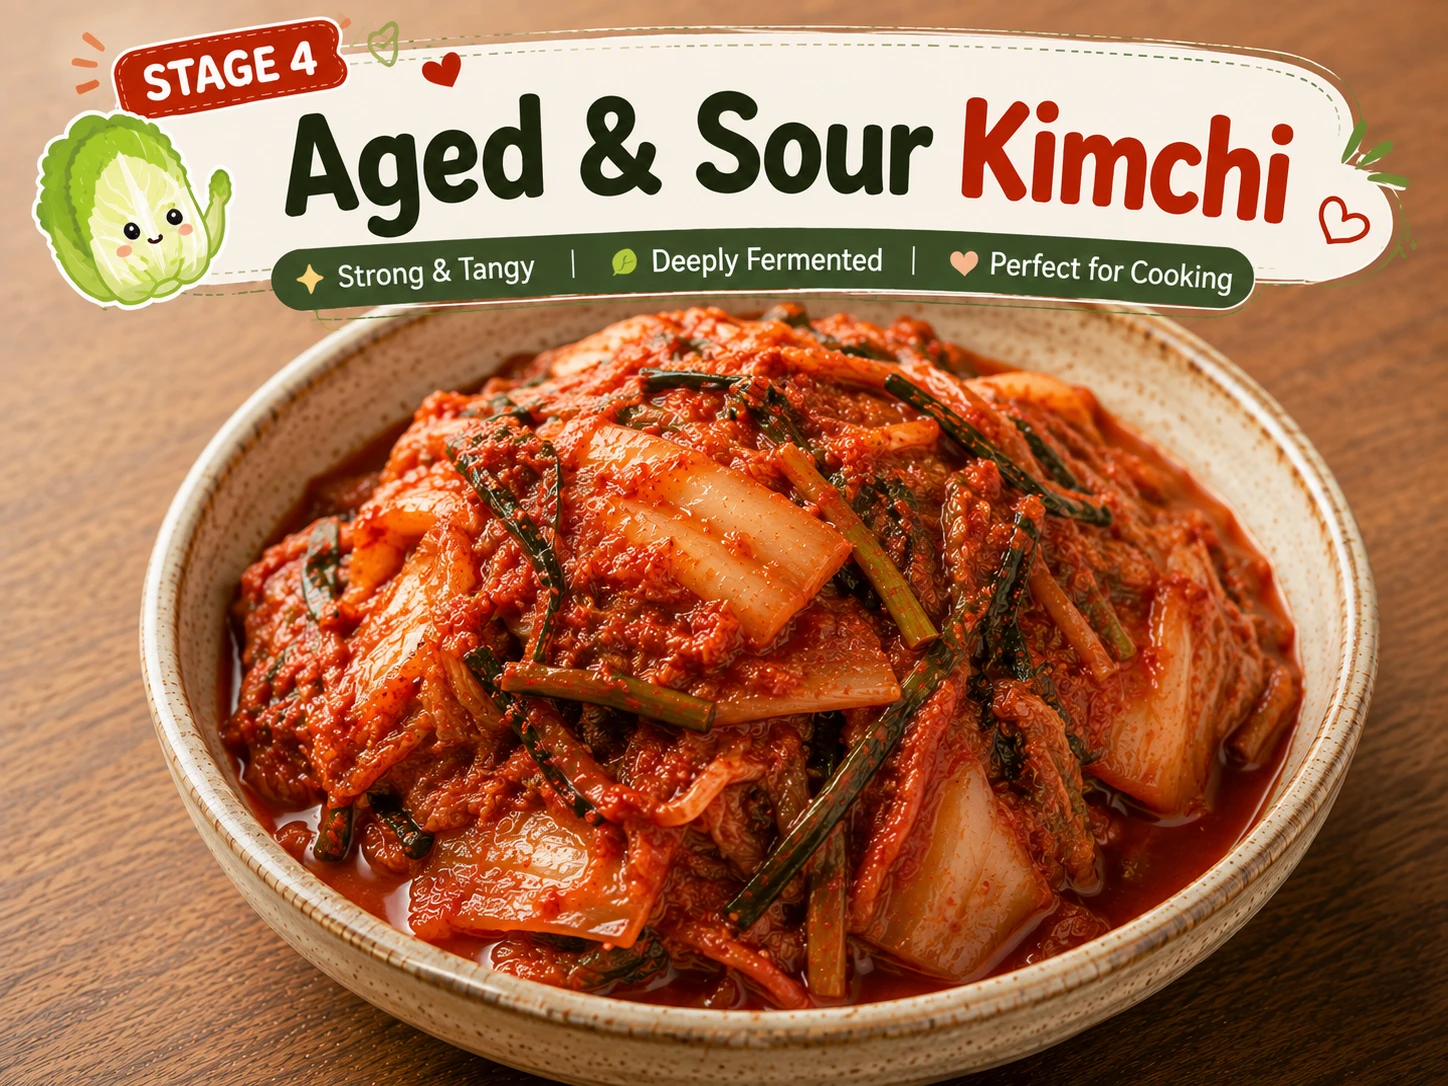
Speeding Up or Slowing Down Fermentation at Home
Room temperature accelerates fermentation significantly — kimchi left on the counter can move through these stages in days rather than weeks, while refrigeration slows the process to a near-crawl, which is why store-bought refrigerated kimchi can sit at a similar stage for a long time. If your kimchi is fermenting faster than you’d like, refrigerate it sooner; if you need Stage 3 kimchi in a hurry, a day or two at room temperature can meaningfully speed things along.
Seasonal Adjustments — Summer vs Winter
The core recipe doesn’t change by season — as a pantry-staple dish, this is genuinely a year-round recipe, more so than any of the richer meat-based variations.
- Kimchi ferments noticeably faster in summer heat — check it 3-5 days earlier than the timeline above suggests
- No rendered meat fat means this is one of the lighter jjigae options for hot weather, without needing any recipe changes
- A quick 30-minute cook with no stovetop searing keeps the kitchen cooler than the meat-based versions
Result: Genuinely one of the best jjigae options for warm-weather cooking in the whole family.
- Kimchi ferments more slowly in cold storage — Stage 3 (3-6 weeks) is a reliable timeline in winter
- Works well as a quick weeknight jjigae when you want something warm without committing to a longer braise like Beef
- Consider the richer Classic or Beef versions if you want something more indulgent for a cold night
Result: A lighter, faster winter option — reach for Classic or Beef instead if richness matters more than speed that day.
How Difficult Is This Recipe?
The easiest recipe in the entire 13-recipe family — no searing, no rendering fat, no braise to time. If you can open a can and watch a pot simmer, you can make this.
Equipment — What You Actually Need
The lowest equipment bar in the entire family — no special pan or long-braise cookware required. See the full Ttukbaegi Buying Guide if you’re considering a traditional stone pot for the presentation, or jump to Shop This Recipe for our specific picks.
| Item | Why You Need It | Substitute |
|---|---|---|
| Any Pot or Ttukbaegi | Sauteing and simmering the broth | Any pot with a lid works — a ttukbaegi (뚝배기) just keeps it bubbling longer at the table. 🛒 View on Amazon ↗ |
| Can Opener | Opening the tuna cans | Pull-tab cans skip this entirely. 🛒 Smooth-edge opener ↗ |
| Fine-Mesh Strainer or Fork | Draining the tuna and reserving its oil | A fork pressed against the can’s edge works in a pinch. 🛒 Shop strainers ↗ |
Ingredients + Scaler
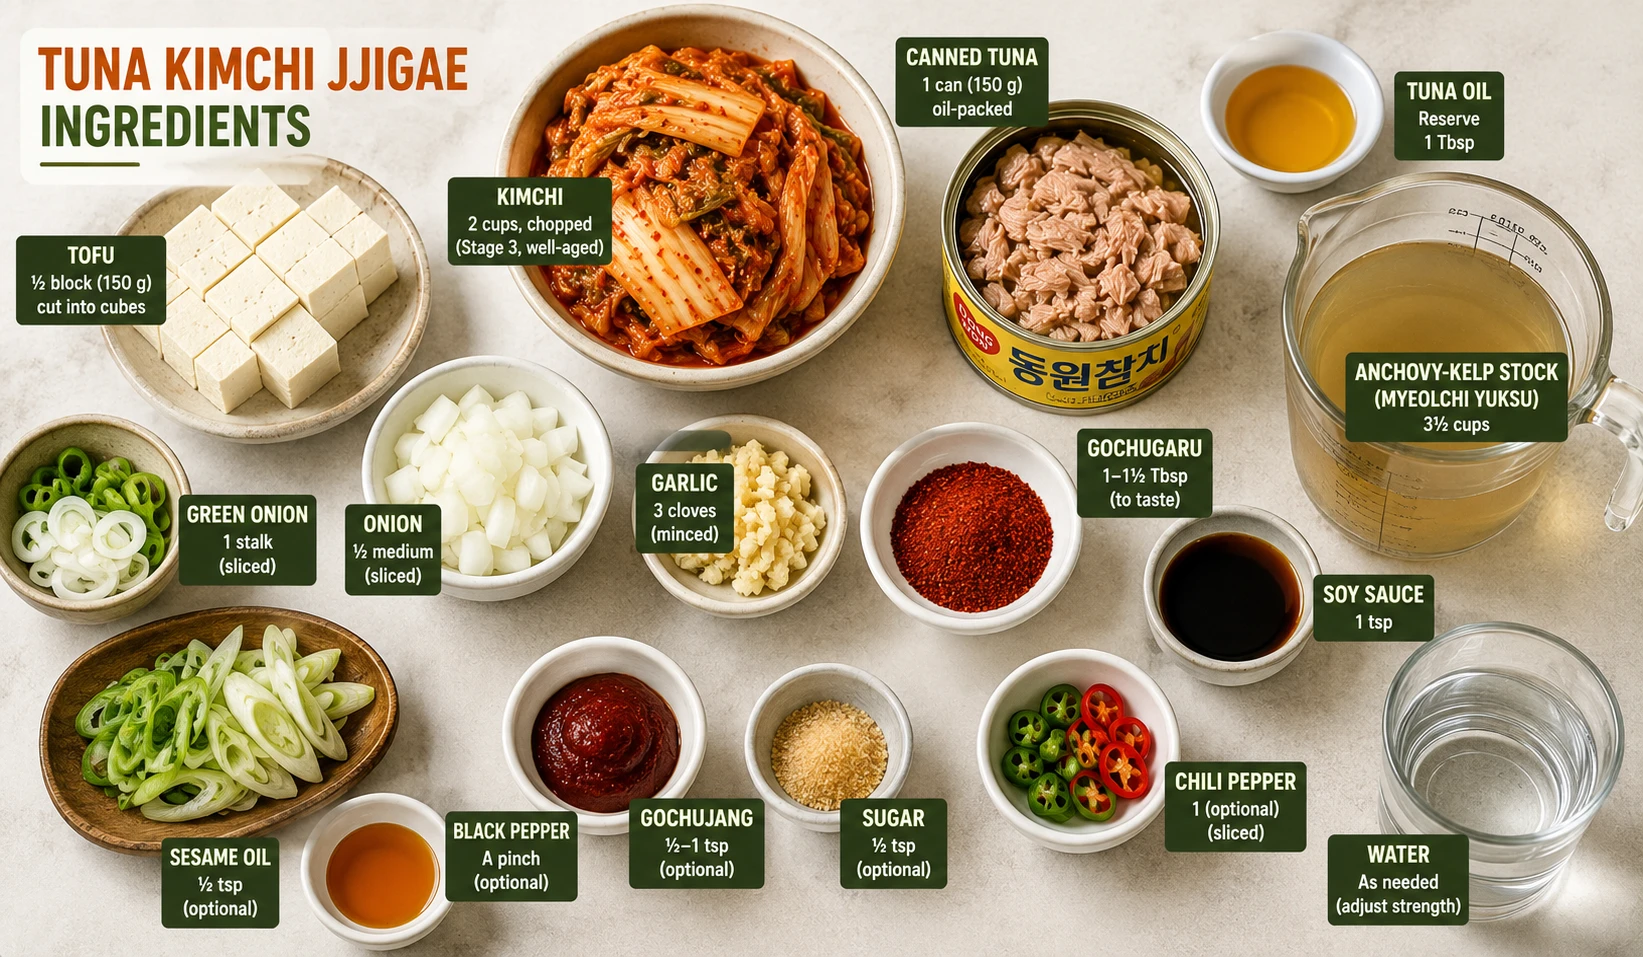
Canned tuna and Stage 3 aged kimchi are the two non-negotiables — everything else is standard pantry stock.
Substitutions & Allergen Notes
A few genuine swaps work directly in this recipe; bigger dietary needs are better served by a dedicated page built for that purpose.
Sourcing Guide — Finding Ingredients Outside Korea
Genuinely the easiest recipe in the family to shop for — canned tuna is a mainstream supermarket staple everywhere. Amazon links below are affiliate links (Amazon Associate: KimchiGuide) — any supermarket or Korean grocery works just as well.
How to Make Tuna Kimchi Jjigae — 5 Steps
Five steps, thirty minutes. The one rule that matters more than any other: the tuna goes in last.
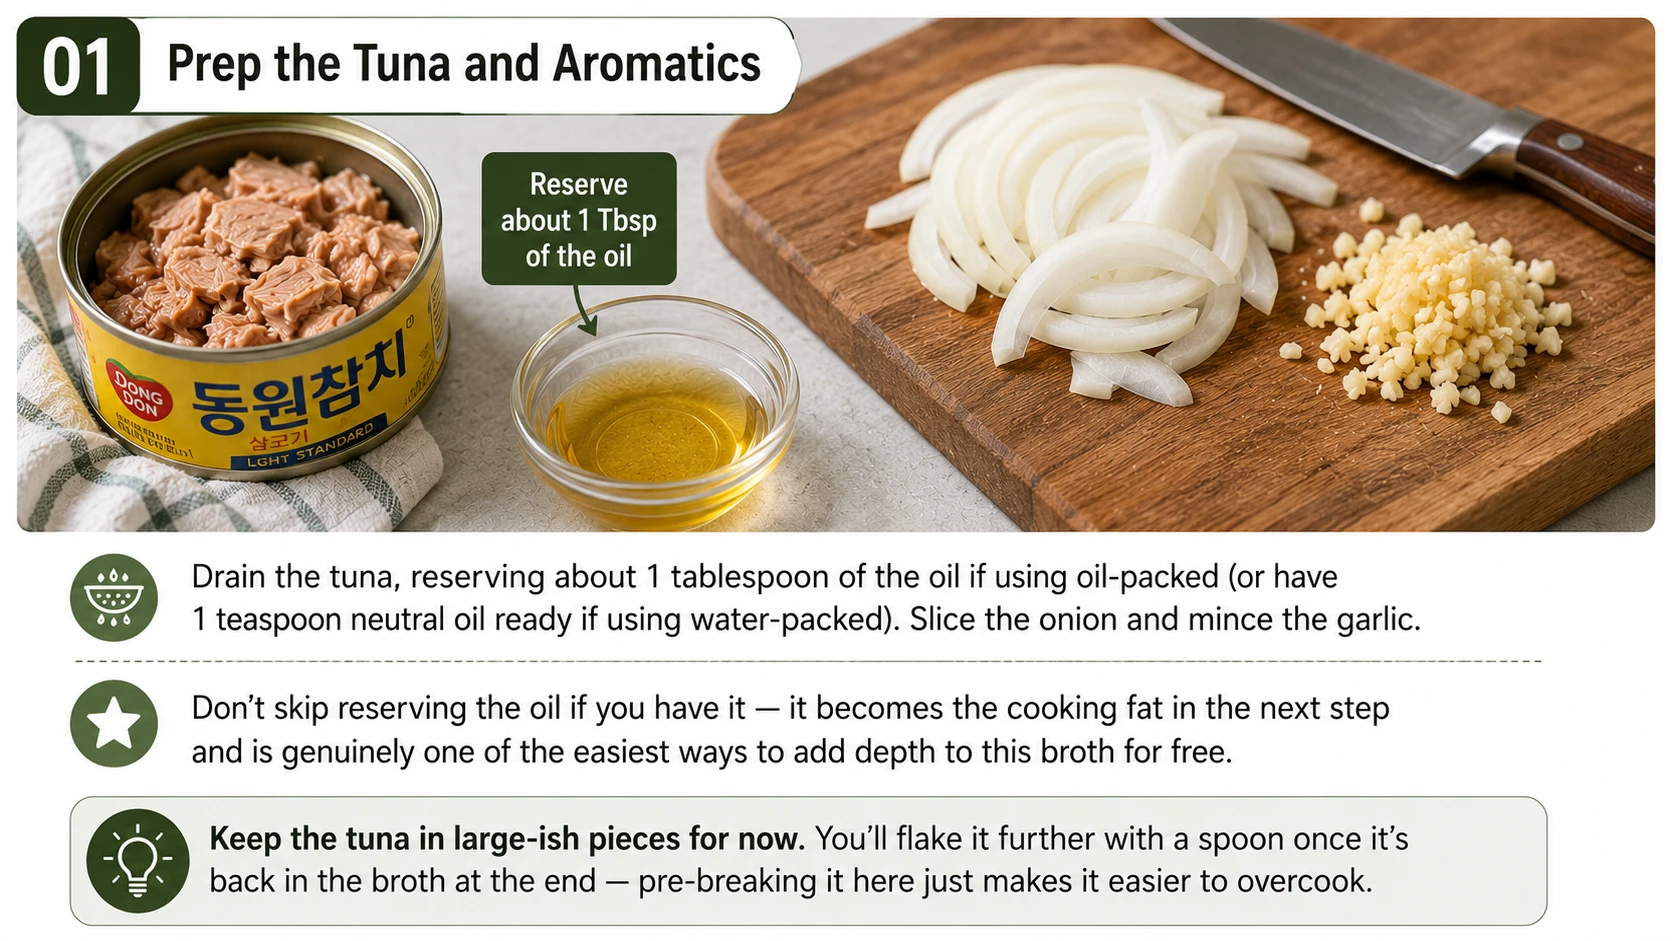
Drain the tuna, reserving about 1 tablespoon of the oil if using oil-packed (or have 1 teaspoon neutral oil ready if using water-packed). Slice the onion and mince the garlic.
Don’t skip reserving the oil if you have it — it becomes the cooking fat in the next step and is genuinely one of the easiest ways to add depth to this broth for free.
If you’re prepping ahead, this whole step can be done the night before and refrigerated — the tuna and aromatics both hold fine for a day without any loss of quality.
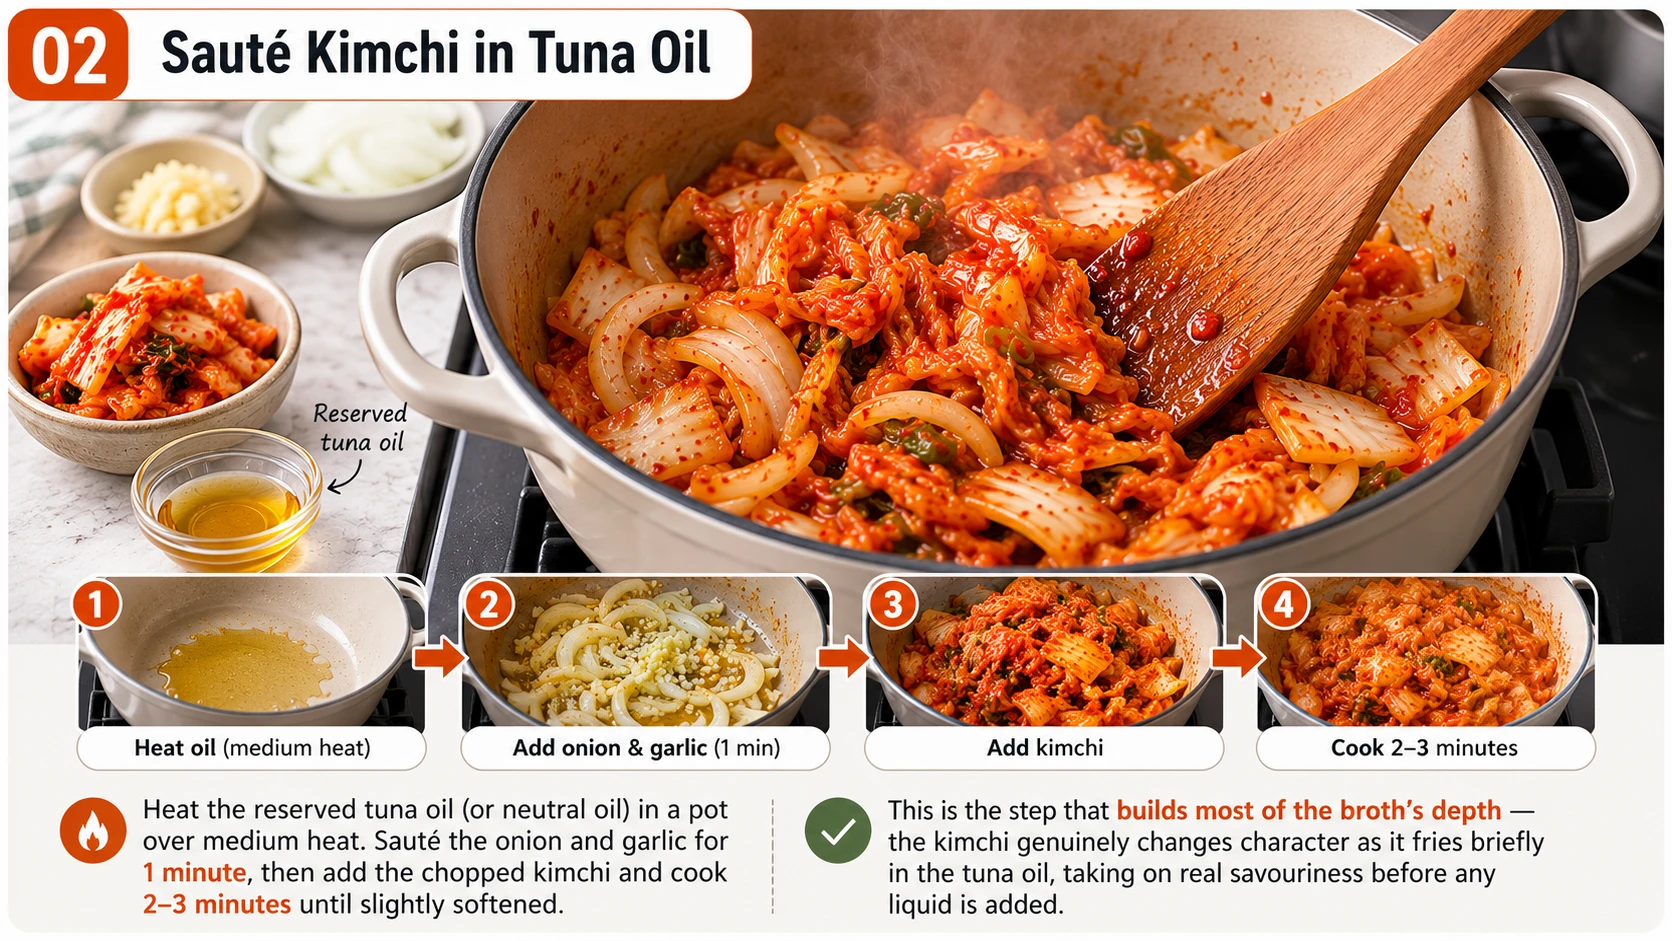
Heat the reserved tuna oil (or neutral oil) in a pot over medium heat. Saute the onion and garlic for 1 minute, then add the chopped kimchi and cook 2-3 minutes until slightly softened.
This is the step that builds most of the broth’s depth — the kimchi genuinely changes character as it fries briefly in the tuna oil, taking on real savouriness before any liquid is added.
Listen for the sizzle to settle into a steadier simmer-like sound as the kimchi releases its own juices — that’s your cue it’s softened enough to move on.
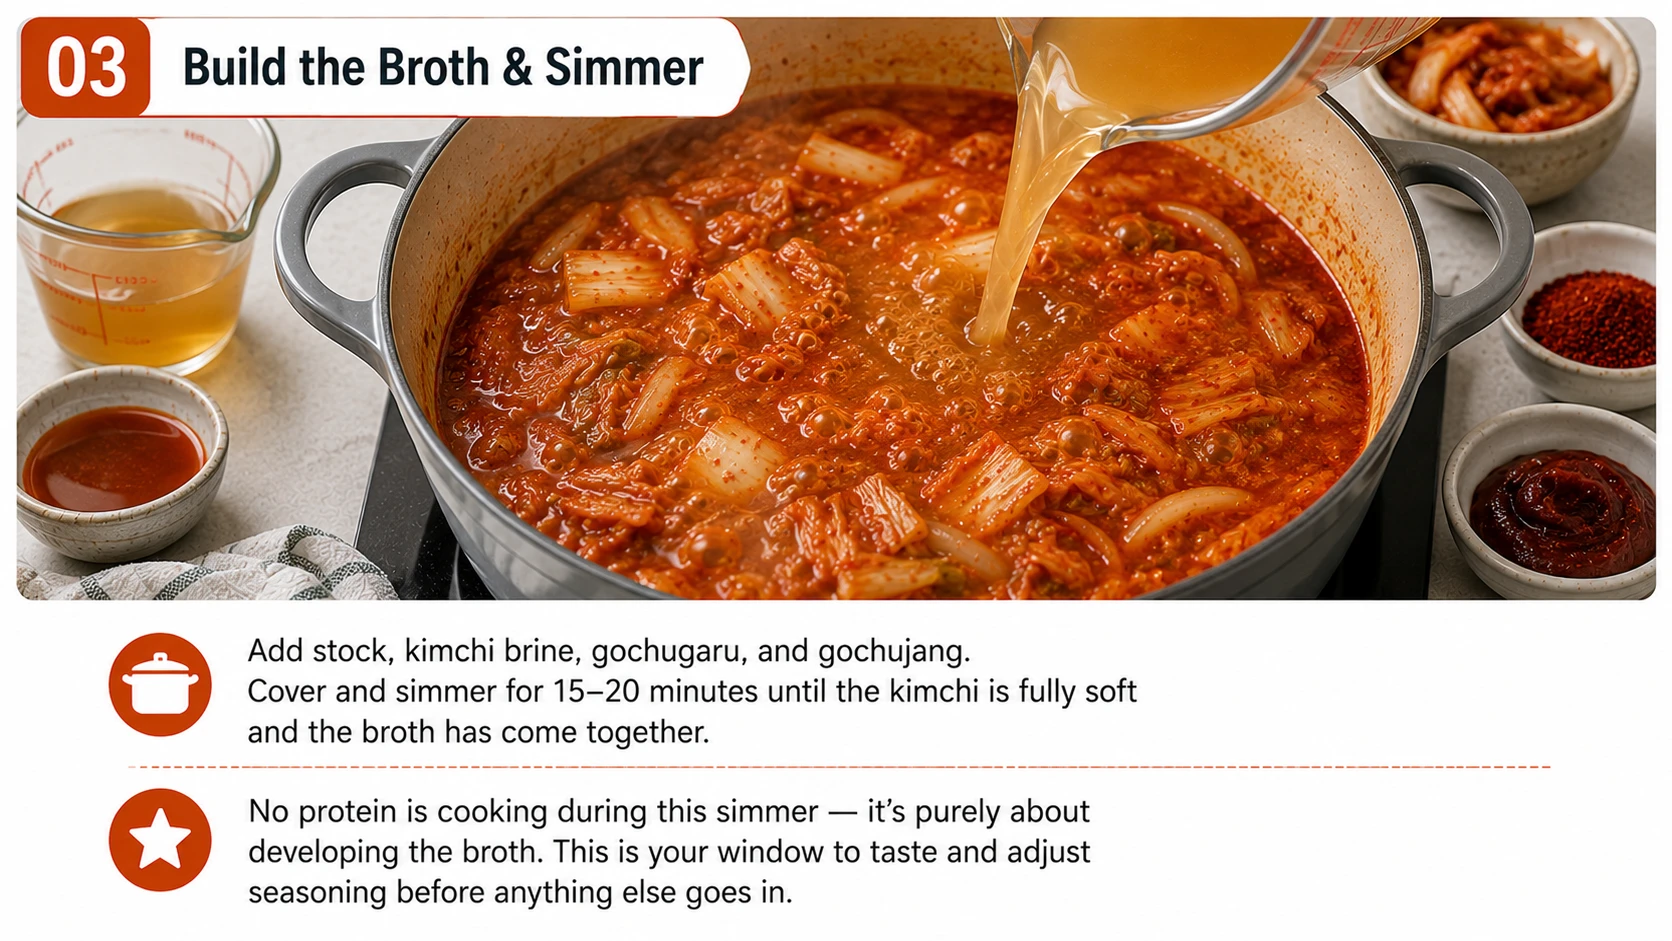
Add stock, kimchi brine, gochugaru, and gochujang. Cover and simmer for 15-20 minutes until the kimchi is fully soft and the broth has come together.
No protein is cooking during this simmer — it’s purely about developing the broth. This is your window to taste and adjust seasoning before anything else goes in.
If you want the extra savoury depth several classic recipes lean on, stir in the fish sauce here too — it’s optional, but it rounds out the broth in a way gochugaru and gochujang alone don’t quite reach.
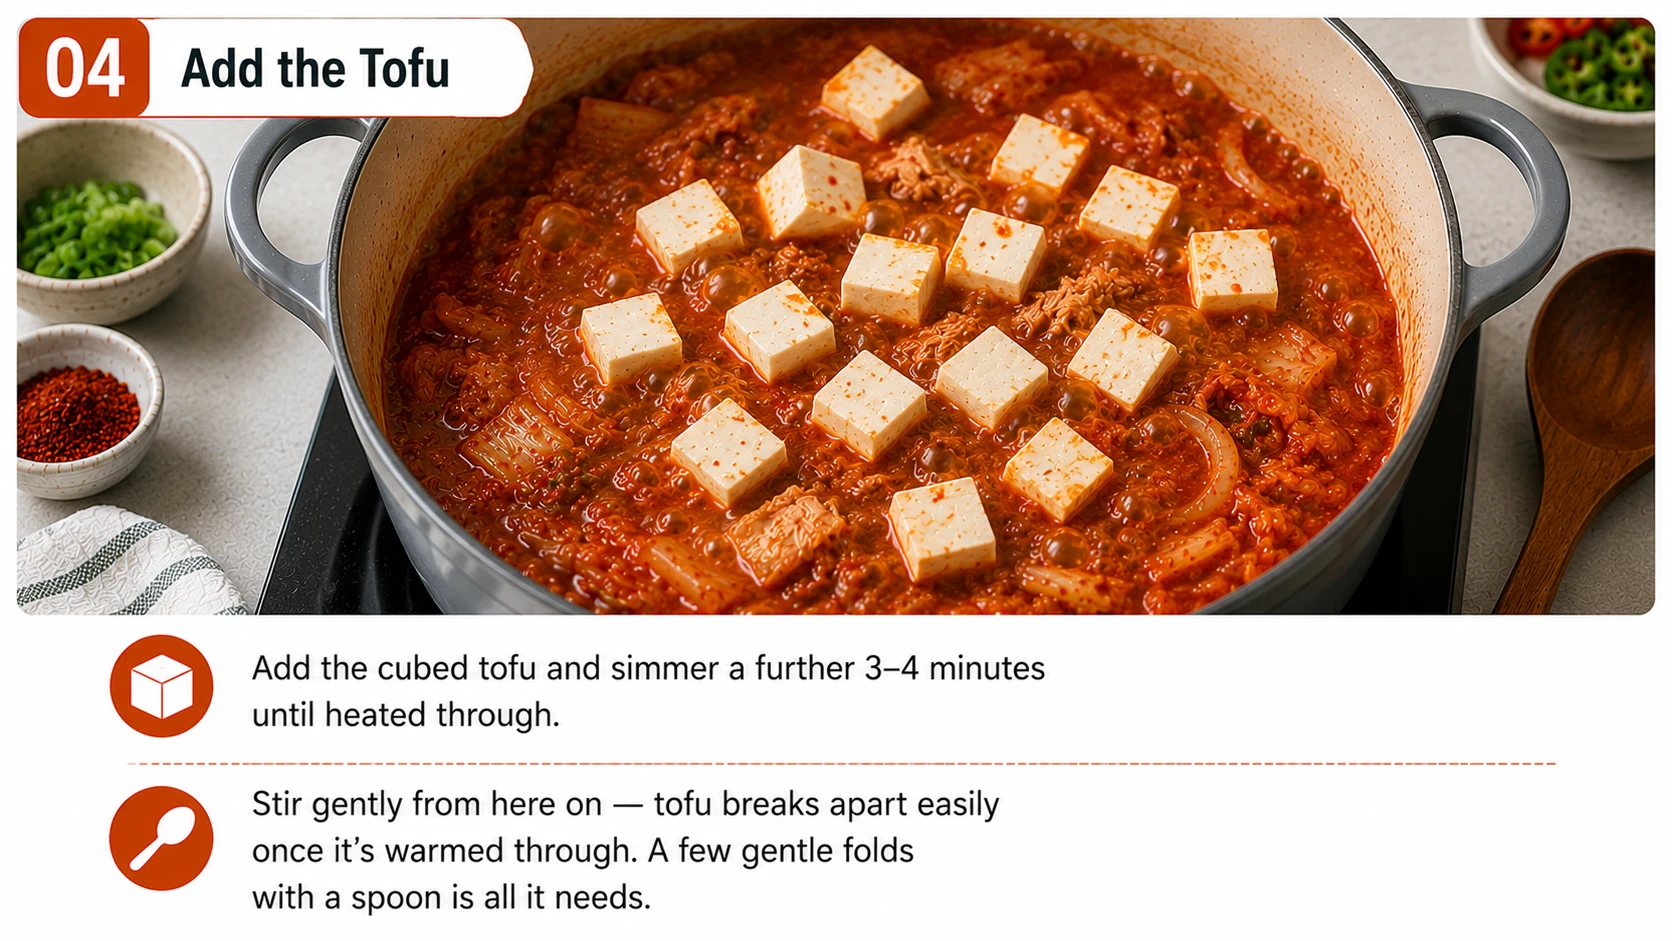
Add the cubed tofu and simmer a further 3-4 minutes until heated through.
Stir gently from here on — tofu breaks apart easily once it’s warmed through. A few gentle folds with a spoon is all it needs.
This is also the moment to do a final taste check on the broth itself — once the tuna goes in next, you’ll want to keep stirring to a minimum.

Drop to a bare simmer, add the drained tuna, and gently break it into large flakes with a spoon. Simmer just 2-3 minutes more — any longer and the tuna turns dry and rubbery.
Remove from heat, drizzle with sesame oil, taste and adjust salt, and scatter spring onions on top. Serve hot with rice.
For a finishing touch borrowed from several Korean-run recipe kitchens, scatter a few slices of fresh red or green chili over the top just before serving — purely optional, but it adds a fresh, sharp bite the cooked seasonings alone don’t give you.
The Science of Tuna Kimchi Jjigae
Three mechanisms explain why this recipe’s technique differs from the rest of the family — and why “add the tuna last” isn’t just a preference, it’s the whole point.
Retort Processing: Why Canned Tuna Is Already “Done”
Canned tuna is cooked inside the sealed can through a high-heat sterilization process called retort processing, which fully cooks the fish and makes it shelf-stable before it ever reaches a store shelf. This means the tuna in your pantry is already, functionally, “done” — there’s no raw protein to bring to a safe internal temperature the way there is with pork, chicken, or beef. Simmering it further doesn’t cook it any more; it just continues to push moisture out of the muscle fibres, which is exactly why prolonged heat turns it dry and stringy rather than more tender.
Protein Denaturation: Why Late-Add Protects Texture
Fish muscle proteins are more delicate than red meat’s, with less connective tissue to break down usefully over a long cook. Once tuna’s proteins have already denatured once during canning, a second extended heat exposure in a simmering broth mostly just squeezes out residual moisture rather than improving texture the way a slow braise tenderizes tougher cuts of beef. That’s the food-science reason behind the household consensus, confirmed across multiple tested recipes, that tuna belongs in the pot for minutes, not tens of minutes.
Umami Synergy: Kimchi’s Glutamate Meets Tuna’s Inosinate
Kimchi’s fermentation produces free glutamates, while tuna’s muscle tissue is naturally rich in inosinate — and food-science research on umami consistently shows these two compounds combine synergistically rather than just additively, the same principle behind Japanese dashi (kombu plus katsuobushi). That’s part of why this broth tastes disproportionately savoury for how few ingredients it uses: the kimchi and the tuna are genuinely amplifying each other, not just sitting side by side in the same pot. The optional fish sauce leans on the same principle — its own glutamates and amino acids stack on top of what the kimchi and tuna are already contributing.
What We Tested for the Tuna Version
Three variables genuinely mattered; here’s what we found testing each of them side by side.
Across three batches, kimchi fermentation stage still mattered most for overall flavour, exactly as it does across the rest of the family — but tuna timing was the single variable most likely to actually ruin the dish if gotten wrong, since dry, rubbery tuna is much harder to recover from mid-cook than a slightly under-seasoned broth. If you take away one rule from this page, make it “tuna goes in last.”
Troubleshooting — Common Mistakes & How to Fix Them
Most problems with this recipe trace back to one of four issues below. If your kimchi itself is the problem rather than the technique, What to Do With Sour Kimchi covers that in more depth than the fixes below.
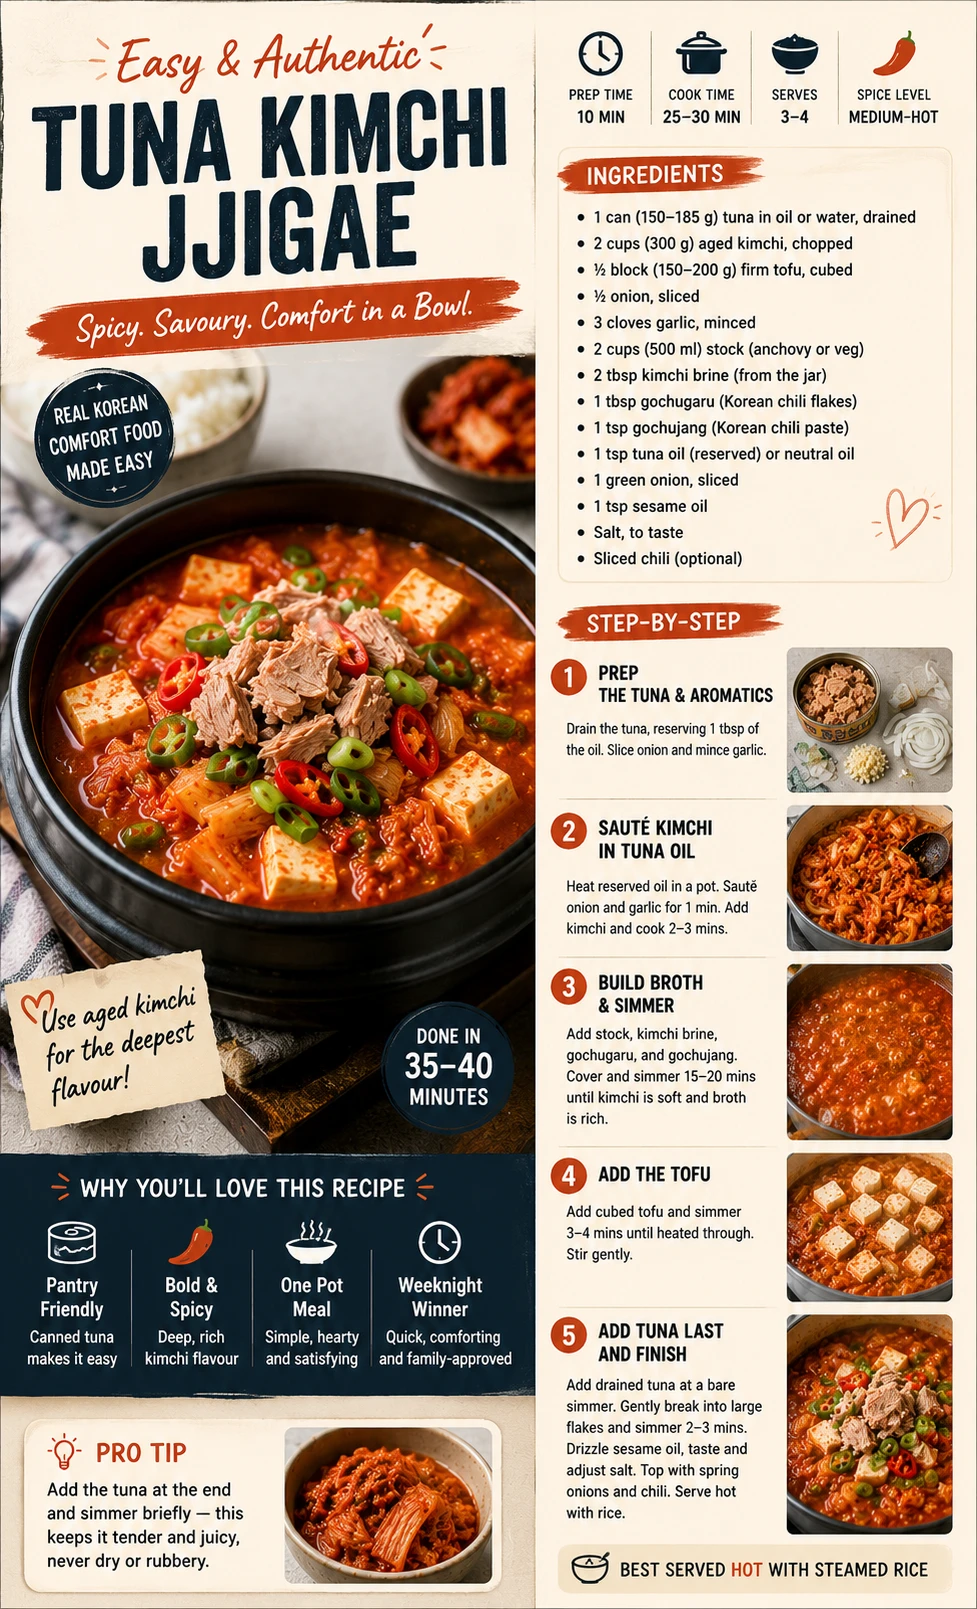
Tuna Kimchi Jjigae (Chamchi)
Canned tuna, aged Stage 3 kimchi, and a classic anchovy-kelp stock, simmered together with tofu — the tuna added last to keep it tender. The fastest, cheapest recipe in the whole family.
Ingredients
- 4 cups anchovy-kelp stock (myeolchi yuksu), or water
- 1.5 cups aged kimchi (Stage 3), chopped
- 3 tbsp kimchi brine
- 1 tbsp gochugaru
- 1 tbsp gochujang
- 1 tsp fish sauce (optional)
- 3 cloves garlic, minced
- ½ onion, sliced
- 2 cans (~300g total) tuna in oil, drained, oil reserved
- 200g firm tofu, cubed
- 2 spring onions, sliced
- 1 fresh red or green chili, sliced (optional)
- 1 tsp sesame oil
- Salt, to taste
Instructions
- Drain the tuna, reserving 1 tbsp of oil if oil-packed. Slice onion, mince garlic.
- Saute onion and garlic in the reserved tuna oil 1 min, add kimchi, cook 2-3 min.
- Add stock, brine, gochugaru, gochujang, and fish sauce if using. Cover, simmer 15-20 min.
- Add tofu, simmer 3-4 min.
- Drop to a bare simmer, add tuna, flake gently, simmer 2-3 min only. Finish with sesame oil, spring onions, and sliced chili if using.
The Kimchi Jjigae Family — 13 Variations
Every recipe below branches from the same base technique on the Classic (Pork) pillar page. The Kimchi Jjigae Variations — All 13 Types Compared → lets you compare every published version side by side.
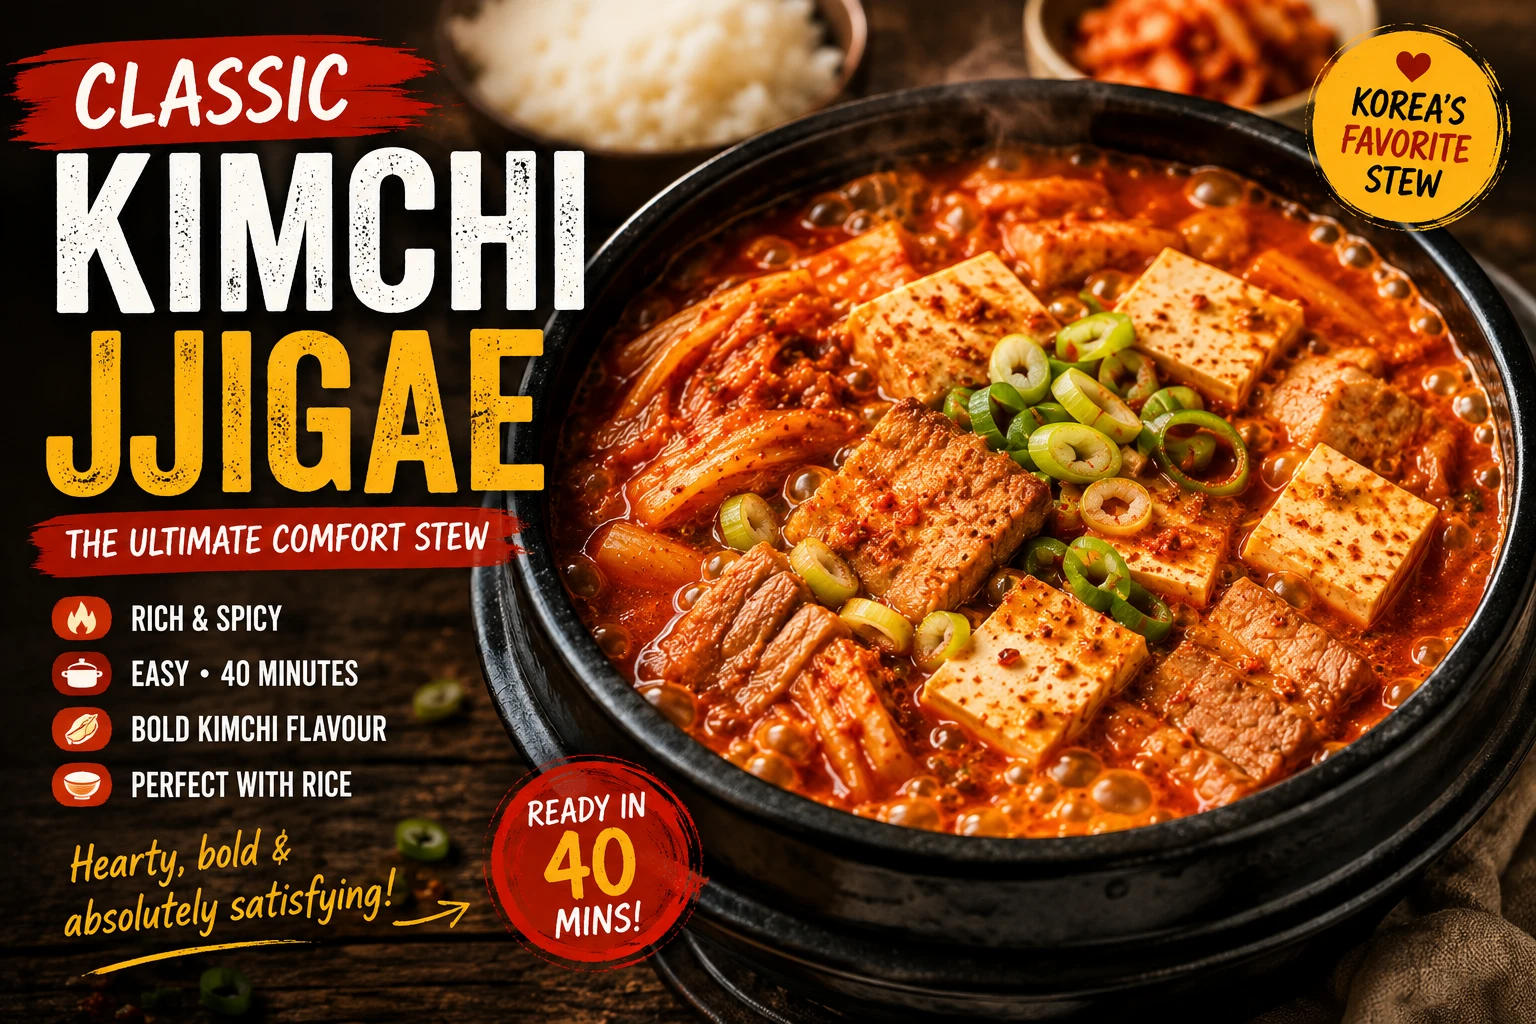




Pairing Guide — Tuna Version
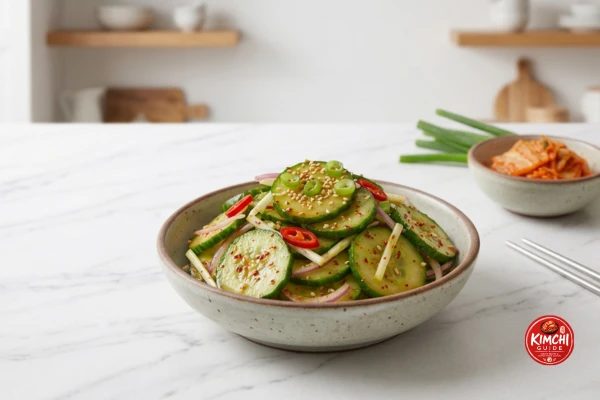
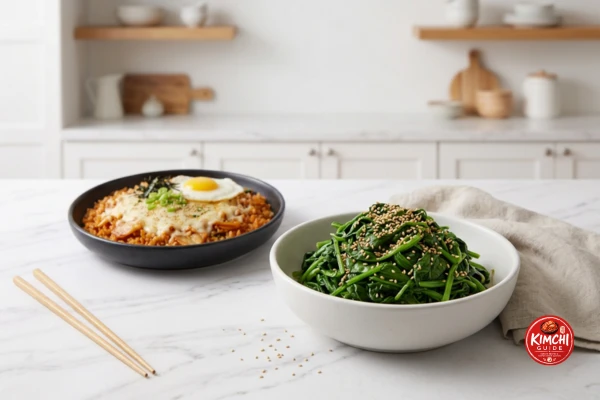
Simple, classic banchan work best here — nothing needs to compete with the broth, just round it out. Serve it the way most households do: spooned over a bowl of freshly steamed rice — see the site’s own rice notes if you’re picky about the grain.
Restaurant vs Homemade Tuna Kimchi Jjigae
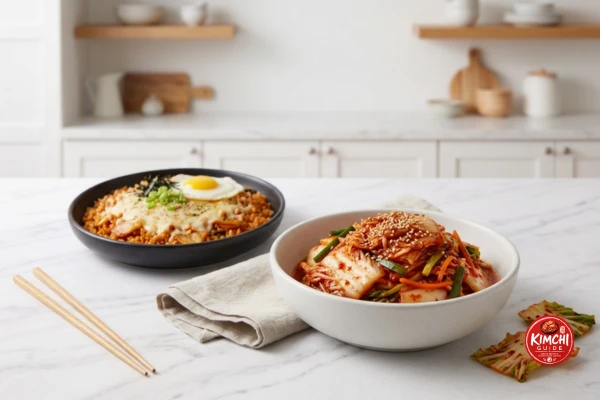
Tuna kimchi jjigae rarely appears on Korean restaurant menus at all — it’s much more of a home-cooking and camping-food staple, which makes this comparison a little different from the rest of the family.
| Factor | Restaurant Version (Rare) | This Homemade Recipe |
|---|---|---|
| Availability | Rarely on menus — usually a home-cooking or camping dish, not a restaurant order | Always available — 30 minutes, pantry staples only |
| Tuna Timing | Variable, if made in bulk it can sit in the broth too long | Added last, on purpose, exactly 2-3 minutes — the whole point of this recipe |
| Tuna Quality | Unknown, likely whatever’s cheapest in bulk | You choose oil-packed vs water-packed and the exact brand — see the comparison above |
| Sodium Level | Typically higher if pre-made | Adjustable to taste; nutrition figures above reflect a moderate seasoning level |
| Cost per Serving | N/A — rarely sold as a standalone dish | Roughly $2-3 per serving — the cheapest recipe in the entire family to cook at home |
Storage & Reheating — Tuna Version
Like most kimchi jjigae variations, the broth genuinely improves after a day in the fridge — just handle the tuna a little differently than the rest of the family.
Meal Prep — Batch-Cooking This Recipe for the Week
The short simmer time and pantry-stable ingredients make this the easiest recipe in the family to keep stocked for a busy week — and, per the Origin section above, the same reasons it travels well on a camping trip.
Detailed Nutrition Comparison — All 13 Published Versions
A complete per-serving breakdown, reviewed by Dr. Sarah Mitchell RD, PhD, alongside how this Tuna recipe compares to every other version now published in the family.
Nutrition Facts
Per serving — recipe makes 4 servings
How the Tuna Version Compares to the Rest of the Family
| Variation | Calories | Protein | Sat. Fat | Sodium | Best For |
|---|---|---|---|---|---|
| Kimchi Guk | 130 | 9g | 1g | 620mg | Lightest, lowest-sodium option in the family |
| Vegan | 200 | 12g | 1.5g | 650mg | Lowest saturated fat, fully plant-based |
| Seafood Jjigae | 210 | 20g | 1.5g | 720mg | Leanest jjigae-format option, alongside Tuna |
| Vegetarian | 220 | 13g | 2.5g | 700mg | Meatless without going fully vegan |
| Tuna (Chamchi) ← This page | 260 | 24g | 3g | 780mg | Highest protein-to-calorie ratio in the whole family |
| Chicken | 280 | 25g | 3g | 760mg | Slightly higher protein, comparable leanness |
| Soondubu | 290 | 17g | 5g | 800mg | Soft, custardy silken-tofu texture |
| Mackerel (Godeungeo) | 300 | 22g | 5g | 790mg | Oilier, stronger-flavoured canned-fish alternative |
| Instant Pot & Slow Cooker | 310 | 19g | 6g | 830mg | Same as Classic — hands-off appliance convenience |
| Classic (Pork) | 320 | 18g | 7g | 810mg | The reference point — moderate on every measure |
| Beef | 340 | 24g | 8g | 870mg | Richest, most indulgent option in the family |
| Budae Jjigae | 360 | 19g | 9g | 1180mg | Korean War-era combo stew — treat as occasional |
| Spam | 380 | 16g | 10g | 1420mg | Richest, saltiest — occasional rather than everyday |
Sources & Further Reading
The history, food-science, and nutrition claims on this page are cross-checked against the following references.
Tuna Kimchi Jjigae FAQ — 19 Questions
Tuna kimchi jjigae — chamchi kimchi jjigae, 참치김치찌개 — is a Korean stew made with canned tuna, aged Stage 3 kimchi, tofu, and an anchovy-kelp stock. It’s widely considered the easiest kimchi jjigae to make at home, since the tuna is already fully cooked and needs only a few minutes in the broth.
Oil-packed tuna is recommended — its richer, more tender texture and the reserved oil (used as a cooking fat for the kimchi) both add real depth. Water-packed works too and is leaner; add a teaspoon of neutral or sesame oil to compensate. See the full comparison above.
Late. Add the drained tuna in the last 2-3 minutes of cooking, off a hard boil. Canned tuna is already fully cooked, so a long simmer only dries it out and makes it rubbery rather than tender. See Household Techniques above for the alternative approaches some households use.
It was added too early and simmered too long. Canned tuna is pre-cooked during canning, so it only needs a brief 2-3 minute warm-through at the end — treat it like a garnish being folded in, not a raw protein being cooked.
Korean brands like Dongwon, Sempio, or Ottogi packed in oil are the most traditional choice and widely available at Korean grocery stores. A good olive-oil-packed Italian or Spanish tuna is an excellent Western substitute — see the Sourcing Guide above.
About 30 minutes total — 10 minutes prep and 20 minutes cooking. It’s the fastest recipe in the entire 13-recipe Kimchi Jjigae family, since there’s no meat to sear or braise.
Stage 3 aged kimchi (roughly 3-6 weeks fermented, pH approximately 4.2) is correct here, the same as most of the family. See the full fermentation stages section above.
It’s the leanest protein choice in the jjigae family alongside Seafood — canned tuna is high in lean protein and omega-3 fatty acids, and this version has the lowest saturated fat of any protein-based variation. See the full nutrition comparison above.
It’s not traditional and not recommended — this dish is specifically built around canned tuna’s pre-cooked texture and pantry convenience. Fresh tuna would need an entirely different, much shorter cooking approach to avoid overcooking.
Not by simply omitting the tuna. See the dedicated Vegetarian Kimchi Jjigae (egg and dairy allowed) or Vegan Kimchi Jjigae pages, built specifically around a mushroom-and-tofu base rather than a same-recipe swap.
Canned mackerel is the closest traditional swap — see the dedicated Mackerel Kimchi Jjigae page. Canned salmon also works well using the same technique, though it’s less traditional.
Yes — canned tuna and kimchi are both inexpensive pantry staples, making this the most affordable recipe to cook in the entire jjigae family. See the Restaurant vs Homemade comparison above for a full cost breakdown.
No — any pot works fine. A ttukbaegi keeps the stew bubbling at the table for longer, which suits the traditional presentation, but it’s not required for an authentic-tasting result.
It can be — use a gluten-free gochujang brand, check any fish sauce you use, and confirm your kimchi and canned tuna don’t contain wheat-based ingredients. Tuna, tofu, and the anchovy-kelp stock are all naturally gluten-free.
Approximately 24g of protein per serving — the highest protein-to-calorie ratio of any variation in the family, since canned tuna is very lean relative to its protein content.
The broth base (through the tofu step) can be made ahead and refrigerated. Add the tuna fresh when reheating rather than in advance, since it’s the one component that suffers from extended time in a hot broth.
Freeze the broth and tofu base for up to 2 months, but add freshly drained tuna when reheating rather than freezing it in — previously-cooked tuna becomes noticeably drier and more crumbly after a freeze-thaw cycle.
Almost always under-fermented kimchi (younger than Stage 3), or skipping the reserved tuna oil saute step. Both the kimchi’s acid and the tuna oil genuinely contribute to the depth of this broth — try the optional fish sauce too — see Troubleshooting above.
It comes down to serving size and ratio, not a different dish. This recipe uses two full cans of oil-packed tuna and a generous portion of tofu across 4 servings (about 400g each), with the reserved tuna oil used as a cooking fat. Recipes reporting 150-180 calories are usually using a single smaller can, water-packed tuna, and a thinner, more soup-like ratio of broth to solids across more servings — see the lighter, no-gochujang variation noted in Household Techniques above if that’s more what you’re after.
Questions & Comments
Oil-packed or water-packed? Leave a question below — Ji-Young reads and responds to every comment.
Your email will not be published. All comments are reviewed before appearing.