How to Make Kimchi From Scratch
Every KFR variation, every stew, every jar you’ve read about on this site starts here. This is the complete homemade kimchi recipe — the fast chopped method and the traditional whole-cabbage method compared, the salt science, vegan swaps, and fixes for every common mistake.


How Do You Make Kimchi From Scratch?
At its core, kimchi is salted napa cabbage mixed with a spicy paste (gochugaru, garlic, ginger, fish sauce, and usually a sweet rice flour porridge) and left to ferment. Salt the cabbage for about 1.5 hours to draw out moisture and firm the leaves, rinse it, coat it in the paste, then pack it into a jar. Leave it at room temperature for 1–2 days until it smells pleasantly sour, then refrigerate — from there it keeps developing flavour for months, moving through the same stages covered in our fermentation stages guide.
History & Kimjang Tradition
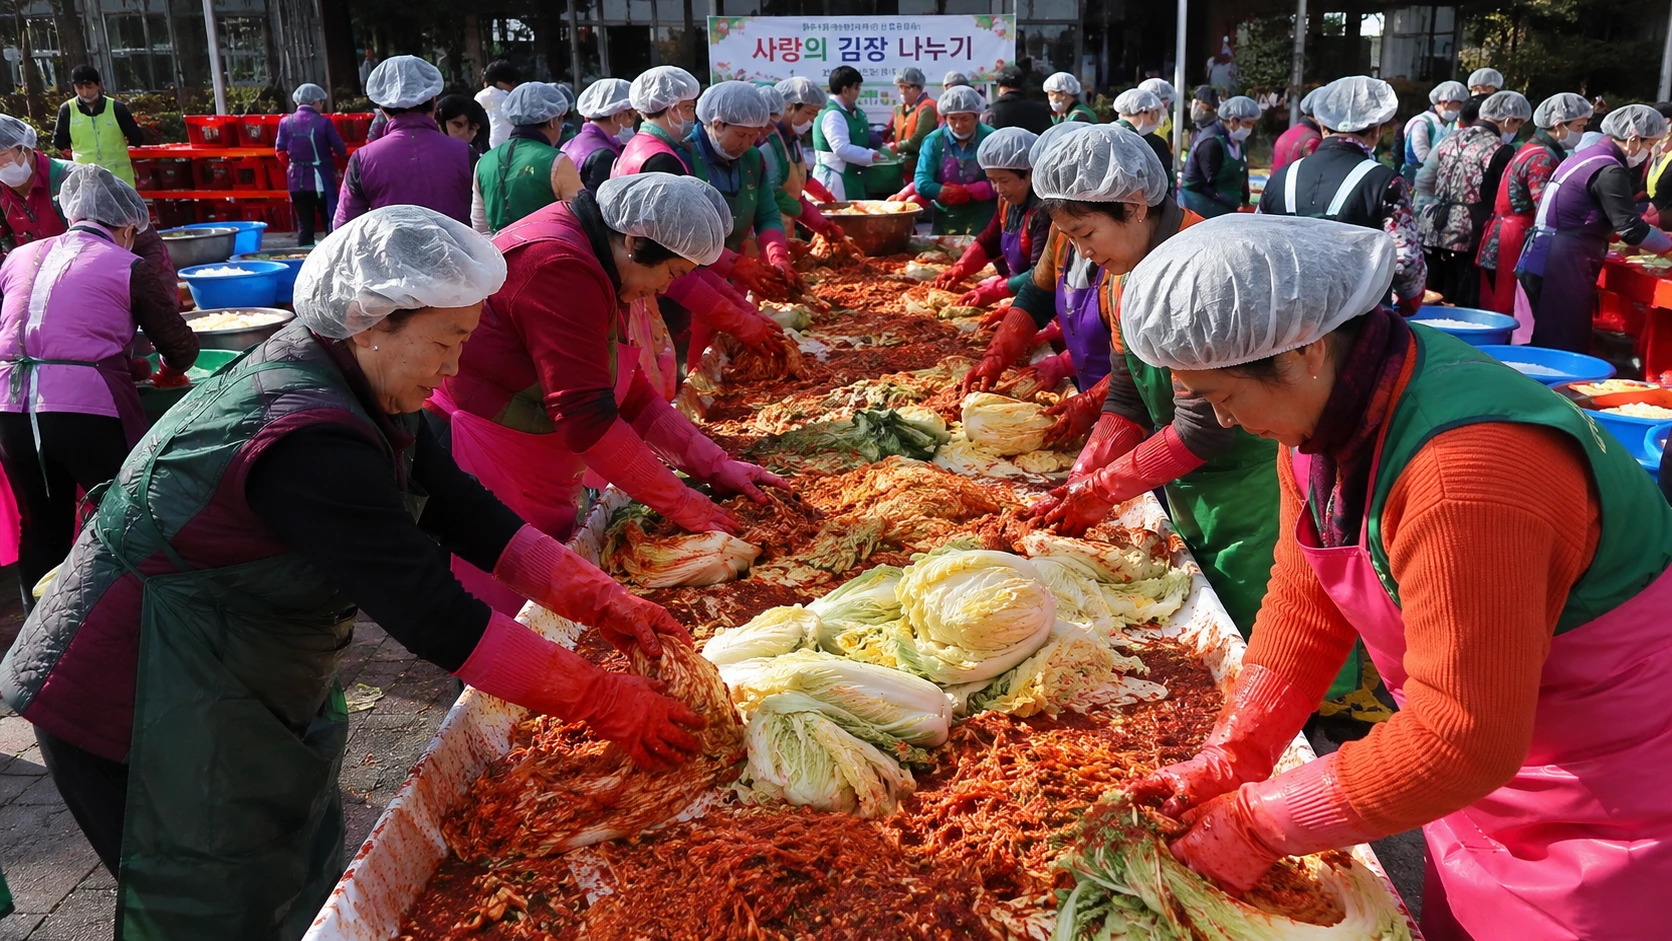
Kimchi isn’t a modern invention dressed up as tradition — it’s one of the oldest continuously practiced food traditions in the world, with a cultural weight that goes well beyond a side dish.
Ingredients Explained
A handful of these ingredient names get mixed up constantly — worth getting straight before your first grocery run.

| Gochugaru Grade | What It’s For |
|---|---|
| Coarse flakes (kimchi-yong, 김치용) | The correct grade for kimchi — labelled “coarse” or “kimchi-yong” on the bag. Coarser flakes cling to wet cabbage better and give the classic textured red coating. |
| Fine mesh / powder | Meant for soups and stews (like kimchi-jjigae) where the pepper needs to dissolve into a broth — using this grade in kimchi paste makes it runny and harder to control heat level. |
| Taeyangcho (태양초, sun-dried) | Sun-dried peppers give a brighter red colour and a slightly fruitier, less bitter heat. Pricier, and the grade most serious home cooks and restaurants specifically seek out. |
| Hwageonjo (화건초, machine/heat-dried) | Faster and cheaper to produce, with a duller colour and sometimes a faint smoky or bitter edge. Fine for everyday cooking, but not the first choice for a showcase batch. |
Mistakes That Ruin a Batch Before It’s Even Fermented
These aren’t the troubleshooting fixes further down — they’re the habits that quietly set a batch up to fail before fermentation even begins.
| Mistake | Why It Hurts the Batch | Do This Instead |
|---|---|---|
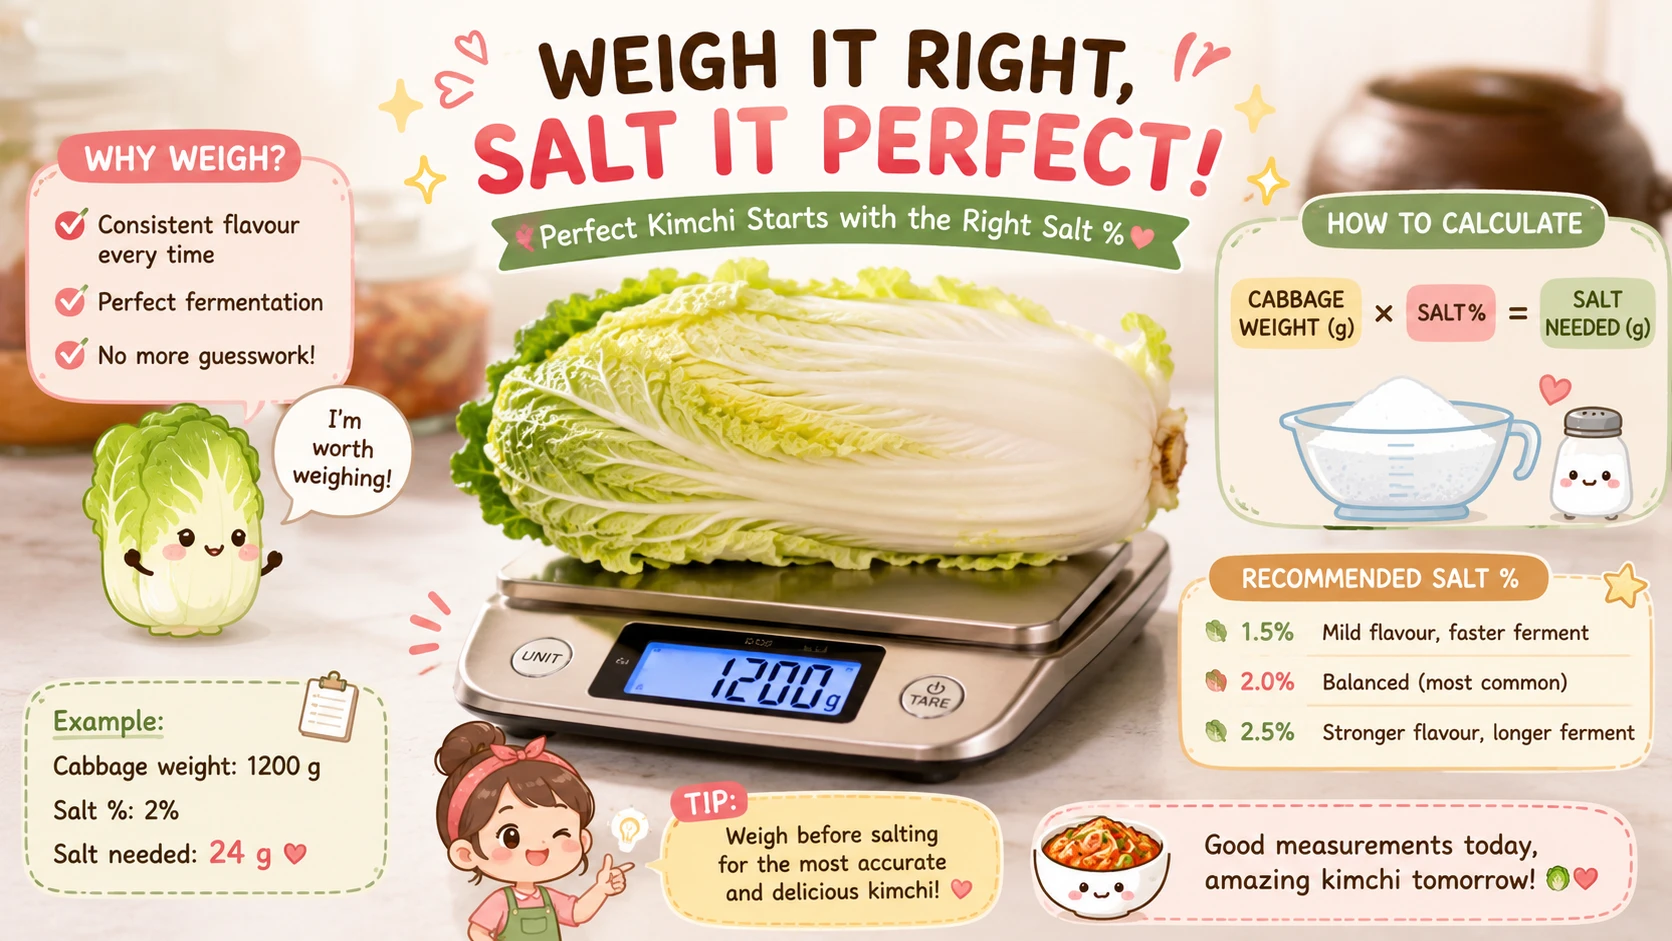
| Eyeballing the salt | Salt is a percentage of cabbage weight, not a fixed spoon count — a bigger or smaller cabbage than the recipe assumed throws the whole ratio off. | Weigh the cabbage and scale the salt to it (see the salt science section), especially the first few times. |
| Cutting pieces unevenly | Thicker chunks stay under-salted at the centre while thin pieces oversalt, so the same jar ferments inconsistently from piece to piece. | Keep pieces a consistent bite-size — closer in size than you’d think matters for texture. |
| Using the porridge while still warm | Warm porridge can start softening the cabbage prematurely and throws off how the paste sets once mixed and packed. | Cool the rice flour porridge completely — room temperature, not just “not hot” — before combining it with anything else. |
| Never tasting the paste before packing | Gochugaru, fish sauce, and salted shrimp all vary in strength batch to batch, so a recipe’s amounts are a starting point, not a guarantee. | Taste a small dab of paste (or a coated cabbage piece) before packing the jar, and adjust salt, sugar, or heat while you still can. |
| Refrigerating immediately, skipping room-temp time | Kimchi put straight in the fridge barely ferments — it stays flat and under-developed instead of building the sourness and depth people actually want. | Give it the full 1–2 days at cool room temperature first, and only refrigerate once it smells pleasantly sour. |
| Using reactive metal bowls or utensils for the long haul | Salt and the acids produced during fermentation can react with some metals over extended contact, affecting flavour. | Mix and store in glass, ceramic, or food-grade plastic/silicone — metal is fine for a quick task but not for anything left sitting. |
Choosing Your Cabbage & Water
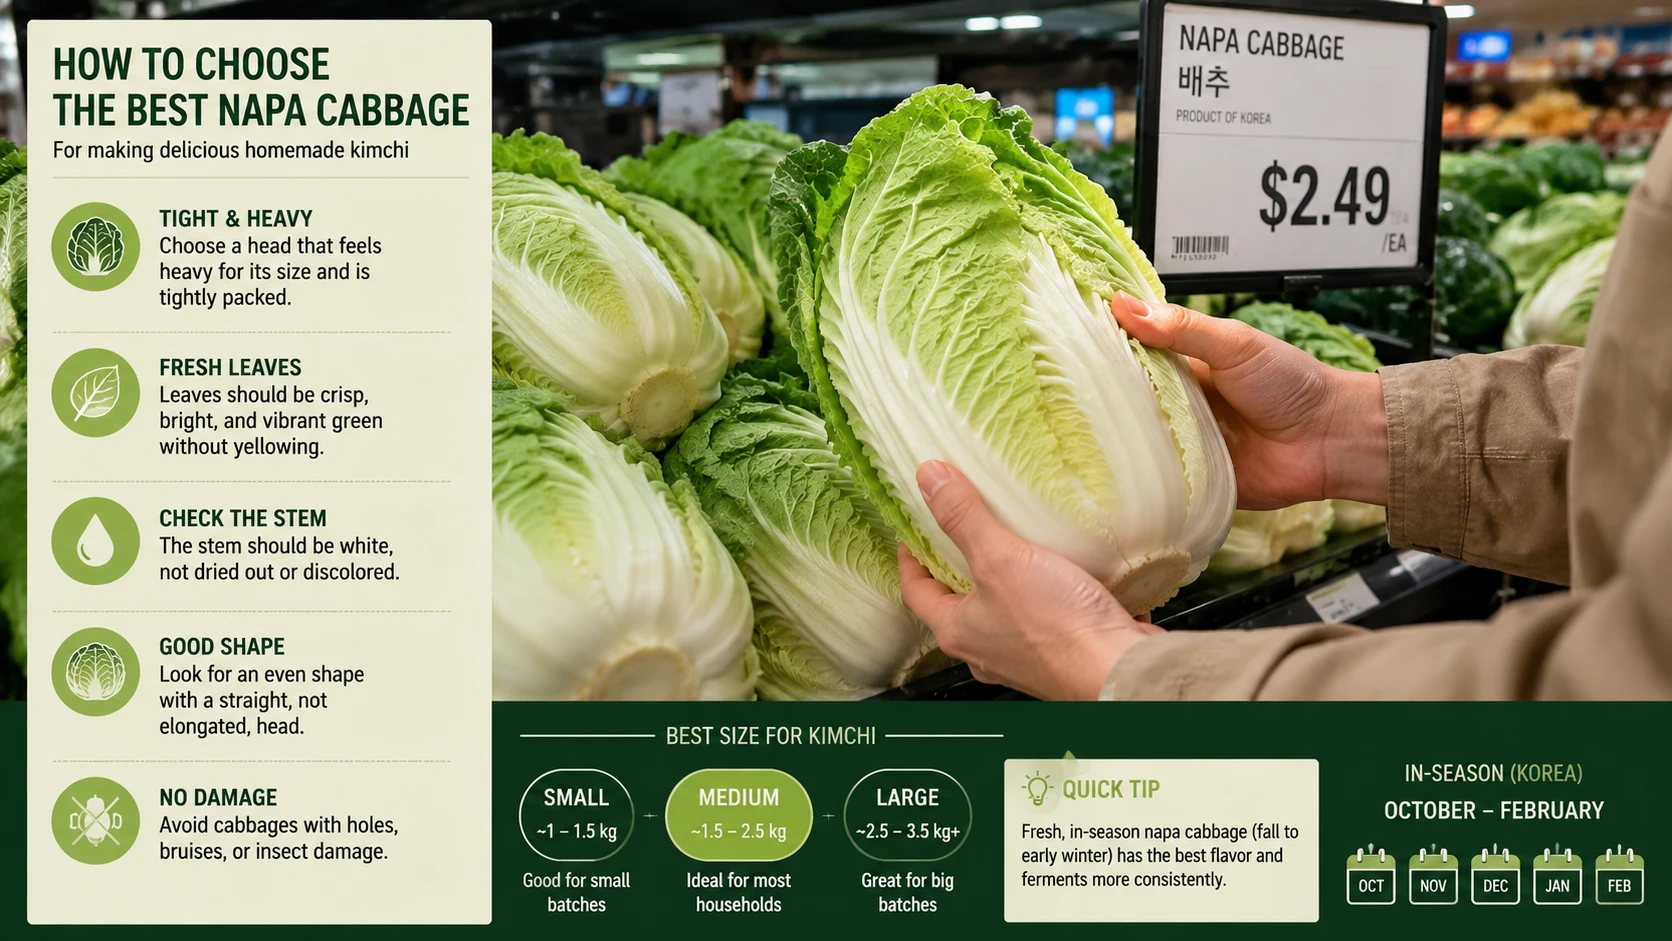
Two ingredients most recipes barely mention — but both quietly affect how your kimchi turns out.
| What to Check | Why It Matters |
|---|---|
| Weight relative to size | A cabbage that feels heavy for its size is more tightly packed and water-rich — a lighter head of the same size often has looser, drier leaves that salt unevenly |
| Tightness of the head | Firm, tightly closed leaves hold together better through salting and mixing than a loose, splayed-open head |
| Colour | Pale yellow-green at the core and crisp white at the base stem is ideal — avoid heads with dark, wilted, or slimy outer leaves |
| Tap water quality | Heavily chlorinated tap water can inhibit the lactic acid bacteria that drive fermentation, the same way it inhibits bacteria in a home aquarium |
Easy Kimchi Recipe (Mak-Kimchi)
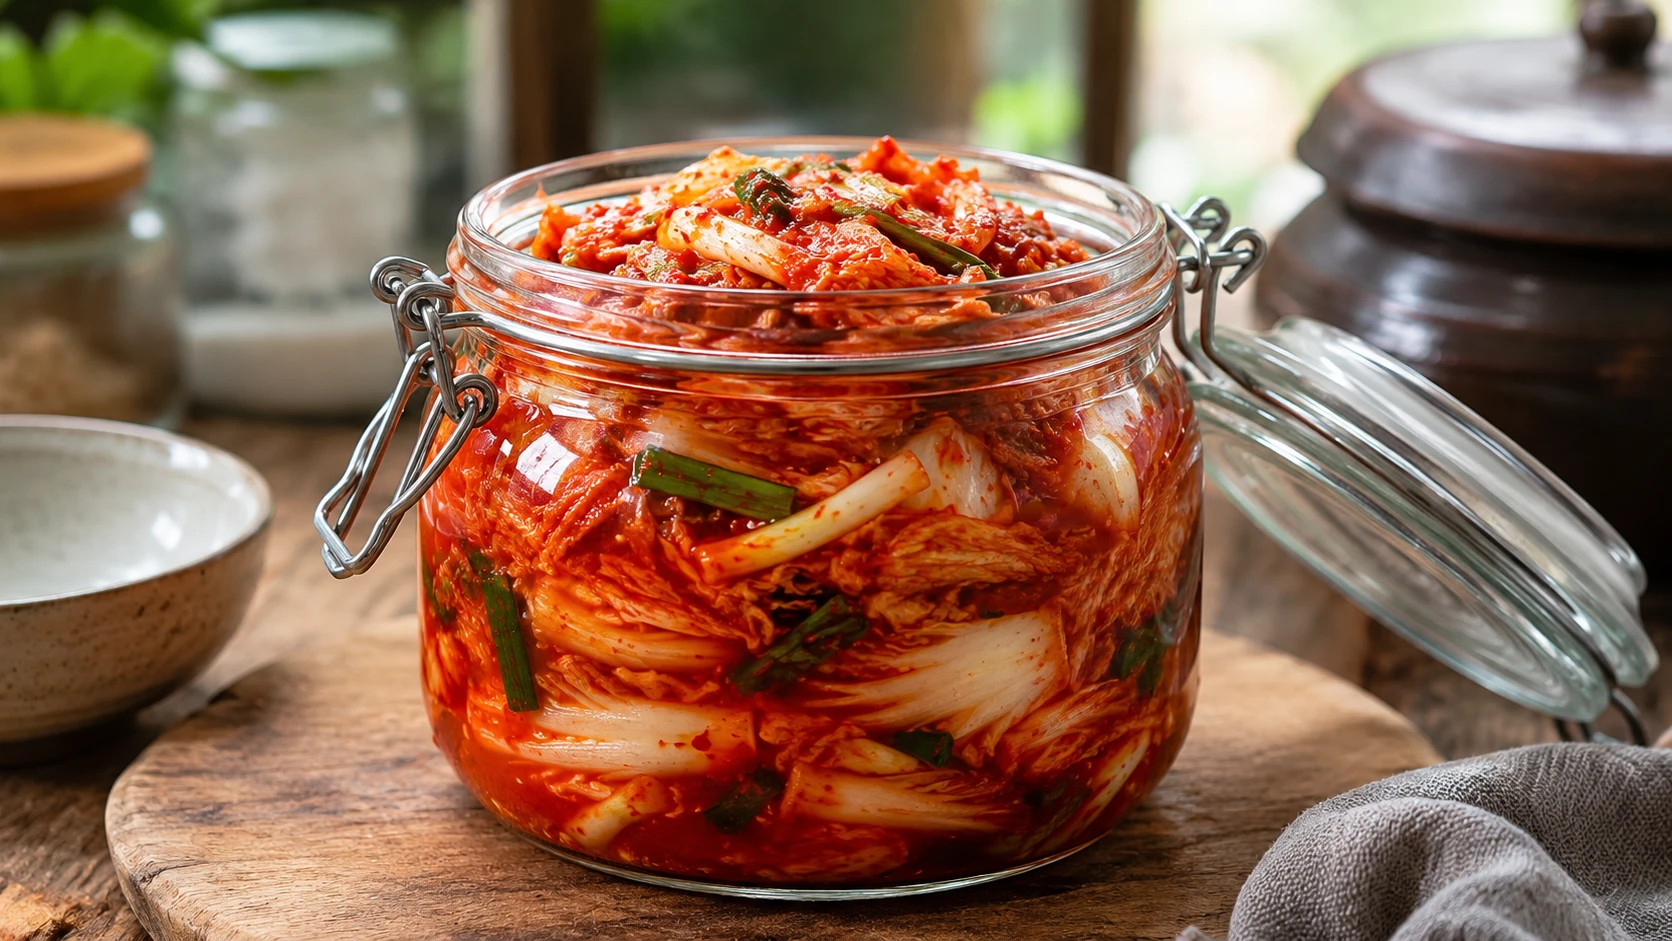
This is the fastest reliable path to real homemade kimchi — cabbage pre-cut into bite-size pieces, so there’s no leaf-by-leaf pasting. Same flavour as the traditional method, less time.
Ingredients
| Ingredient | Amount |
|---|---|
| Napa cabbage | 1 large head (about 2–2.5 kg / 4–5 lb) |
| Kosher or coarse sea salt (not iodized) | 1/4 cup, for salting the cabbage |
| Sweet rice flour | 2 tablespoons |
| Water (for porridge) | 3 cups |
| Sugar | 1/4 cup |
| Gochugaru (Korean red pepper flakes) | 1/2 to 1 cup, to taste |
| Fish sauce | 1/4 cup (or soy sauce/tamari — see vegan swaps below) |
| Garlic, minced | 2 tablespoons |
| Ginger, grated | 1 teaspoon |
| Onion, roughly chopped | 1 small |
| Korean radish (mu), julienned | 1 cup, optional |
| Scallions, cut into 1-2 inch lengths | 4-5 stalks |
Step-by-Step, In Full Detail
Each step below includes exactly what to look for, so you know you’re on track before moving to the next one — not just a list of actions.
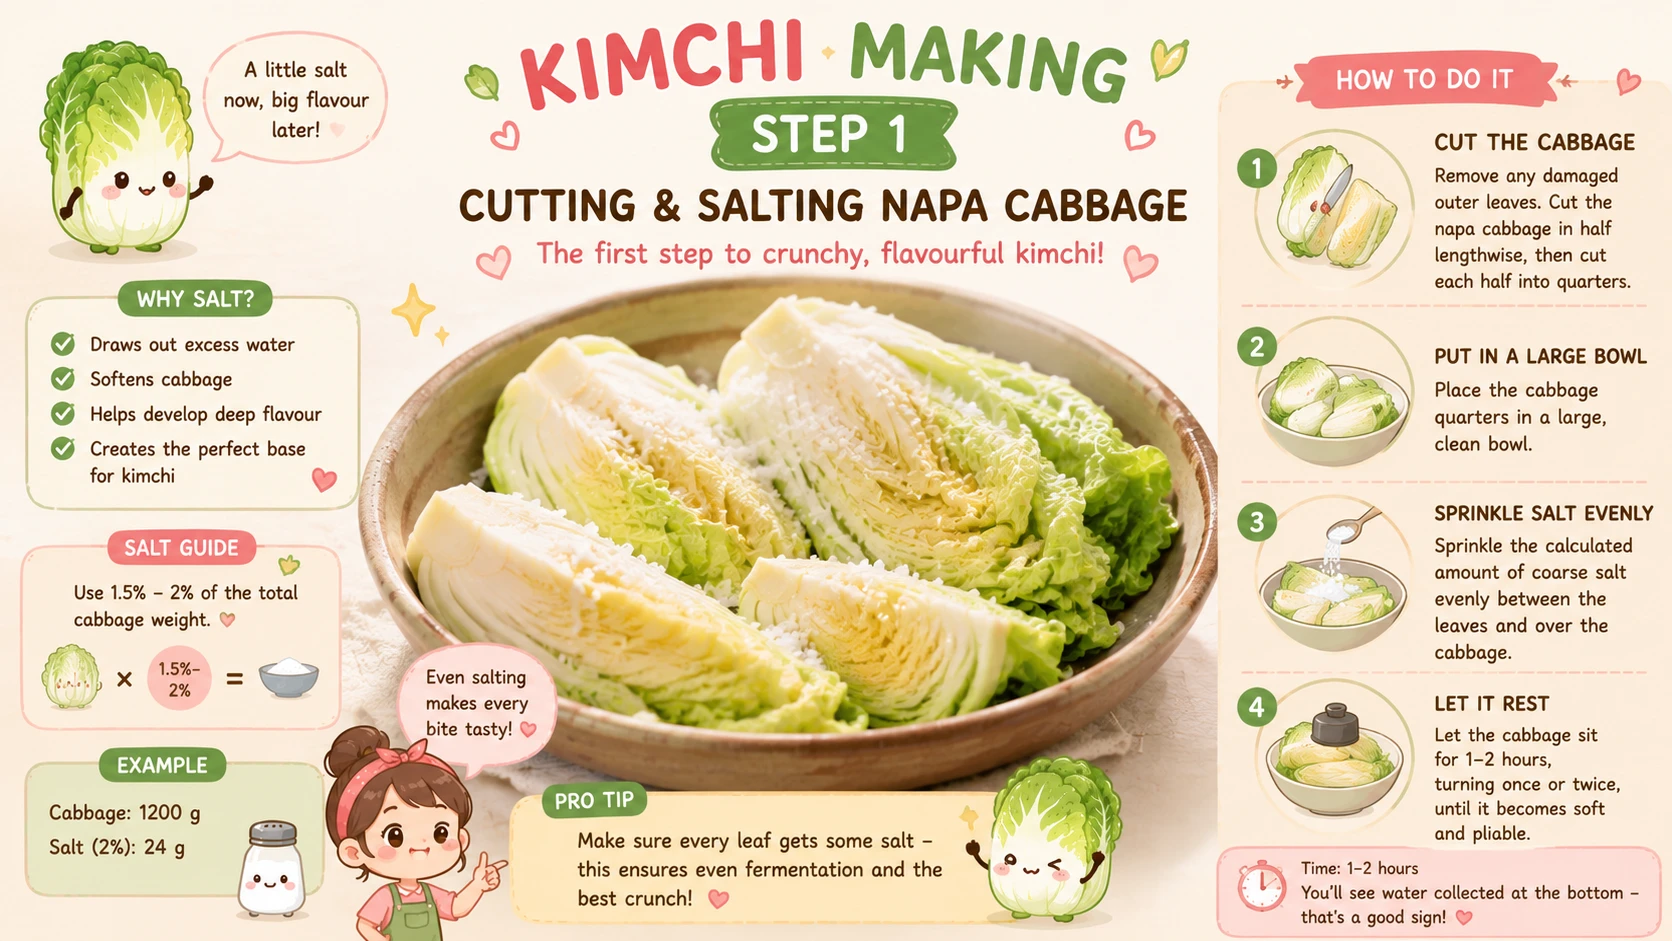
Cut the napa cabbage in half lengthwise through the core, then cut each half in half again so you have four long quarters. Cut out the tough white core at the base of each quarter at an angle, then chop the leaves crosswise into bite-size pieces, roughly 1.5–2 inches (4–5 cm).
Give the chopped cabbage a quick rinse in a large bowl of cold water to knock off any dirt, then drain it well. Spread it out in a large bowl or basin, and sprinkle the salt over it in stages rather than all at once:
- Sprinkle about a third of the salt, toss gently with your hands, and let it sit for 30 minutes.
- Toss again, sprinkle the second third, and let it sit another 30 minutes.
- Toss one more time, add the remaining salt, and let it sit for a final 30–45 minutes.
This staged approach salts the cabbage more evenly than dumping it in all at once, since the salt has time to work into each piece between tosses.
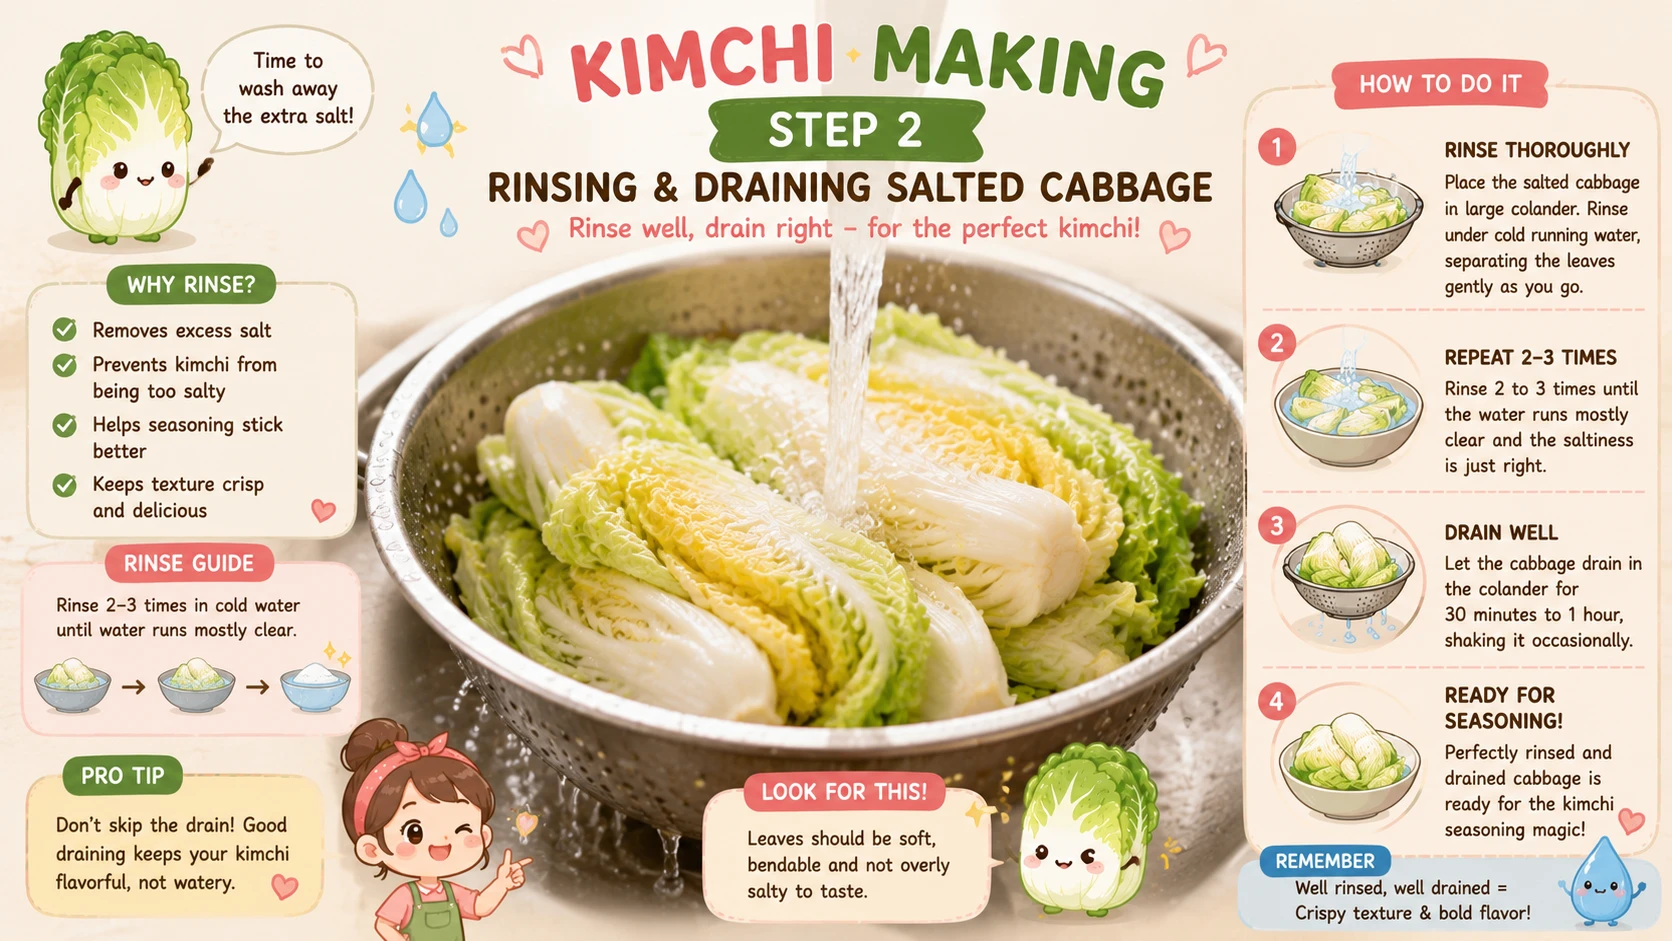
Transfer the salted cabbage to a colander and rinse it under cold running water, tossing it with your hands as you go so water reaches every piece, not just the top layer. Do this three separate times, refilling a bowl of clean water each time if you’re rinsing by submerging rather than under a running tap.
After the third rinse, let the cabbage sit in the colander for a good 10 minutes, tossing it once or twice, so as much water as possible drips away before it goes anywhere near the paste.
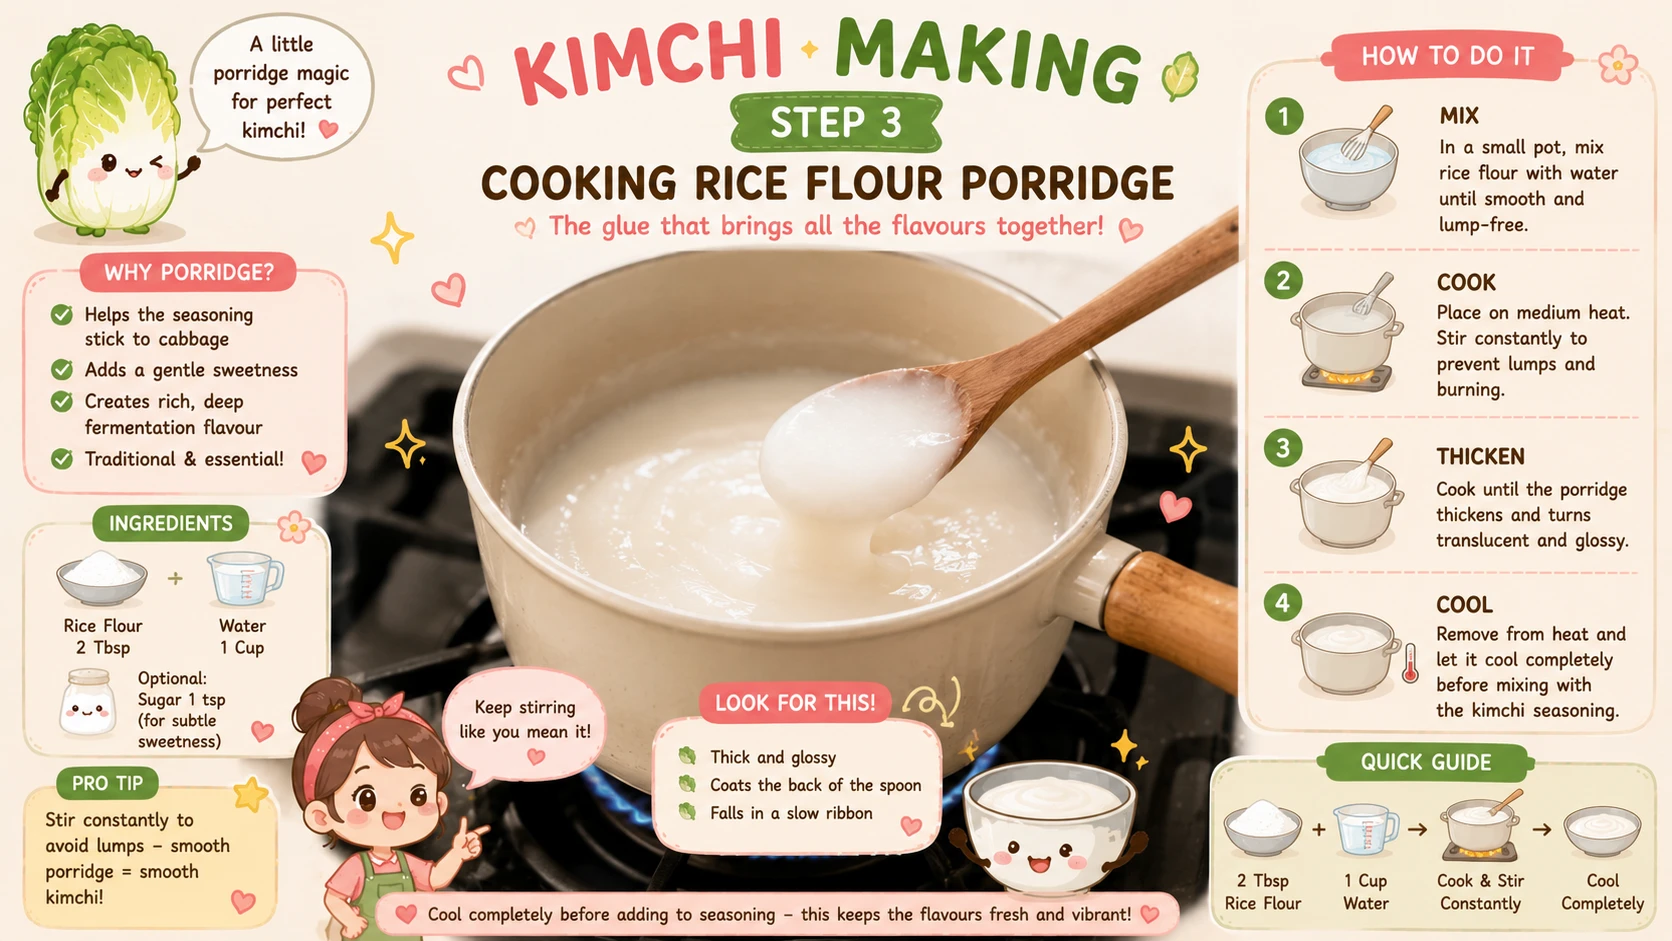
In a small pot, whisk the sweet rice flour into the water while it’s still cold — whisking into cold liquid first prevents lumps from forming once the heat goes on. Once it’s smooth, place the pot over medium heat.
Stir constantly as it heats. It will look thin and cloudy at first, then gradually thicken into a loose, pourable porridge, similar in thickness to a light gravy. This usually takes 5–8 minutes of active stirring.
Once thickened, stir in the sugar until fully dissolved, then remove from heat and let it cool completely to room temperature before the next step — adding gochugaru or garlic to a hot porridge can dull their flavour and even partially cook the garlic.
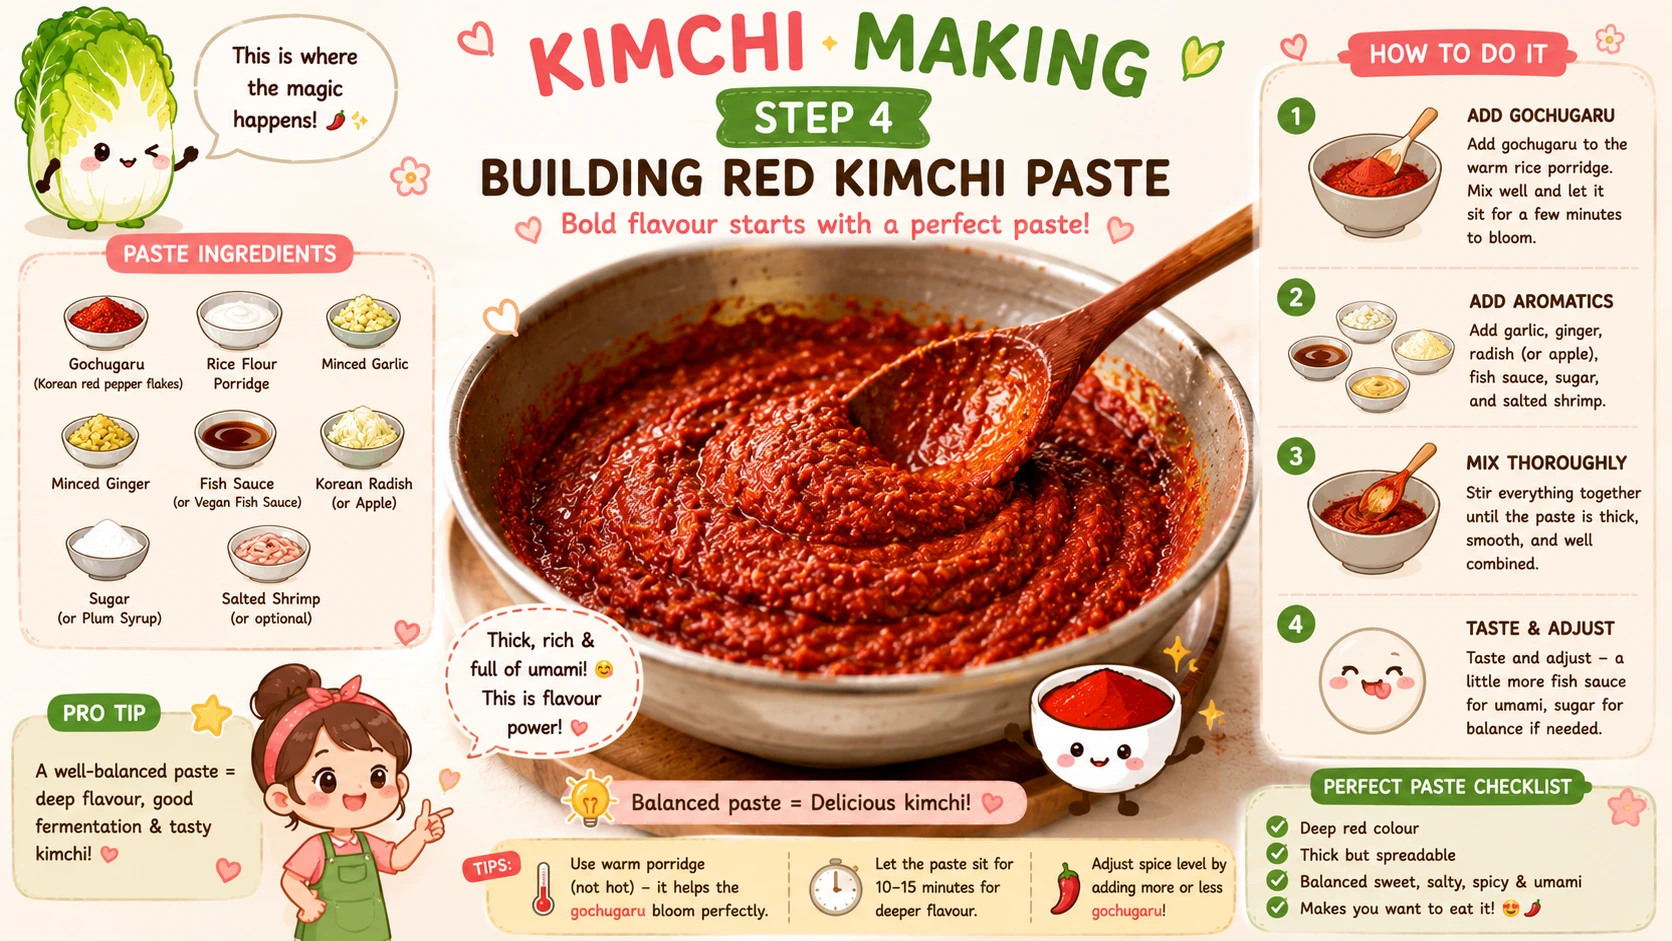
In a large mixing bowl, combine the cooled rice flour porridge with the gochugaru first, stirring until it forms an even, deep red mixture with no dry, unhydrated pepper flakes left. Letting the gochugaru sit in the porridge for a few minutes before adding anything else helps it bloom and soften slightly.
Add the fish sauce, minced garlic, grated ginger, and roughly chopped onion. If you prefer a smoother, more uniform paste, the onion (and even the garlic and ginger) can be blended with a splash of the porridge in a food processor before combining — either way works, it’s a texture preference rather than a correctness issue.
Mix everything together into a thick, spreadable, glossy red paste. It should hold its shape on a spoon without being stiff or dry.
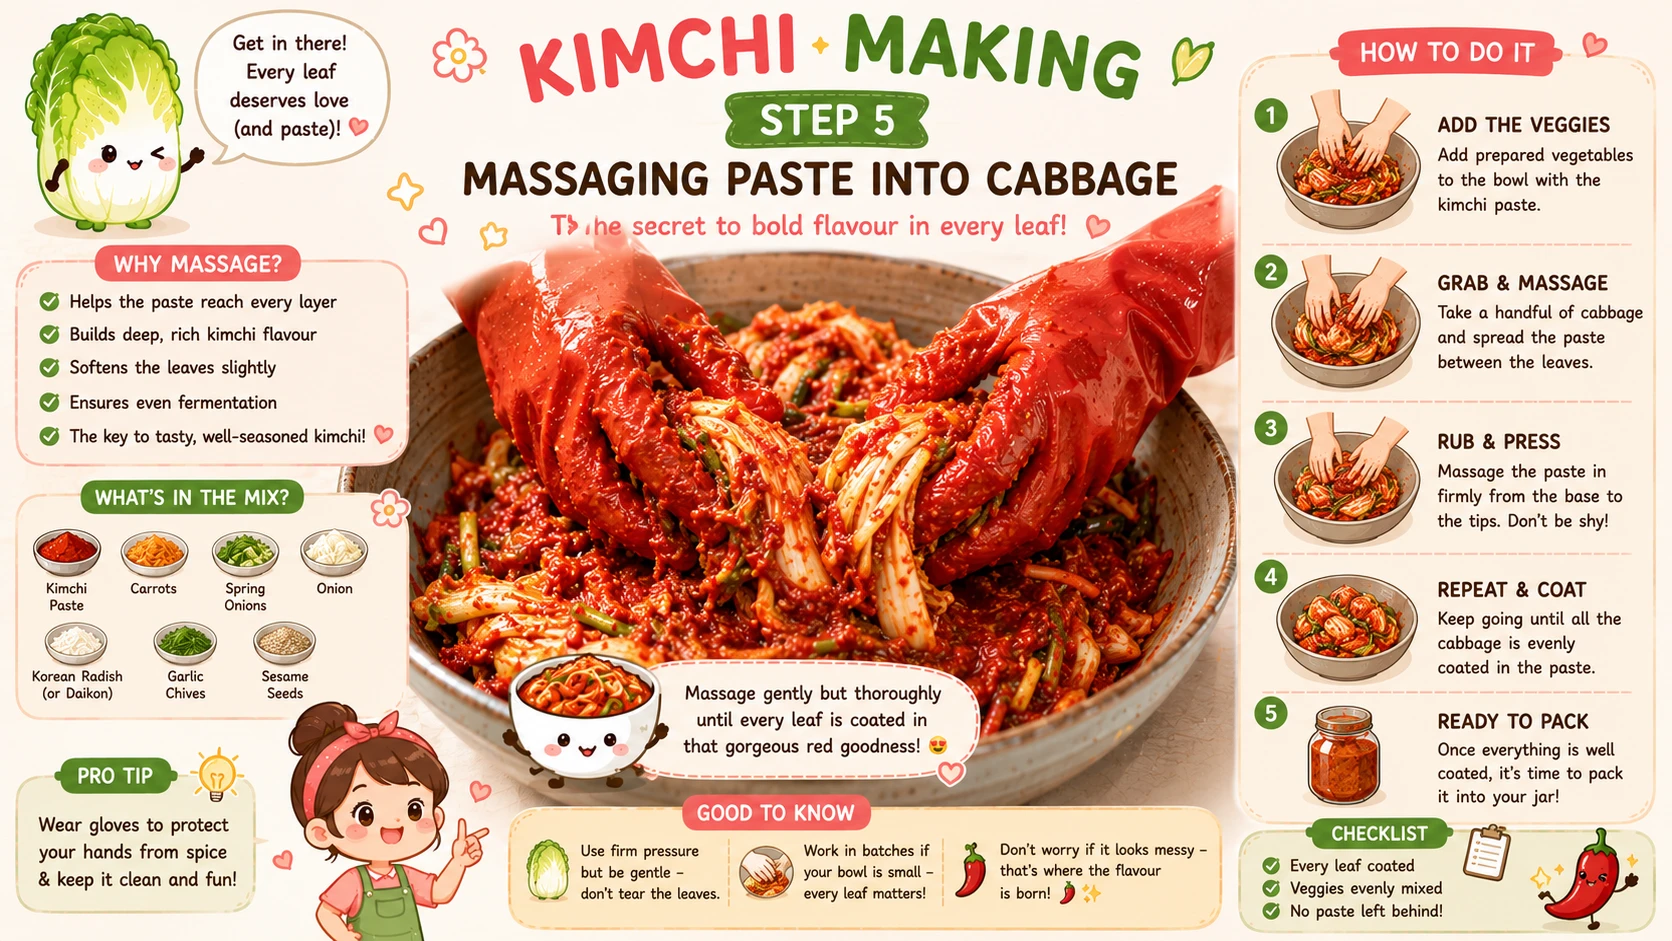
Add the julienned radish and scallions to the paste first and toss to coat, then add the drained, salted cabbage in batches rather than all at once — this makes it much easier to get an even coating rather than a few over-pasted pieces and a lot of bare ones.
Put on food-safe gloves (gochugaru will stain skin and can sting any small cuts) and massage everything together by hand, working the paste into every fold of every piece. Hand-mixing works noticeably better than a spoon here, since you can feel which pieces still need more paste.
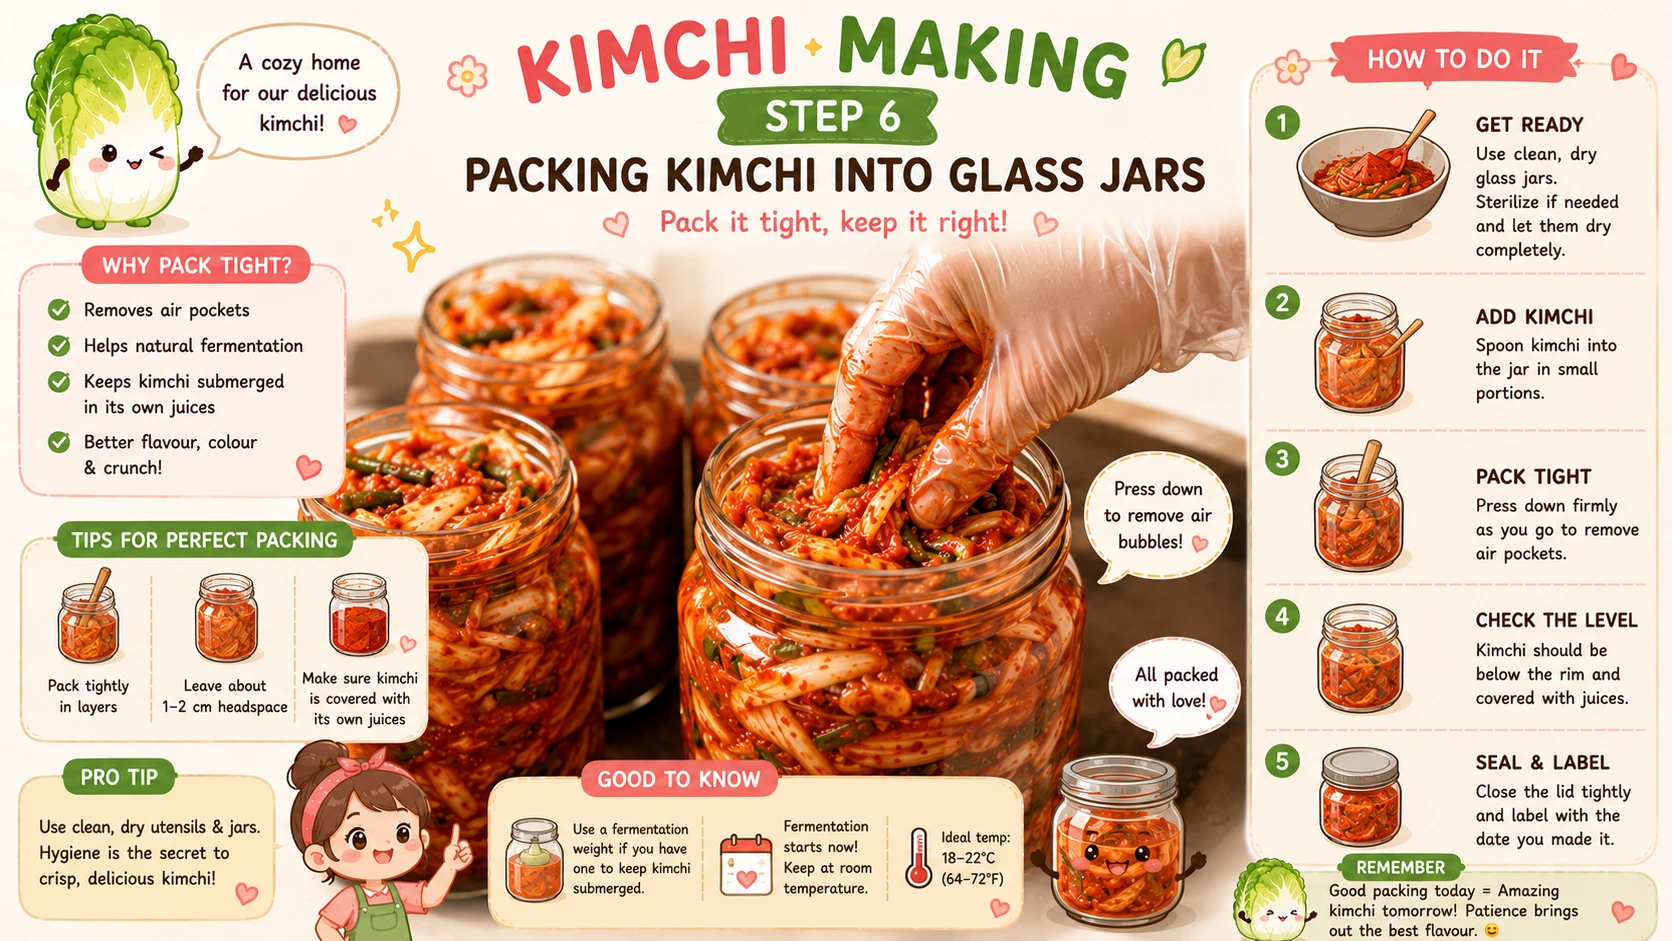
Pack the finished kimchi into clean glass jars a handful at a time, pressing down firmly after each addition with the back of a spoon or your fist (still gloved) to push out trapped air pockets. Leave about 1–1.5 inches (3–4 cm) of headspace at the top of each jar — fermentation produces gas, and a too-full jar can overflow or push its lid off.
Within a few hours to a day, you should start seeing brine rise up around the solids as the salt continues drawing moisture out — if a piece is sitting above the brine line, push it back down.
Leave the jars at a cool room temperature (18–22°C / 64–72°F) for 1–2 days. Check once a day: a faint sour smell and small bubbles rising through the brine mean it’s fermenting properly. Once it smells pleasantly sour rather than just salty and raw, move the jars to the fridge.
Salt, garlic, ginger, and sugar scale with batch size only. Gochugaru scales with both batch size and your chosen spice level — everything else in the recipe (cabbage, radish, scallions) scales 1:1 with the number of cabbages.
Traditional Whole-Cabbage Method (Tongbaechu-Kimchi)
This is the method behind kimjang — cabbage salted and pasted in halves or quarters rather than chopped, closer to how it’s made for large communal batches.
| Easy / Mak-Kimchi | Traditional / Tongbaechu-Kimchi | |
|---|---|---|
| Cabbage prep | Chopped into bite-size pieces before salting | Cut into halves or quarters, kept mostly intact through salting and pasting |
| Salting method | Dry-salted directly in a bowl, turned periodically | Often soaked in a saltwater brine, then turned periodically over several hours |
| Applying the paste | Mixed directly into the chopped cabbage | Spread leaf by leaf between the cabbage layers by hand |
| Total active time | Faster — no leaf-by-leaf work | Longer — more hands-on time per batch |
| Best for | First-time batches, smaller quantities, weeknight prep | Larger batches, kimjang-style community-scale kimchi making, more traditional presentation |
| Final flavour | Identical — same ingredients, same fermentation | Identical — same ingredients, same fermentation |
How the Leaf-by-Leaf Pasting Actually Works
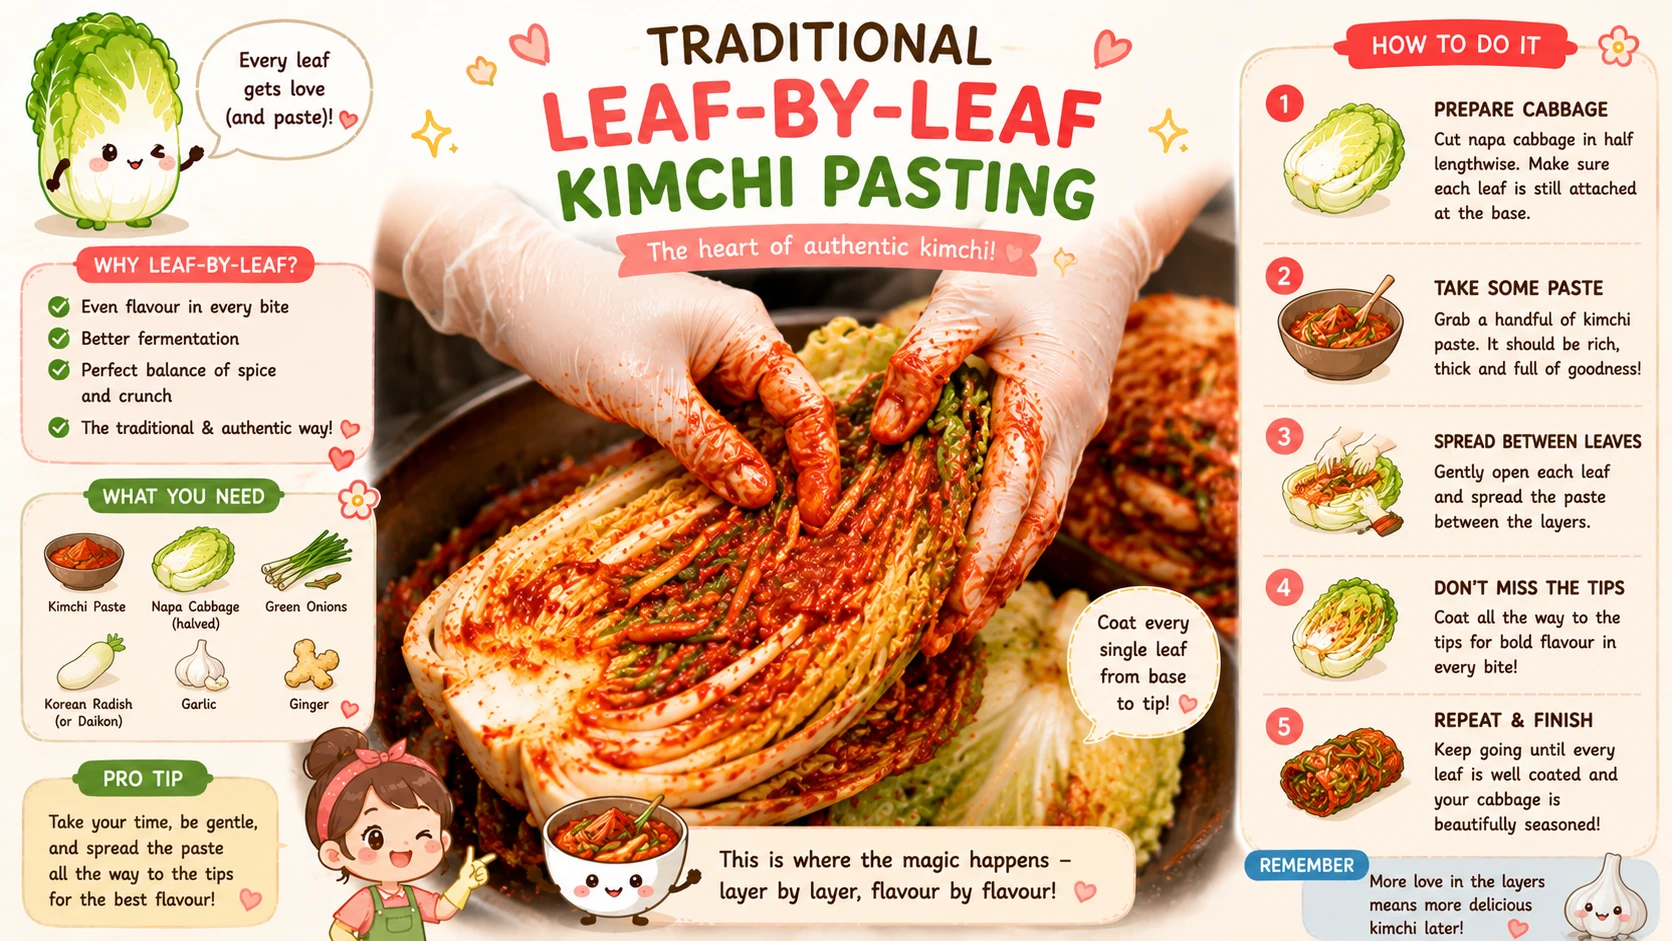
After salting and rinsing the halved or quartered cabbage the same way as the easy method (just handled more gently to keep the piece intact), lay each piece on a cutting board or tray with the leaves fanned open like a book. Starting from the outermost leaf, spread a spoonful of paste evenly over each leaf, working inward toward the core, lifting each leaf up and over as you go so the paste reaches between every layer, not just the surface.
Once every leaf has been coated, fold the whole piece back into its original shape, wrap the outermost leaf around the rest like a parcel, and pack it into the jar or crock cut-side up. This is what produces the classic whole-cabbage kimchi look often served sliced at the table.
The Science of Salt in Kimchi
Salt is doing three separate jobs at once in kimchi, and understanding all three explains most of what can go wrong.
| What Salt Does | Why It Matters |
|---|---|
| Draws moisture out of the cabbage | This creates the brine the cabbage sits in, and firms up the leaves so they hold texture through fermentation instead of turning mushy |
| Seasons the cabbage directly | Properly salted cabbage tastes balanced on its own, even before the paste is added |
| Selects for the right bacteria | Salt-tolerant lactic acid bacteria thrive in a salted environment, while many unwanted spoilage bacteria can’t compete — this is the same mechanism covered in more depth in the fermentation stages guide |
Customize Your Paste — Regional Jeotgal Variations
The recipe above uses fish sauce, but which salted seafood (jeotgal) goes into the paste is one of the biggest regional and household variables in real Korean kitchens — not a fixed rule.

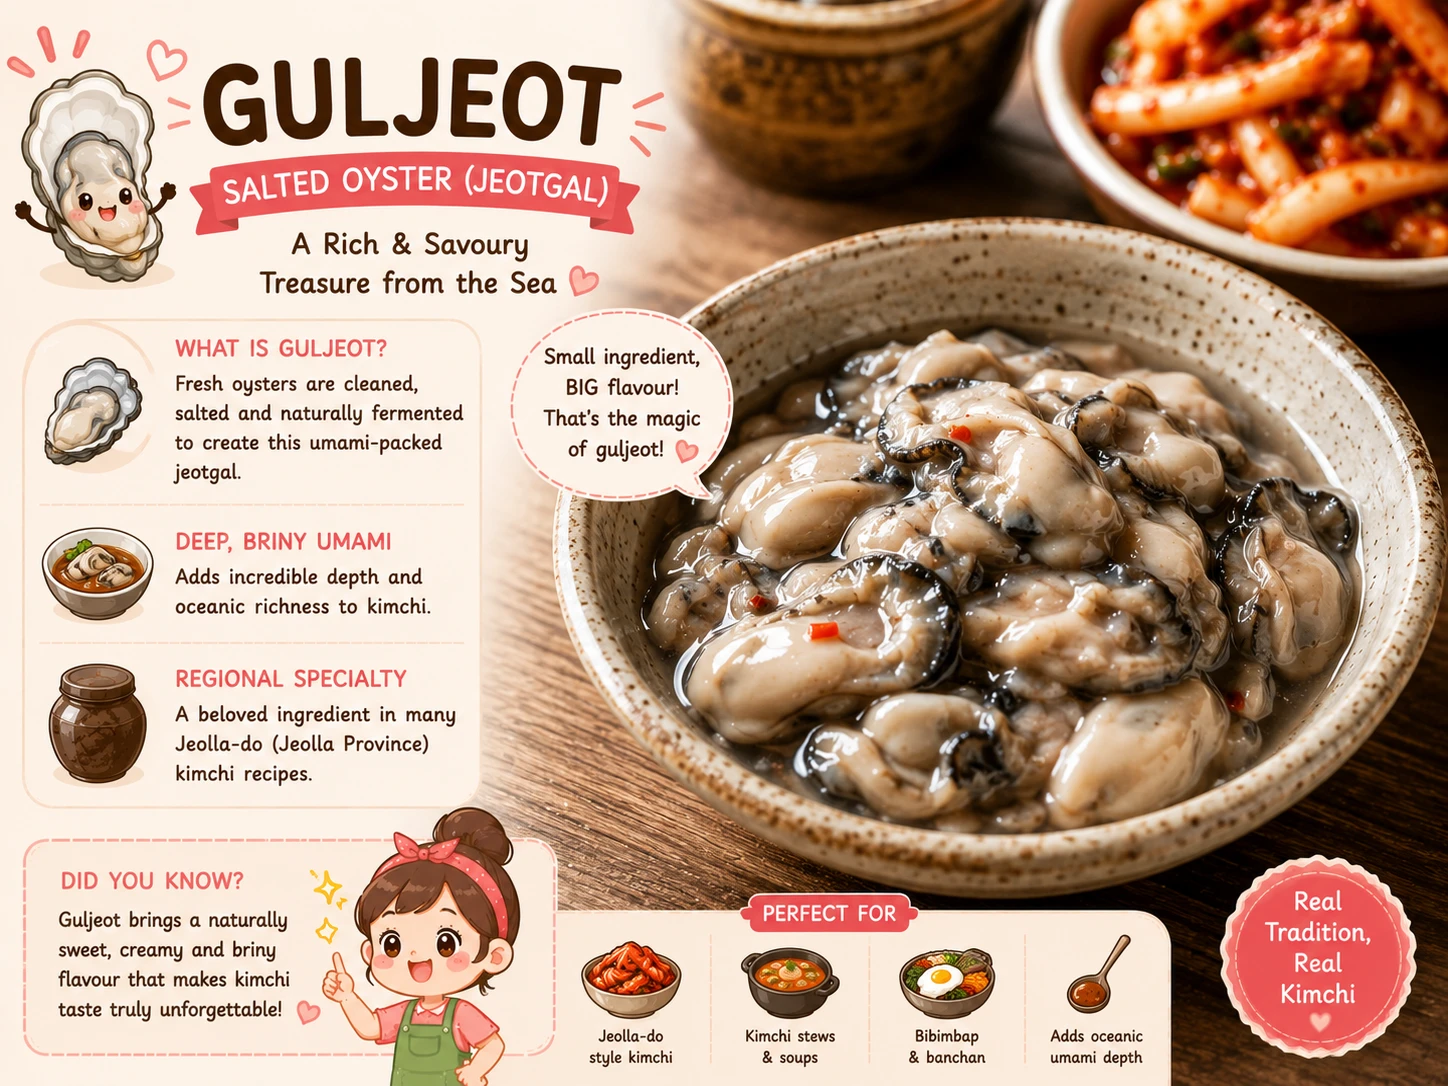
Vegan & Pescatarian Substitutions
Traditional kimchi paste leans on fish sauce and salted shrimp for depth — both are easy to swap out without losing the dish entirely.
| Traditional Ingredient | Substitute | Flavour Trade-Off |
|---|---|---|
| Fish sauce (myulchiaekjeot) | Soy sauce, tamari, or a store-bought vegan fish sauce alternative | Slightly less deep umami, but still balanced and savoury |
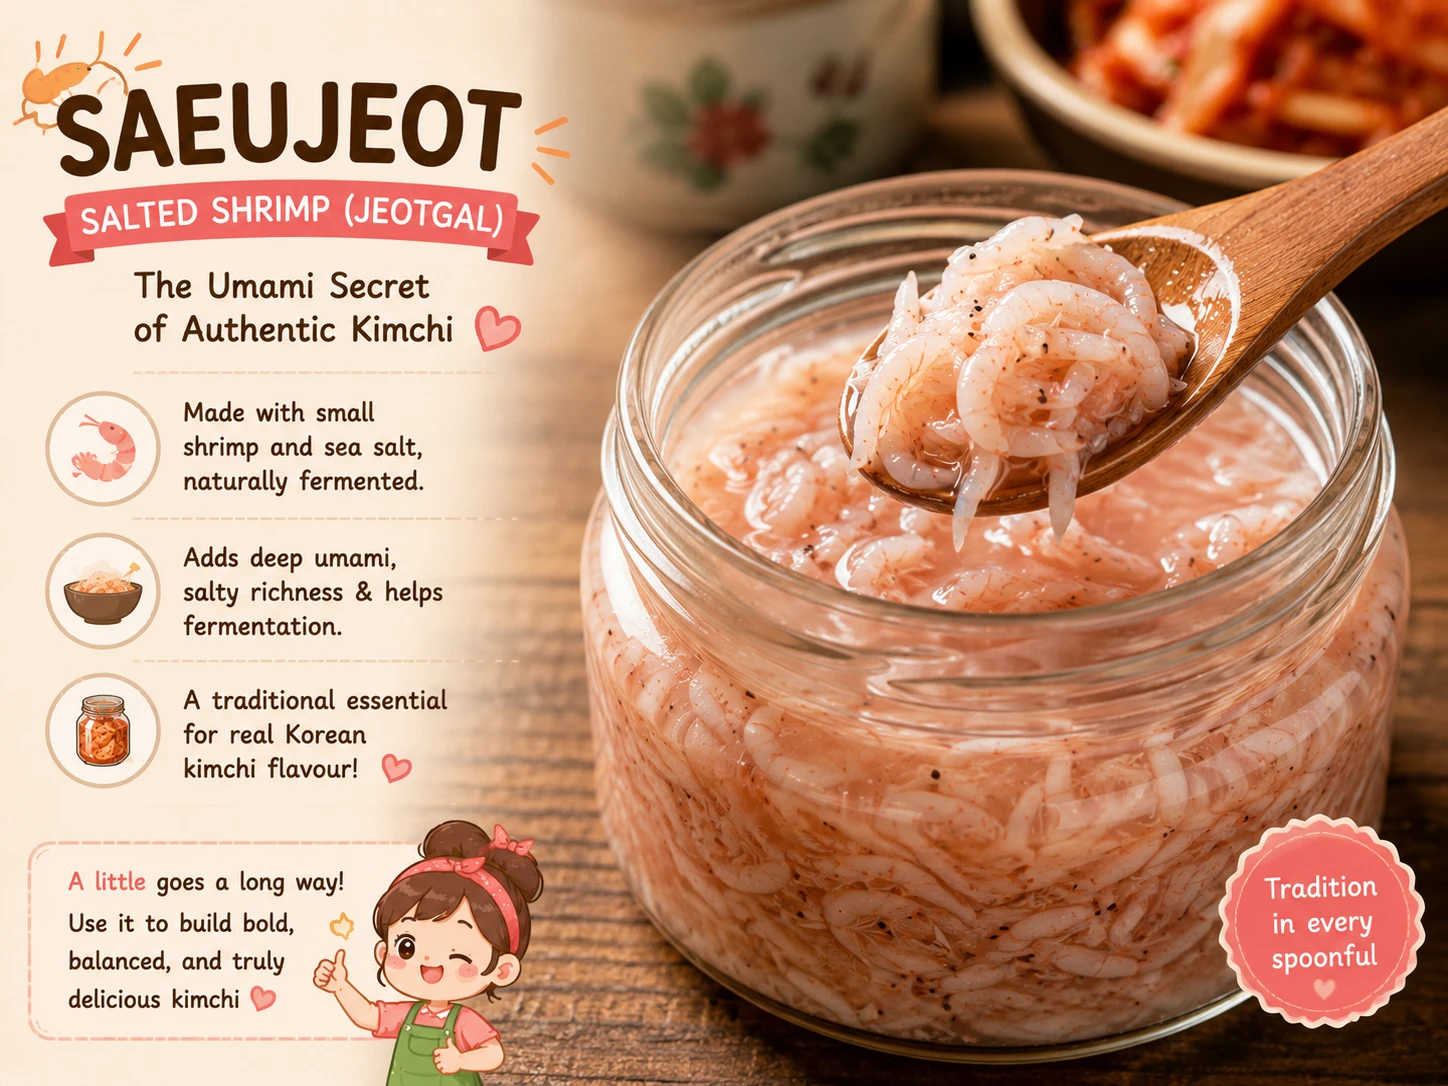
| Saeujeot (salted shrimp) | Omit entirely, or add extra soy sauce/miso for umami depth | Noticeably milder funk, closer to a “clean” vegetable ferment |
| Sugar (if avoiding refined sugar) | A small amount of fruit purée (Korean pear or apple) in the paste | Slightly fruitier sweetness, similar overall balance |
A fully vegan kimchi ferments the same way as traditional kimchi — the substitutions above change flavour, not the fermentation process itself, since the lactic acid bacteria doing the actual work come from the cabbage and environment, not from the fish sauce or shrimp.
Nutrition Facts (Per Serving)
Based on a standard 100g serving of finished, homemade napa cabbage kimchi made with the Easy Kimchi recipe above.
Nutrition Facts
Fermenting & Storing Your Kimchi
What happens after you pack the jar matters just as much as anything before it.
Leave freshly packed kimchi at cool room temperature (18–22°C) for 1–2 days to kick-start fermentation, then move it to the fridge.
Refrigeration slows fermentation dramatically without stopping it — your kimchi will keep developing flavour for months in the fridge.
Fresh, Young, Ripe, or Over-ripe each suit different dishes — see the full breakdown in the fermentation stages guide.
Nothing Goes to Waste
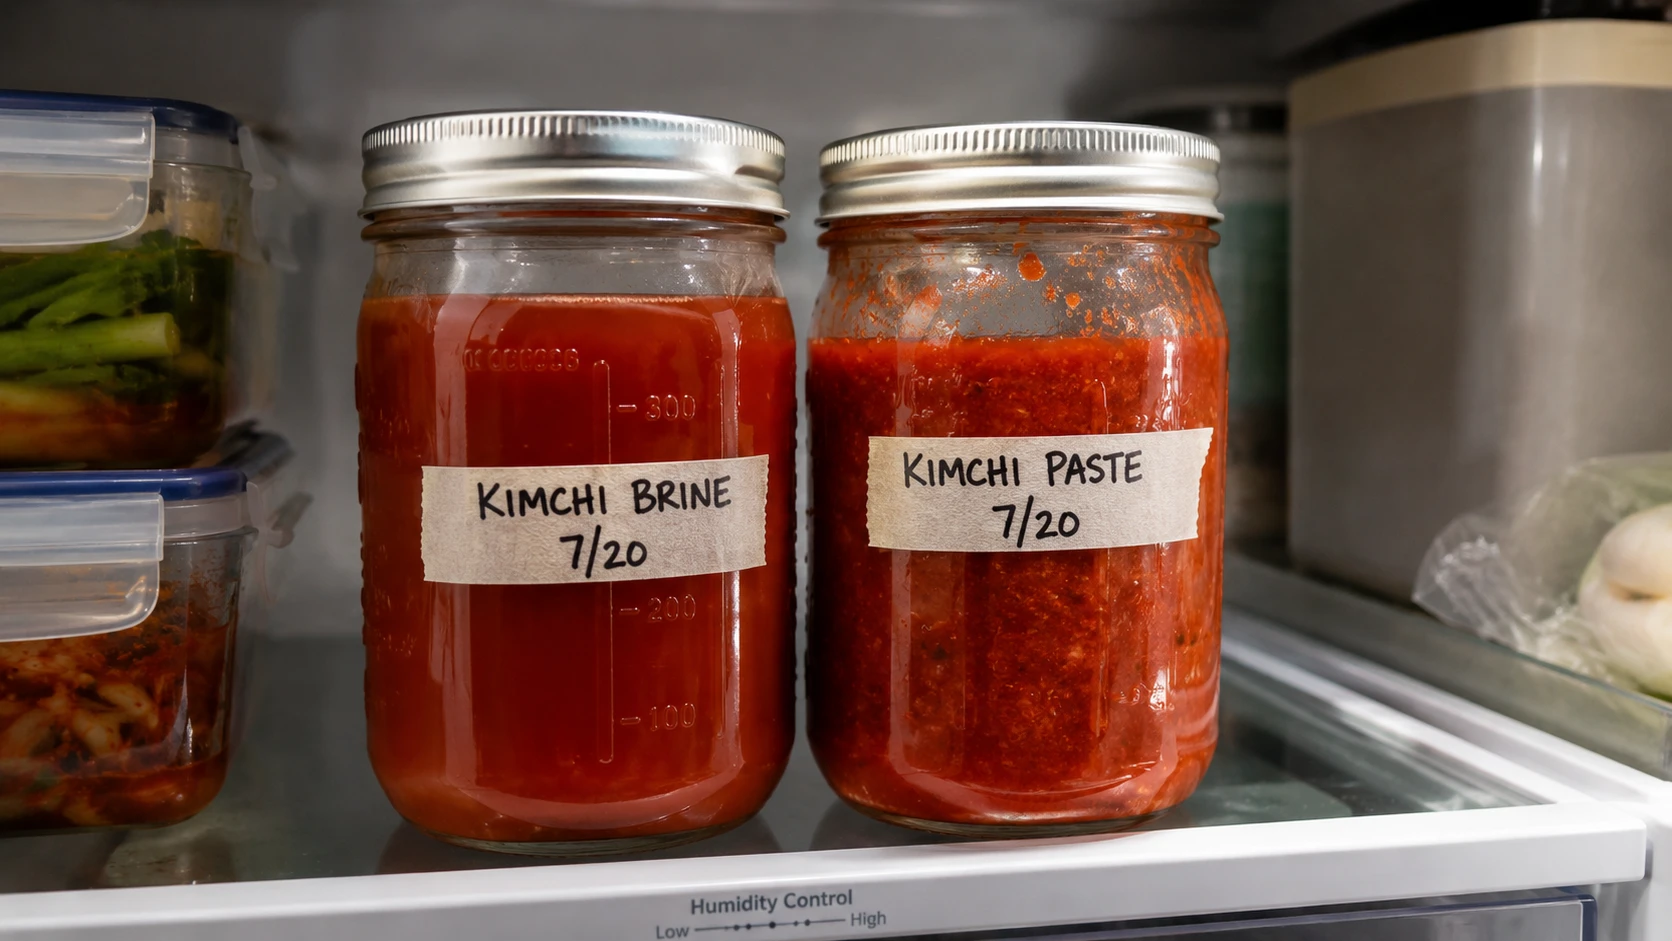
Made a double batch of paste but not enough cabbage on hand? Freeze the extra paste in portioned bags — it keeps well for months and thaws ready to mix into freshly salted cabbage.
Leftover kimchi brine (the liquid at the bottom of the jar) works as a tangy base for salad dressings, marinades, or stirred into a fried-rice or stew for extra depth instead of being poured out — see the full guide to using leftover kimchi juice for the complete list, including how to use it as a fermentation starter for your next batch.
Split a fresh batch across two jars right after mixing — leave one at room temperature to reach Ripe faster, and refrigerate the other immediately to stay Young longer for banchan.
Troubleshooting
Nearly every kimchi problem traces back to salt, temperature, or hygiene. Pick what you’re seeing below for an instant answer, or scan the full table underneath.
Full Reference Table
| Problem | Likely Cause | Fix |
|---|---|---|
| Too salty | Not rinsed thoroughly after salting, or iodized table salt was used | Rinse the cabbage 2–3 times after salting; switch to coarse sea salt or kosher salt next batch. For an already-salty batch, adding extra radish or unseasoned cabbage helps dilute it |
| Not salty enough | Under-salted during the initial step, or over-rinsed afterward | Add a small amount of salt directly to the mixed kimchi, gradually and to taste |
| Mushy or slimy texture | Over-salting or leaving salt on the cabbage too long breaks down cell walls; too much sugar relative to salt can also cause a slimy texture | Reduce salting time next batch; check your sugar-to-salt ratio; use this batch mainly in cooked dishes where texture matters less |
| Not fermenting / no bubbles | Salt concentration too high, or room temperature too cold | Leave the jar at a moderate room temperature (18–22°C) for longer before judging it; use less salt next time if this happens repeatedly |
| Mould or off-smells | Contamination from unclean utensils, or kimchi not staying submerged under the brine | Discard if mould is fuzzy or coloured; always use clean utensils and press kimchi back under the brine after serving |
| Not red enough / weak flavour | Not enough gochugaru, or low-quality/old chili flakes | Increase the gochugaru amount to taste, and use fresh, good-quality Korean gochugaru rather than a generic chili flake |
Other Kimchi Varieties Worth Trying
Once you’re comfortable with the base recipe, these are quick adaptations using the same salt-and-paste principle — full standalone recipes aren’t needed once you know the core method.

Korean radish (mu) cut into 1-inch cubes instead of using cabbage. Ferments faster than cabbage kimchi thanks to the radish’s higher water content.
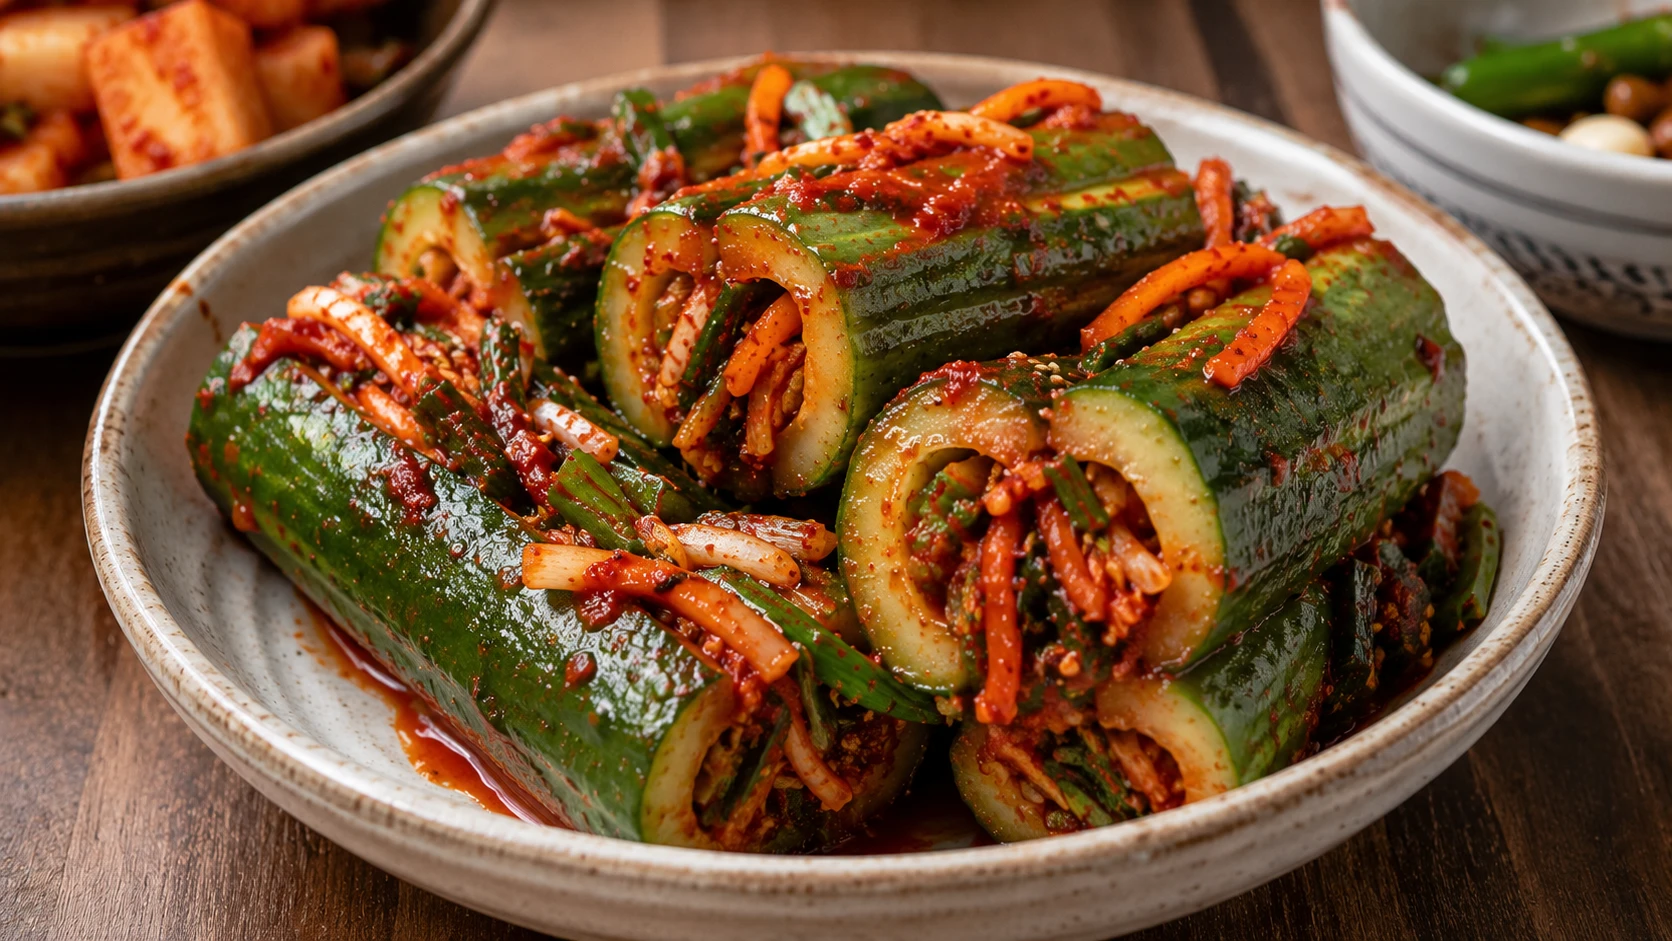
Small Korean or Persian cucumbers, slit and stuffed with a quick paste rather than fully submerged — a fresh, crunchy, fast-fermenting summer version.
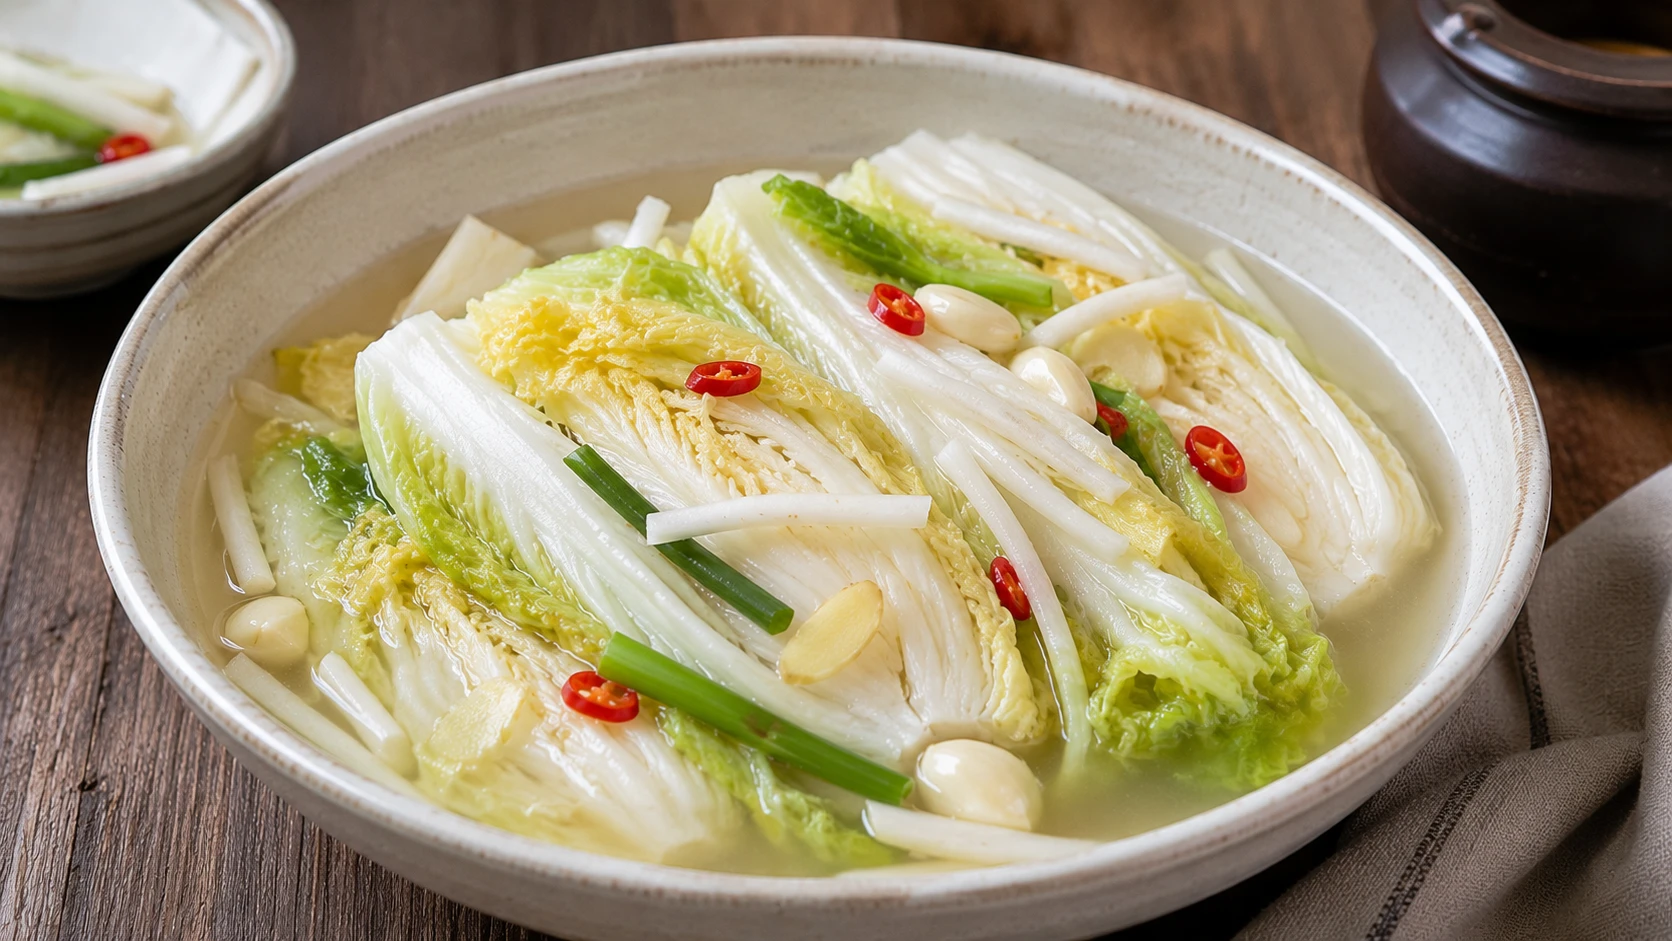
The same napa cabbage base, fermented in a clear, mildly sweet brine with no gochugaru at all — a good option for anyone avoiding heat entirely.
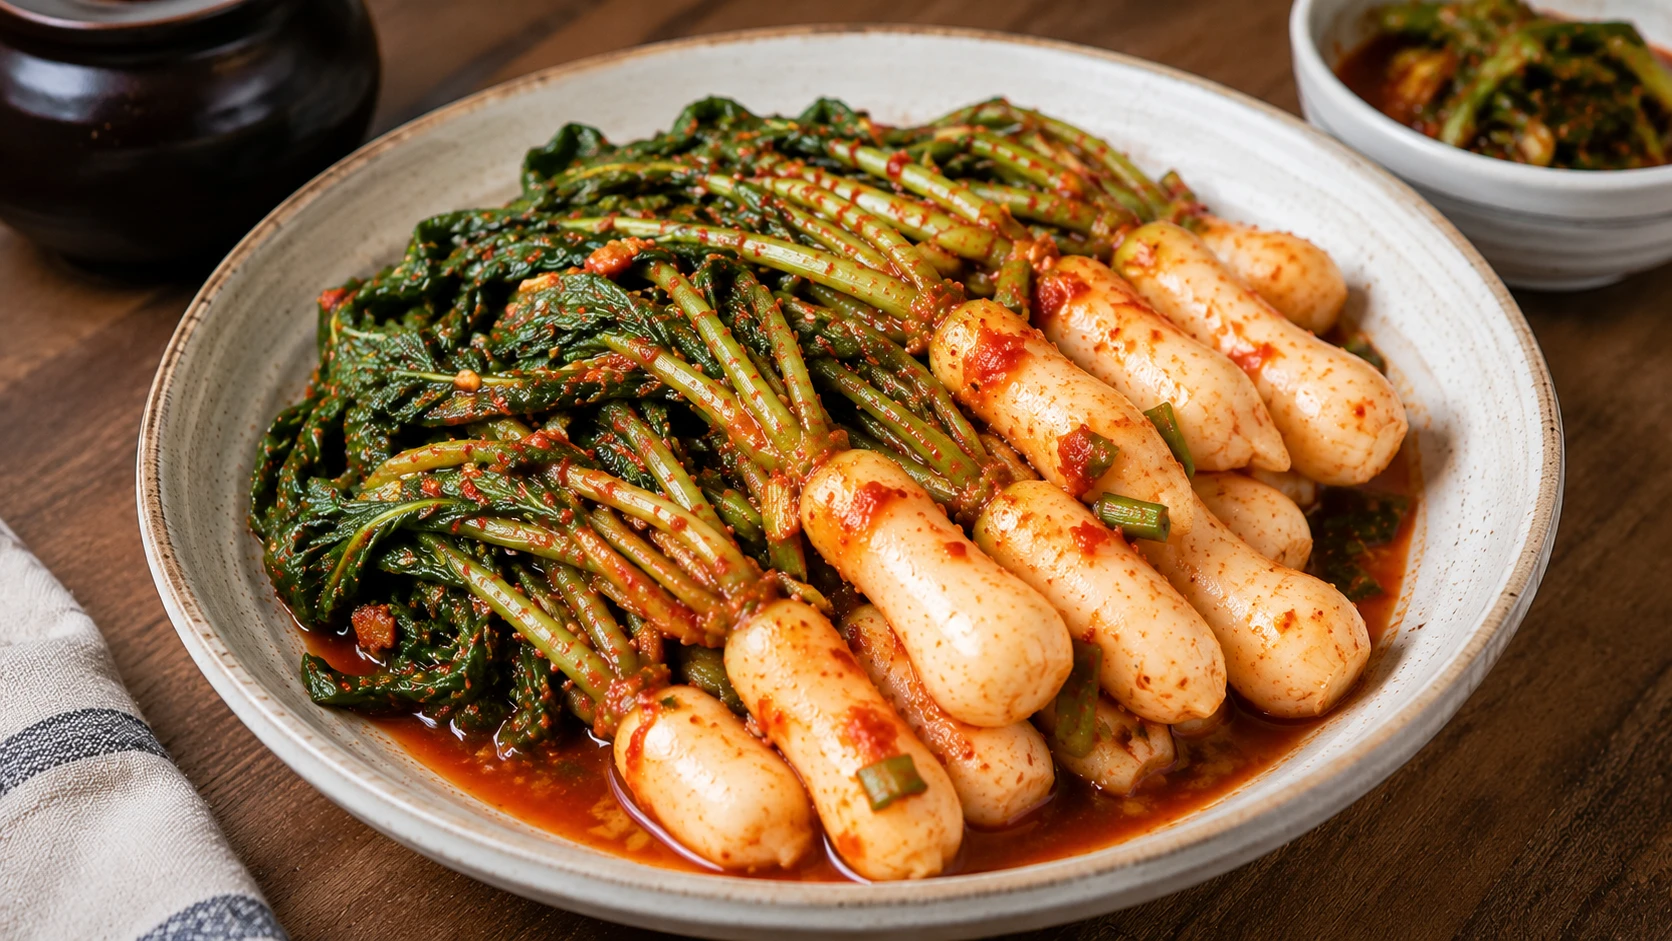
Made with whole young radish and its greens rather than napa cabbage — often served with noodles (yeolmu-guksu) rather than as a standalone side.
What to Make With Your Kimchi
Once your batch is fermented to the stage you want, here’s where to put it to use.


Frequently Asked Questions
Search or tap any question below.
Active prep time is about 1.5–2 hours (salting, rinsing, mixing), plus 1–2 days at room temperature for initial fermentation before refrigerating. The traditional whole-cabbage method can take longer since salting and draining steps are more involved.
The easy method (mak-kimchi) chops the cabbage into bite-size pieces before salting and mixing, which is faster and simpler. The traditional method (tongbaechu-kimchi) salts the cabbage in halves or quarters and spreads the paste leaf by leaf, which takes longer but is closer to how kimchi is made during kimjang, Korea’s traditional kimchi-making season.
Usually from not rinsing the salted cabbage thoroughly enough, or using iodized table salt instead of coarse sea salt or kosher salt. Rinsing the cabbage 2–3 times after salting, and using non-iodized salt, are the two most reliable fixes.
Mushy texture is most often caused by over-salting or leaving salt on the cabbage too long, which breaks down the cell walls. A slimy texture usually points to too much sugar relative to salt, or fermentation temperatures that ran too warm.
This usually means the salt concentration was too high, or the room temperature was too cold to get lactic acid bacteria active. Leaving the jar at a moderate room temperature (18–22°C) for longer, or checking that salt wasn’t overdone, usually resolves it.
Yes. Soy sauce, tamari, or a vegan fish sauce alternative can replace fish sauce and saeujeot (salted shrimp) for a fully vegan kimchi, with a slightly less deep umami flavour as the main trade-off.
Coarse sea salt or kosher salt, not iodized table salt. Iodine can inhibit the lactic acid bacteria responsible for fermentation, and the coarser texture also salts cabbage more evenly.
Properly refrigerated, homemade kimchi stays safe to eat for several months, continuing to slowly ferment and sour the whole time — see the fermentation stages guide for how flavour and texture change from Fresh to Over-ripe.
Generally yes per pound, especially for larger batches, though the upfront cost of gochugaru and a jar or crock is a factor for a first-time batch. If you’d rather buy it, see our guide to the best store-bought kimchi brands.
Napa cabbage is strongly preferred since its softer, more water-rich leaves absorb the paste and ferment more evenly. Regular green cabbage is denser and less traditional, and will produce a noticeably different texture and flavour.
No — a clean glass jar with a loose-fitting or vented lid works fine at home. Traditional Korean households historically used clay onggi pots, and some now use a dedicated kimchi refrigerator, but neither is required for a good result.
Kimjang is the traditional Korean practice of communities and families making and sharing large quantities of kimchi together in late autumn to last through winter. It was recognised by UNESCO as an Intangible Cultural Heritage of Humanity in 2013.
Made Your First Batch? Questions?
Share what worked (or didn’t) with your batch, or ask a question — Ji-Young reads every comment.