Chicken Kimchi Jjigae (닭고기 김치찌개 — Lean Protein Version)
The same aged-kimchi base and anchovy-kelp stock as the classic recipe, built on browned chicken thigh instead of pork belly. A meaningfully lower-saturated-fat option for the same comfort-food craving — Wikipedia itself lists chicken alongside pork and beef as a recognized base protein for this dish.


What Is Chicken Kimchi Jjigae?
Chicken kimchi jjigae — 닭고기 김치찌개 — is the same Stage 3 aged-kimchi stew as the classic recipe, with browned chicken thigh replacing pork belly as the protein. The two things that make this version work: using boneless chicken thigh, not breast (thigh’s fat and connective tissue keep it tender through the full simmer), and browning it first before building the broth, exactly the way pork belly would be treated in the classic version. Get both right and you get a meaningfully leaner jjigae — noticeably less saturated fat than pork — without sacrificing the tender, satisfying protein bite the dish is known for. Serves 4 in 35 minutes at approximately 280 calories and 25g protein per serving.
Why This Version Works — Lean, Not Dry
Swapping pork belly for chicken sounds like it should risk a dry, disappointing stew — in practice, the right cut and the right technique keep this version just as satisfying as the classic, at a fraction of the saturated fat.
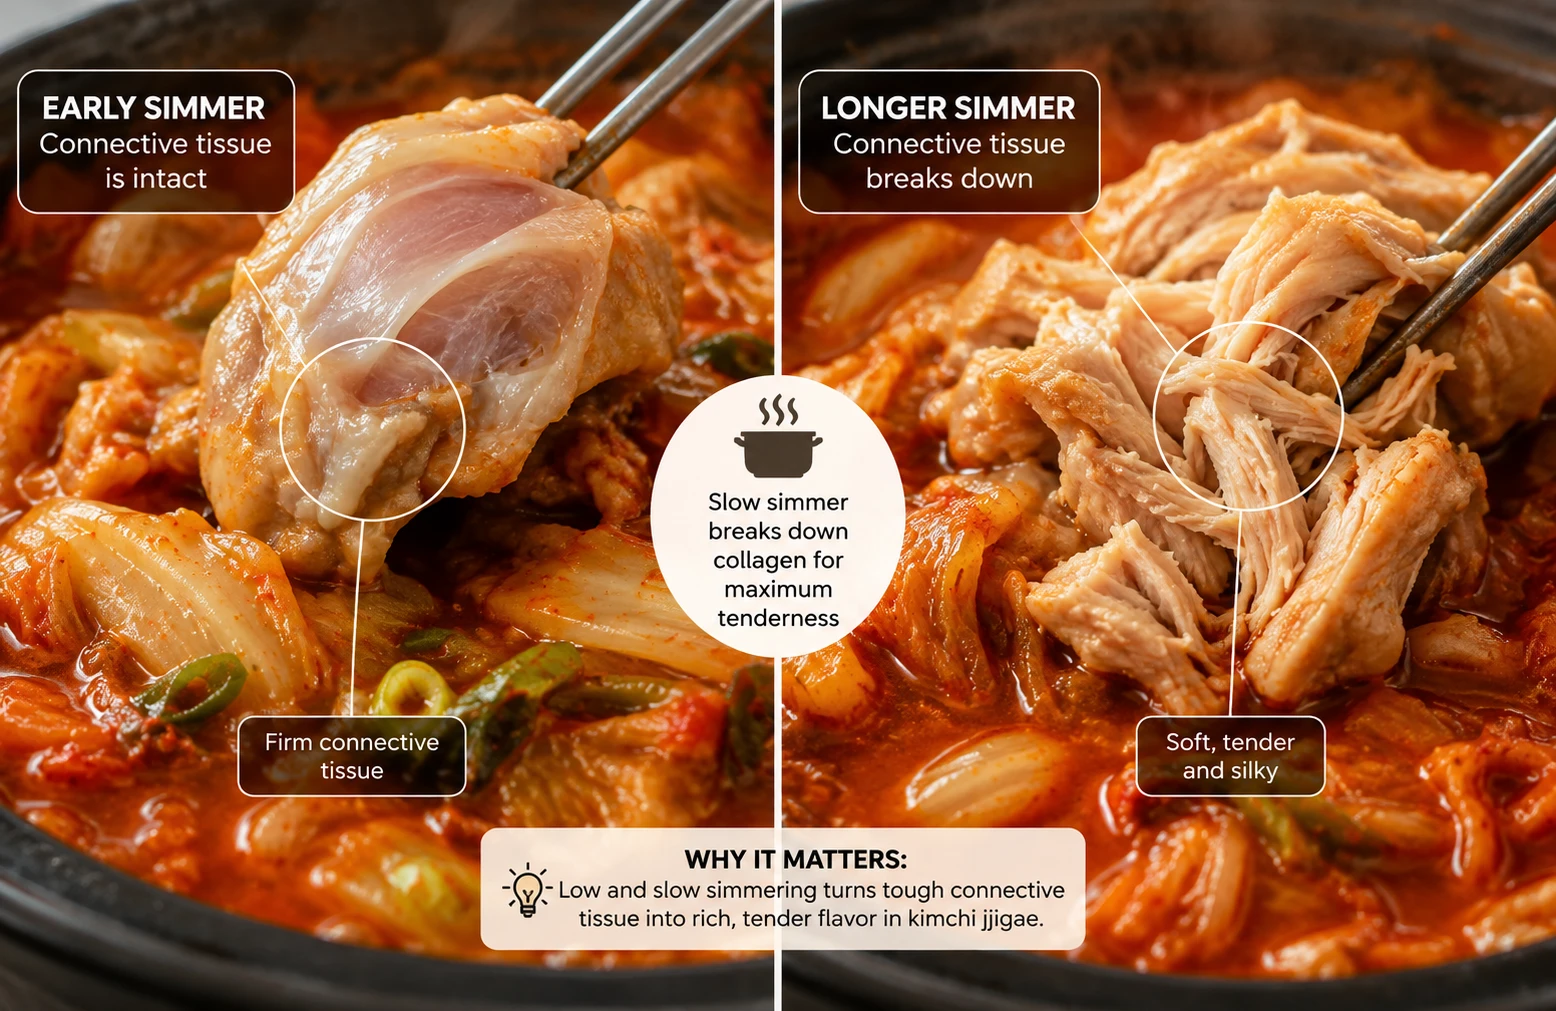
Chicken thigh contains collagen-rich connective tissue that slowly breaks down into gelatin during a 15-18 minute simmer, actively basting the meat from the inside as it cooks. This is the same principle that makes braised short rib or pork shoulder tender — chicken breast simply doesn’t have this tissue to work with, which is exactly why it dries out under identical cooking conditions.
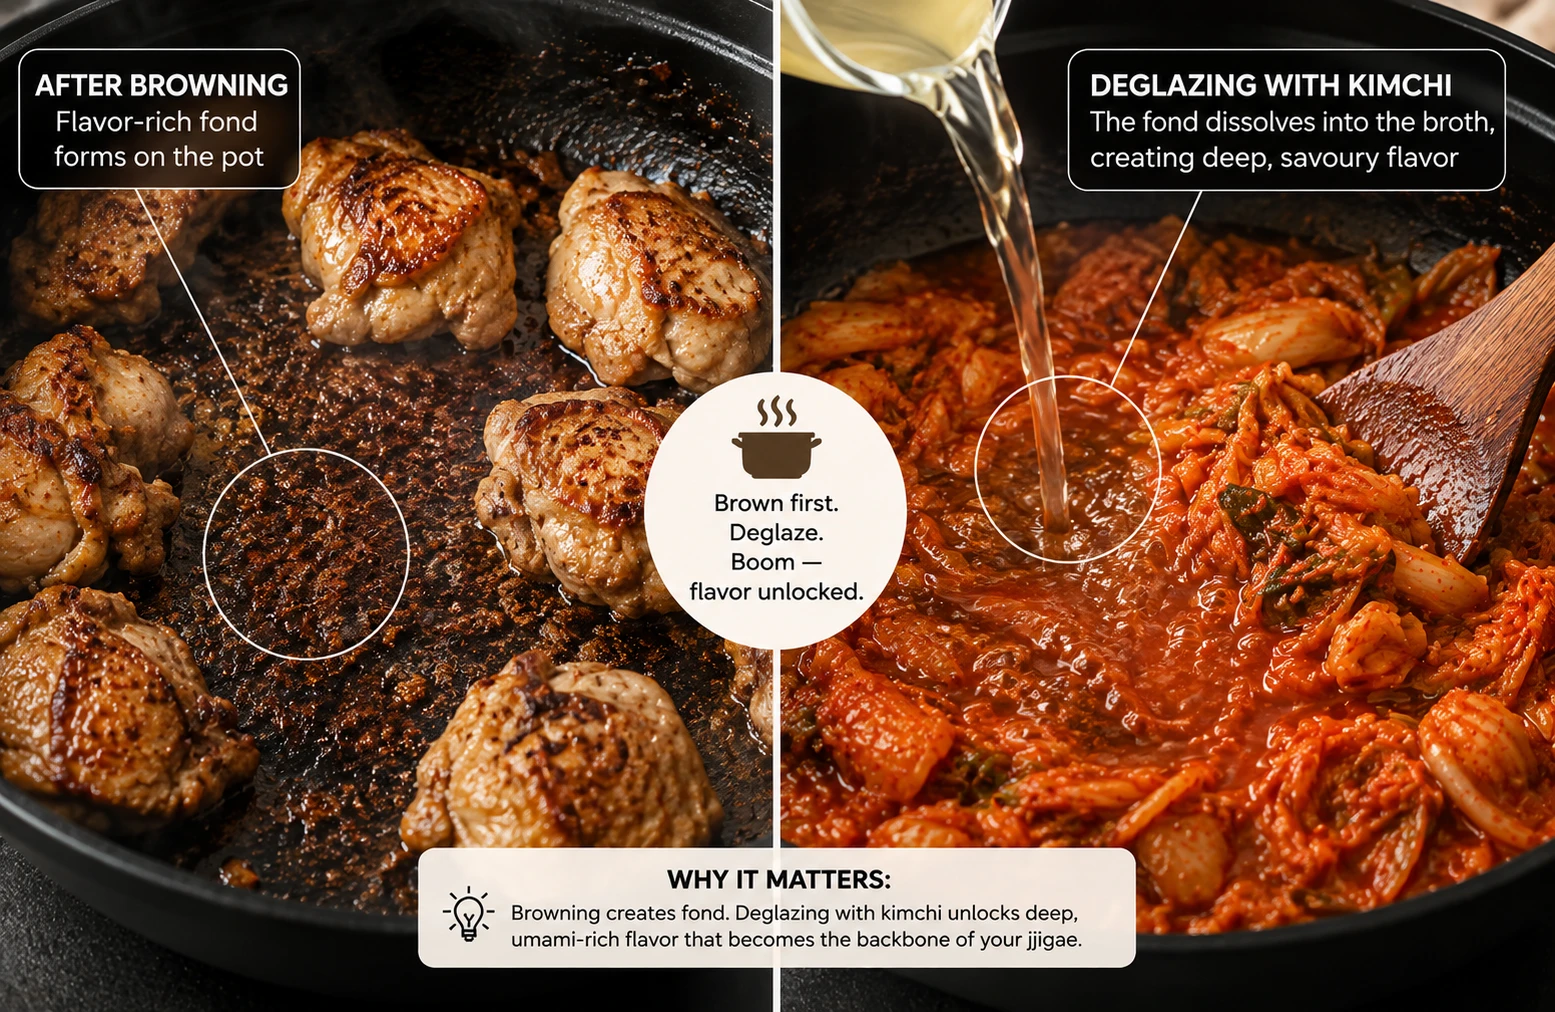
The Maillard reaction that browns the chicken’s surface also leaves a fond — caramelised protein and sugar residue stuck to the pot — that dissolves back into the dish when the kimchi is sauteed in the same pot afterward. Skipping this step and simmering raw chicken directly in the broth from the start produces a noticeably flatter, less savoury result.
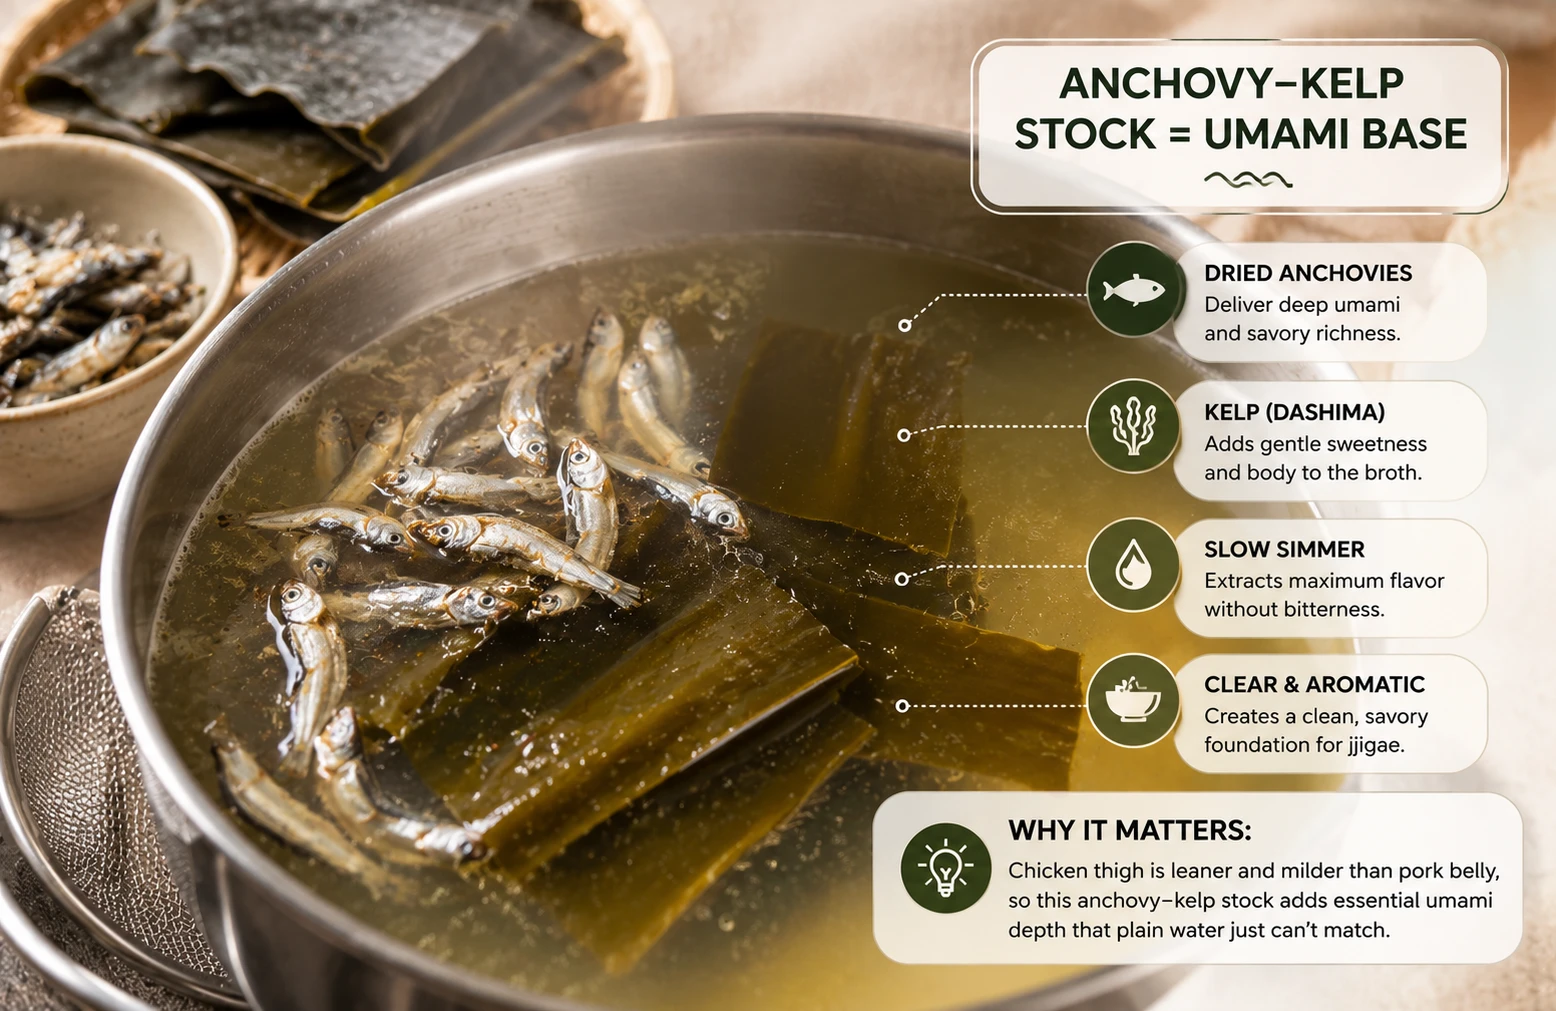
Chicken thigh’s flavour is milder than pork belly’s, so the anchovy-kelp stock’s umami contribution matters proportionally more here — this is one variation where skipping the stock in favour of plain water produces a more noticeably weaker result than it might with a richer, fattier protein.
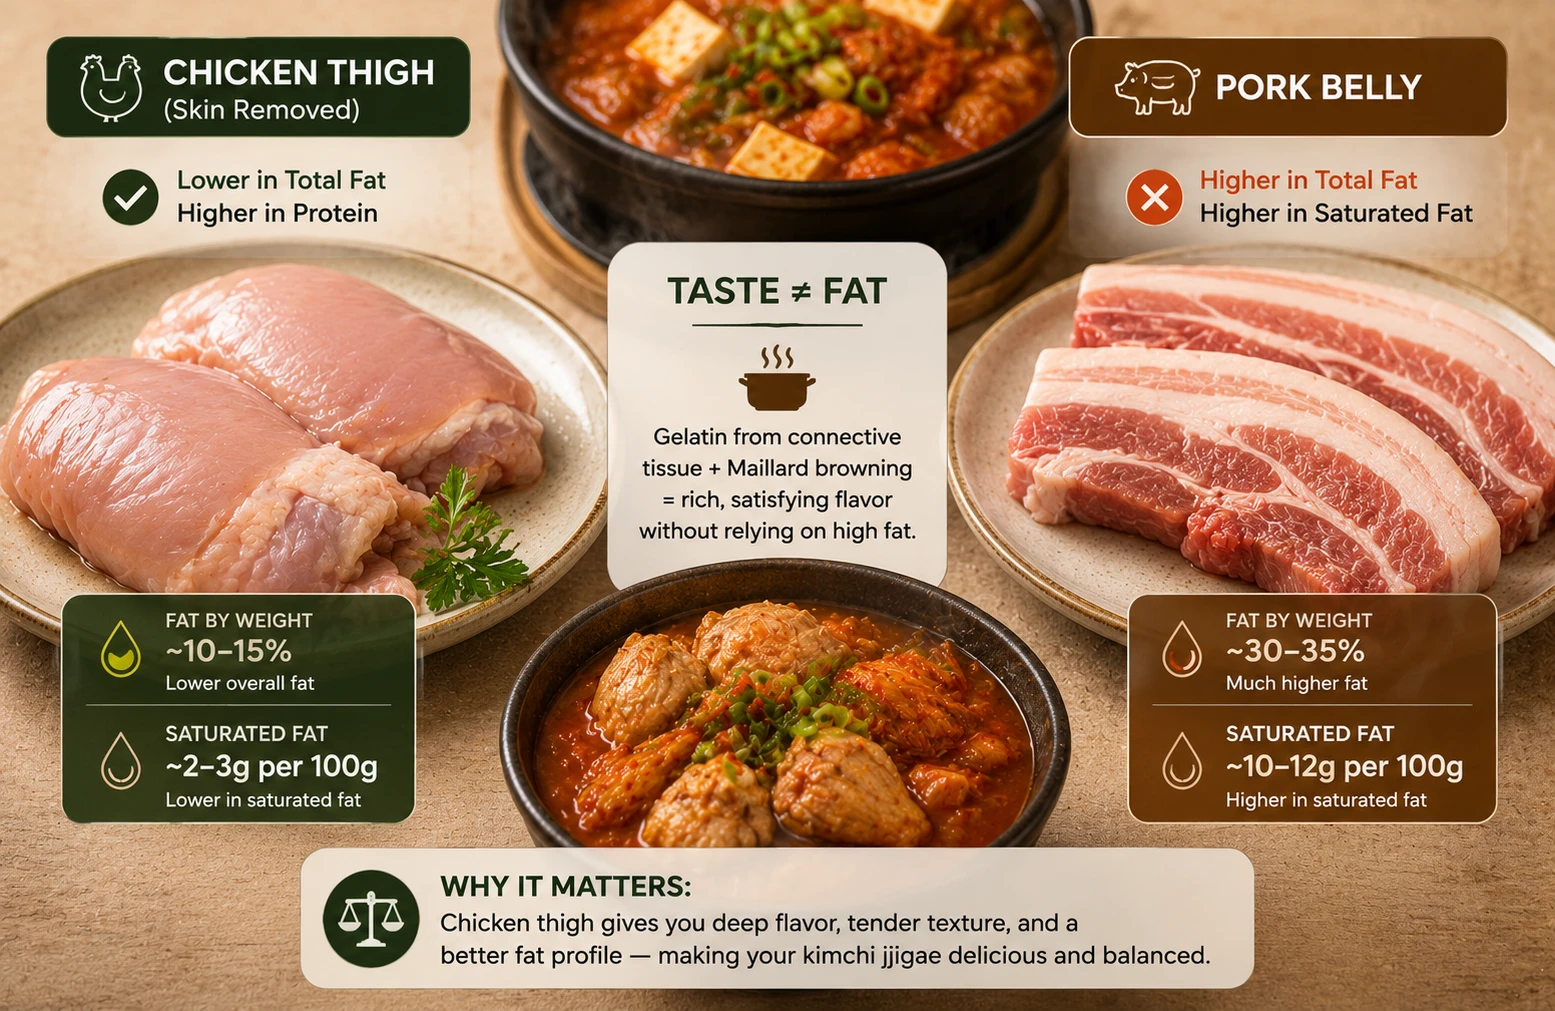
Pork belly is roughly 30-35% fat by weight, much of it saturated; chicken thigh (skin removed) sits meaningfully lower, particularly in saturated fat specifically. The dish still tastes rich and satisfying because the connective-tissue gelatin and browning technique deliver mouthfeel that isn’t purely dependent on fat content.
The Origin of Chicken Kimchi Jjigae
Chicken is the newest major protein in the kimchi-jjigae family — a modern, health-conscious adaptation of a much older stew.
The word 찌개 (jjigae) comes from a verb root meaning “to stew” or “to simmer down,” describing thick communal stews served bubbling in the pot they were cooked in. Kimchi-jjigae’s classic form is built on pork, the historically dominant protein in inland Korean households, prized for the way its fat rounds out the kimchi’s acidity.
Chicken kimchi-jjigae is a more recent household adaptation — a direct response to a desire for a leaner version of the same comfort food, rather than a regionally distinct traditional style. It became common as chicken thighs grew widely available and affordable in Korean supermarkets, and as home cooks looked for ways to keep the dish’s flavour profile while reducing saturated fat. Today it’s a standard weeknight option in many households, sitting alongside the pork original rather than replacing it.
Thigh vs Breast — Two Cuts Compared
Most recipes online just say “chicken” without specifying which cut, or worse, assume breast because it’s the more commonly stocked cut. We tested both across 3 batches. The difference decides whether the meat stays tender or turns dry and stringy.

- Cut into bite-size pieces (~3cm)
- Brown 2-3 min per side before adding to broth
- Simmer 15-18 minutes until fully tender
- Connective tissue bastes the meat as it breaks down
Result: Tender, juicy, forgiving even if slightly overcooked by a few minutes. Correct in every batch test.
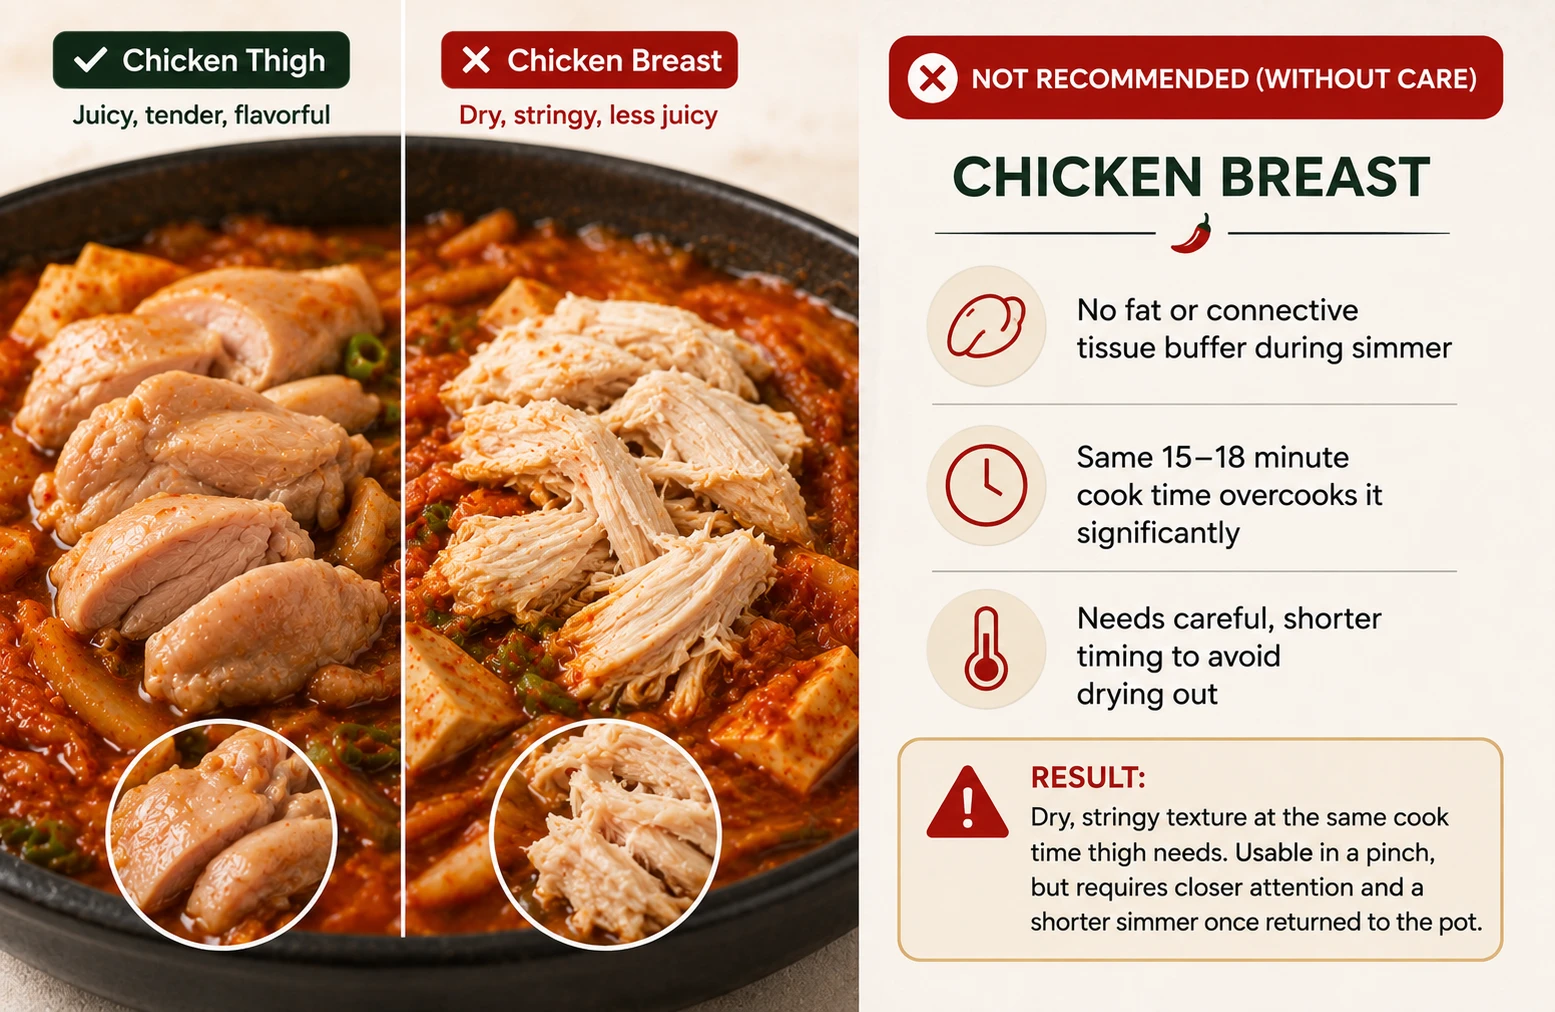
- No fat or connective tissue buffer during simmer
- Same 15-18 minute cook time overcooks it significantly
- Needs careful, shorter timing to avoid drying out
Result: Dry, stringy texture at the same cook time thigh needs. Usable in a pinch, but requires closer attention and a shorter simmer once returned to the pot.
Cut Comparison at a Glance
| Cut | Texture Result | Ideal Simmer Time | Forgiving Timing? | Verdict |
|---|---|---|---|---|
| Thigh ⭐ | Tender, juicy | 15-18 min | Yes | Always use this |
| Breast | Dry, stringy at same timing | 10-12 min max | No | Use only with careful, shorter timing |
Key Terms — Language & Food Science Entities
These terms define the technique and vocabulary specific to the chicken version — see the full silo glossary on the Kimchi Jjigae Hub for terms shared across the whole family.
Which Chicken Cut to Use — Four Options Ranked
Beyond the basic thigh-versus-breast decision, here’s how all the common chicken formats compare for this specific recipe.
The recipe as written. Best balance of tenderness, ease of eating, and manageable fat content.
⭐ Best Choice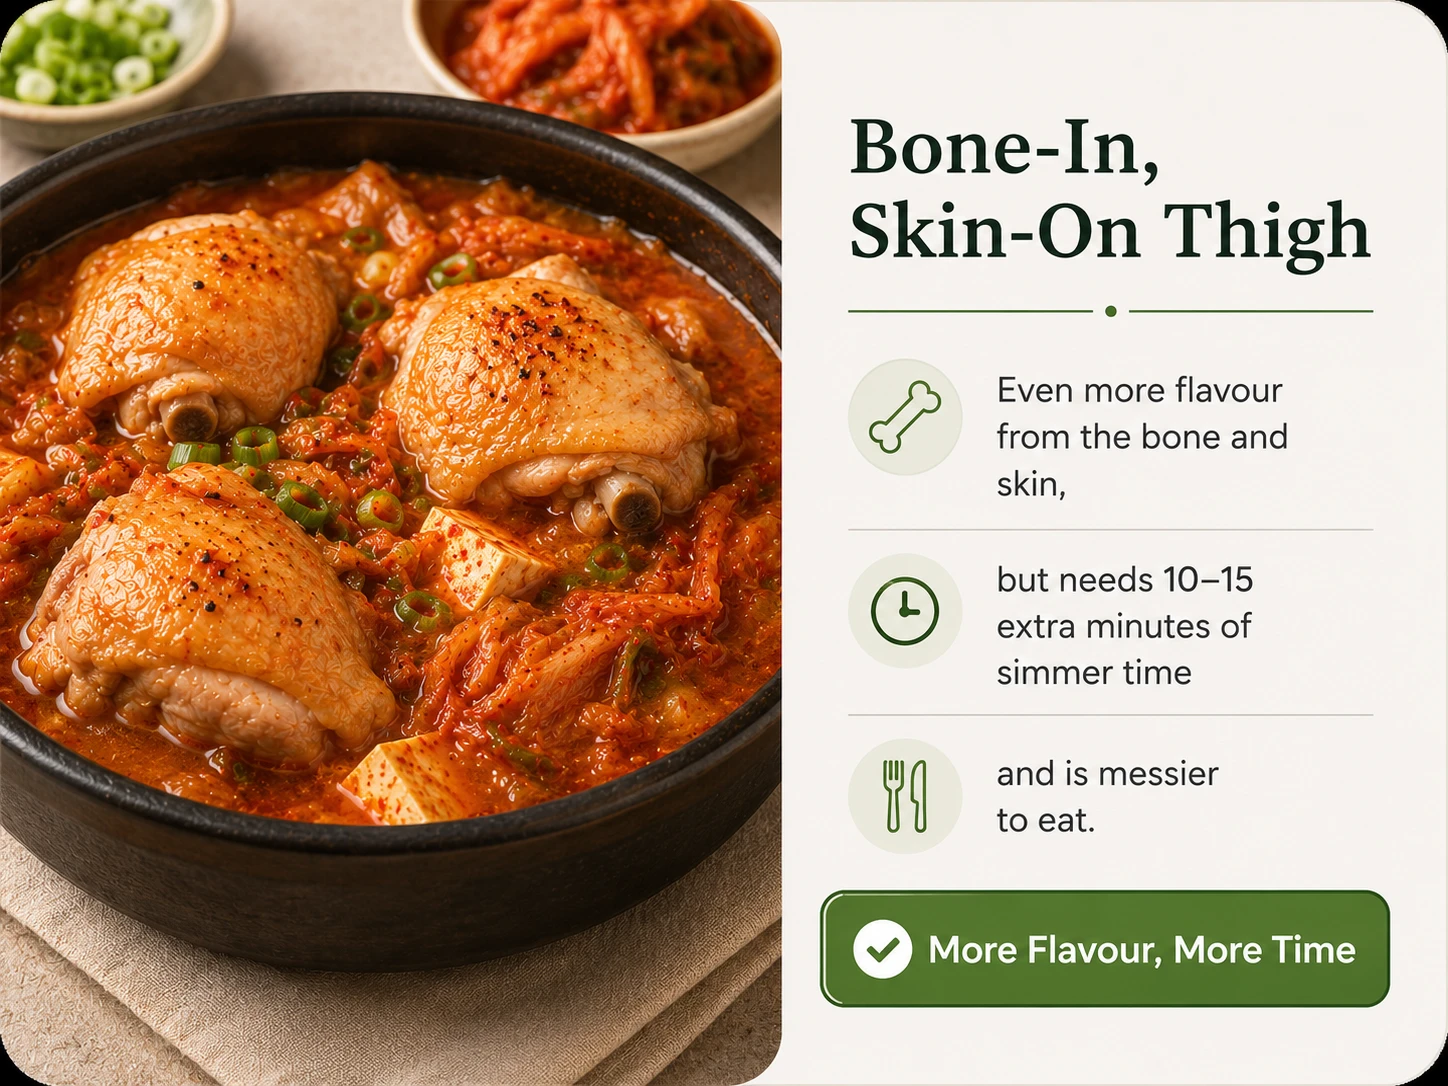
Even more flavour from the bone and skin, but needs 10-15 extra minutes of simmer time and is messier to eat.
✅ More Flavour, More Time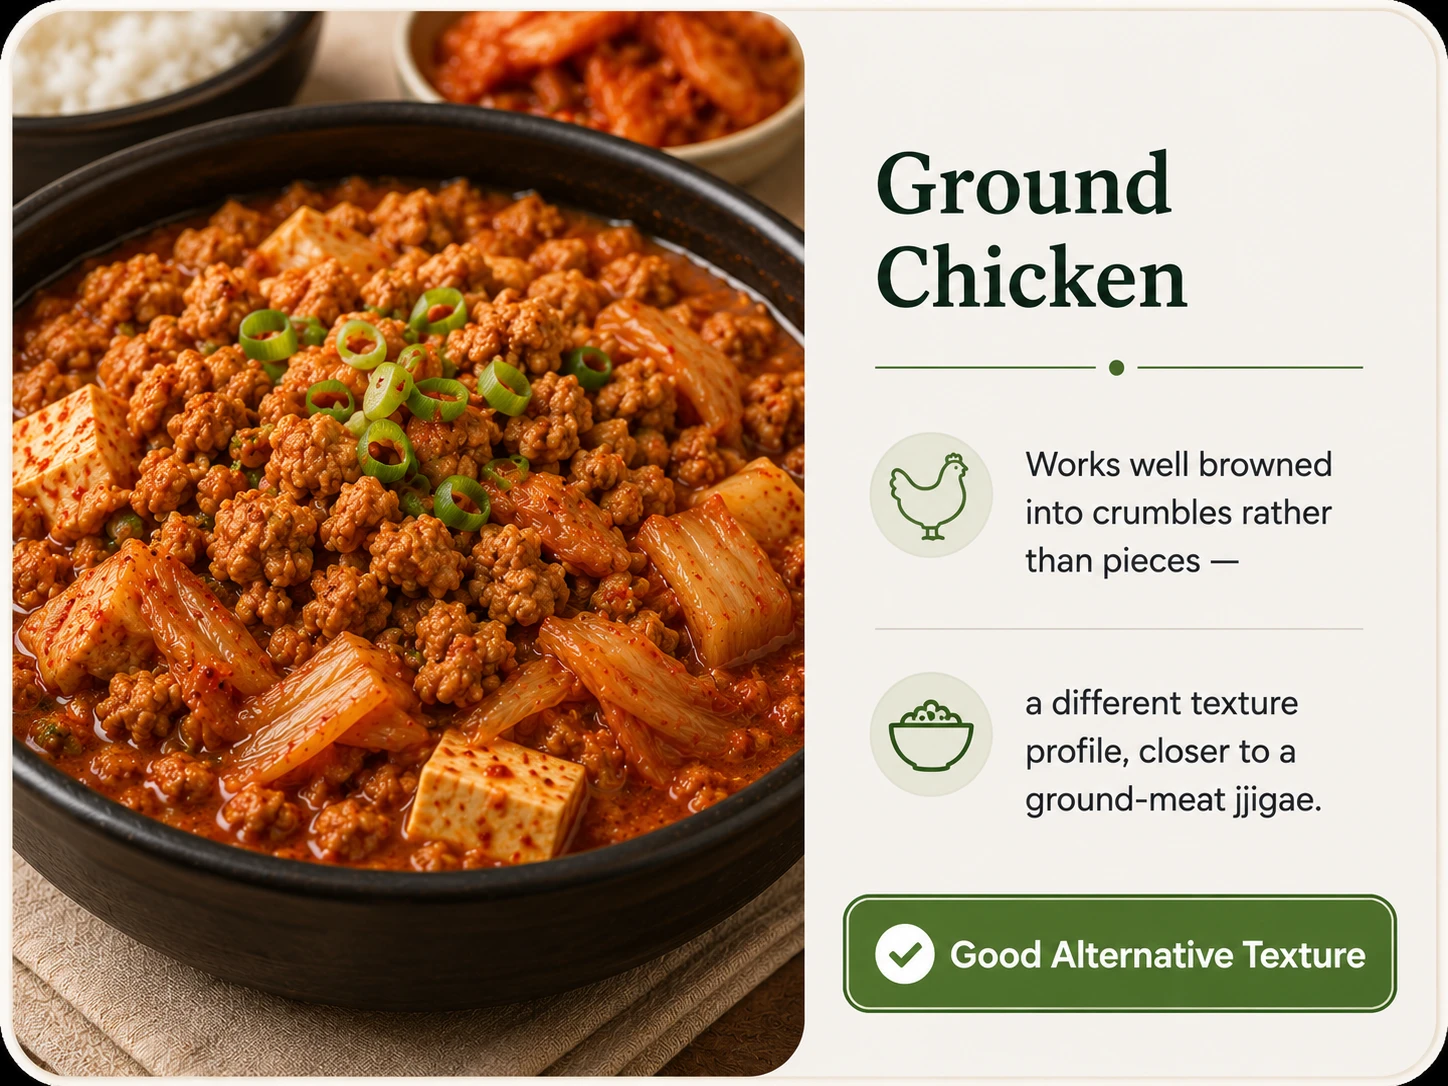
Works well browned into crumbles rather than pieces — a different texture profile, closer to a ground-meat jjigae.
Good Alternative Texture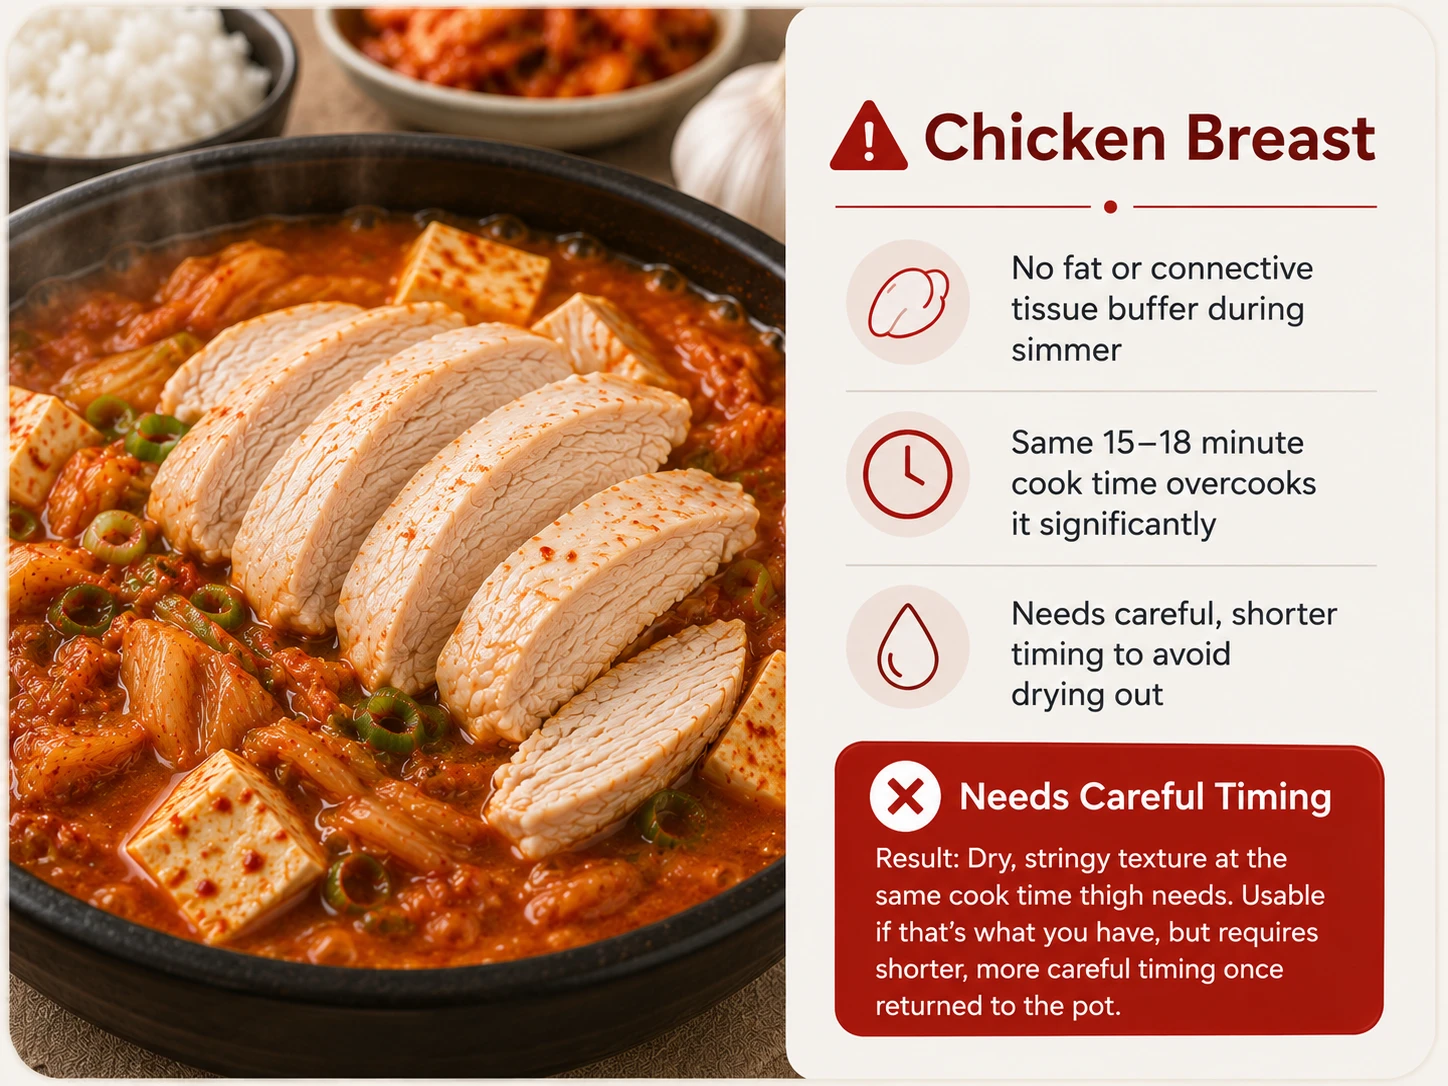
Usable if that’s what you have, but requires shorter, more careful timing to avoid the dry, stringy result the full simmer produces.
❌ Needs Careful TimingHow Chicken Kimchi Jjigae Varies by Household
Because this is a modern adaptation rather than a centuries-old regional dish, the “styles” here are more about household habit and cut choice than geography — but real patterns still exist.

The most common home-style approach — bone-in or boneless thigh browned before the kimchi goes in, building a fond that carries through the whole broth. This recipe follows this style.
This Recipe’s Base
Some households simmer bone-in chicken pieces (drumstick, thigh) directly in the broth for a longer cook, extracting more collagen and body from the bones at the cost of a longer cooking time.
Richer, Longer Cook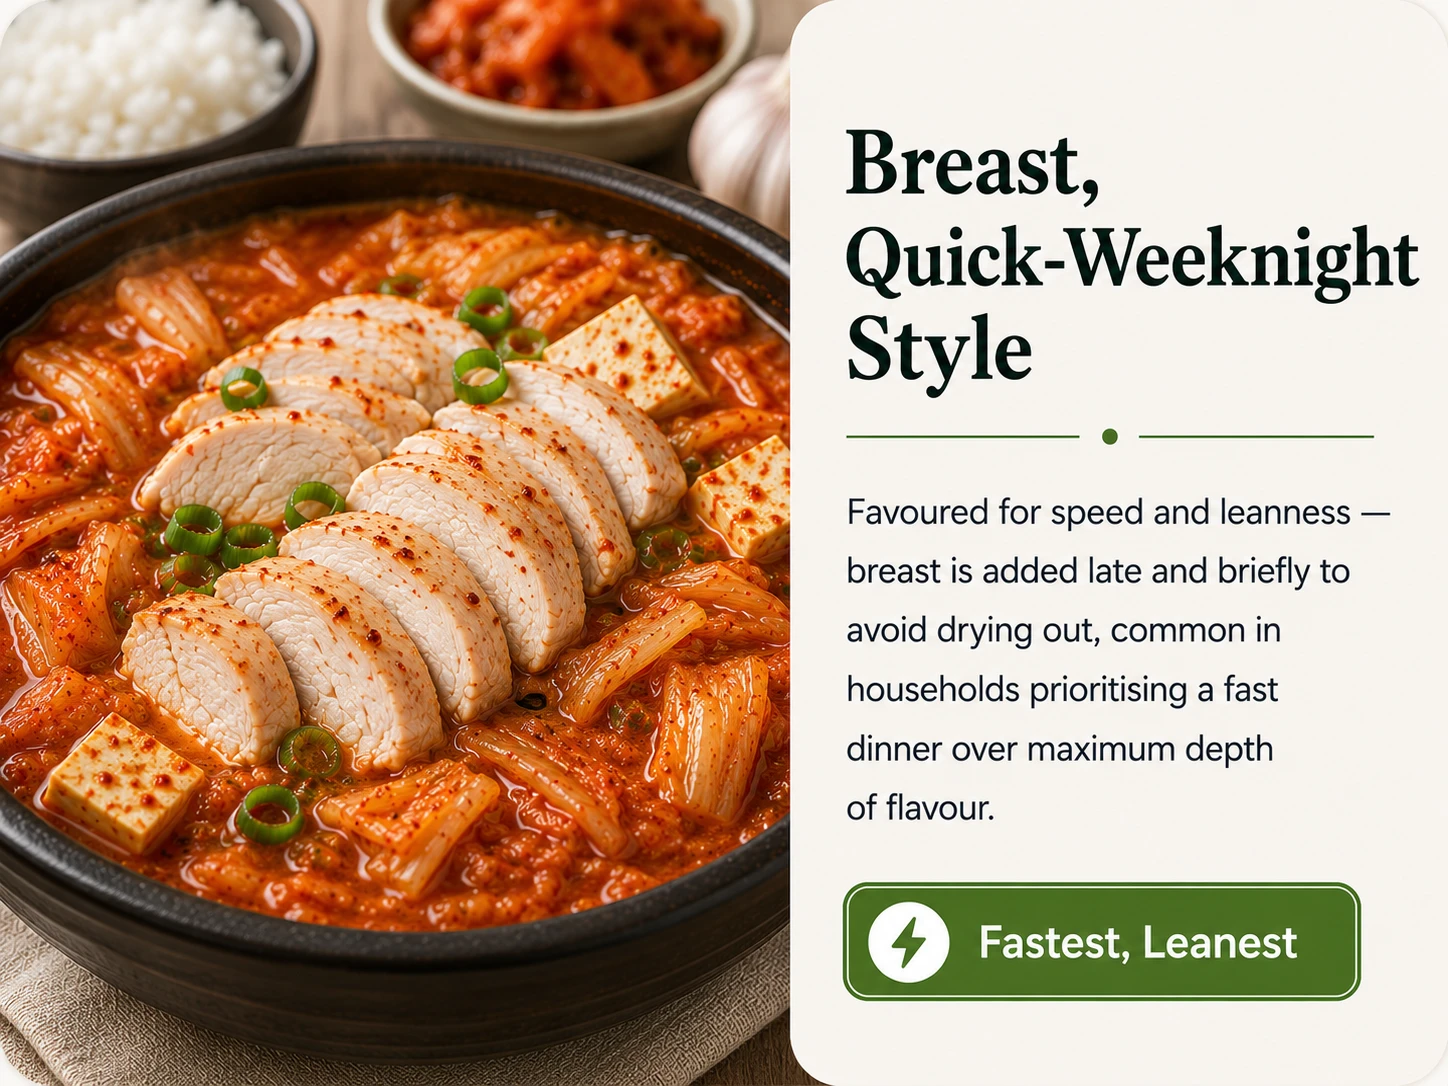
Favoured for speed and leanness — breast is added late and briefly to avoid drying out, common in households prioritising a fast dinner over maximum depth of flavour.
Fastest, Leanest
A newer household shortcut using ground chicken thigh or breast, browned and crumbled into the broth — quick and inexpensive, though it loses the bite-sized pieces of the classic preparation.
Quickest, Most AffordableWhich Kimchi Stage to Use — Chicken Version Guide
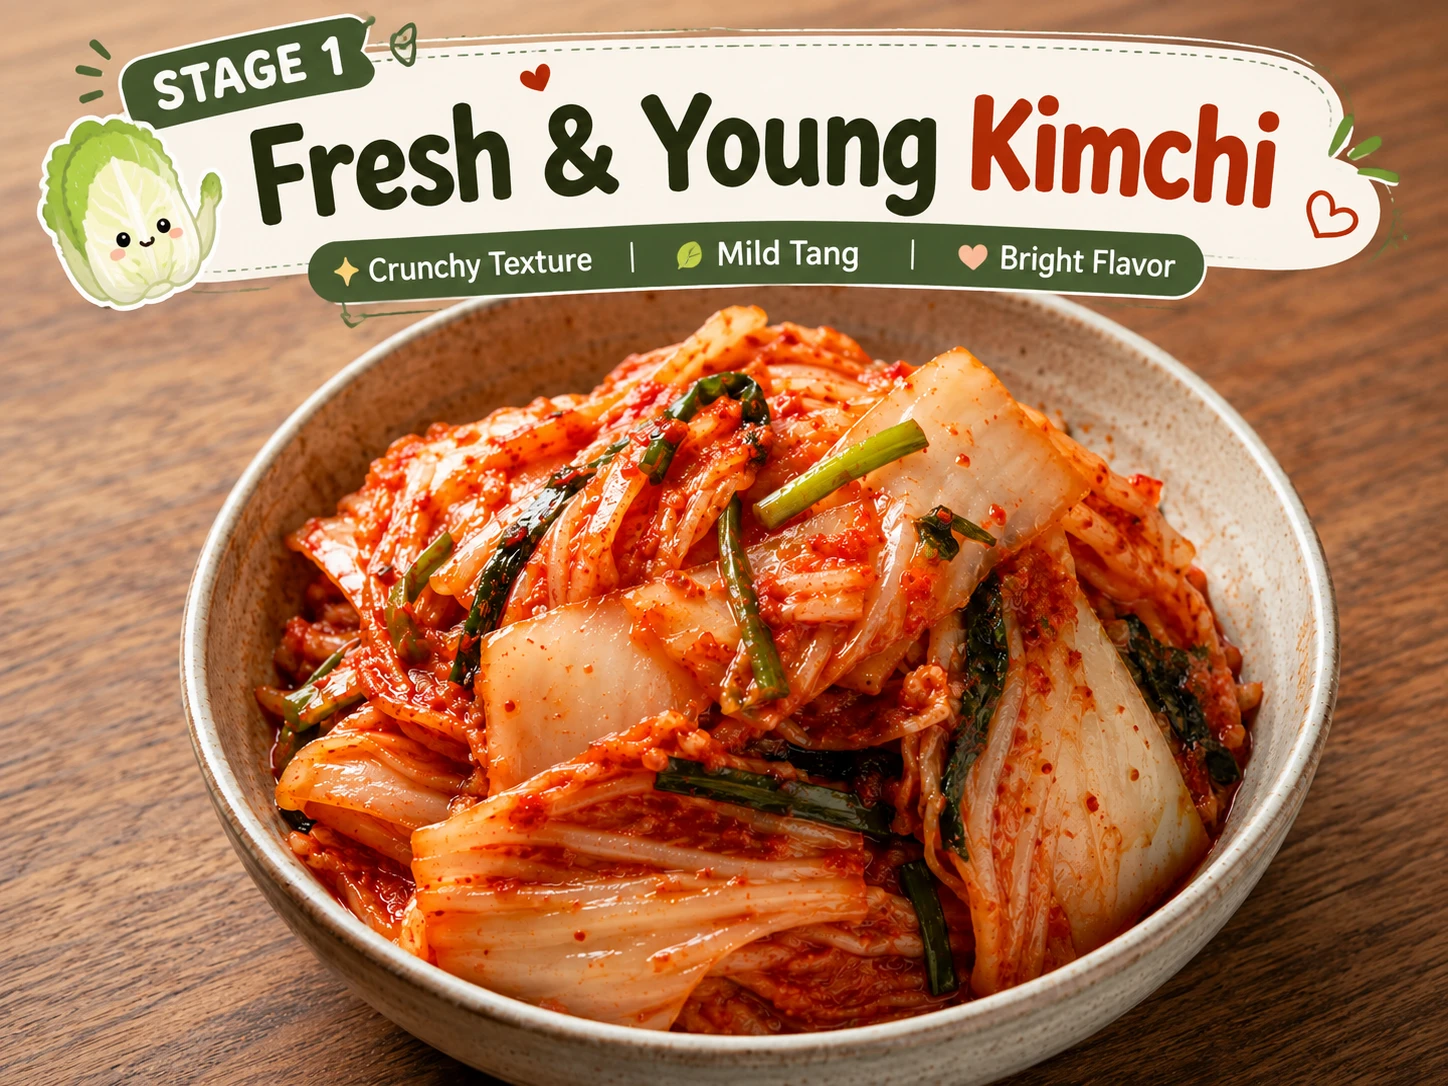
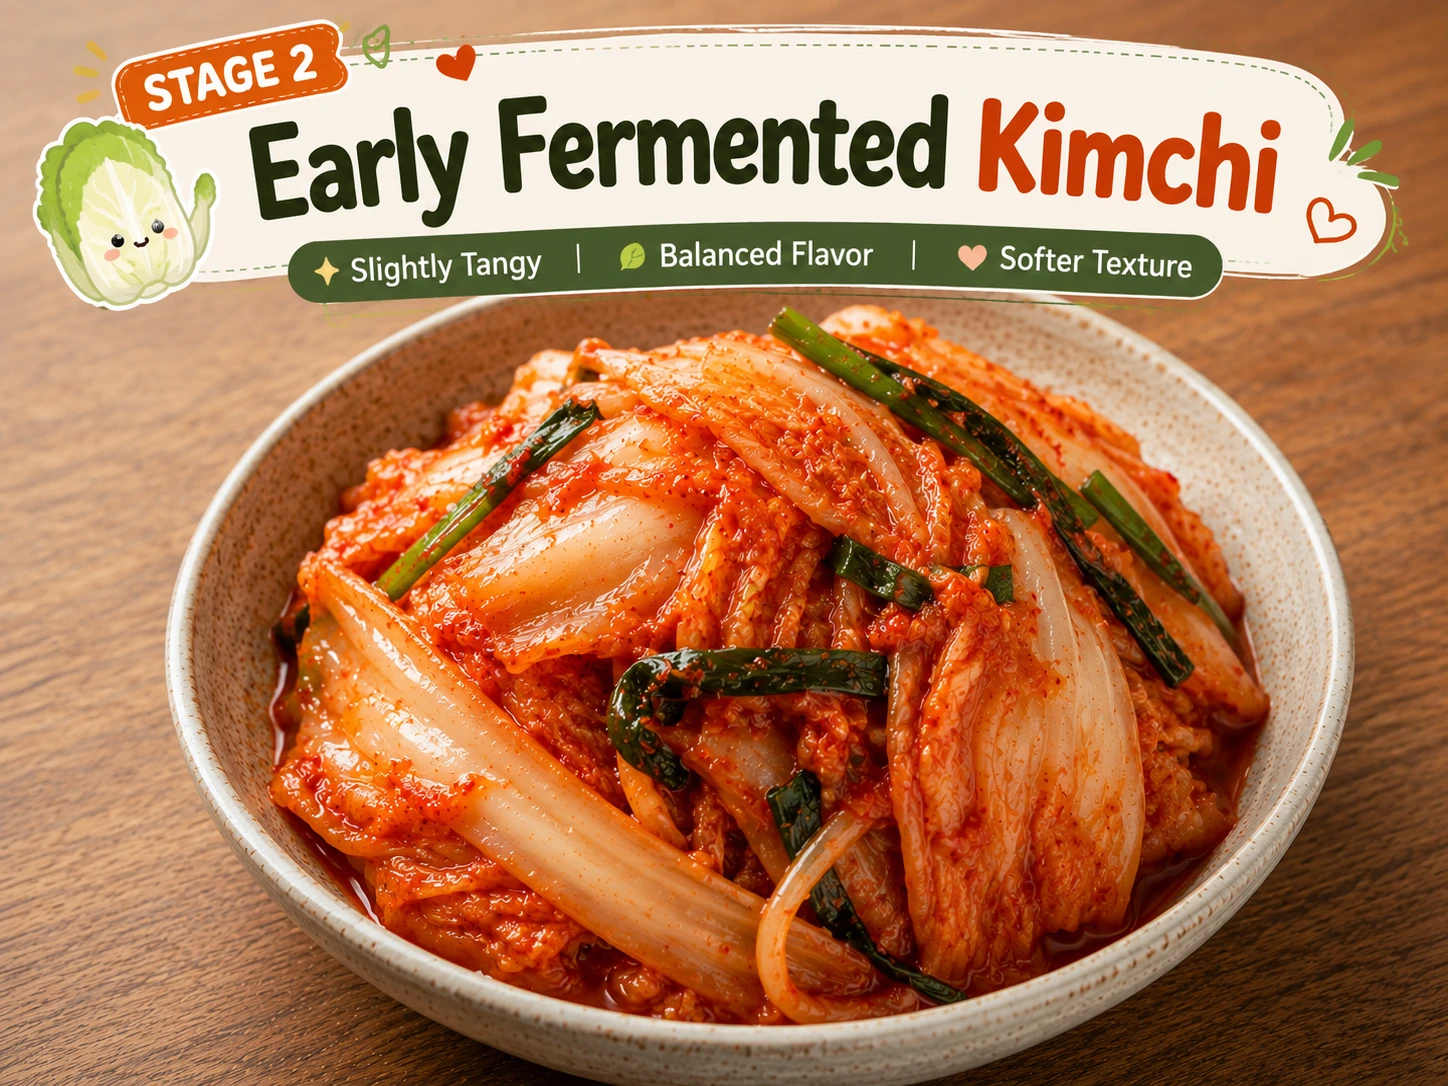
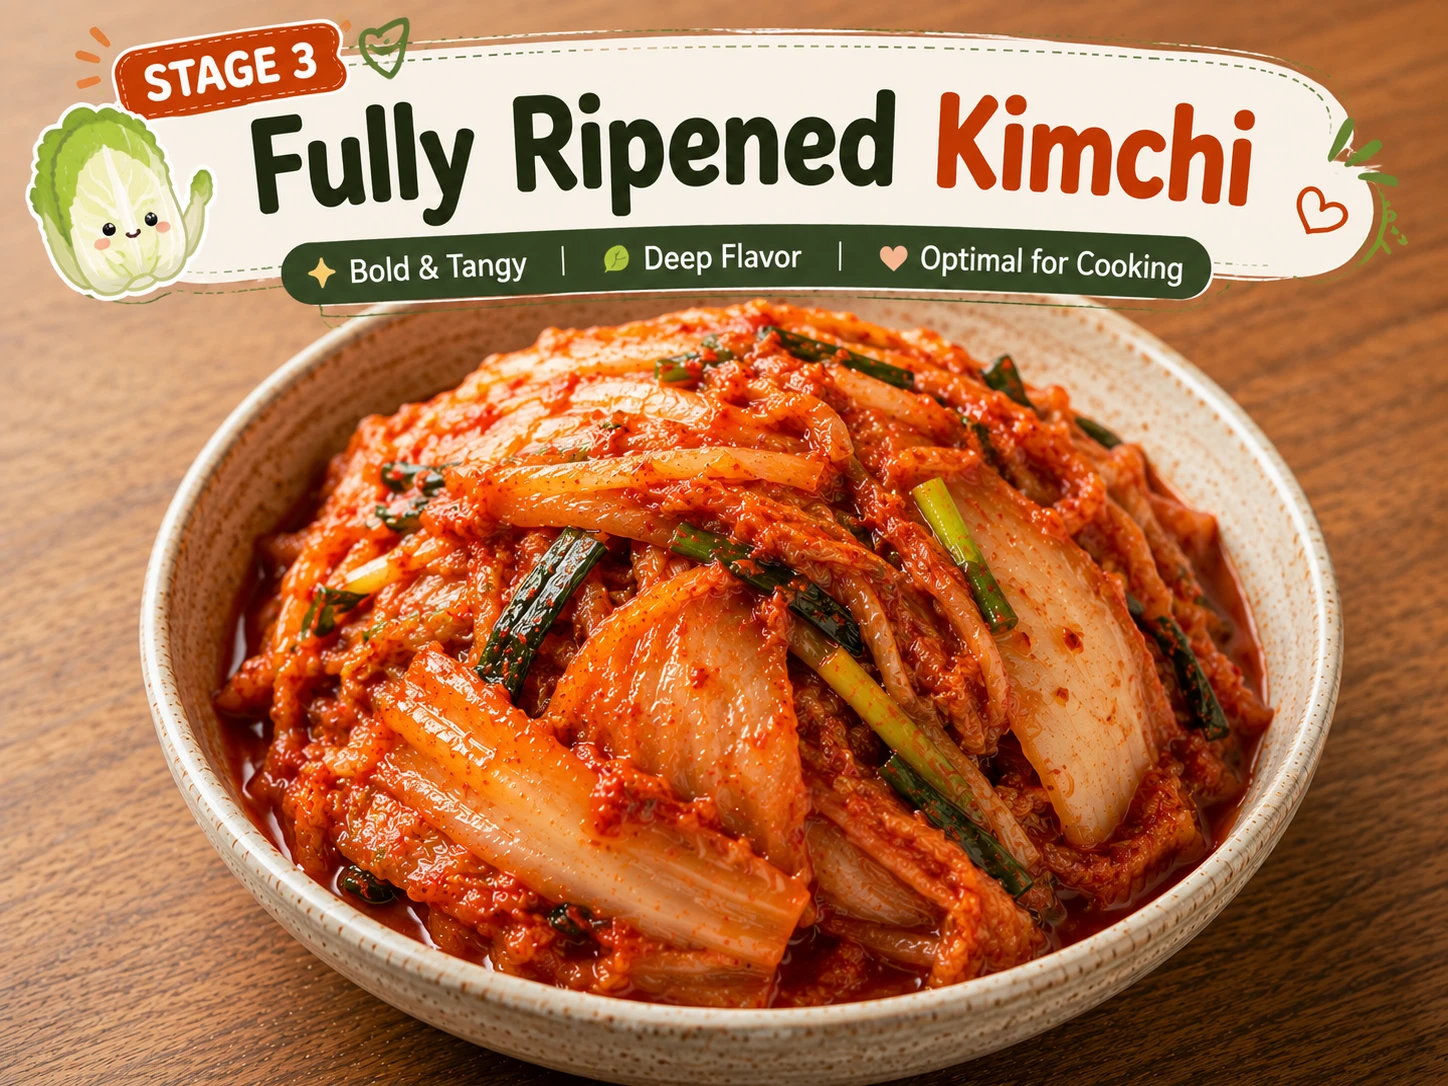
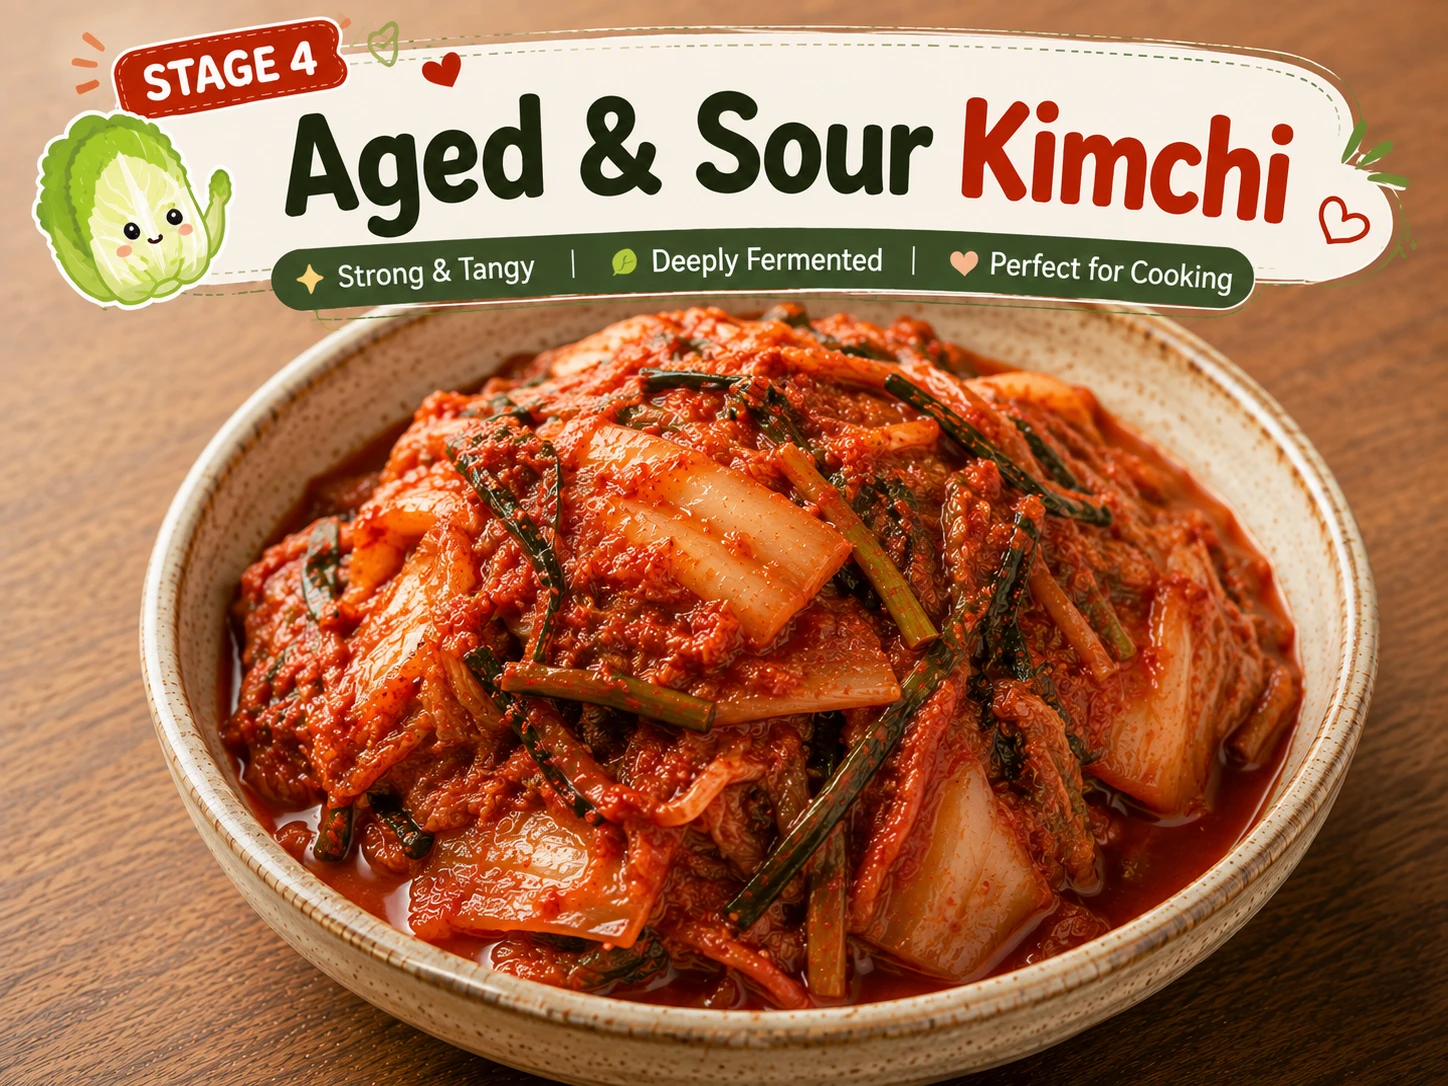
Fermentation stage and protein choice are independent variables — Stage 3 remains the correct default whether you’re making the pork classic or this chicken version.
Seasonal Adjustments — Summer vs Winter
The core recipe doesn’t change by season, but two things worth adjusting do: how your kimchi is fermenting, and how you want the broth served.
- Kimchi ferments noticeably faster in summer heat — check it 3-5 days earlier than the timeline in the kimchi-stage guide above suggests
- Breast over thigh is a natural summer swap — leaner, faster to cook, and suits lighter warm-weather eating
- A shorter simmer keeps the broth from feeling too heavy in warm weather
Result: The recipe stays the same — only your kimchi timeline and cut choice shift.
- Kimchi ferments more slowly in cold storage — Stage 3 (3-6 weeks) is a reliable timeline, and over-ripe Stage 4 kimchi is far more commonly on hand in winter households
- Thigh, and even bone-in pieces, suit winter better — the extra fat and collagen round out a longer, deeper simmer
- Winter is traditionally when jjigae is eaten most often in Korean households, precisely because well-aged kimchi is naturally more available
Result: Winter is genuinely the recipe’s home season — well-fermented kimchi is easiest to source, and the dish is at its best.
How Difficult Is the Chicken Version?
Still beginner-to-easy — the only extra skill versus a from-scratch stock recipe is browning the chicken properly and judging doneness.
Equipment — Ttukbaegi vs Regular Pot vs Instant Pot
You don’t need a traditional stone pot to make this well, but it does change the eating experience — here’s how the three most common options compare.
| Equipment | Heat Retention | Serving Style | Best For |
|---|---|---|---|
| Ttukbaegi (뚝배기) ⭐ | Excellent — stays bubbling at the table for 10+ minutes | Serve directly in the pot, communal-style | Authentic texture and presentation; worth the investment if you cook Korean stews often |
| Stainless Steel or Enamelled Pot | Good, but cools noticeably faster than clay | Ladle into individual bowls to serve | Most households — performs the recipe identically, just loses the tableside bubbling |
| Instant Pot / Electric Pressure Cooker | N/A — used for the broth and browning stage only, not final serving | Transfer to a pot or bowl to serve | Cutting simmer time on bone-in chicken significantly; sauté function works well for the browning step too |
Ingredients + Scaler
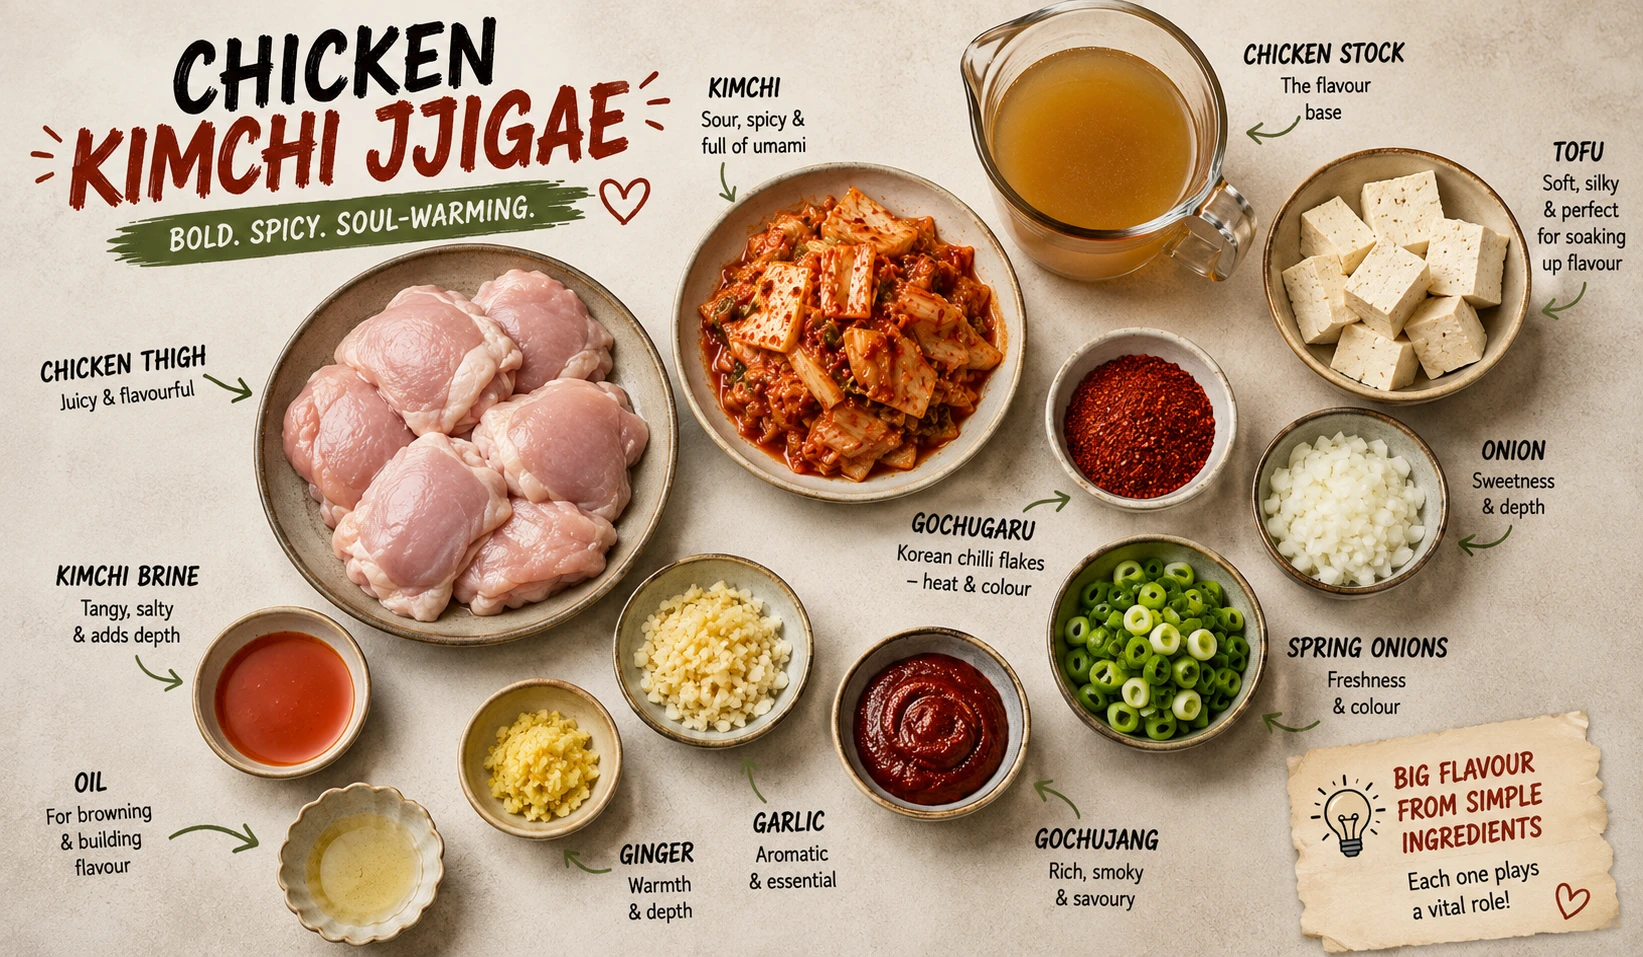
Boneless chicken thigh and a proper browning step are the two non-negotiables. Everything else follows the same base kimchi jjigae logic as the classic recipe.
Substitutions & Allergen Notes
This version is naturally more adaptable than the seafood or classic pork versions — here’s what actually works.
Sourcing Guide — Finding Ingredients Outside Korea
This is one of the easier recipes in the family to source — chicken and most ingredients are found in any mainstream grocery store.
How to Make Chicken Kimchi Jjigae — 5 Steps
Five steps. The key difference from a straight simmer-everything-together approach: the chicken is browned separately first, exactly like pork belly would be in the classic recipe.
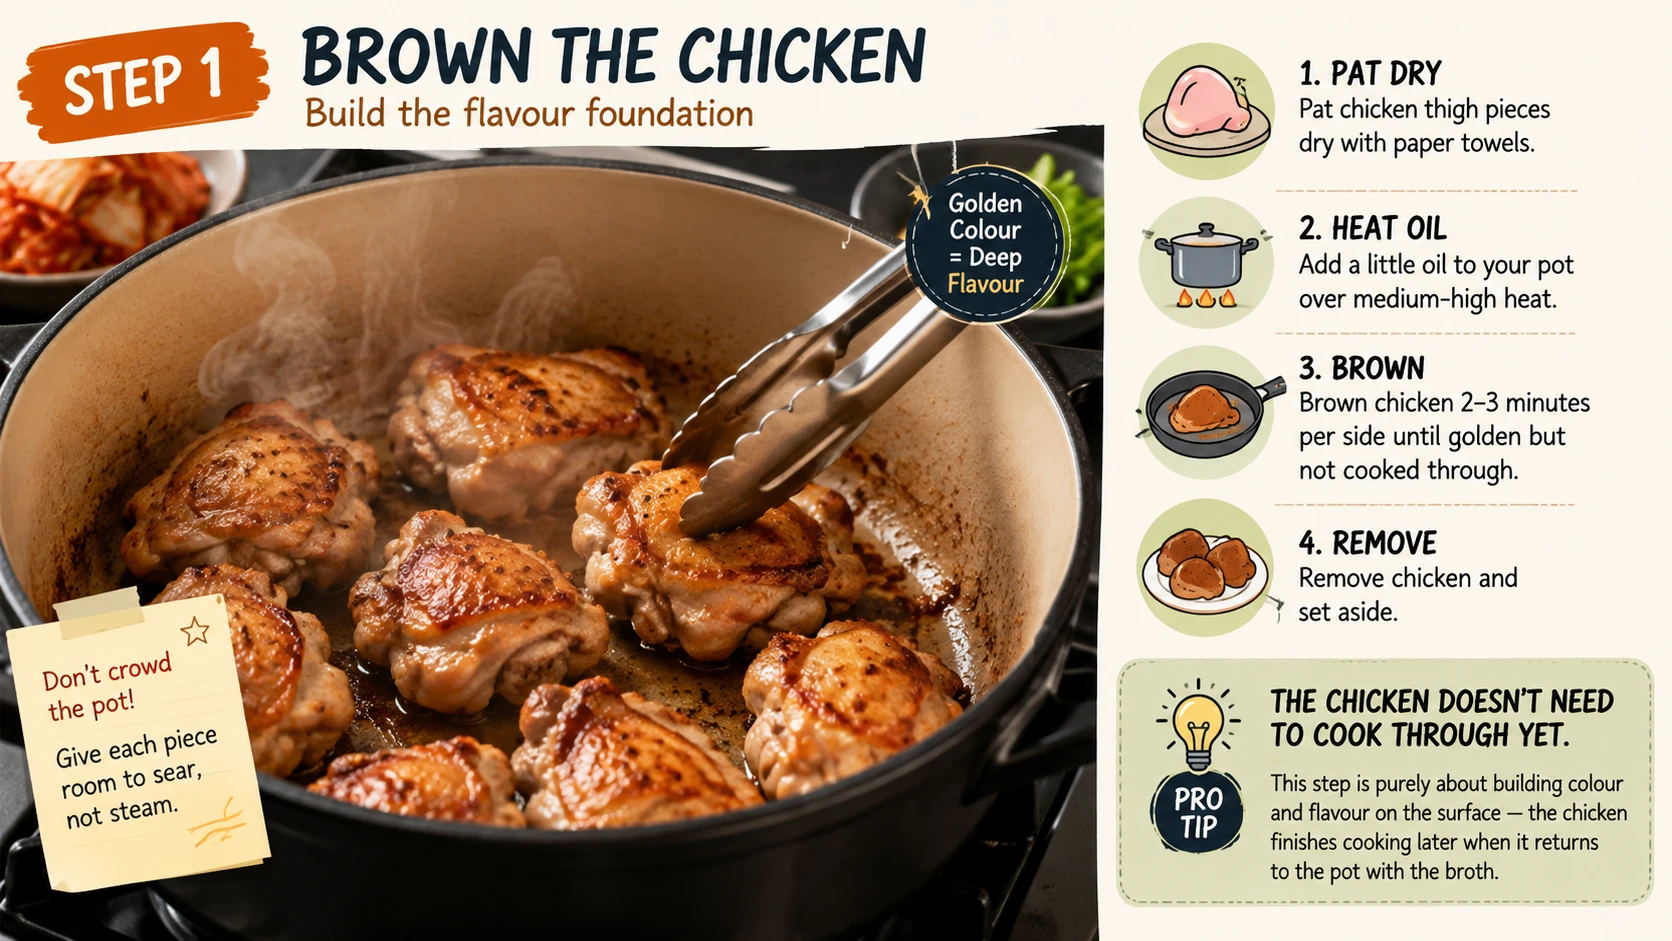
Pat chicken thigh pieces dry and brown in a little oil over medium-high heat, 2-3 minutes per side, until golden but not cooked through. Remove and set aside.
Don’t crowd the pot during this step — if the chicken pieces are touching, they’ll steam rather than sear, and you’ll miss the fond that gives the broth its depth later. Work in two batches if your pot isn’t large enough to give each piece breathing room, rather than dumping everything in at once.
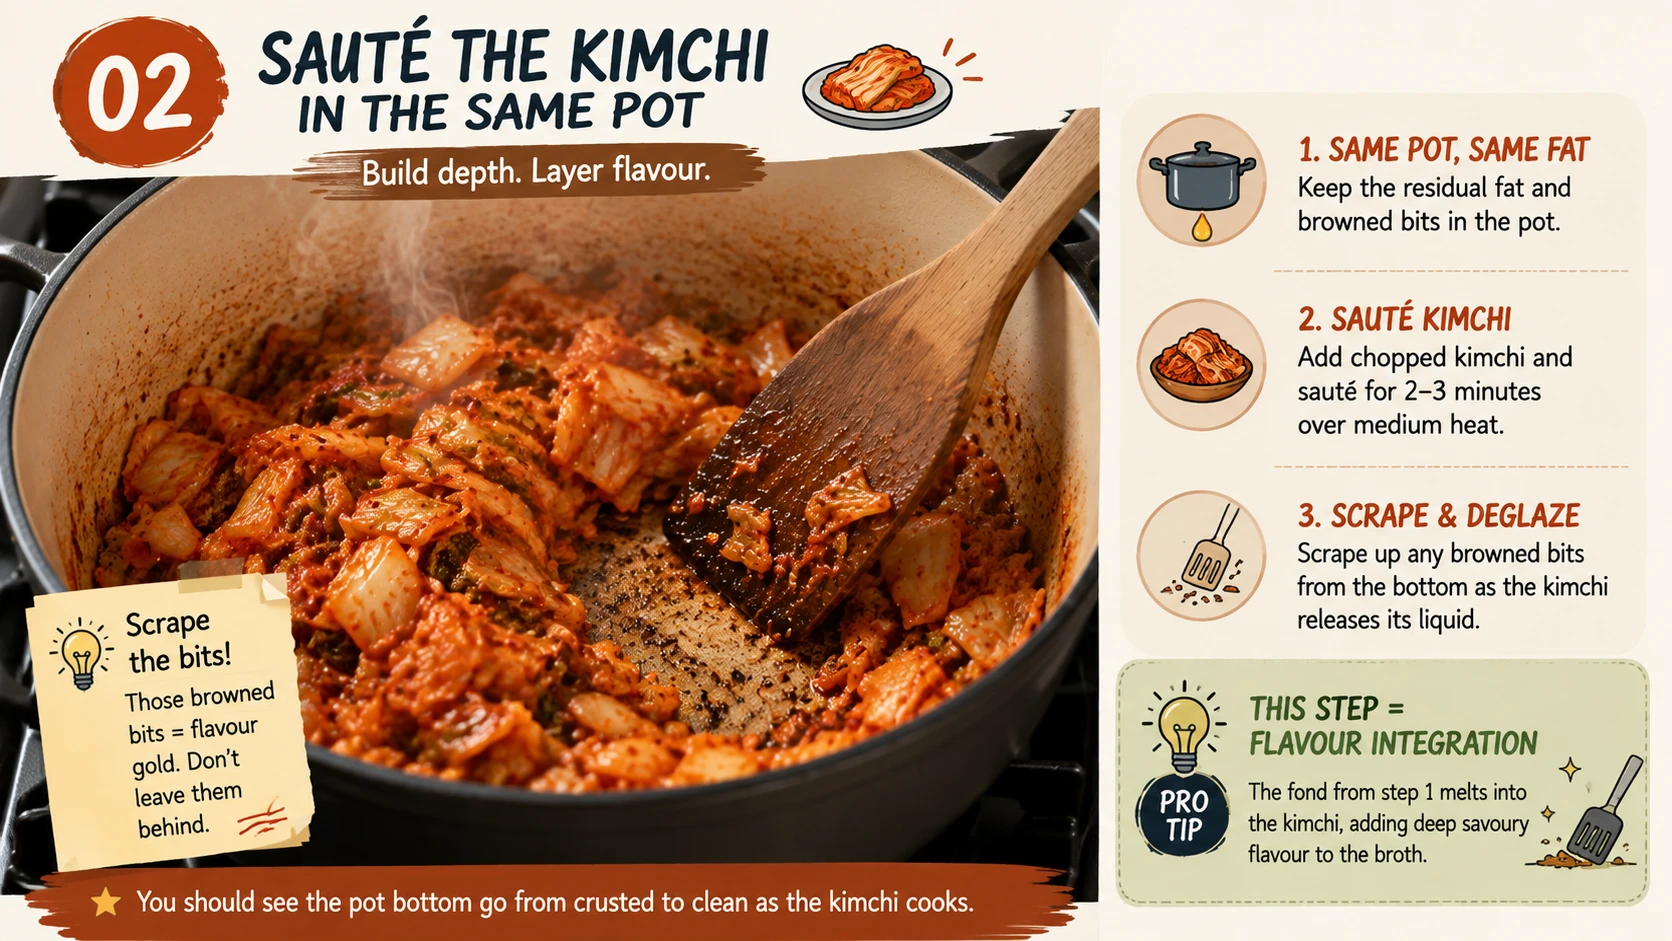
In the same pot, using the residual fat, saute the chopped kimchi for 2-3 minutes to deepen its flavour, scraping up any browned bits from the chicken.
This scraping step (deglazing, in cooking terms) is where the fond from step 1 actually integrates into the dish — use your spatula’s edge to work the browned bits loose as the kimchi releases its own liquid. You should see the pot bottom go from crusted to clean as the kimchi cooks.
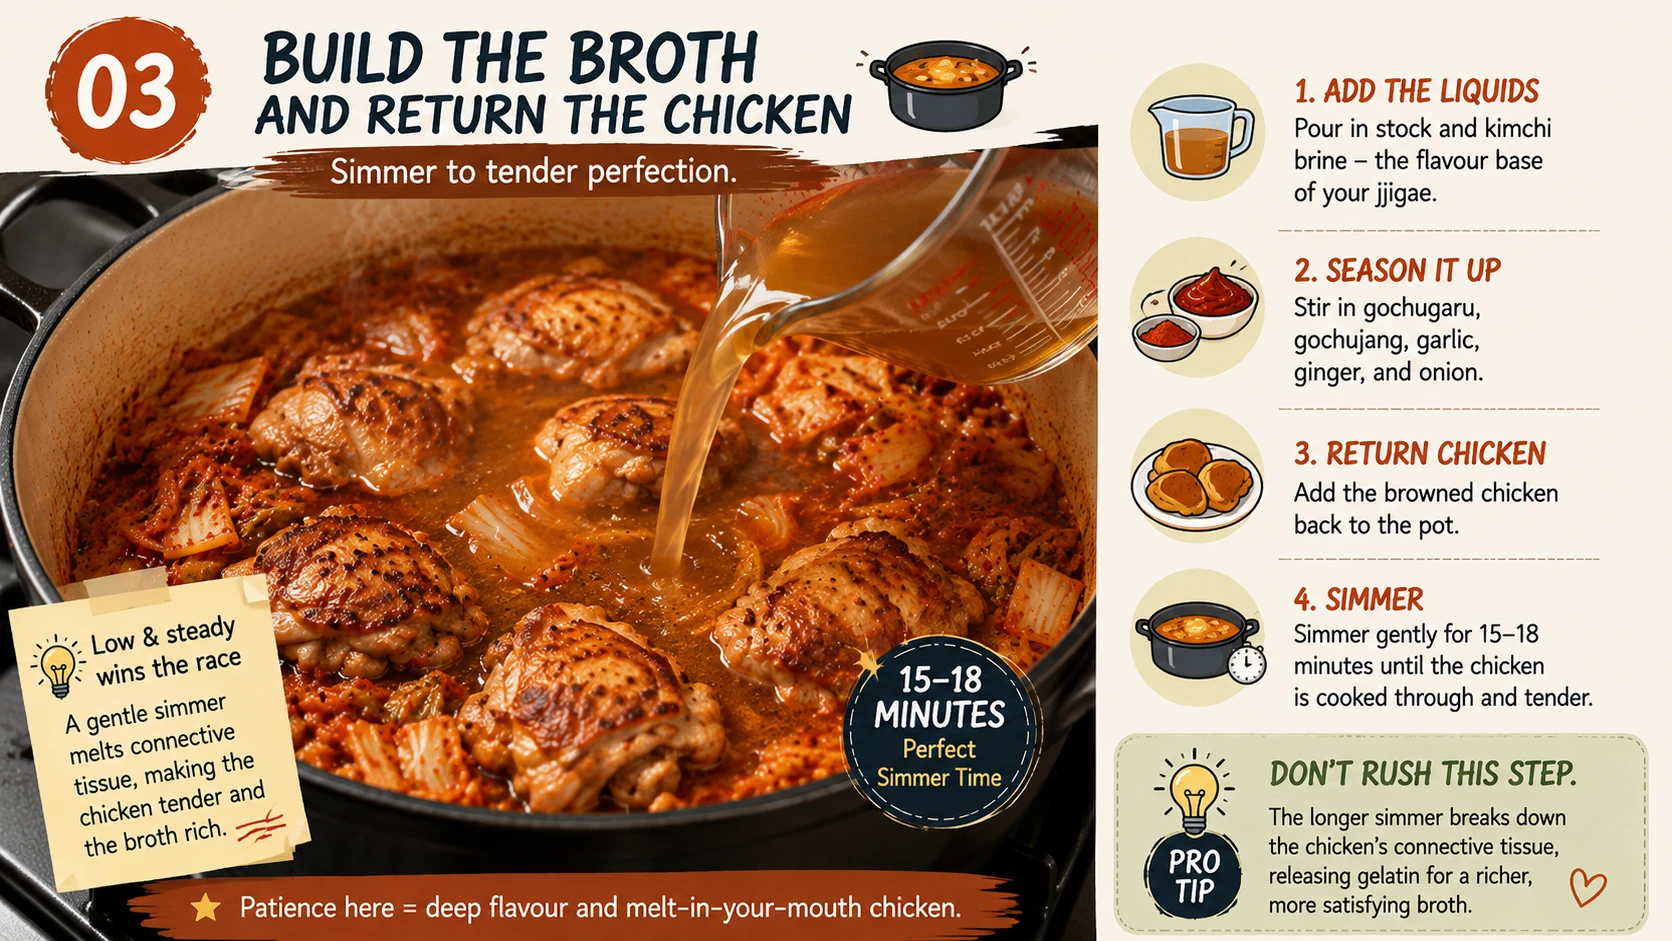
Add stock, kimchi brine, gochugaru, gochujang, garlic, ginger, and onion. Return the browned chicken to the pot. Simmer for 15-18 minutes until the chicken is cooked through and tender.
This is the longest single stage in the recipe, and it’s doing double duty — building the broth’s flavour while the chicken’s connective tissue slowly breaks down into gelatin. Resist checking the chicken too early; the texture actually improves the closer it gets to the full 15-18 minutes, unlike leaner cuts that only get worse with more time.
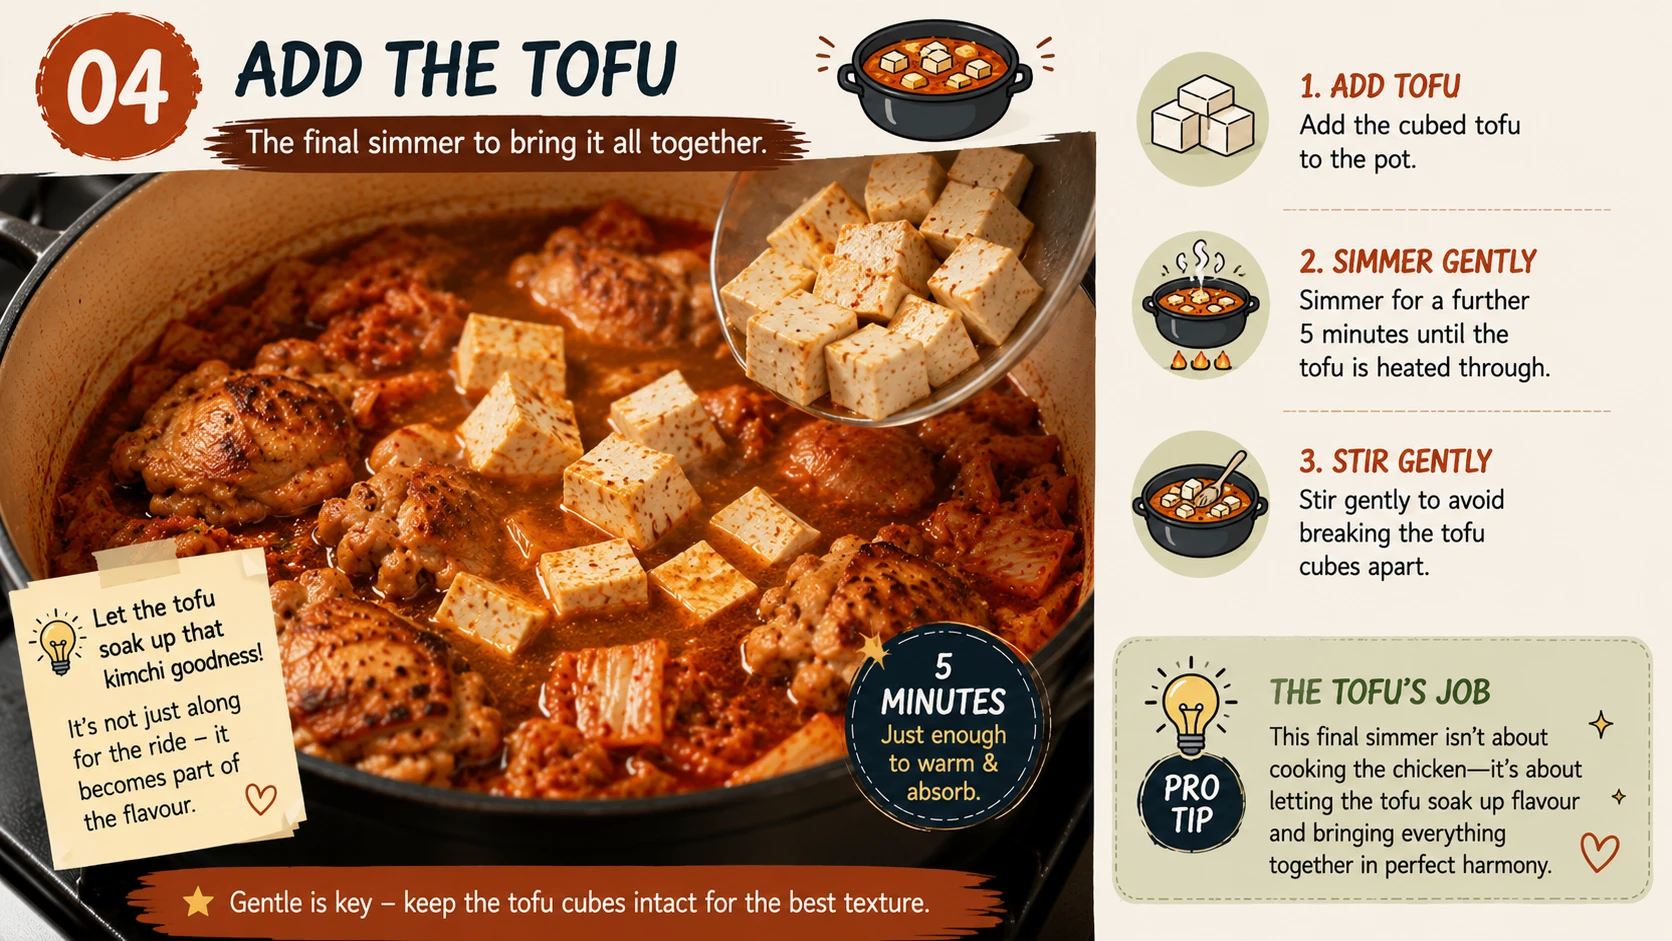
Add the cubed tofu and simmer a further 5 minutes until heated through.
By this point the chicken should already be fork-tender, so this final simmering stage is mainly about warming the tofu through and letting it absorb some of the broth’s flavour, not about further cooking the meat. Stir gently to avoid breaking the tofu cubes apart.
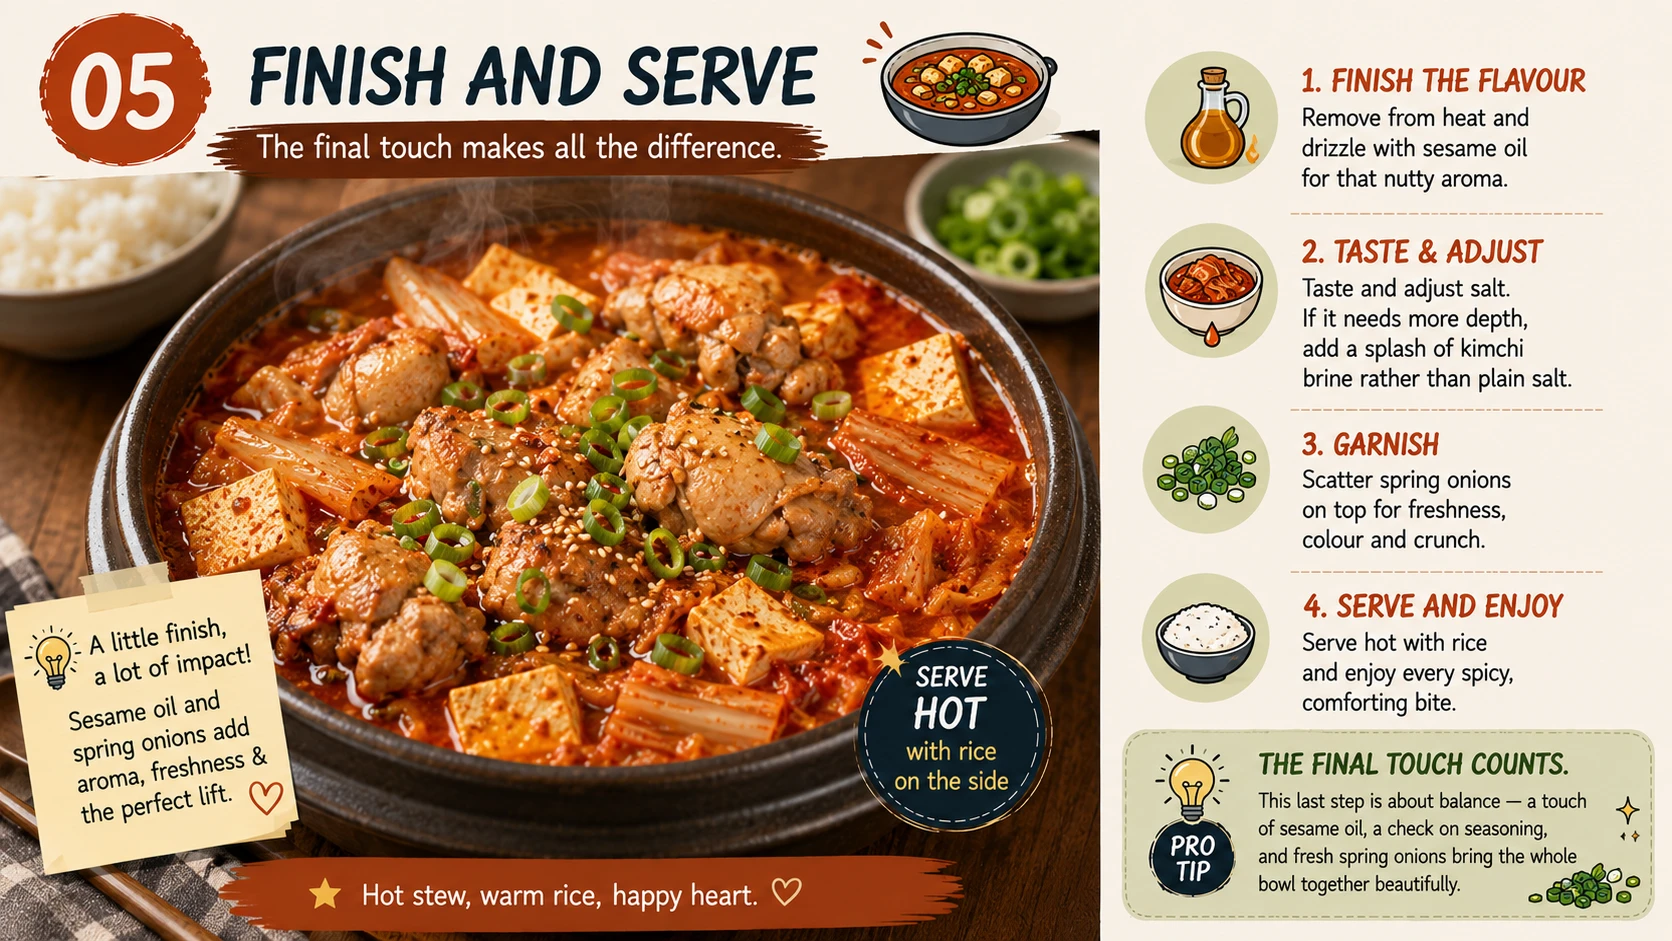
Remove from heat, drizzle with sesame oil, taste and adjust salt, and scatter spring onions on top. Serve hot with rice.
Because chicken’s flavour is milder than pork or beef, this is a good moment to taste critically before serving — if the broth seems to need a touch more depth, a small extra splash of kimchi brine (rather than plain salt) keeps the seasoning in character with the rest of the dish.
What We Tested for the Chicken Version
Three variables decide whether this recipe tastes like a proper jjigae or a thin chicken soup with kimchi in it. Here’s what we found.
Unlike the seafood variation, where a few extra minutes ruins the texture, chicken thigh’s fat and connective tissue give home cooks real margin for error here. If you’re checking on dinner and it simmers a little longer than planned, this is one of the more forgiving recipes in the entire kimchi jjigae family.
Troubleshooting — Common Mistakes & How to Fix Them
Most problems with this recipe trace back to one of five issues below — here’s what causes them and how to correct course.
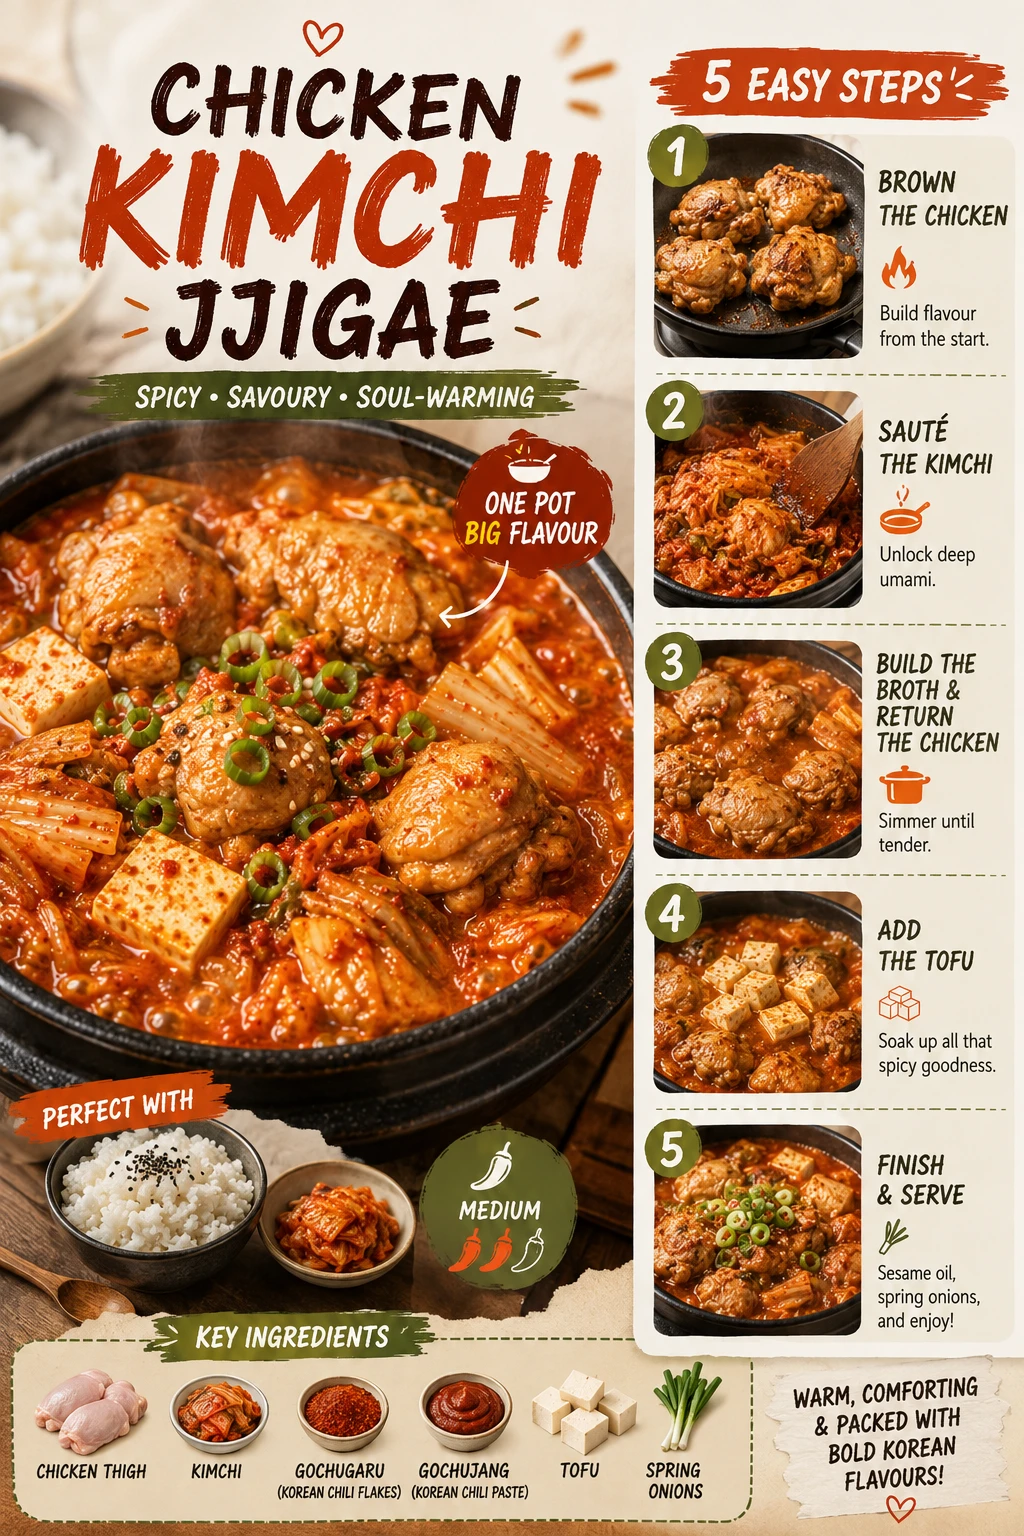
Chicken Kimchi Jjigae (닭고기 김치찌개)
Brown-first method · Stage 3 kimchi · 35 min · ~280 calories, 25g protein
- 4 cups anchovy-kelp stock (or water)
- 1.5 cups aged kimchi (Stage 3), chopped
- 3 tbsp kimchi brine
- 1 tbsp gochugaru
- 1 tbsp gochujang
- 3 cloves garlic, minced
- 1 tsp ginger, minced
- ½ onion, sliced
- 300g boneless chicken thighs, cut into pieces
- 200g firm tofu, cubed
- 2 spring onions, sesame oil, salt to taste
- Brown chicken pieces 2-3 min per side. Remove, set aside.
- Saute kimchi in same pot 2-3 min, scraping up browned bits.
- Add stock, brine, gochugaru, gochujang, garlic, ginger, onion. Return chicken. Simmer 15-18 min.
- Add tofu, simmer 5 min.
- Remove from heat, drizzle sesame oil, season, top with spring onions. Serve hot with rice.
The Kimchi Jjigae Family — 13 Variations
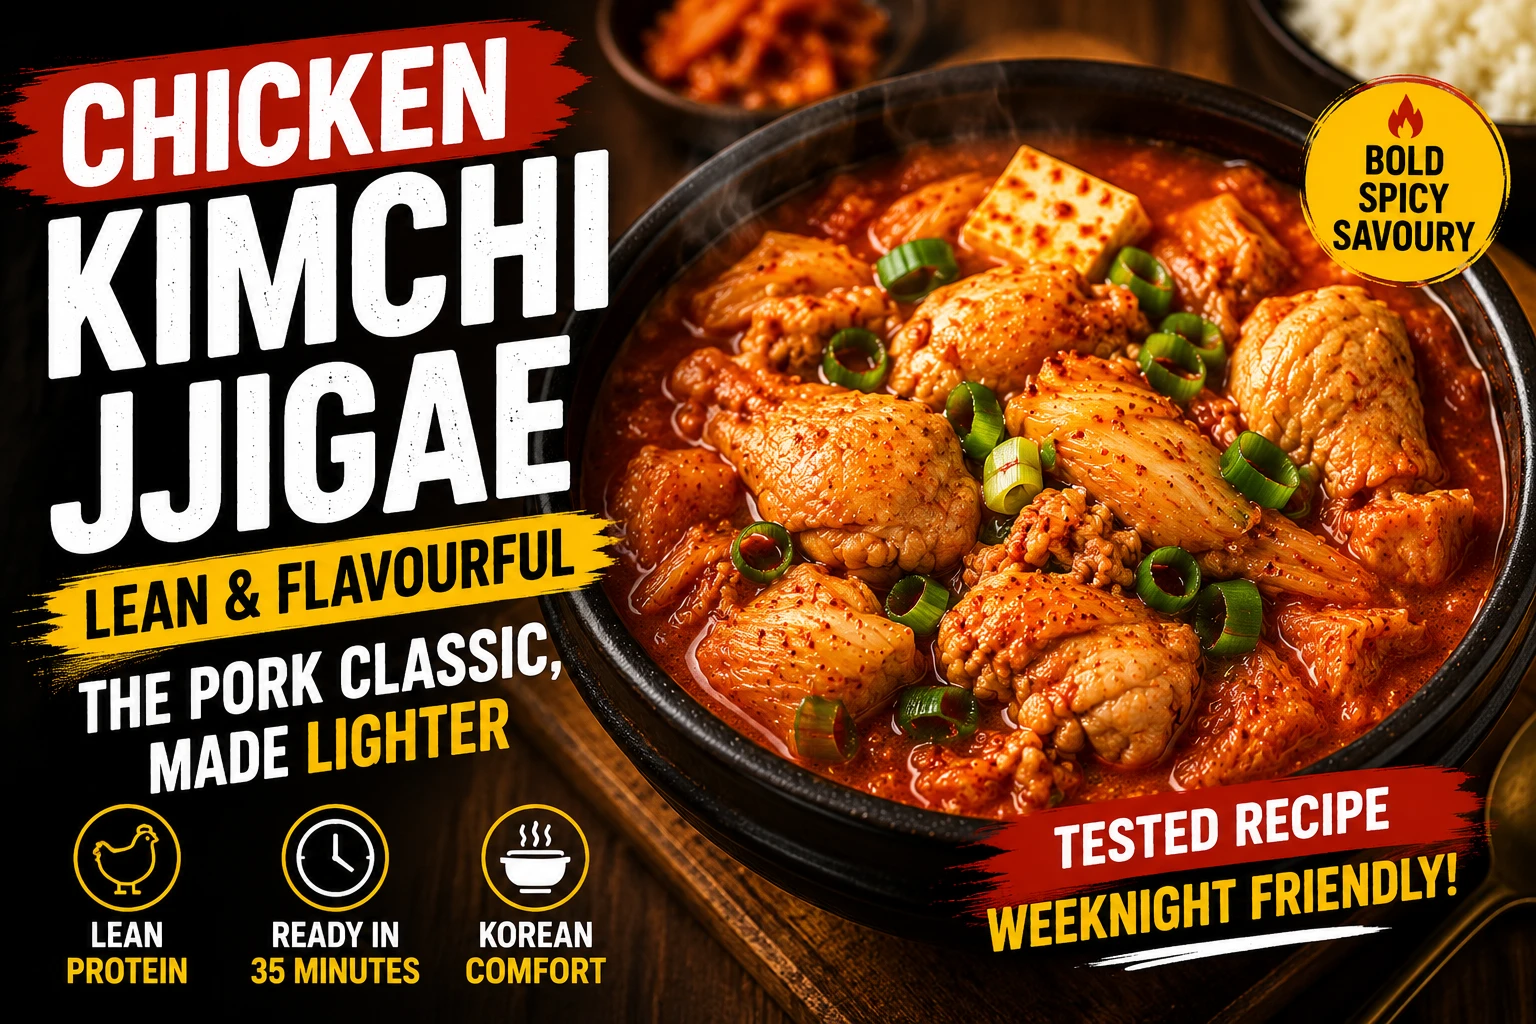
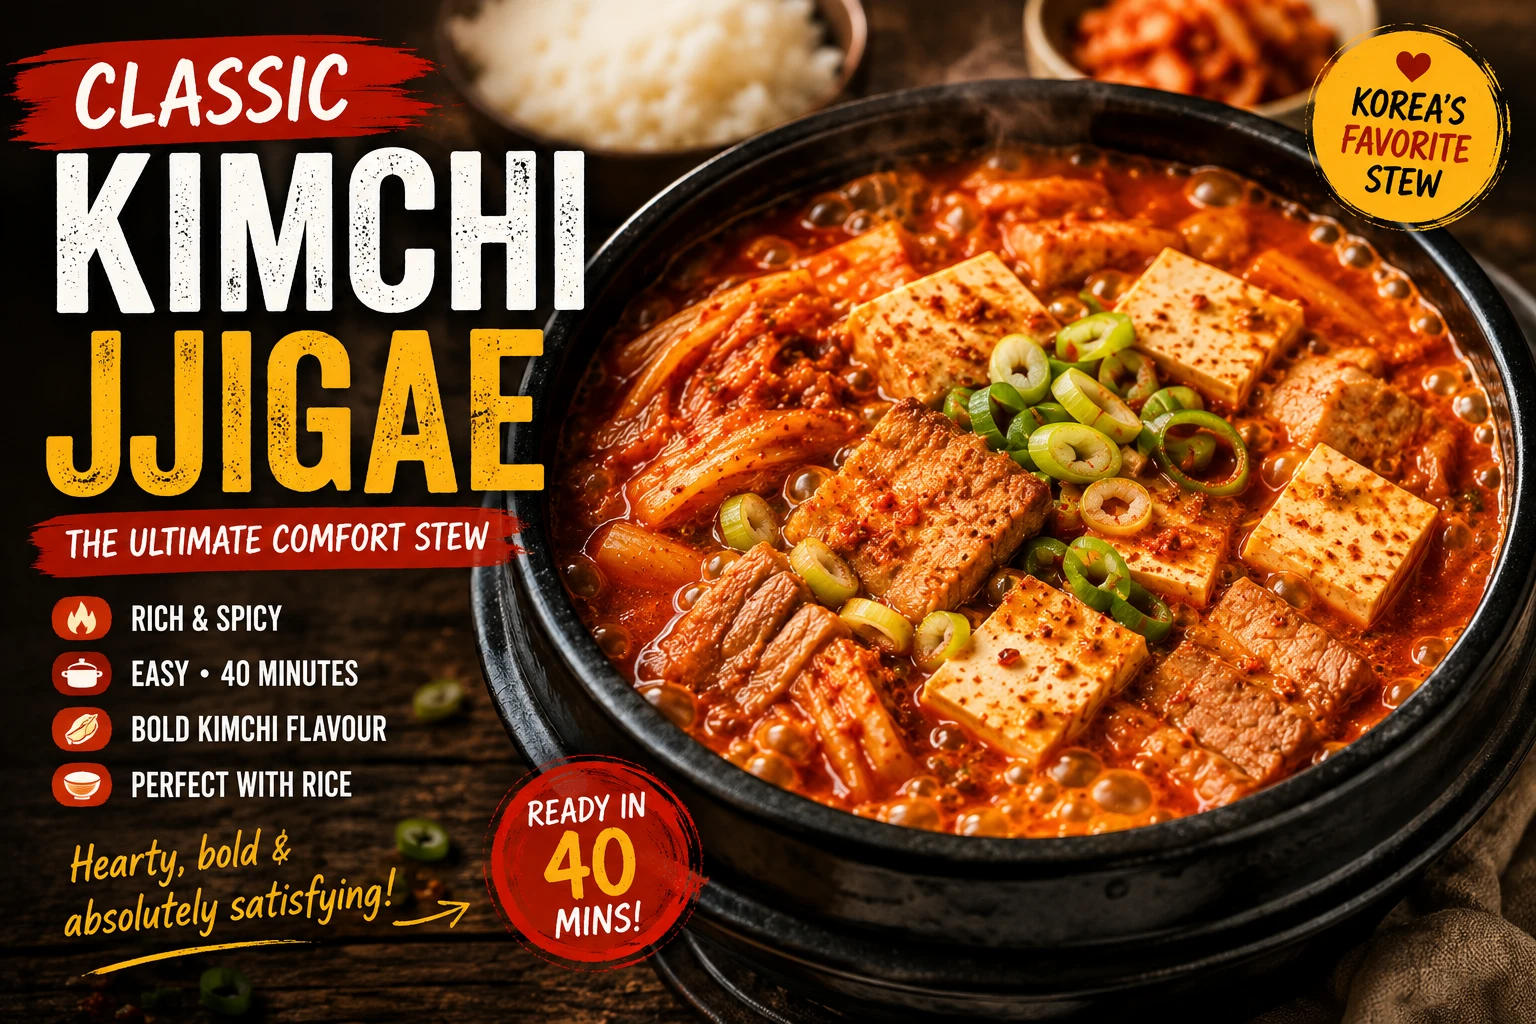
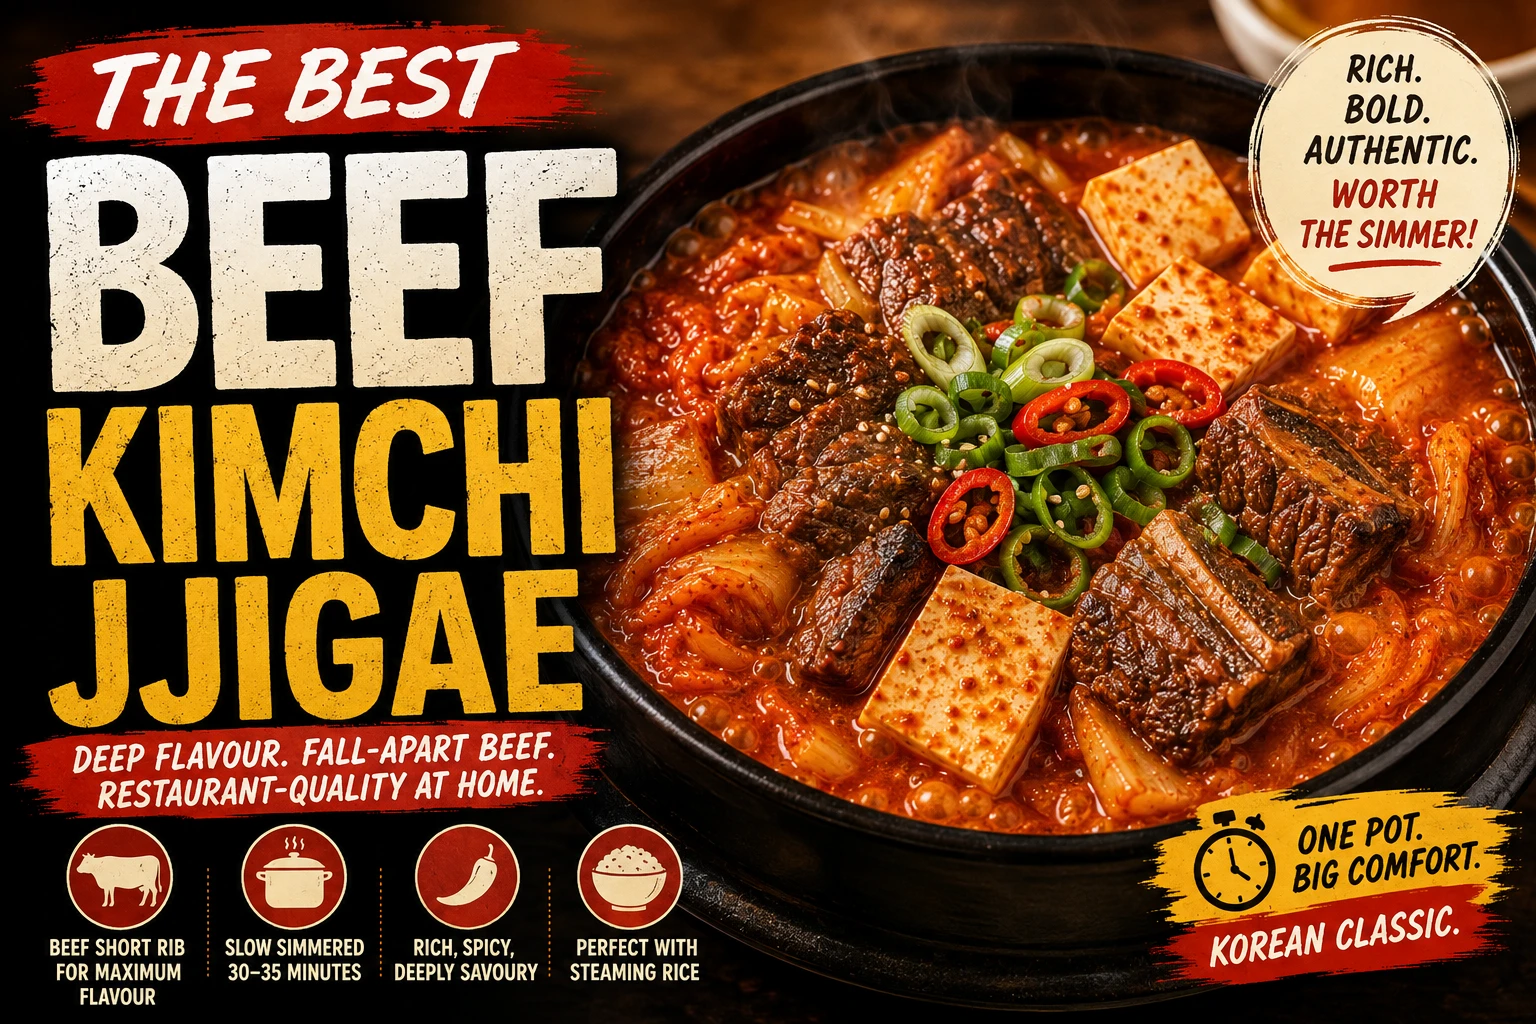
This is page 3 of a growing 13-recipe family, all built on the same aged-kimchi base. The Kimchi Jjigae Ultimate Guide → compares every variation as it’s published.






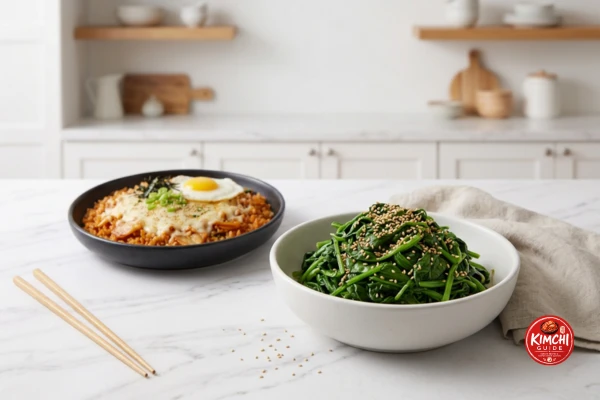
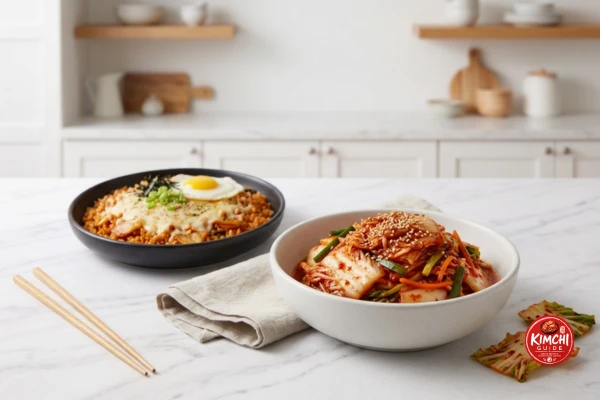
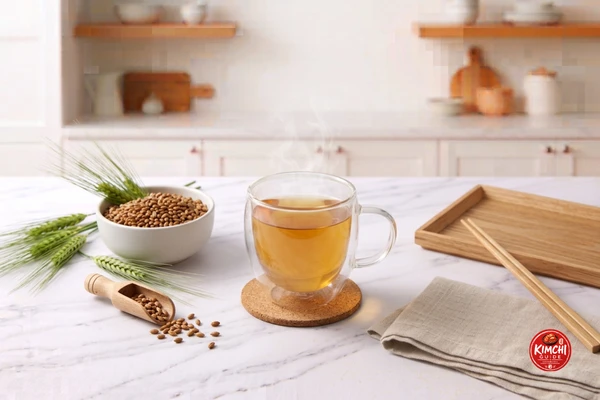
Pairing Guide — Chicken Version
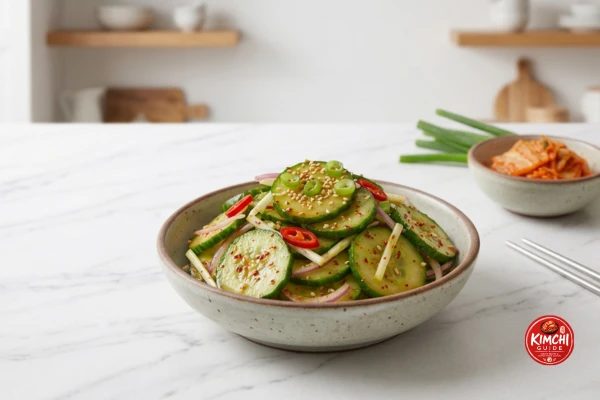
Because chicken’s flavour is milder than pork or beef, pairings here can lean slightly bolder without overwhelming the main dish.
Restaurant vs Homemade Chicken Kimchi Jjigae
This is a less common menu item than the pork or seafood versions, but the comparison still holds where you do find it.
| Factor | Restaurant Version | This Homemade Recipe |
|---|---|---|
| Cut Used | Often bone-in for lower cost and better broth body | You choose thigh, breast, or bone-in based on your priorities |
| Browning Step | Variable — busy kitchens sometimes skip a proper sear to save time | Always browned first, which is what gives this leaner protein its depth |
| Kimchi Fermentation Stage | Usually whatever’s on hand that shift — not always ideal Stage 3 | You control and choose Stage 3 (or Stage 4) specifically for this dish |
| Sodium Level | Typically higher — restaurant broths are seasoned assertively for immediate impact | Adjustable to taste; nutrition figures above reflect a moderate seasoning level |
| Cost per Serving | $12-18 per bowl in most Western cities | Roughly $2-3 per serving when made at home |
Storage & Reheating — Chicken Version
This is one of the better-storing recipes in the family — chicken and tofu both hold up well to refrigeration and reheating.
Meal Prep — Batch-Cooking This Recipe for the Week
Chicken kimchi jjigae is one of the most batch-friendly versions in the family — unlike the seafood version, it genuinely improves with a day or two in the fridge.
Detailed Nutrition Comparison — Chicken Version
A complete per-serving breakdown, reviewed by Dr. Sarah Mitchell RD, PhD, alongside how this recipe compares to the rest of the kimchi jjigae family.
Nutrition Facts
Per serving — recipe makes 4 servings
How Chicken Compares to the Rest of the Family
| Variation | Calories | Protein | Sat. Fat | Best For |
|---|---|---|---|---|
| Kimchi Guk | 130 | 9g | 1g | Lightest, lowest-sodium option in the family |
| Seafood Jjigae | 210 | 20g | 1.5g | Leanest jjigae-format option |
| Chicken ← This page | 280 | 25g | 3g | Highest protein, significantly leaner than pork |
| Classic (Pork) | ~320 | 18g | ~7g | Coming soon — the family’s pillar recipe |
Sources & Further Reading
The food-science and nutrition claims on this page are cross-checked against the following references.
Chicken Kimchi Jjigae FAQ — 16 Questions
Chicken thigh is strongly recommended over breast. Thigh’s higher fat content and connective tissue keep it tender through the full simmer, while lean chicken breast tends to dry out and turn stringy over the same cooking time.
Generally yes, in terms of saturated fat — chicken thigh carries noticeably less saturated fat than pork belly, even though both are considered fattier cuts within their respective proteins. Calories are moderately lower too, though the difference is smaller than the saturated fat gap.
Yes — browning builds a fond (the browned bits stuck to the pot) that significantly deepens the broth’s flavour when the kimchi is sauteed in the same pot afterward. Skipping this step produces a noticeably flatter result.
Bite-size chicken thigh pieces are done after roughly 15-18 minutes of simmering in the broth — the meat should be opaque throughout with no pink, and easily pierced with a fork.
Yes, though it will need a longer simmer time (25-30 minutes) to cook through and for the meat to become tender enough to easily remove from the bone at the table.
You can, but expect a drier, less tender result. If using breast, cut it slightly larger than you would thigh and reduce the simmer time once it’s added back to avoid overcooking.
Stage 3 aged kimchi (3-6 weeks, pH approximately 4.2) is correct for this recipe, same as the classic pork version and most other variations in the kimchi jjigae family.
Moderately, from the standard gochugaru and gochujang combination. Reduce gochugaru to 2 teaspoons for a milder result, or increase for more heat.
Yes — brown it the same way, breaking it into small crumbles rather than bite-size pieces. The texture will be closer to a ground-meat jjigae than the classic chunky-chicken version.
It can be — use a gluten-free gochujang brand and confirm your kimchi doesn’t contain wheat-based ingredients. Chicken, stock, and tofu are all naturally gluten-free.
Yes — this recipe reheats well, unlike the seafood variation. Store in an airtight container up to 3-4 days refrigerated and reheat gently on the stovetop.
Yes, this freezes reasonably well for up to 2 months — chicken and tofu both hold up better to freezing than seafood does. Thaw in the refrigerator before reheating.
Only the protein and the resulting fat content differ — the kimchi, stock, seasoning, and technique are otherwise identical. Chicken thigh is browned the same way pork belly would be, just with a shorter overall cook time.
Kimchi-jjigae is traditionally made with pork, beef, or chicken interchangeably depending on what’s available or preferred, rather than being defined by one specific protein — chicken is a recognized, if less common, mainstream choice.
Approximately 25g of protein per serving, among the highest in the kimchi jjigae family, thanks to chicken thigh’s naturally high protein density.
Yes — sliced mushrooms or zucchini added alongside the tofu in step 4 work well and are a common home addition without changing the core technique.

Questions & Comments
Did you use thigh or breast? Leave a question below — Ji-Young reads and responds to every comment.
Your email will not be published. All comments are reviewed before appearing.