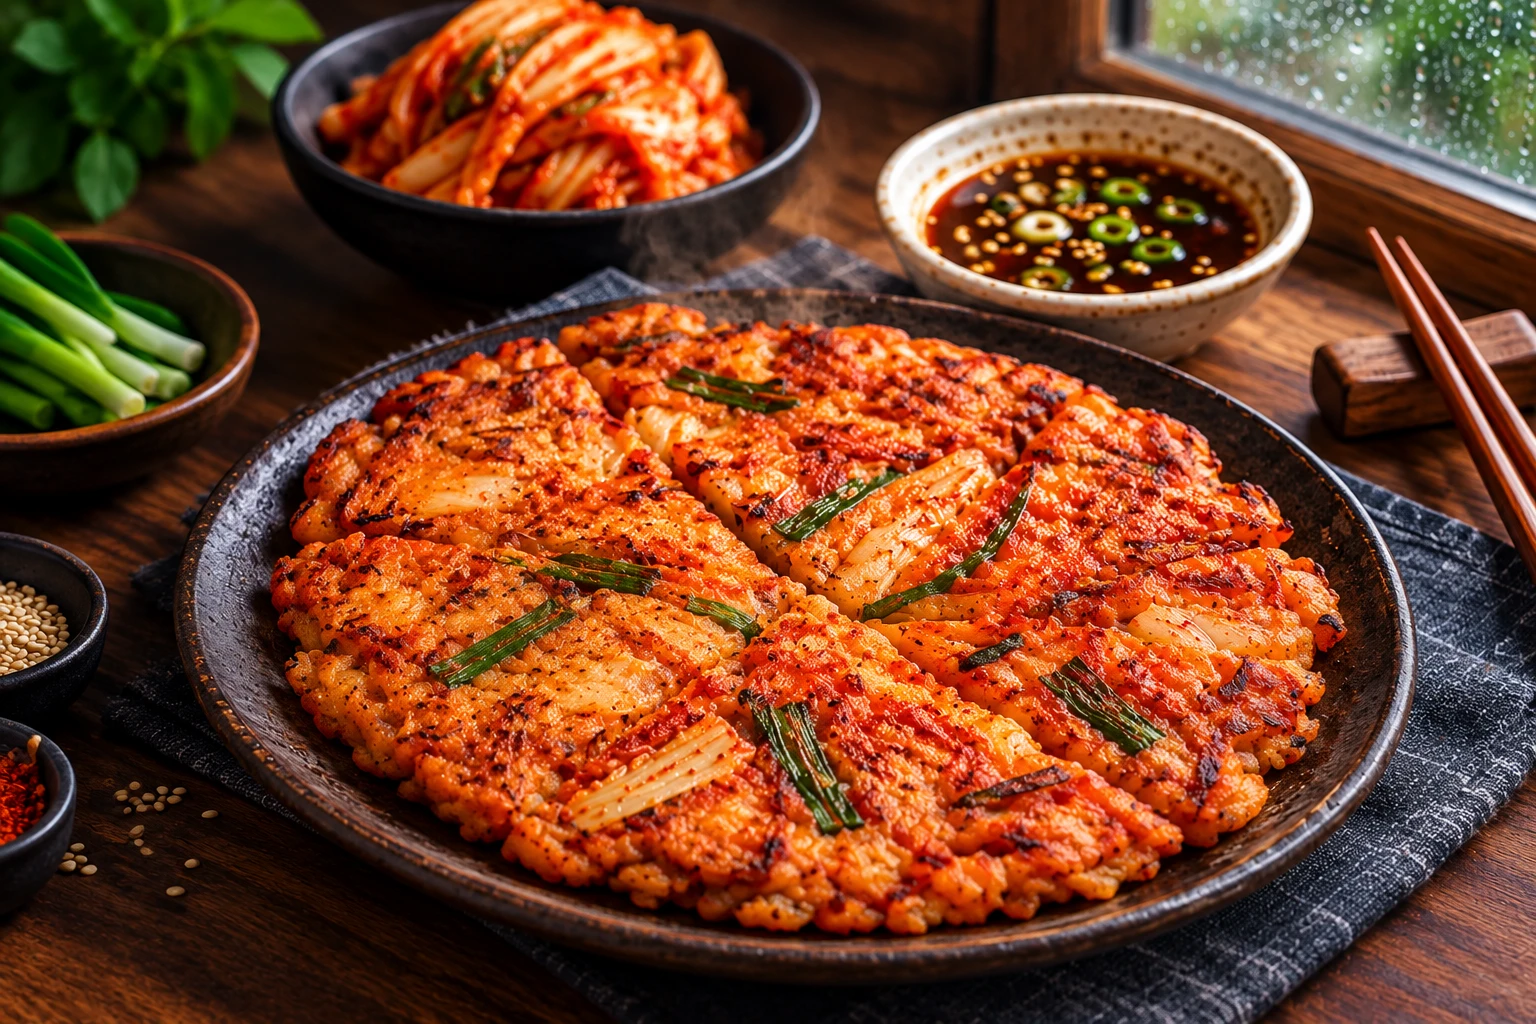
Kimchi PancakesKimchijeon · 김치전
Kimchijeon — crispy, savory kimchi pancake — is the classic way Koreans use up kimchi once it’s gone sour, and the dish that comes out on a rainy day with a bottle of makgeolli. Here’s the full recipe, an interactive tool for dialing in exactly how crispy you want it, and the dipping sauce to go with it.
What Is Kimchijeon?
Kimchijeon (김치전), also called kimchi buchimgae, is a savory Korean pancake made by folding chopped kimchi into a simple flour-and-potato-starch batter and pan-frying it until the edges turn crisp and lacy. It belongs to the wider jeon (전) family of Korean pan-fried dishes — the same family as pajeon (scallion pancake) and gamja-jeon (potato pancake). Kimchijeon is specifically known as the classic way to use up kimchi that’s gone sour, and is a beloved rainy-day comfort food, traditionally paired with makgeolli (Korean rice wine). No fermentation, no waiting — batter to plate in about 20 minutes, around 195 calories per serving.
- Dish: Kimchijeon (김치전), also called kimchi buchimgae — a Korean savory pancake.
- Main ingredients: chopped kimchi, all-purpose flour, potato starch, water, kimchi juice, scallion.
- Total time: about 20 minutes — 10 minutes prep, 10 minutes frying. No fermentation step.
- Crispiest ratio: roughly equal parts flour and potato starch (1:1 by weight).
- Best kimchi to use: sour, well-fermented kimchi — this dish is the standard way to use kimchi that’s gone too sour to eat plain.
- Calories: approximately 195 per serving (1/4 of a 10-inch pancake).
- Traditional pairing: makgeolli (Korean rice wine), especially on rainy days.
- Dipping sauce: chojang — soy sauce, rice vinegar, sesame oil, and a pinch of gochugaru.
How to Make Kimchi Pancake
Kimchijeon takes about 10 minutes of active prep and 10 minutes of frying: whisk the dry ingredients, whisk in cold water and kimchi juice to make a thin batter, fold in the kimchi and scallions, then fry in plenty of oil until deeply golden and crisp on both sides.
- Whisk the dry mix: flour, potato starch, and salt.
- Add cold water + kimchi juice: whisk to a thin, pourable batter.
- Fold in kimchi and scallion: just until combined, don’t overmix.
- Fry the first side: generous oil, spread thin, leave undisturbed until golden.
- Flip and crisp: more oil under the edges, press, fry until deeply golden.
Why Kimchijeon Is Korea’s Rainy-Day Favorite
Kimchijeon’s reputation isn’t about rarity or royal ceremony — it’s about being fast, cheap, forgiving, and the single best thing to do with kimchi that’s turned too sour to eat straight from the jar.
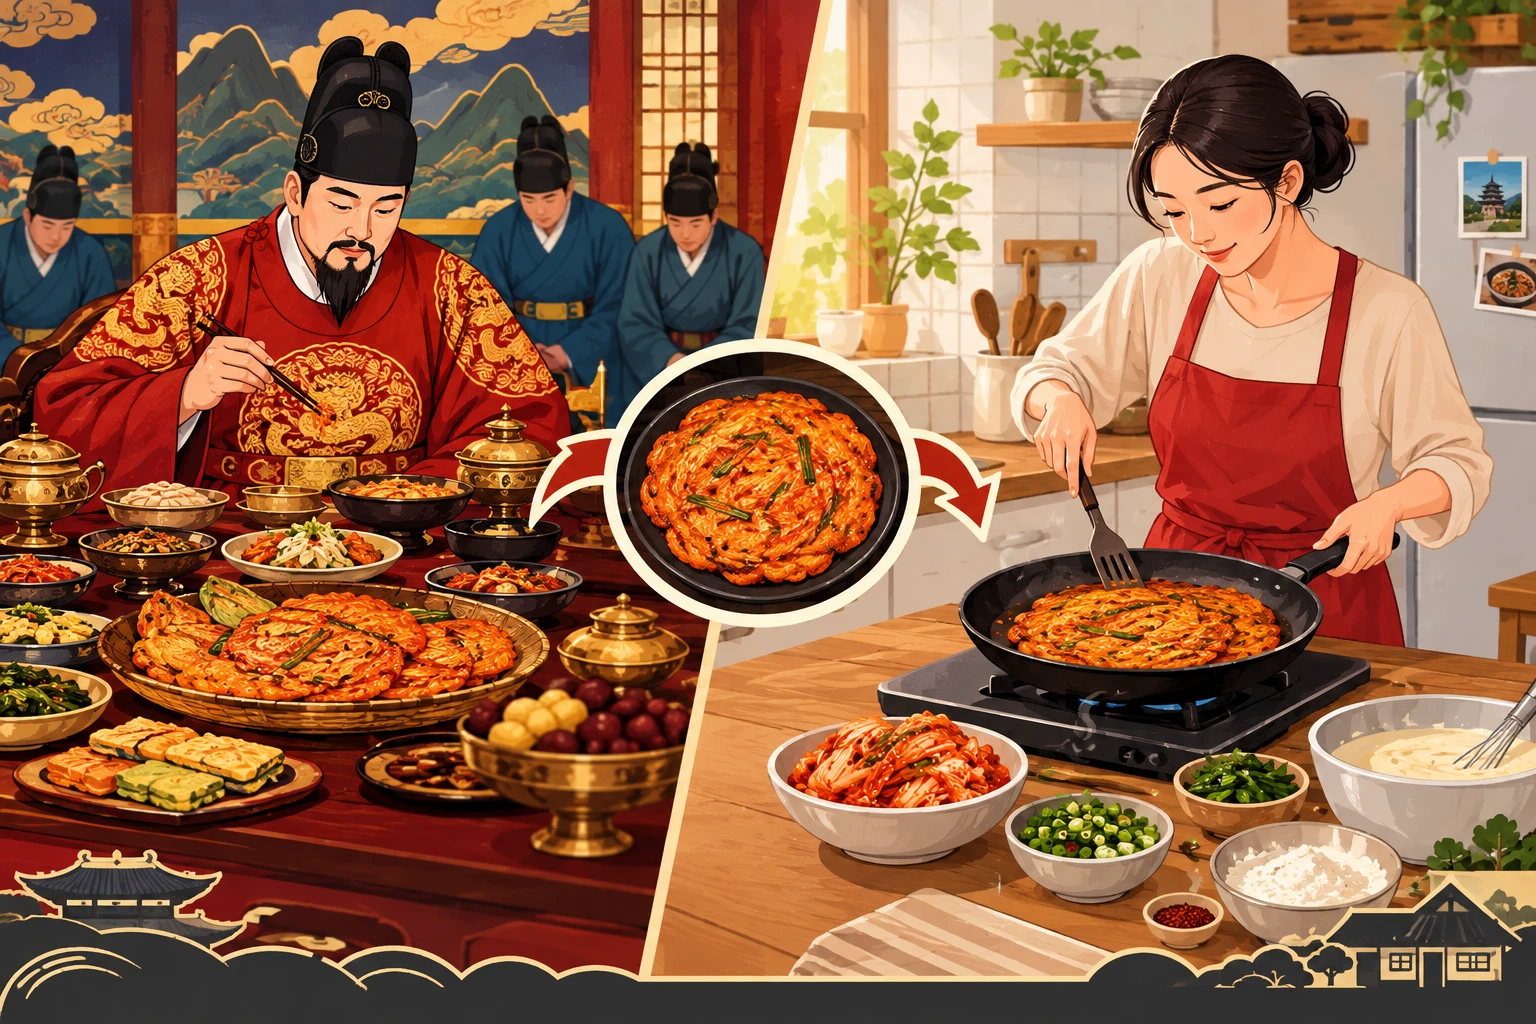
Jeon as a category grew prominent during the Joseon Dynasty (1392–1897), served at royal banquets and ancestral memorial-rite tables, where the oil and labor required were themselves a sign of occasion. Kimchijeon sits on the everyday, democratic side of that same family — a folk dish anyone can make cheaply at home with what’s already in the fridge.
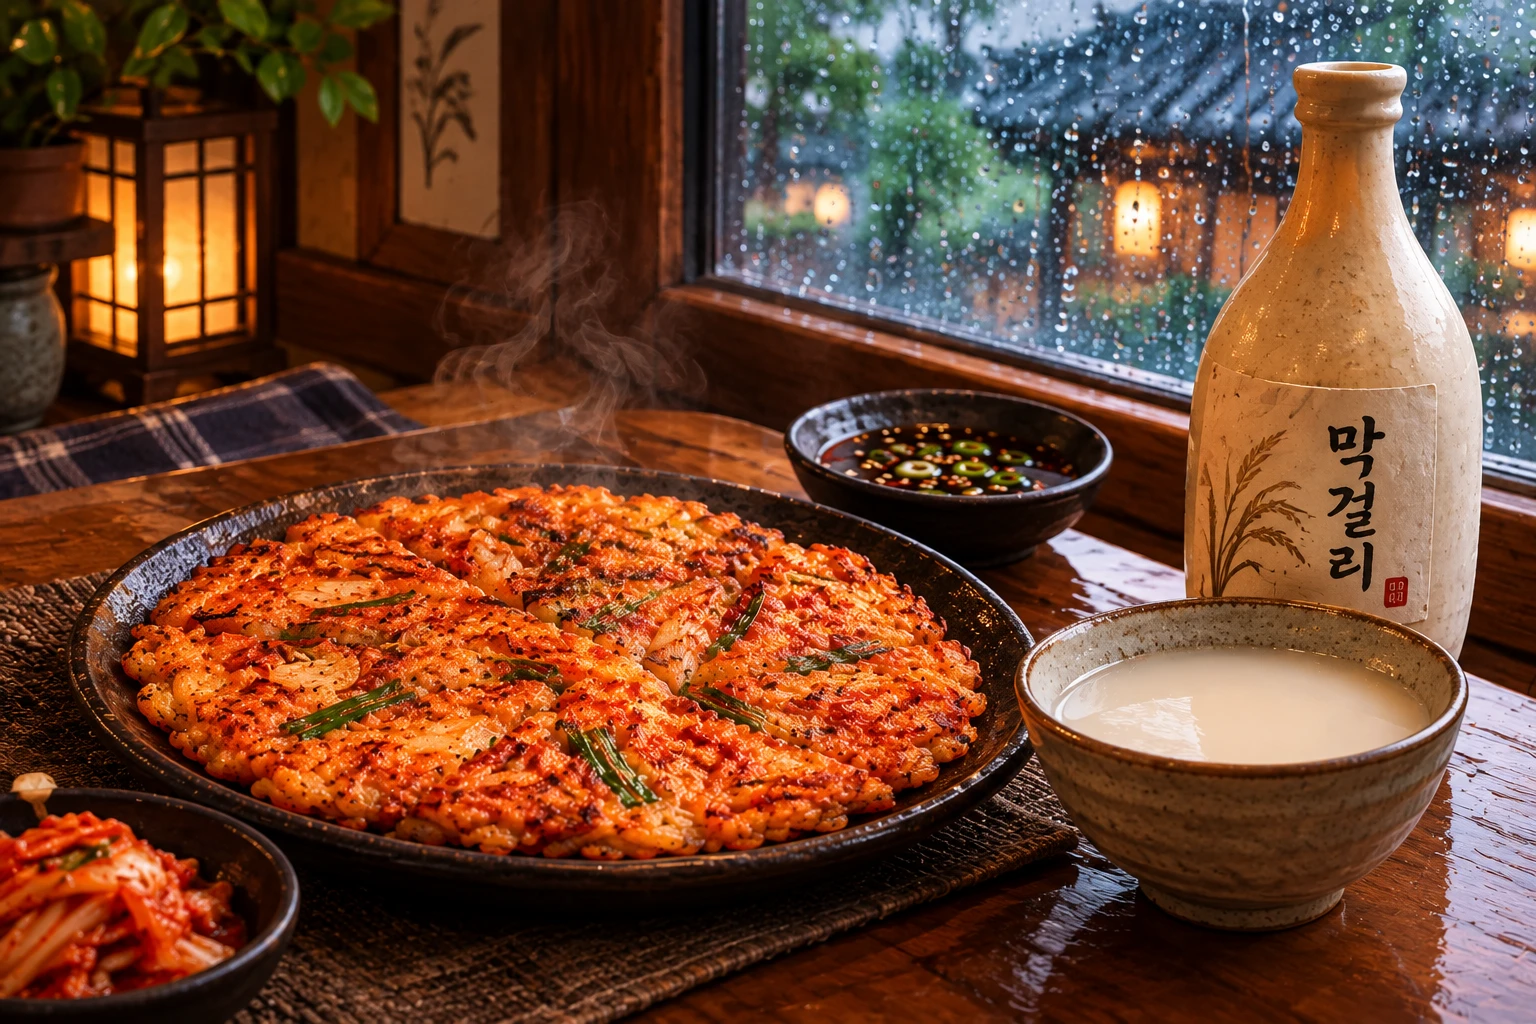
Jeon and makgeolli (rice wine) together are one of Korea’s best-known food pairings, with roots in old farming days — when rain stopped fieldwork, people stayed in and fried something. The habit outlasted the farming.
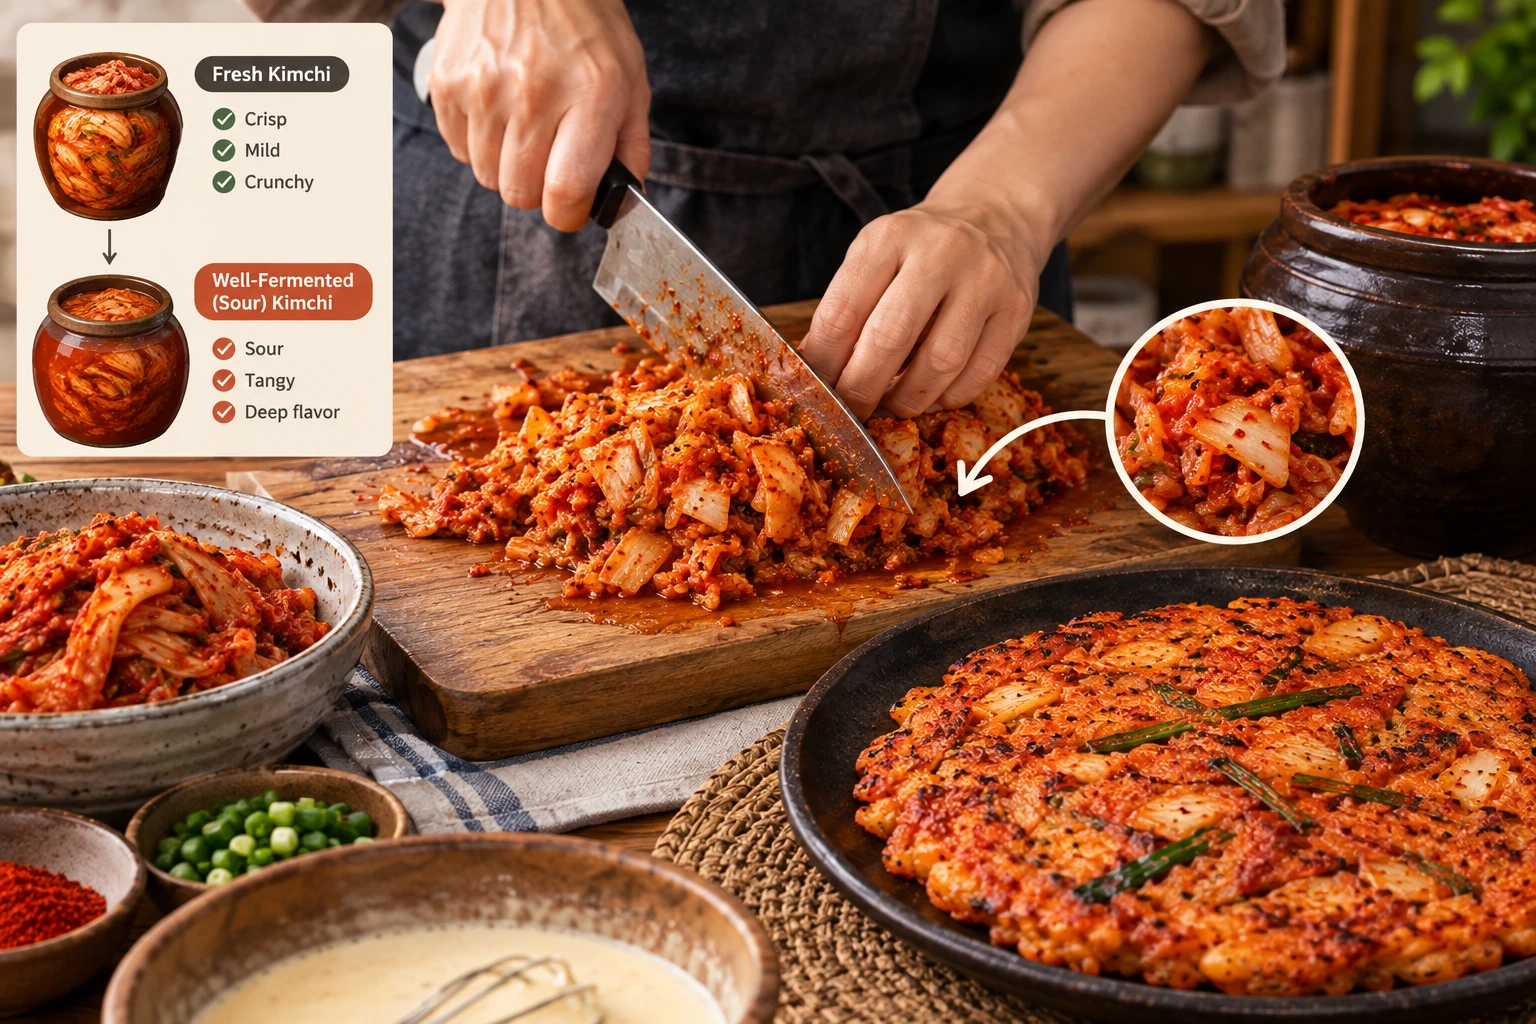
Kimchijeon is specifically recognized as the dish for kimchi that’s fermented past its fresh-eating window — the sourness that’s too sharp for a side dish becomes exactly the flavor this batter wants. See Fresh vs Aged Kimchi for what’s actually changing in the jar by that point.
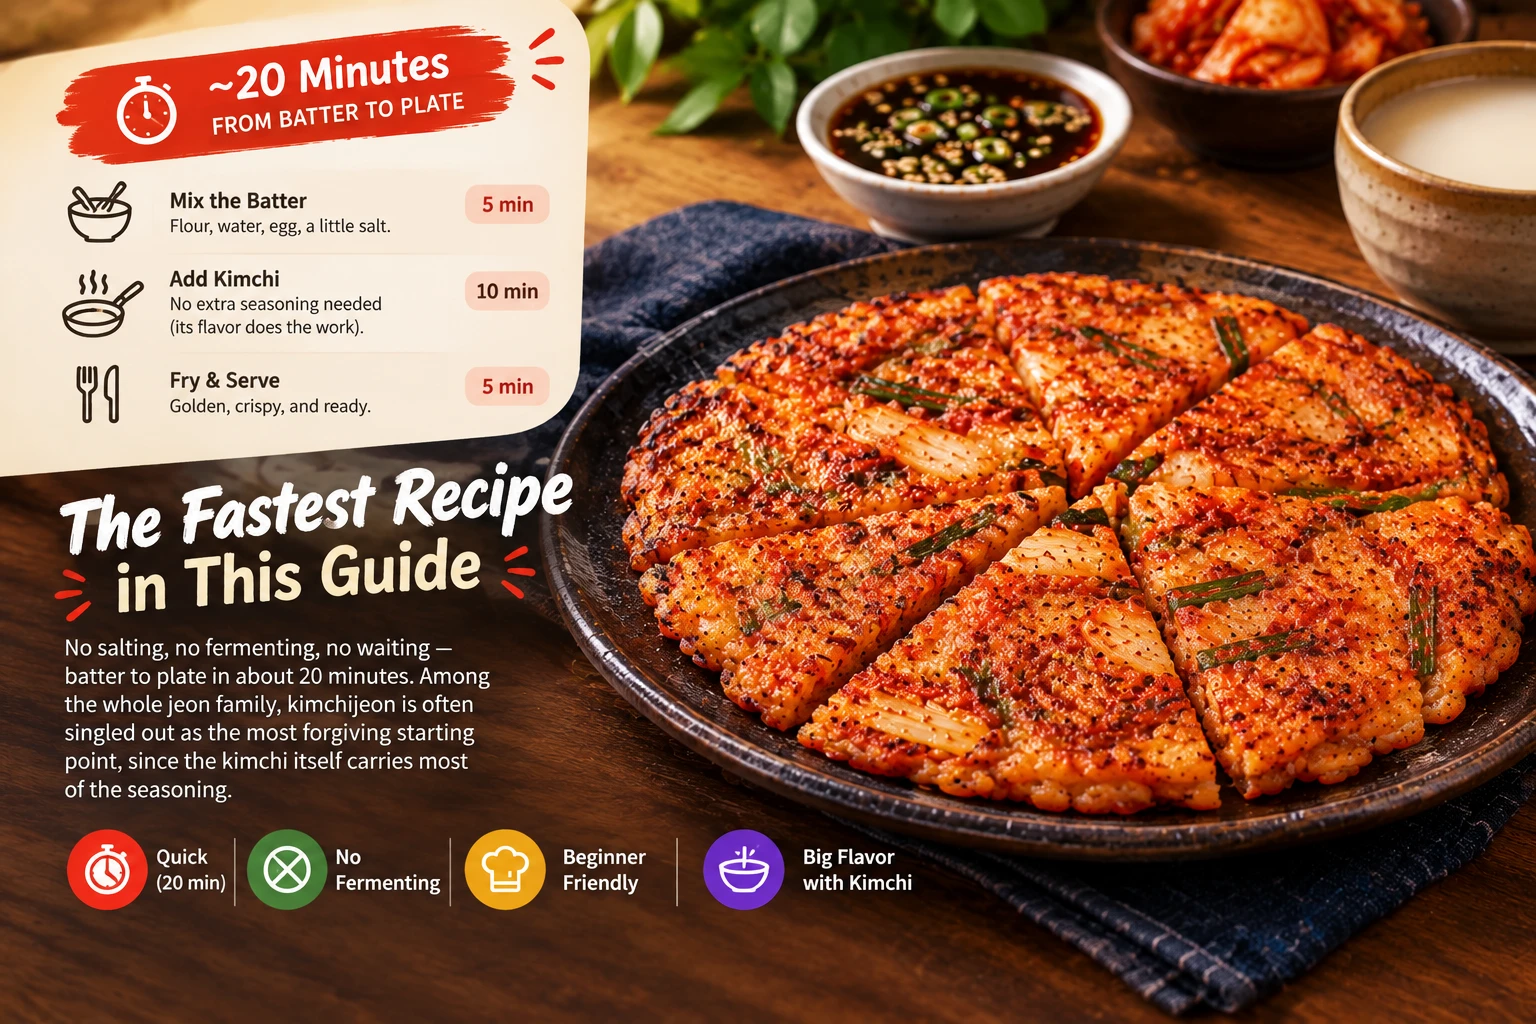
No salting, no fermenting, no waiting — batter to plate in about 20 minutes. Among the whole jeon family, kimchijeon is often singled out as the most forgiving starting point, since the kimchi itself carries most of the seasoning.
Fresh Kimchi vs. Sour Kimchi — Which to Use
Kimchijeon doesn’t have a fermentation step of its own — the only fermentation choice you’re making is which jar of kimchi to reach for.
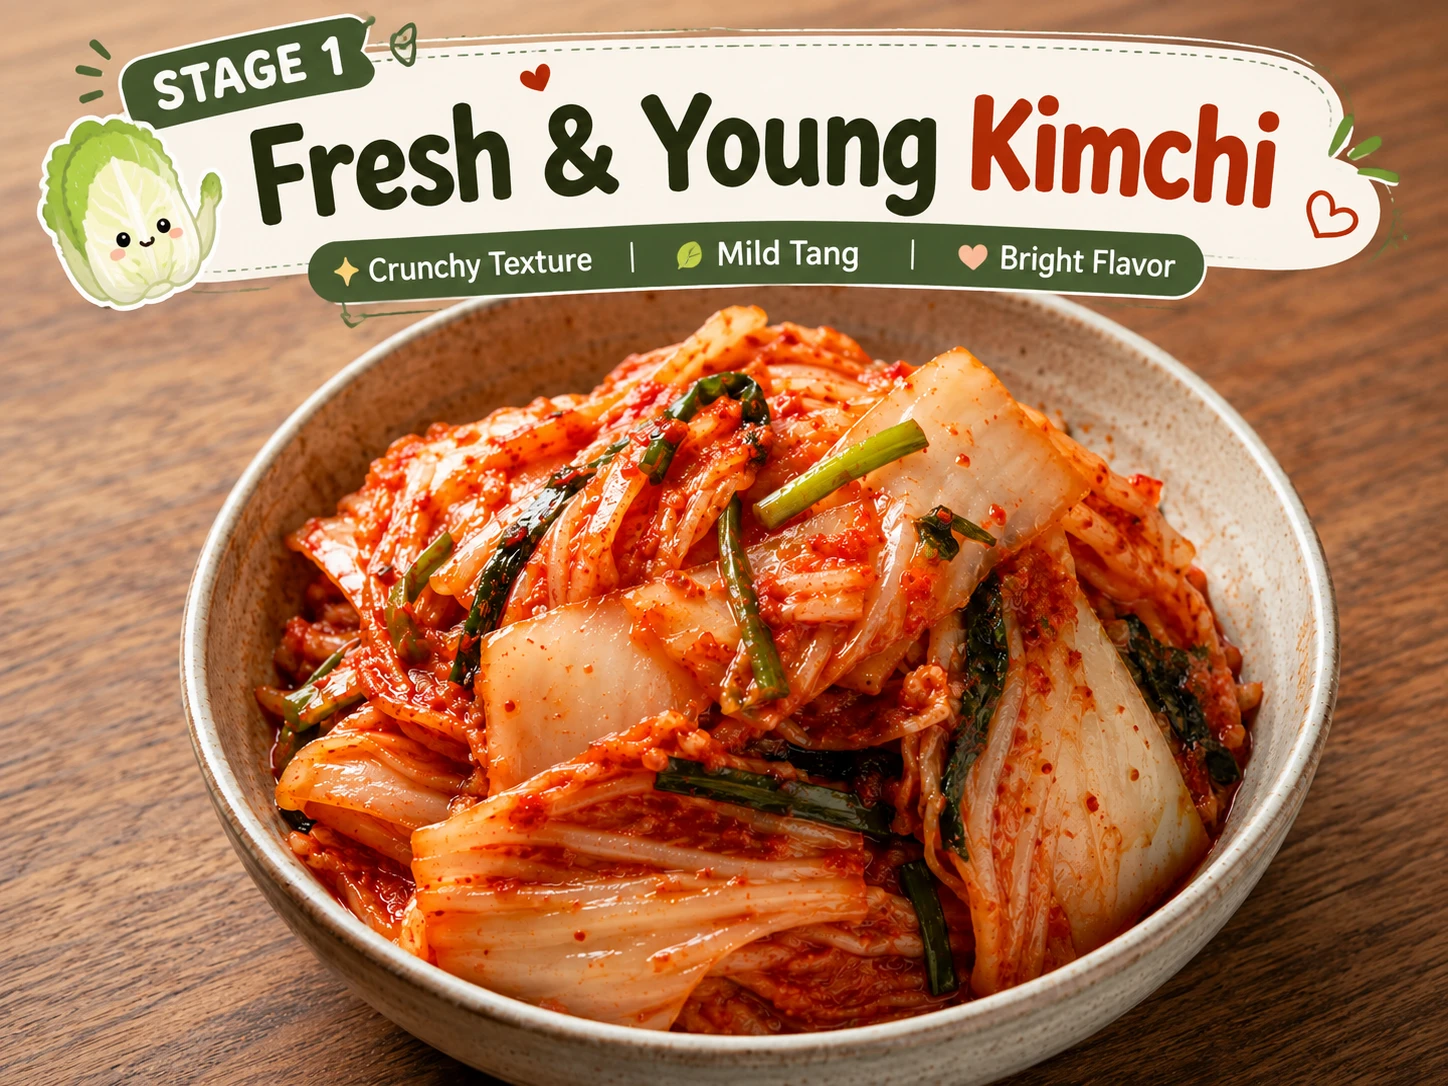
Usable, but noticeably milder — the pancake will need a little help from extra kimchi juice, a pinch of sugar, or a bit of gochugaru to make up the flavor a longer ferment would have supplied on its own.
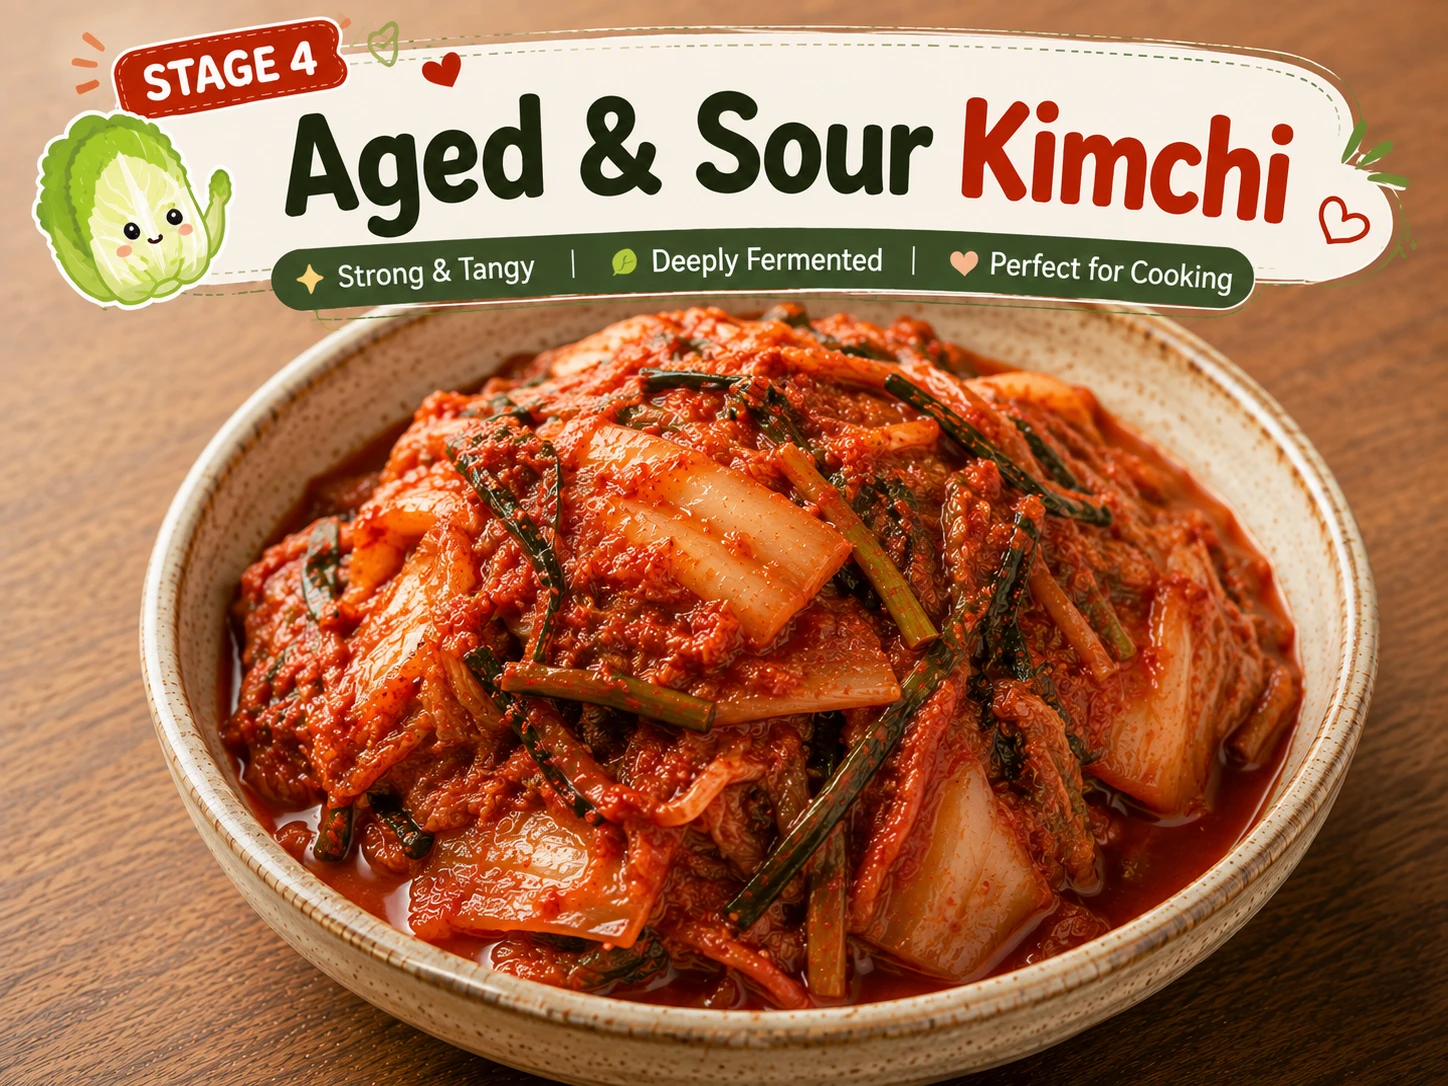
Deep, tangy, and needs almost no extra seasoning — this is the kimchi most kimchijeon recipes are actually built around, and the reason this dish exists in the first place: a good use for kimchi past its best fresh-eating window.
At a Glance
| Kimchi Age | Flavor in the Pancake | Adjustments to Make |
|---|---|---|
| Fresh (few days) | Mild, more vegetal, less tang | Add extra kimchi juice, a pinch of sugar, or a little gochugaru |
| Sour / well-fermented | Deep, tangy, savory — needs little else | None — this is the recipe as written |
Key Terms Explained
How Difficult Is This Recipe?
The fastest recipe in this guide — no salting, no waiting, no fermentation. Whisk, fold, fry.
Ingredients + Scaler
Nothing exotic here — the one thing worth being deliberate about is the flour-to-potato-starch ratio, which the Crispy-O-Meter below walks through in detail.
Amounts scale automatically with the servings control above.
Common Substitutions
| Ingredient | Substitute | Notes |
|---|---|---|
| Potato starch | Cornstarch | Very close in effect — both give a crispier result than flour alone |
| All-purpose flour + potato starch | Store-bought Korean pancake mix (buchimgaru) | A legitimate shortcut, not a lesser method — just add water per the package, then fold in kimchi as written |
| Ice-cold water | Cold sparkling/carbonated water | A few sources use this for a slightly airier batter — see Test Kitchen below |
| Fresh kimchi | Sour, well-fermented kimchi | Sour is traditional and needs less added seasoning — see Fresh vs. Sour above |
🛒 Shop This Recipe
A few things that make this specific recipe easier — a shortcut pancake mix if you don’t want to measure flour and starch separately, real potato starch, and a pan wide enough to get proper crispy edges.
| Item | Why You’d Want It Here | |
|---|---|---|
| Surasang Buchimgaru Korean Pancake Mix | Pre-seasoned Korean pancake flour — the shortcut mentioned in Common Substitutions above. Just add water, then fold in your kimchi. | View on Amazon → |
| Bob’s Red Mill Potato Starch | The single ingredient that makes the biggest difference in crispiness — see the Crispy-O-Meter below for exactly how much to use. | View on Amazon → |
| T-fal Ultimate Hard Anodized 12″ Nonstick Fry Pan | Wide, even heat and a nonstick surface you can trust for a clean flip — crowding a small pan is one of the most common reasons kimchijeon comes out pale instead of crisp. | View on Amazon → |
| OXO Good Grips Silicone Flexible Pancake Turner | A wide, thin edge that slides fully under the pancake for a clean, one-motion flip in Step 5, instead of tearing it apart with a narrow spatula. | View on Amazon → |
| Pyrex Smart Essentials 8-Piece Mixing Bowl Set | For keeping the dry mix, the wet ingredients, and the chopped kimchi separate until Step 3, so nothing gets combined too early. | View on Amazon → |
As an Amazon Associate, KimchiGuide earns from qualifying purchases. Links go to Amazon.com; prices and availability may change.
How to Make Kimchi Pancake — 5 Steps
One batter, one pan, two sides. The only step that takes any patience is leaving it alone once it’s in the pan.
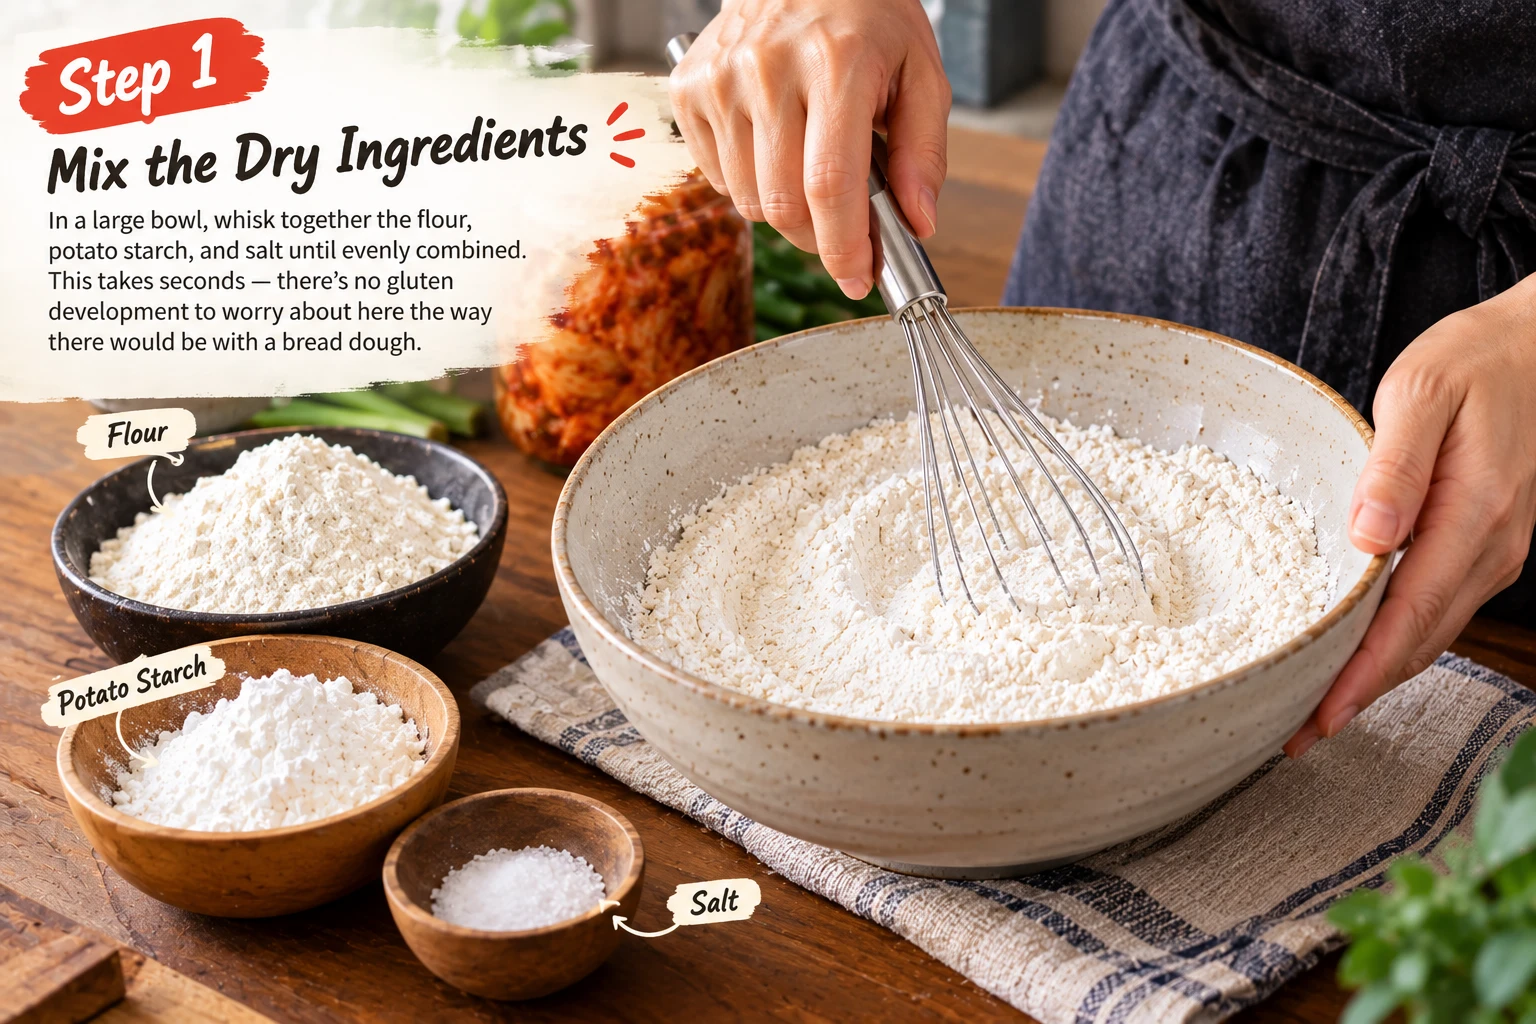
In a large bowl, whisk together the flour, potato starch, and salt until evenly combined. This takes seconds — there’s no gluten development to worry about here the way there would be with a bread dough.
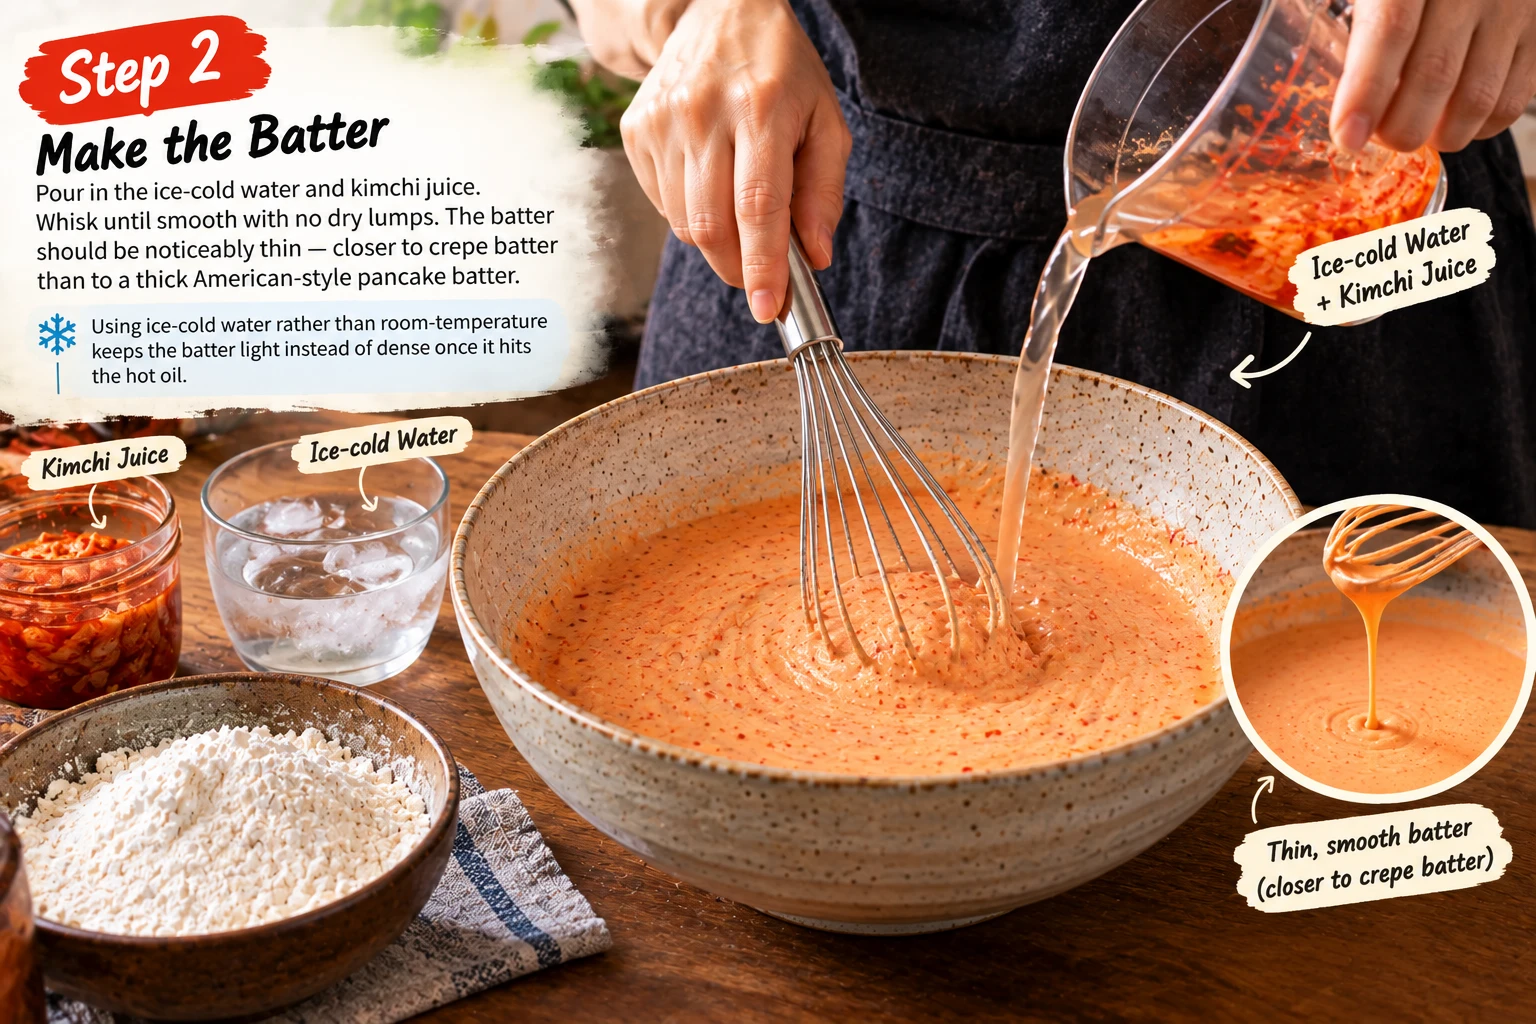
Pour in the ice-cold water and kimchi juice. Whisk until smooth with no dry lumps. The batter should be noticeably thin — closer to crepe batter than to a thick American-style pancake batter.
Using ice-cold water rather than room-temperature keeps the batter light instead of dense once it hits the hot oil.
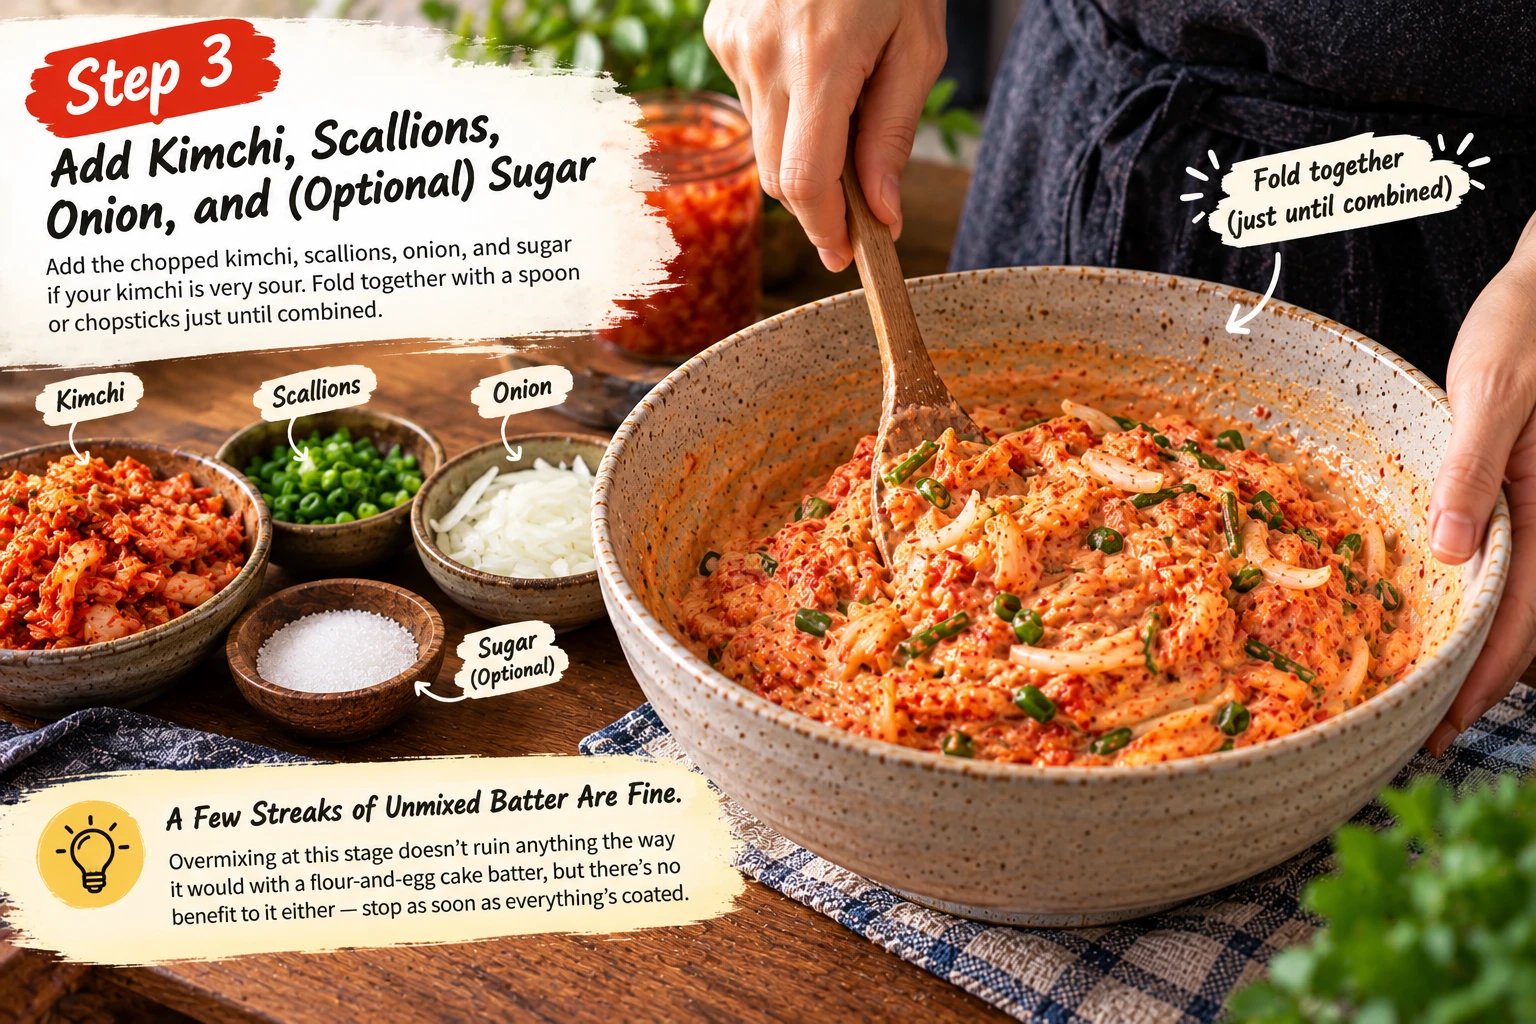
Add the chopped kimchi, scallions, onion, and sugar if your kimchi is very sour. Fold together with a spoon or chopsticks just until combined.
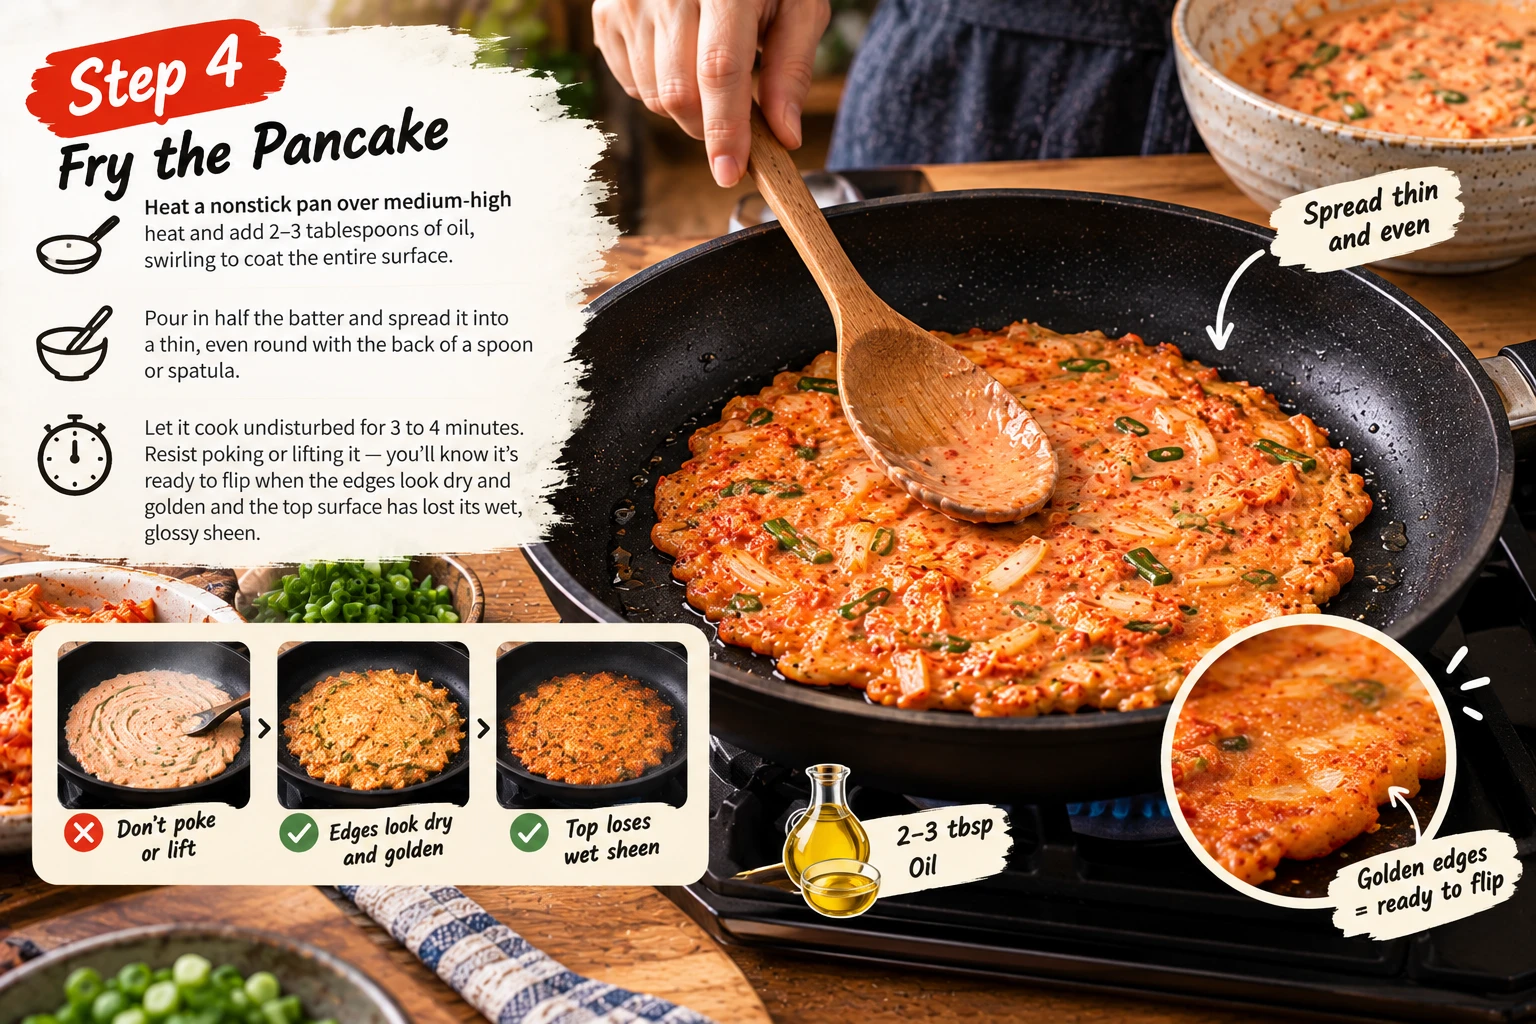
Heat a nonstick pan over medium-high heat and add 2–3 tablespoons of oil, swirling to coat the entire surface. Pour in half the batter and spread it into a thin, even round with the back of a spoon or spatula.
Let it cook undisturbed for 3 to 4 minutes. Resist poking or lifting it — you’ll know it’s ready to flip when the edges look dry and golden and the top surface has lost its wet, glossy sheen.

Flip the pancake in one confident motion — a wide spatula makes this much easier than a narrow one. Drizzle another tablespoon or two of oil around the edges and gently lift the pancake so the oil can run underneath.
Press down lightly with the spatula and fry 3 to 4 more minutes, until deeply golden and audibly crisp at the edges. Slide onto a cutting board, slice into wedges, and repeat with the remaining batter.
Kimchi Pancake — Recipe Card
김치전 · 20 Minutes Total · No Fermentation Required. Save this to Pinterest, print it, or copy it straight to your notes app.
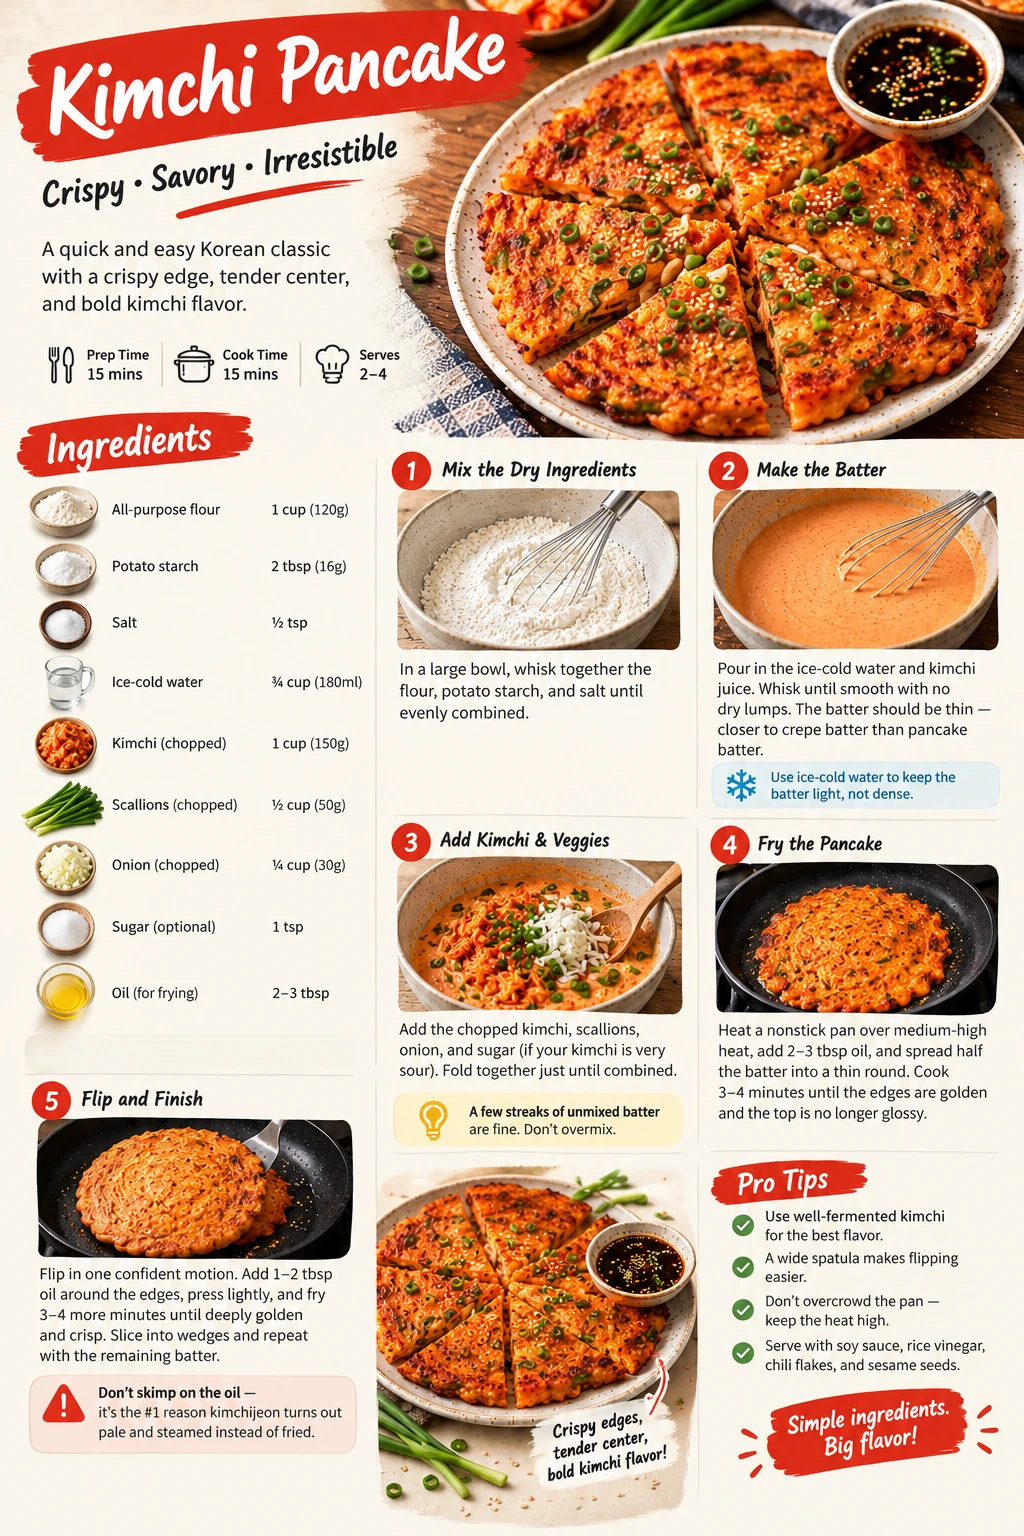
- 65g all-purpose flour (about 1/2 cup)
- 65g potato starch (about 1/2 cup)
- 240ml ice-cold water, plus more as needed
- 2 tbsp reserved kimchi juice
- 1/2 tsp salt (optional)
- 225g well-fermented kimchi, chopped
- 2 scallions, cut into 1-inch pieces
- 1/4 small onion, thinly sliced (optional)
- 1 tsp sugar (optional, for very sour kimchi)
- 4–5 tbsp neutral oil, for frying
- 1Whisk flour, potato starch, and salt.
- 2Whisk in ice-cold water and kimchi juice to a thin batter.
- 3Fold in kimchi, scallion, onion, and sugar just until combined.
- 4Fry in oiled hot pan, undisturbed, 3–4 min until edges are golden.
- 5Flip, add more oil under the edges, press, fry 3–4 more min until crisp.
Per serving (4 servings total, 1/4 of a 10-inch pancake). Reviewed by Dr. Sarah Mitchell RD, PhD · Published September 16, 2026
Ingredient Notes — What Each One Does and Why
A quick amount list only tells you how much. Here’s what each ingredient is actually doing, and where it’s safe to swap.
Where Kimchijeon Fits in the Kimchi Family
This is the first entry in a new “Quick Kimchi Recipes” grouping — fast, low-fuss dishes built around kimchi you already have on hand.


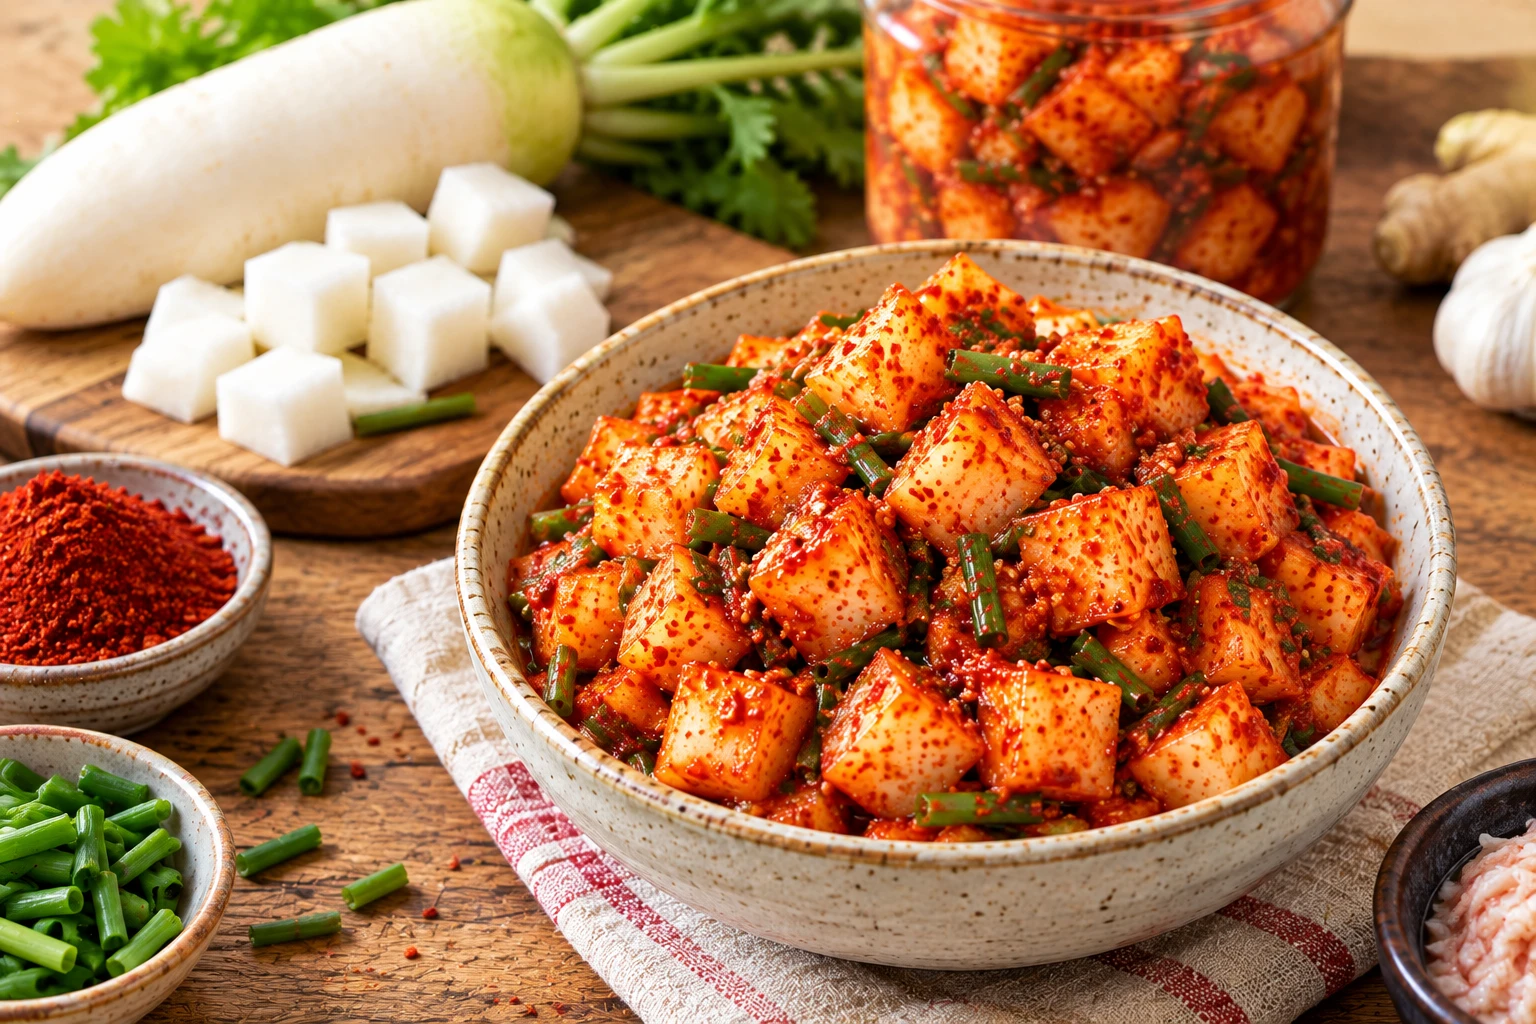
Pairing Guide & Dipping Sauce
Kimchijeon is built to be shared straight out of the pan, cut into wedges, with something to dip it in.


Storage, Leftovers & Reheating
Kimchijeon is best fresh from the pan, but leftovers reheat well if you avoid the microwave.
How Kimchi Pancake Compares to Other Kimchi Dishes
The figures below sit on a genuinely different basis than raw kimchi — this is a fried, flour-based dish, not a spoonful of kimchi straight from the jar — but the comparison is still useful context. Figures are approximate per site convention.
| Dish / Variety | Calories | Sodium | Basis | Notes |
|---|---|---|---|---|
| Baechu Kimchi | ~15–23 kcal | ~450–750mg | Per 100g, raw | The most-studied variety in kimchi nutrition research. |
| Kkakdugi | ~26–32 kcal | ~480–560mg | Per 1/2-cup serving, raw | Slightly higher natural sugar than most raw types. |
| Dongchimi | ~8–14 kcal | Lowest of the common types | Per 100g, raw | Mostly water-based brine, so both figures run low. |
| Kimchi Pancake ← This page | ~180–220 kcal | ~450–520mg | Per fried serving, 1/4 of a 10-inch pancake | Higher than raw kimchi types by design — flour, starch, and frying oil all add calories a spoonful of plain kimchi doesn’t have. |
Looking to work more kimchi into your regular meals in a lighter way? See our 7-Day Kimchi Diet Plan or the more gradual 30-Day Kimchi Diet Plan.
What We Tested Before Writing This Guide
Crispiness comes down to three things working together — potato starch in the batter, ice-cold liquid, and enough oil that the pancake actually fries rather than steams. Flipping technique and resting time, which most recipes spend a lot of words on, matter far less than those three.
Kimchijeon FAQ — 10 Questions
Kimchi fried rice is stir-fried rice with kimchi mixed through it. Kimchi pancake is a completely different dish and cooking method — chopped kimchi folded into a flour-and-starch batter and shallow-fried flat in a pan, more like a savory crepe than a rice dish. Both are classic ways to use up kimchi, but they don’t share a base ingredient beyond the kimchi itself.
It’s strongly preferred but not required. Sour, well-fermented kimchi gives the pancake most of its flavor and needs almost no extra seasoning. Fresh, mild kimchi works too, but the result is blander — a pinch of sugar and a little extra kimchi juice can help make up the difference.
Yes, using all-purpose flour alone is fine and is how some recipes are written. The pancake will be noticeably softer and less crispy than one made with a flour-and-potato-starch blend. Cornstarch is an easy substitute for potato starch if that’s what you have on hand.
The three most common causes are: not enough oil in the pan (kimchijeon needs to genuinely fry, not steam), a batter that’s too thick, or flipping before the first side has properly set and dried at the edges. Using potato starch and ice-cold water also make a bigger difference than most people expect — see the Crispy-O-Meter tool above for how the ratio changes the result.
Yes — this recipe as written doesn’t use egg at all, which matches most traditional kimchi pancake recipes. To make it fully vegan, just confirm your kimchi itself is vegan (some brands use fish sauce or shrimp in the seasoning), since everything else in the batter already is. See our how to make vegan kimchi guide or browse vegan kimchi if you need a vegan jar to start from.
A simple chojang works well: 2 tablespoons soy sauce, 1 tablespoon rice vinegar, 1 teaspoon sesame oil, a pinch of gochugaru, a sprinkle of toasted sesame seeds, and a little chopped scallion, stirred together.
Yes, this is a completely normal shortcut, not a lesser method — buchimgaru is pre-seasoned Korean pancake flour and typically just needs water. Follow the ratio on the package, then fold in your chopped kimchi the same way as in this recipe.
Reheat it in a dry or very lightly oiled skillet over medium heat for a couple of minutes per side, rather than the microwave, which will make it rubbery instead of crisp. A toaster oven or air fryer at around 350°F for a few minutes also works well.
Both are savory Korean pancakes in the same buchimgae/jeon family and use a similar batter. Pajeon is built around scallions as the main vegetable (often with seafood added), while kimchijeon is built around kimchi as the main ingredient. They’re cousins, not the same dish.
Cooked pancakes freeze reasonably well — cool completely, layer with parchment, and reheat from frozen in a dry skillet or oven to re-crisp. The raw batter is best made fresh; kimchi continues to release liquid as it sits, which can throw off the batter’s consistency by the time you’d get around to frying it.
Was this guide helpful?
Your feedback helps us improve KimchiGuide for everyone.
Explore More
More guides and recipes from KimchiGuide.
See how kimchi pancake fits among every other recipe on the site.
Read the hub →Another quick, beginner-friendly kimchi recipe — this one a type of kimchi in its own right.
Get the recipe →
More ways to use kimchi once it’s fully aged, beyond this recipe.
Read the guide →
What actually changes in flavor, texture and probiotics as kimchi ages.
Read the guide →Figure out exactly how sour your kimchi is before you decide what to make with it.
Read the guide →Sourcing and heat-level notes for Korean chili flakes.
Read the guide →New to kimchi entirely? Start here before you need a jar to cook with.
Read the guide →Don’t have kimchi on hand yet? See what’s actually worth buying.
Read the guide →Two of the biggest store-bought brands, compared head to head.
Read the comparison →Not making it yourself today? Here’s where to find it.
Read the guide →Another classic way sour kimchi gets used up — this time as a stew.
Get the recipe →The other everyday classic for using up kimchi — see how it compares in the FAQ above.
Get the recipe →No frying required — another fast recipe for kimchi you already have.
Get the recipe →
A regionally-rooted, non-cabbage kimchi from Dolsan Island — good next kimchi to try making.
Get the recipe →
Garlic chive kimchi — another quick, non-cabbage type worth knowing.
Get the recipe →

What’s Your Crispy Ratio?
Have you tried the 50/50 flour-and-potato-starch split, or do you push it further toward all-starch? Let us know in the comments.