KkakdugiCubed Radish Kimchi · 깍두기
Kkakdugi — crunchy, cubed Korean radish kimchi — is consistently named one of Koreans’ most-loved kimchi types, second only to napa cabbage kimchi. Here’s its royal origin story, a full recipe with step photos, and how to serve it the traditional way.
What Is Kkakdugi?
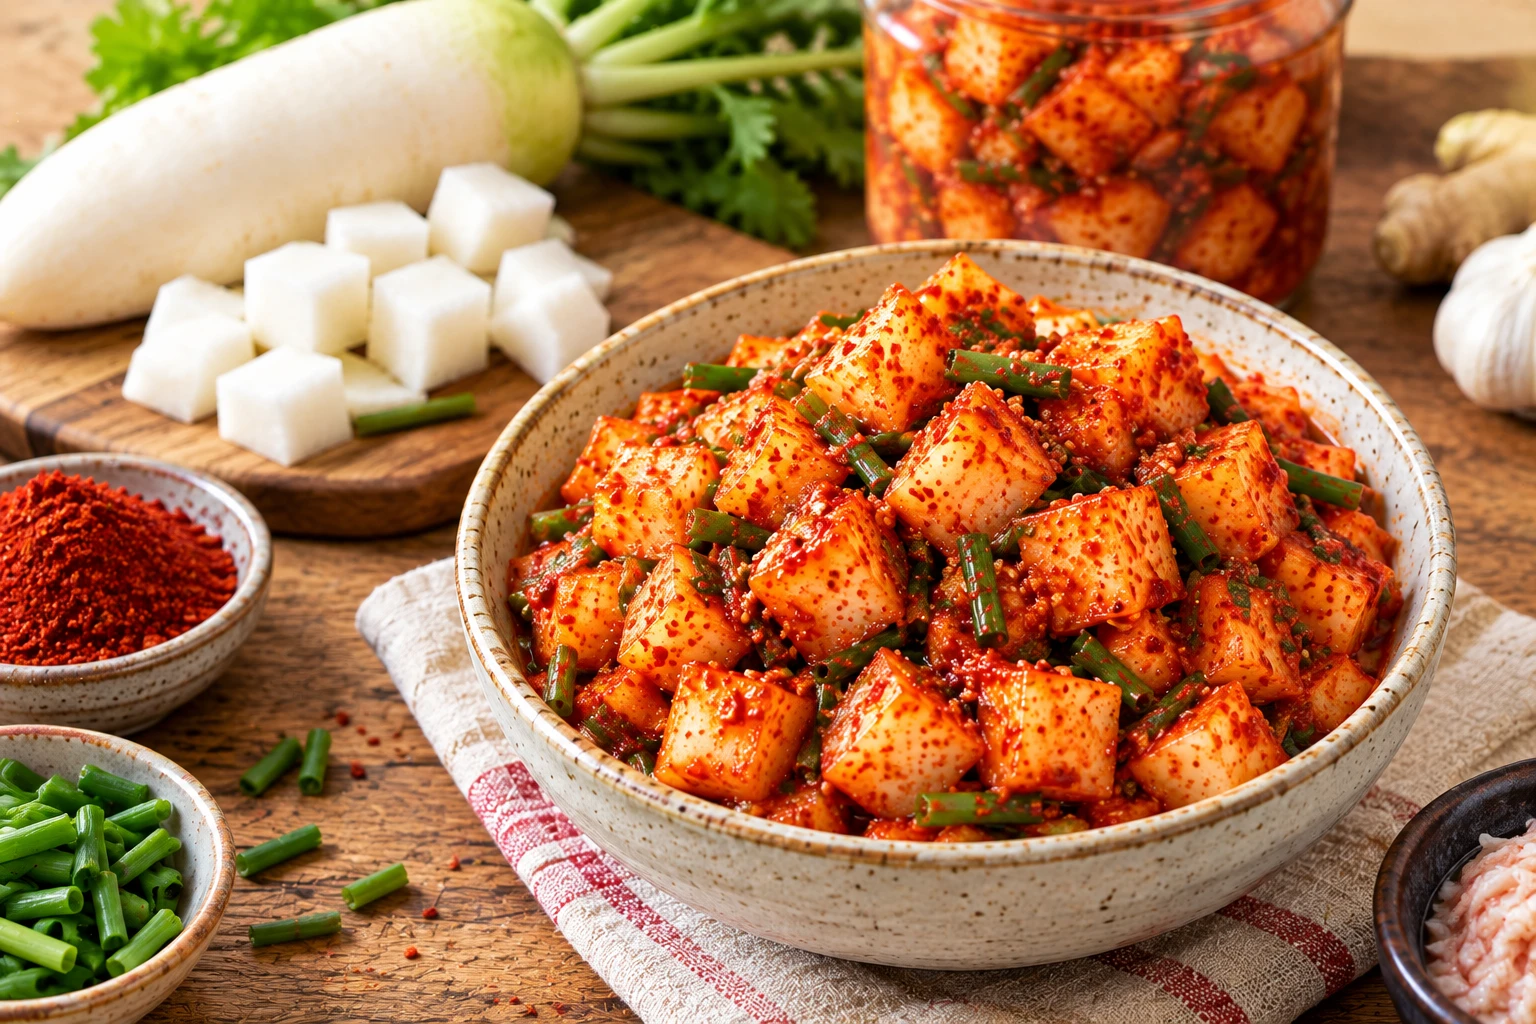
Kkakdugi (깍두기) is Korean kimchi made from Korean radish (mu) cut into cubes instead of napa cabbage, then coated in a gochugaru-based seasoning paste. Unlike gat or buchu kimchi, it isn’t tied to one region — it’s made and eaten everywhere in Korea, and is consistently named one of the country’s most-loved kimchi types, right behind baechu (napa cabbage) kimchi. Legend credits its creation to Princess Sukseon, daughter of King Jeongjo, who presented a diced-radish dish to the royal court. The radish is salted briefly (45 minutes to an hour), tossed in seasoning, and either eaten fresh within a day or two or fermented for a deeper sour tang. Around 28 calories per half-cup serving.
How to Make Kkakdugi
Kkakdugi takes about 25 minutes of active prep plus a 45-minute to 1-hour salt cure: cut and salt the radish, drain and reserve the liquid, build a gochugaru-based seasoning paste, toss everything together, then eat fresh or let it ferment for a deeper sour flavor.
- Cut and salt the radish: cube the radish, toss with salt and sugar, rest 45 min–1 hour.
- Drain, keep the liquid: drain the radish over a bowl — don’t rinse, don’t discard the liquid.
- Build the paste: bloom gochugaru in the reserved liquid, stir in fish sauce, shrimp, garlic, ginger.
- Toss together: combine radish and scallions with the paste until evenly coated.
- Pack and wait: eat fresh, or ferment 1–3 weeks in the fridge for the classic sour tang.
Why Kkakdugi Is Korea’s Favorite Radish Kimchi
Kkakdugi isn’t tied to one island or province like gat or buchu kimchi — its reputation comes from a royal origin story, its everyday versatility, and the sheer number of Koreans who name it a favorite.
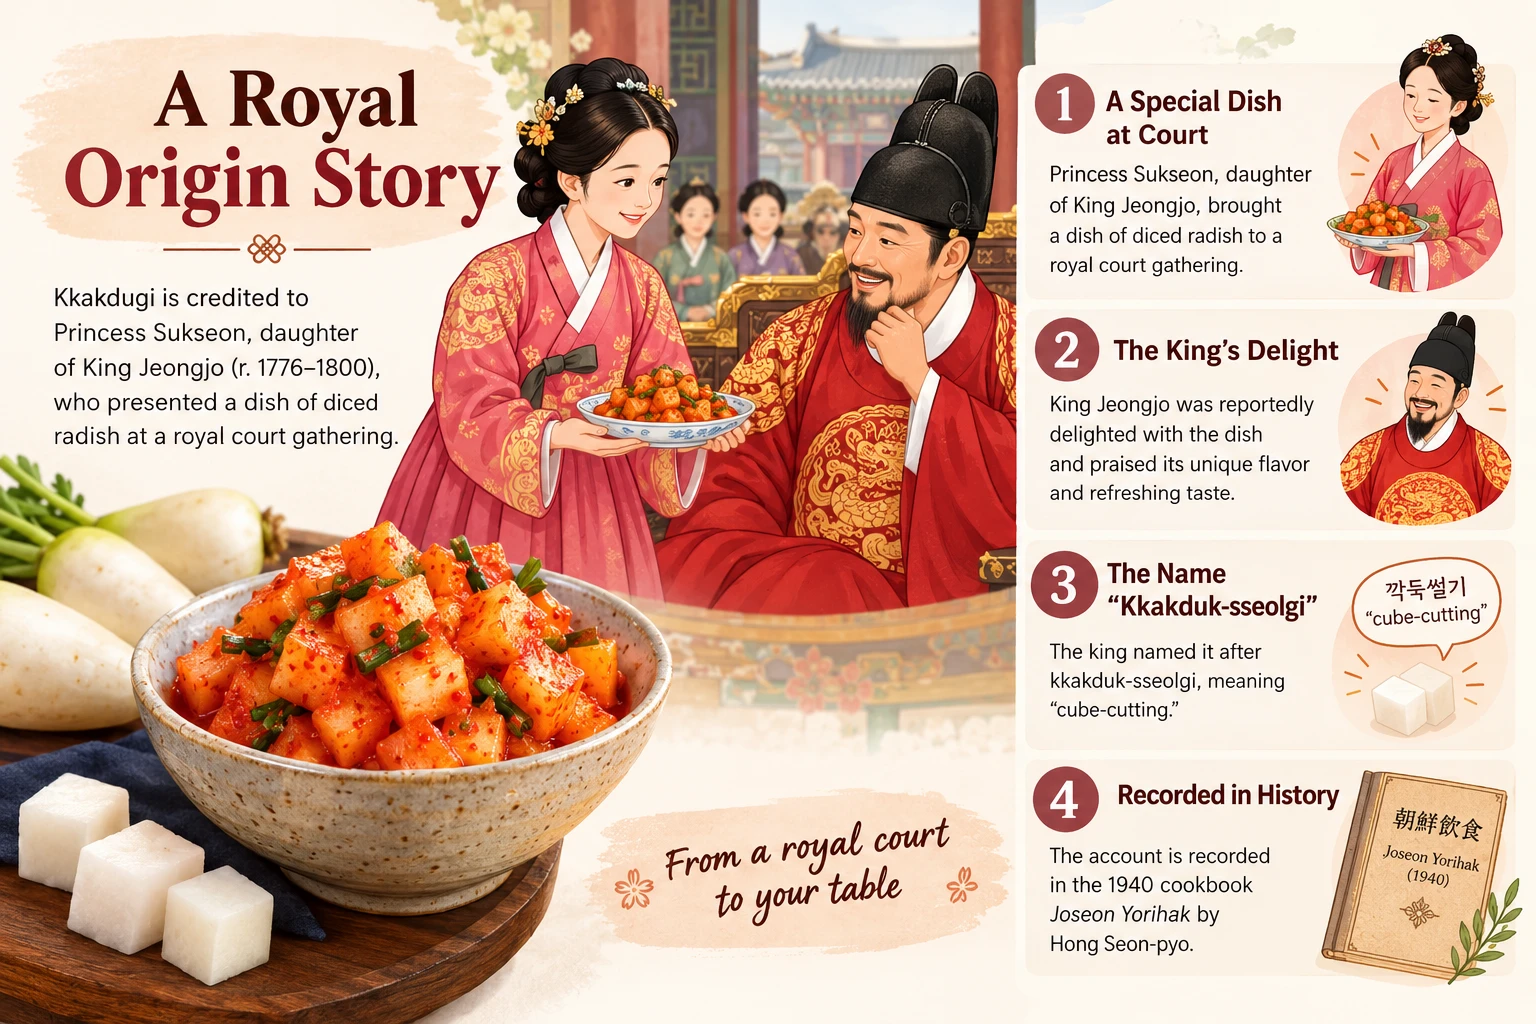
Kkakdugi is credited to Princess Sukseon, daughter of King Jeongjo (r. 1776–1800), who presented a dish of diced radish at a royal court gathering. The king was reportedly delighted and named it after kkakduk-sseolgi, meaning “cube-cutting.” The account is recorded in the 1940 cookbook Joseon Yorihak by Hong Seon-pyo.
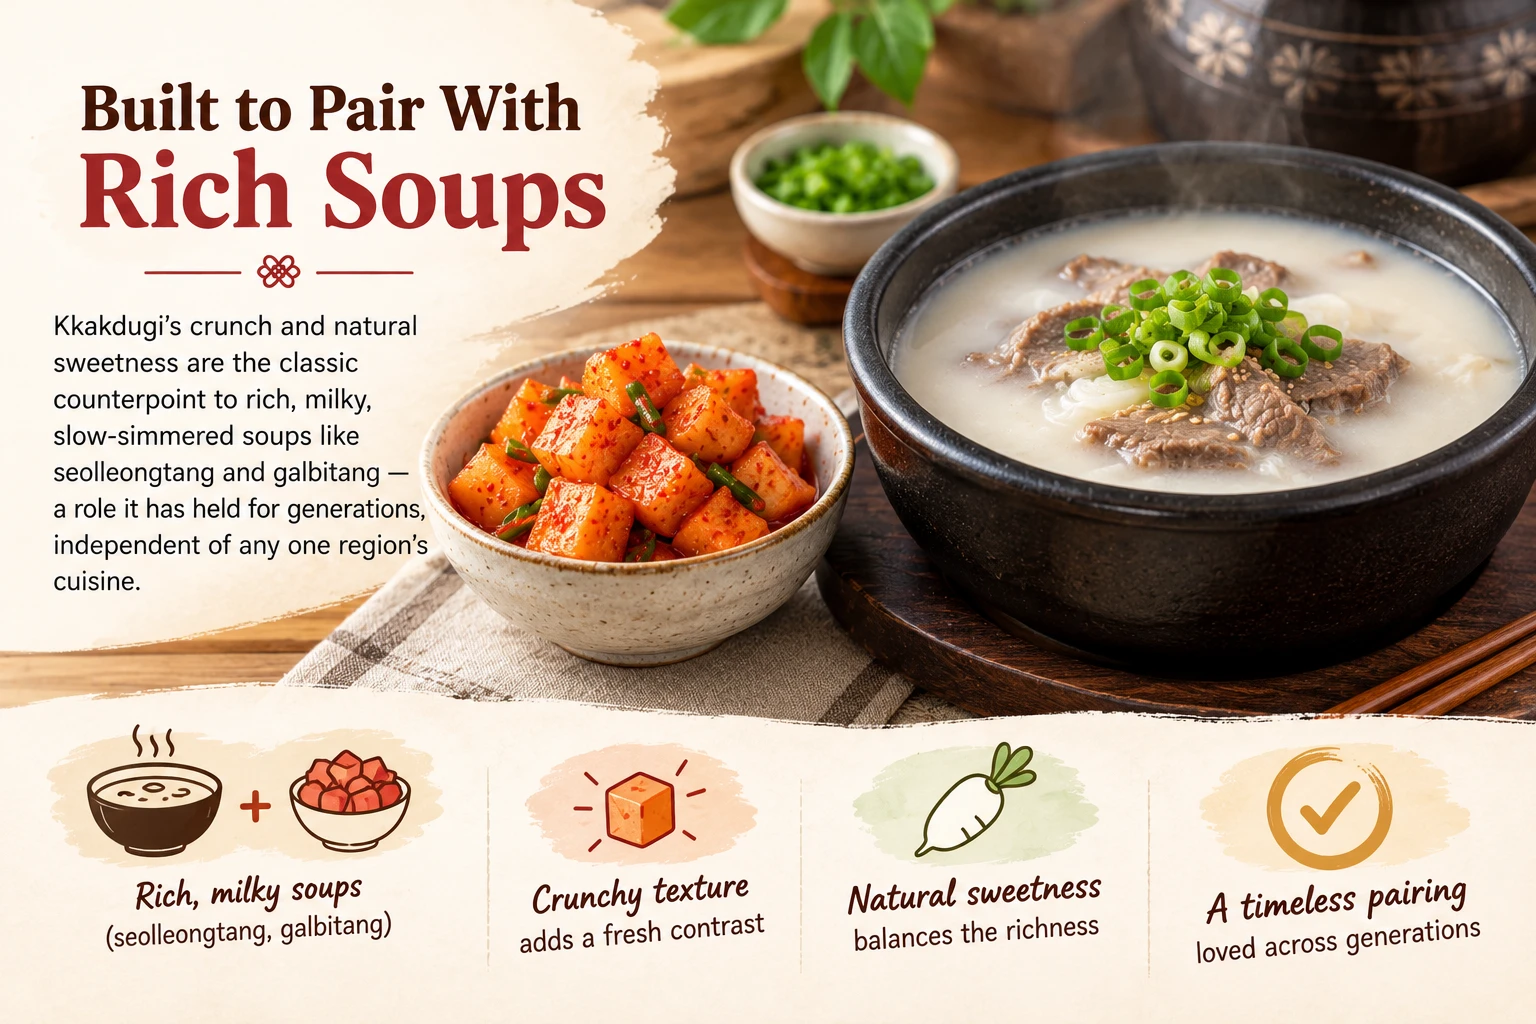
Kkakdugi’s crunch and natural sweetness are the classic counterpoint to rich, milky, slow-simmered soups like seolleongtang and galbitang — a role it has held for generations, independent of any one region’s cuisine.
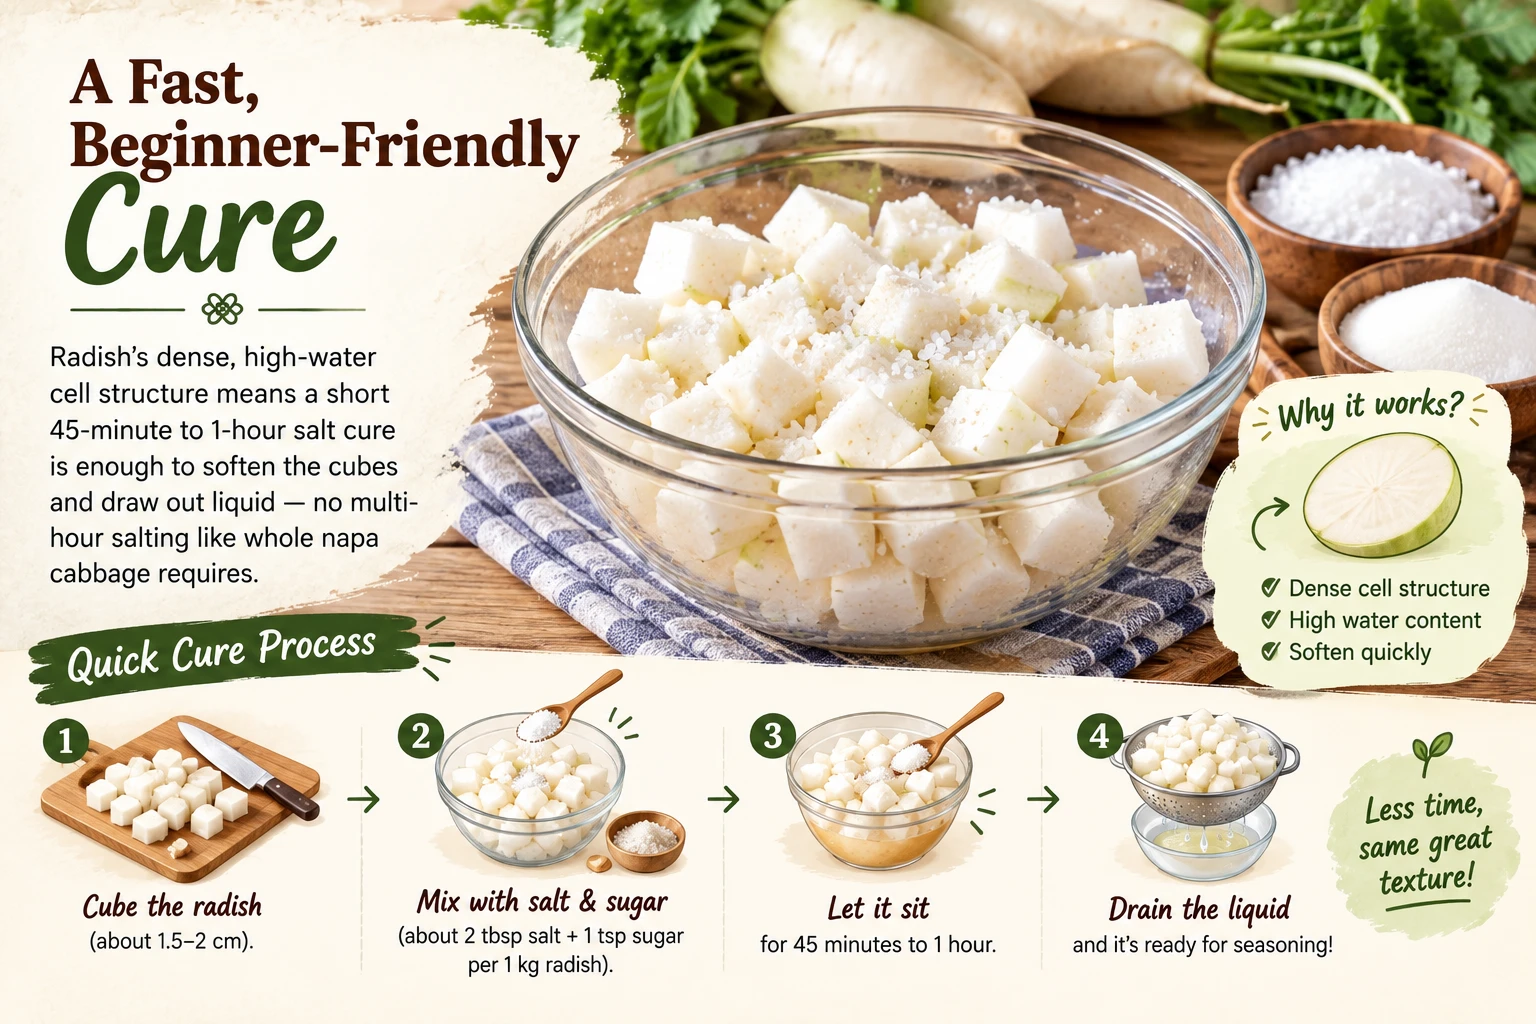
Radish’s dense, high-water cell structure means a short 45-minute to 1-hour salt cure is enough to soften the cubes and draw out liquid — no multi-hour salting like whole napa cabbage requires.
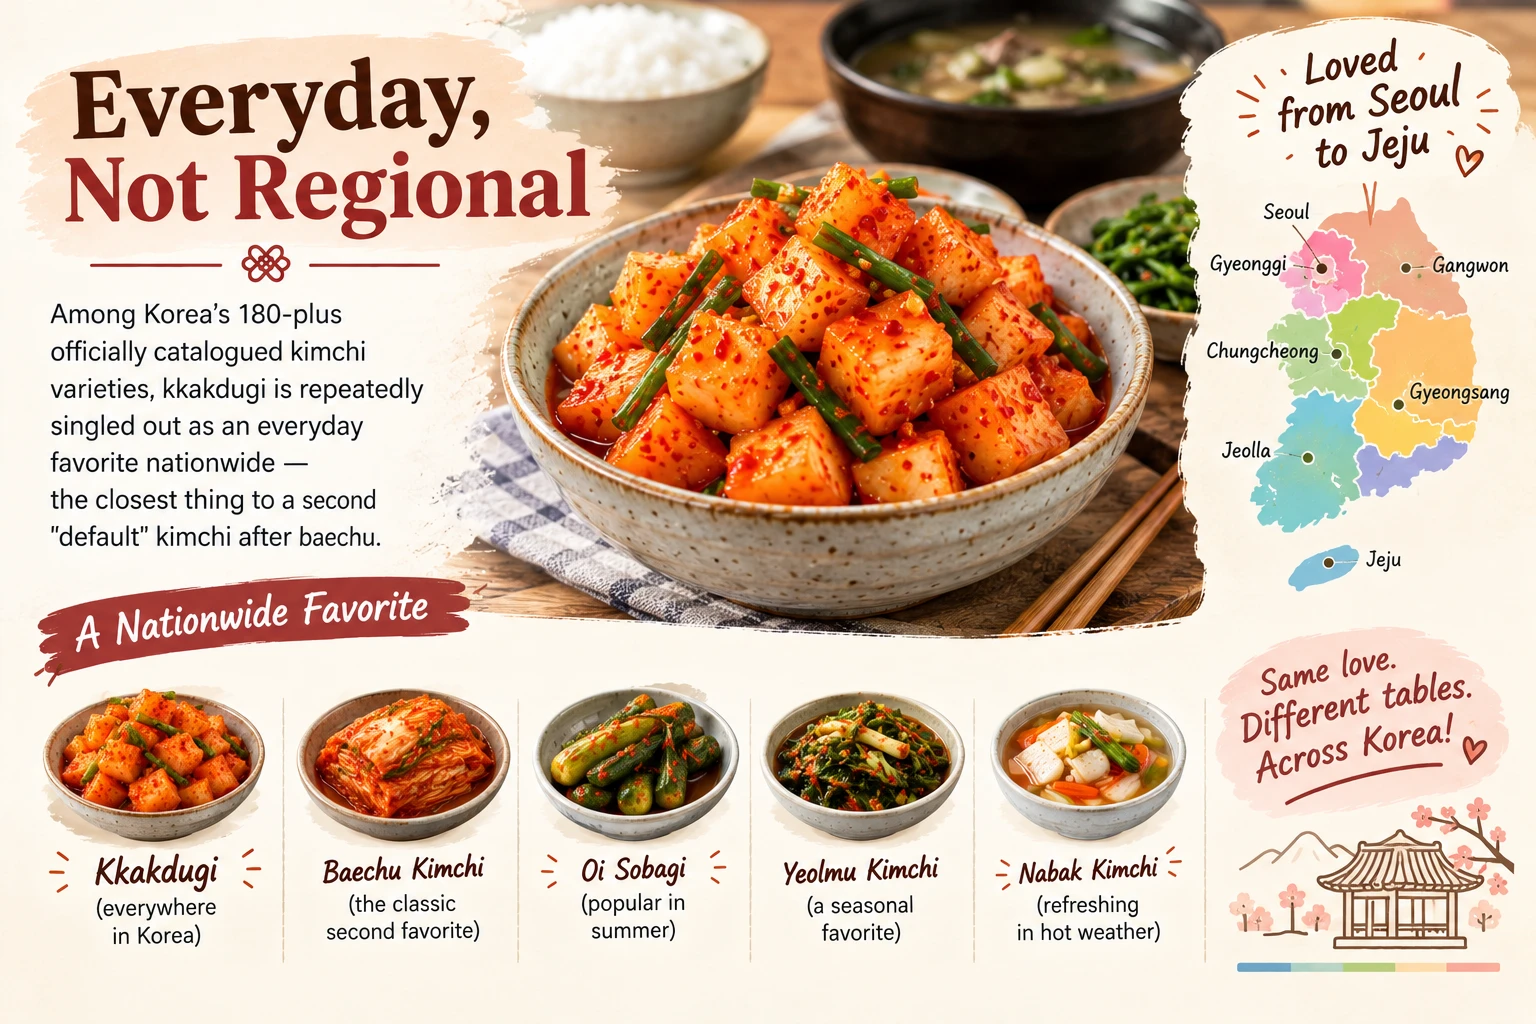
Among Korea’s 180-plus officially catalogued kimchi varieties, kkakdugi is repeatedly singled out as an everyday favorite nationwide — the closest thing to a second “default” kimchi after baechu.
Freshly Cured vs. Fully Fermented — Compared
You can eat kkakdugi within a day or two of making it, or let it develop the deeper sour tang most people associate with kimchi — both are completely normal.
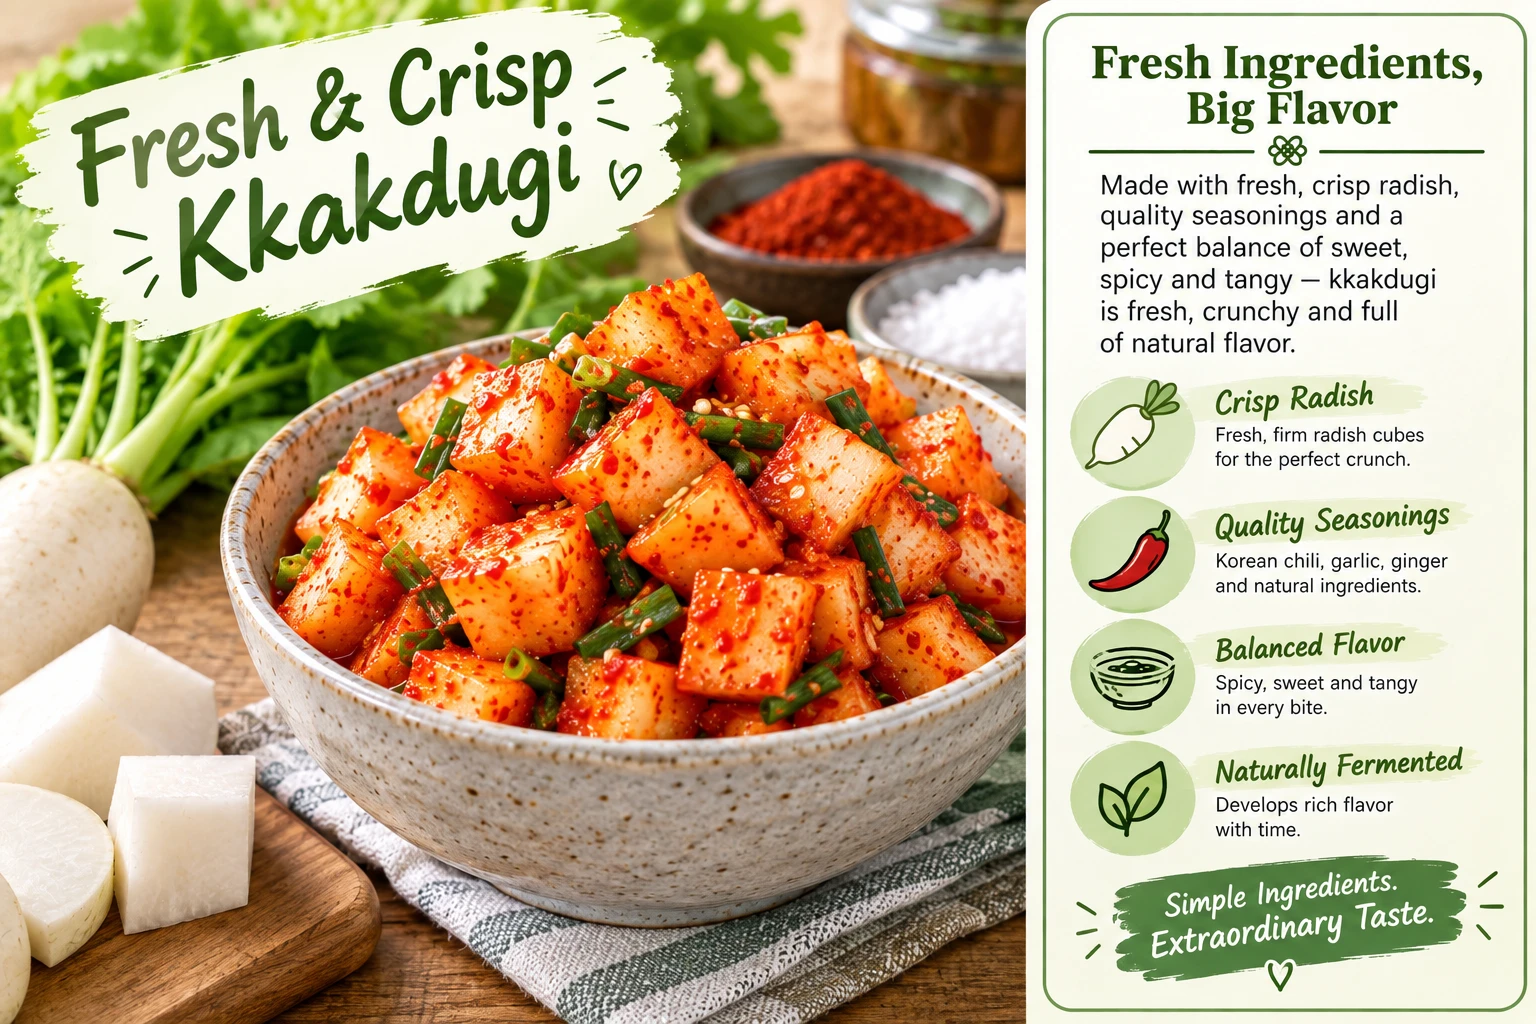
Crunchy, sweet, and mildly spicy — the radish’s own flavor still comes through clearly. A great introduction if you’ve never had kkakdugi before.
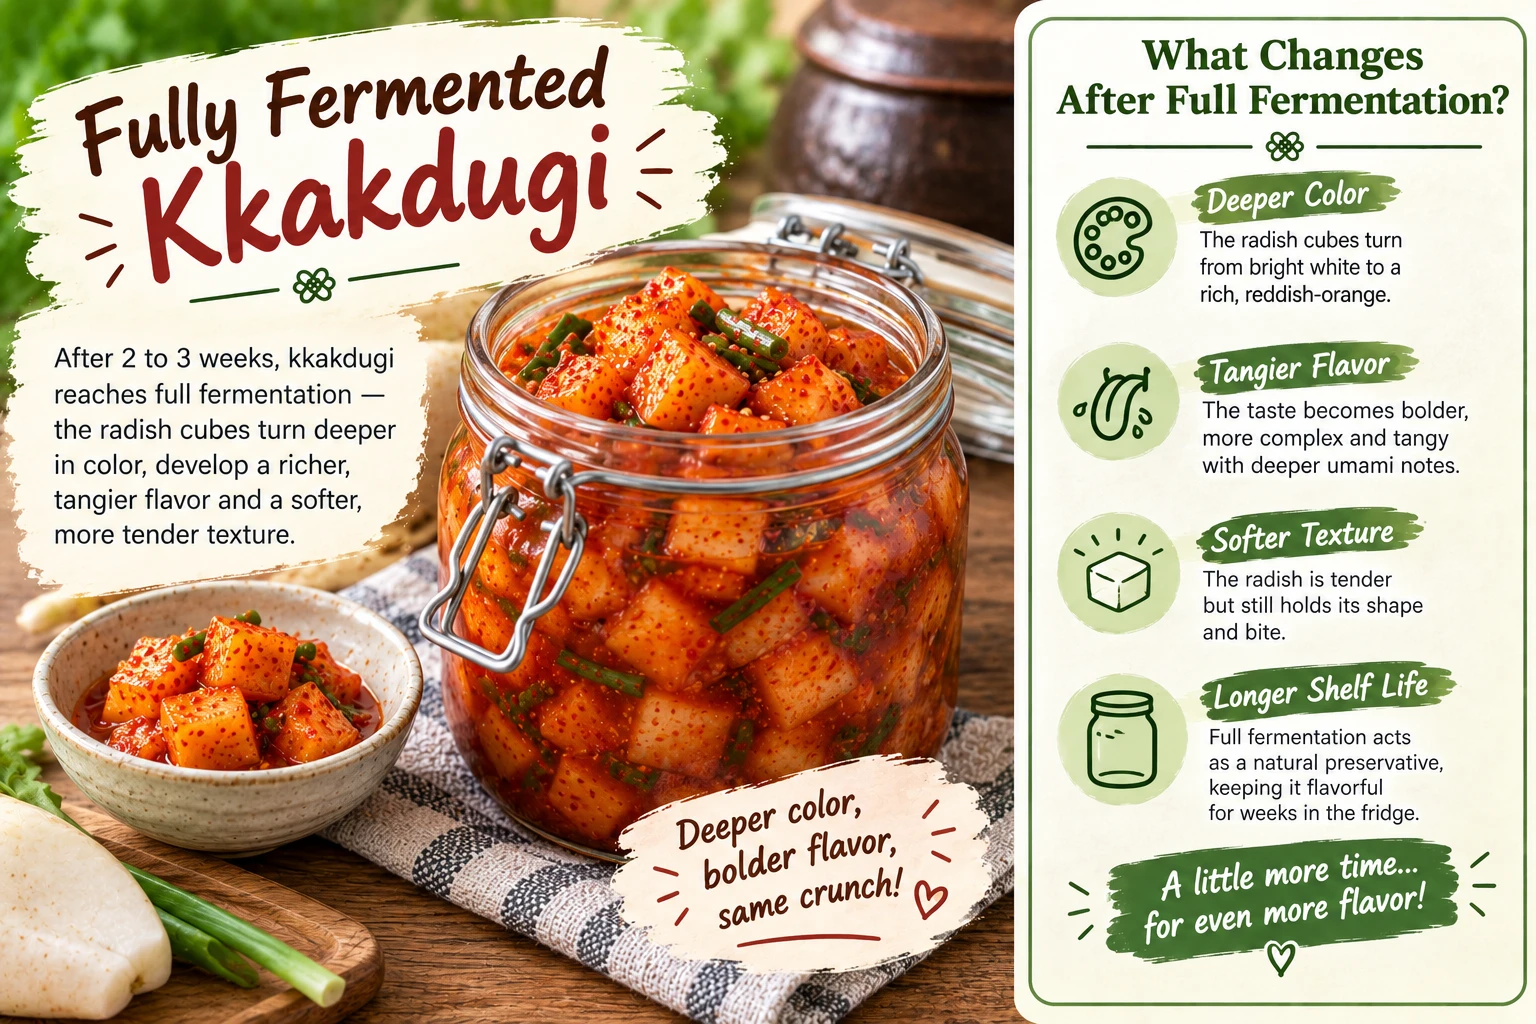
The classic kkakdugi experience — deeper, tangier, with the radish still holding its signature crunch. This is the version most commonly served alongside soup.
Style Comparison at a Glance
| Style | Texture | Flavor | Best For |
|---|---|---|---|
| Freshly Cured | Crisp, firm cubes | Sweet, mild heat, clean radish flavor | Tasting the radish clearly, quick side dish |
| Fully Fermented | Crisp but tangier, slightly softened | Sour, deep, balanced heat | The classic soup-side kkakdugi experience |
Key Terms Explained
How Difficult Is This Recipe?
One of the easiest kimchi types to start with — a short salt cure, basic knife work to cube the radish, and a straightforward seasoning paste.
Ingredients + Scaler
Korean radish is the one ingredient worth sourcing thoughtfully — everything else is standard kimchi pantry staples.
Amounts scale automatically with the servings control above.
Common Substitutions
| Ingredient | Substitute | Notes |
|---|---|---|
| Fish sauce & saeujeot | Soy sauce, omit shrimp | Makes it fully vegan |
| Korean radish (mu) | Daikon | Slightly more watery and mild — still workable |
| Reserved radish liquid | Water or anchovy kelp stock | See our Anchovy Kelp Stock Guide if you’d like extra savory depth |
| Salted shrimp (saeujeot) | Extra fish sauce, or omit | Slightly less savory complexity, still a proper kkakdugi |
🛒 Shop This Recipe
A few things that make this specific recipe easier — coarse gochugaru sized right for kimchi, a proper airtight kimchi container, and gloves if you’d rather not hand-dye your fingers red.
| Item | Why You’d Want It Here | |
|---|---|---|
| Coarse Gochugaru (Korean Red Pepper Flakes) | Coarse-cut flakes made for kimchi and kkakdugi specifically — the texture this recipe’s paste is built around. | View on Amazon → |
| LockandLock Airtight Kimchi Container | A press-plate kimchi container keeps the radish submerged and sealed through the full 1–2 day room-temp start and the refrigerated ferment. | View on Amazon → |
| Masontops Mason Jar Fermentation Kit | If you’d rather ferment in mason jars you already own — airlock lids let gas escape without daily burping. | View on Amazon → |
| Food-Safe Disposable Gloves | For tossing the radish in the paste (Step 4) without staining your hands red for the rest of the day. | View on Amazon → |
| Farberware Large Cutting Board | A dedicated board for cubing the radish — dishwasher-safe, so it doesn’t hold onto gochugaru color or smell. | View on Amazon → |
As an Amazon Associate, KimchiGuide earns from qualifying purchases. Links go to Amazon.com; prices and availability may change.
How to Make Kkakdugi — 5 Steps
One salt cure, one paste, one toss. The only step that needs advance planning is the first one.
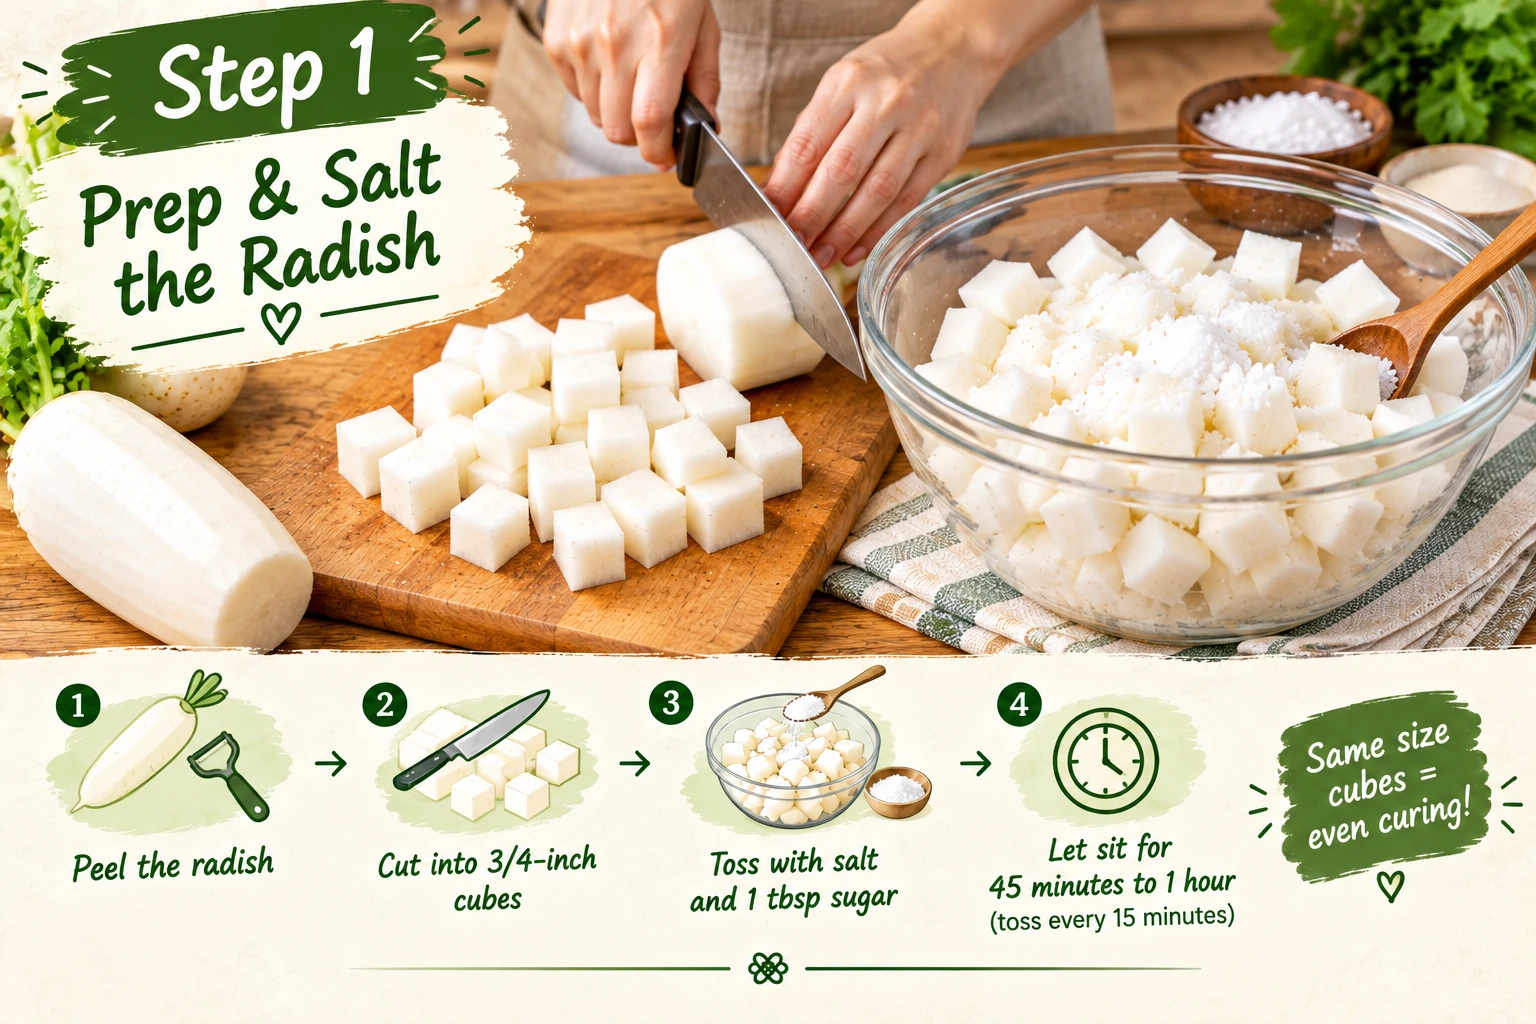
Peel the radish and cut it into roughly 3/4-inch cubes, keeping the pieces close in size so they cure evenly. Toss with the salt and 1 tablespoon of sugar in a large bowl and let sit for 45 minutes to 1 hour, tossing every 15 minutes.
You’ll know it’s ready when the cubes have released a noticeable amount of liquid and look slightly translucent at the edges — a much shorter process than the multi-hour salting whole napa cabbage needs.
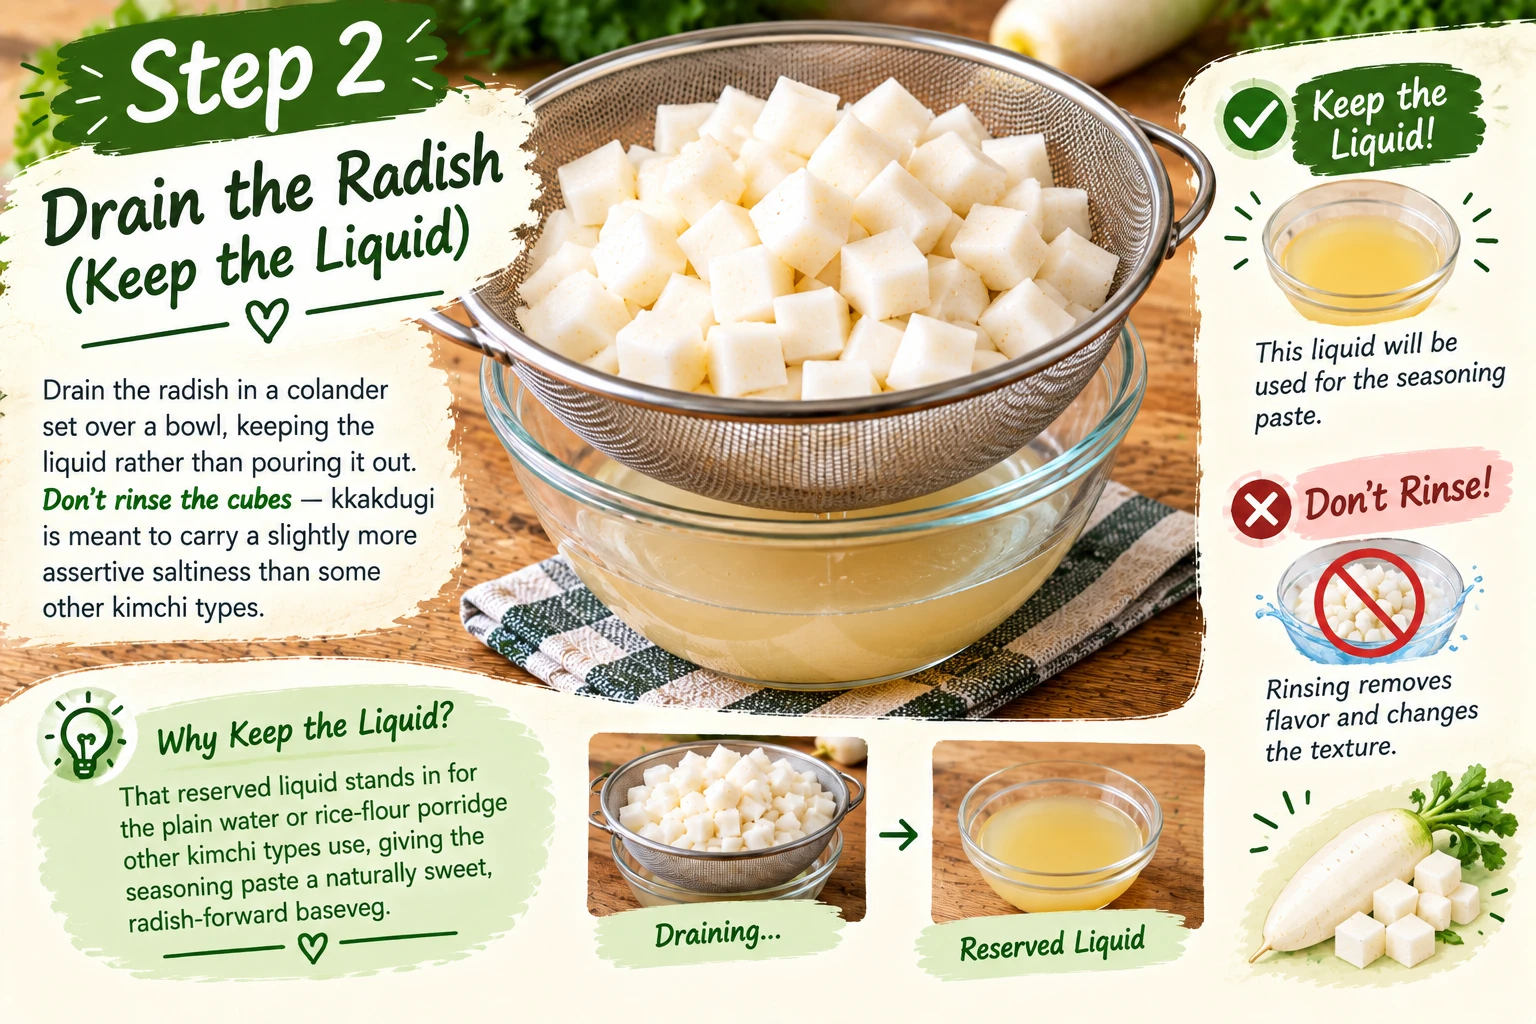
Drain the radish in a colander set over a bowl, keeping the liquid rather than pouring it out. Don’t rinse the cubes — kkakdugi is meant to carry a slightly more assertive saltiness than some other kimchi types.
That reserved liquid stands in for the plain water or rice-flour porridge other kimchi types use, giving the seasoning paste a naturally sweet, radish-forward base.
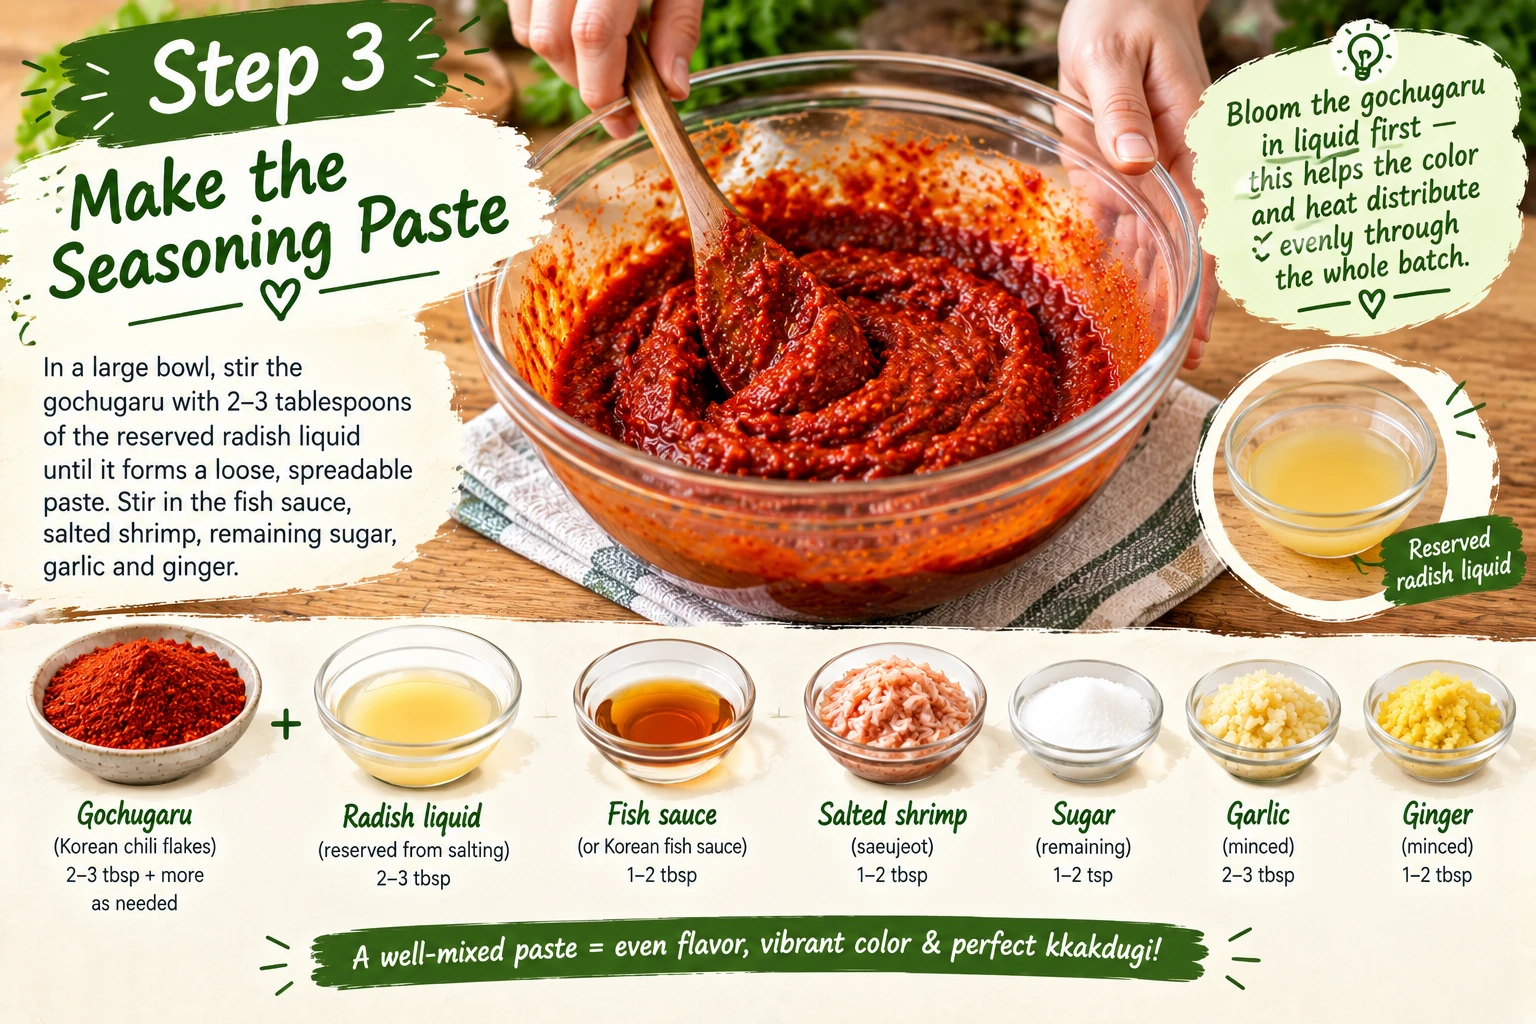
In a large bowl, stir the gochugaru with 2–3 tablespoons of the reserved radish liquid until it forms a loose, spreadable paste. Stir in the fish sauce, salted shrimp, remaining sugar, garlic, and ginger.
Blooming the gochugaru in liquid first — rather than adding it dry straight onto the radish — helps the color and heat distribute evenly through the whole batch.
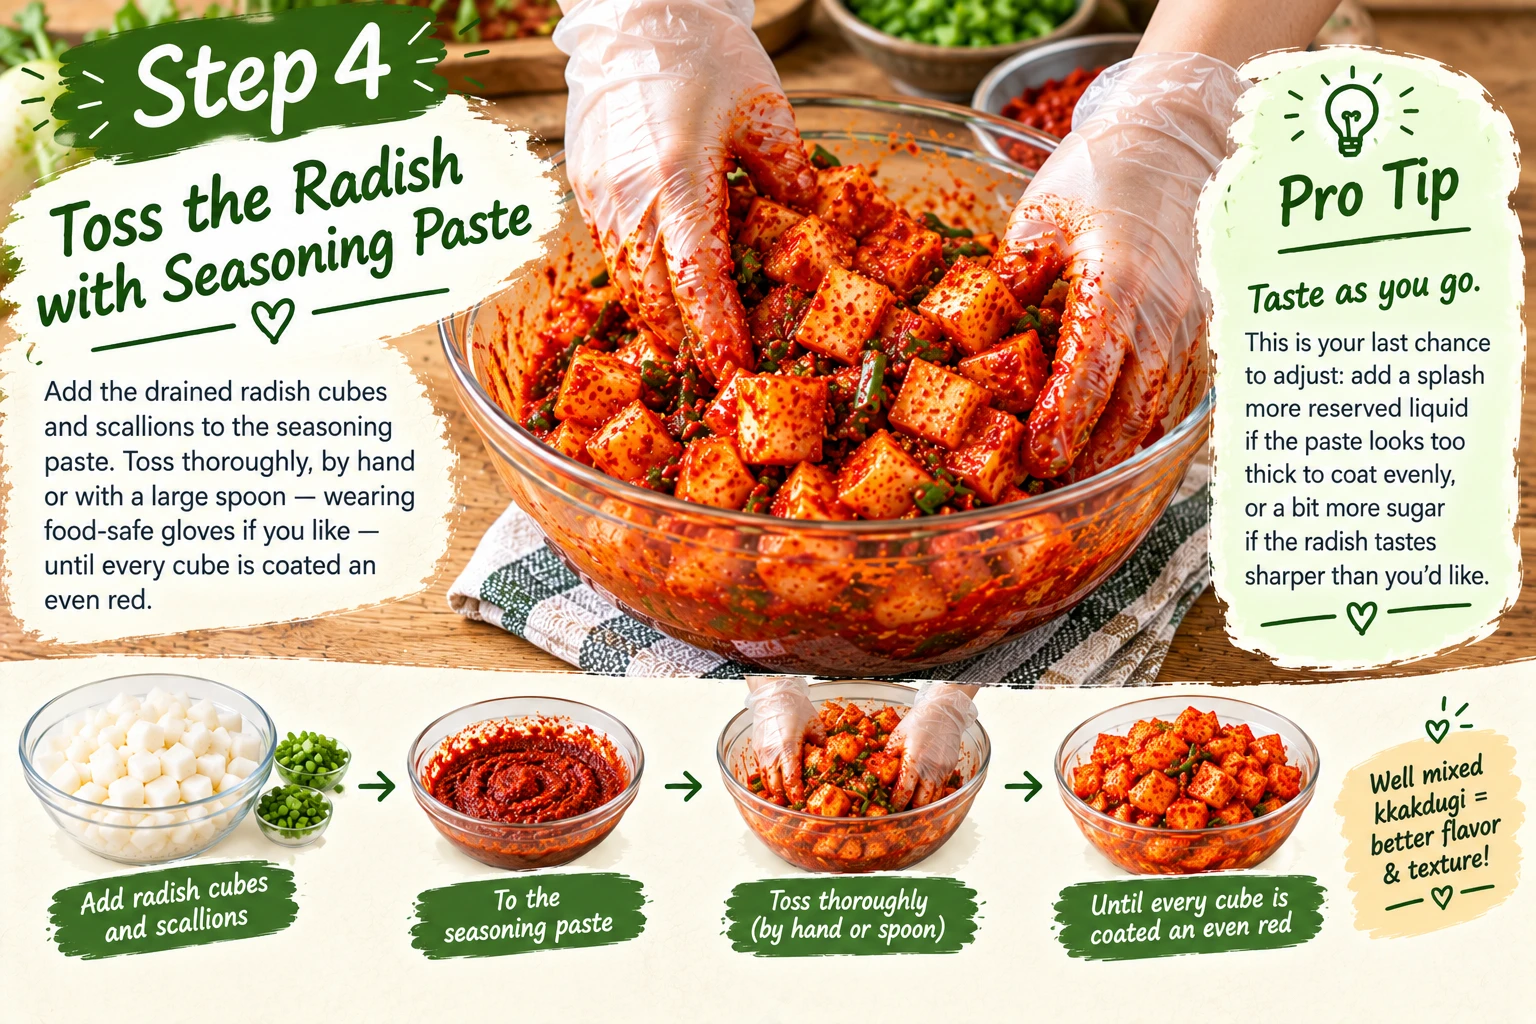
Add the drained radish cubes and scallions to the seasoning paste. Toss thoroughly, by hand or with a large spoon — wearing food-safe gloves if you like — until every cube is coated an even red.
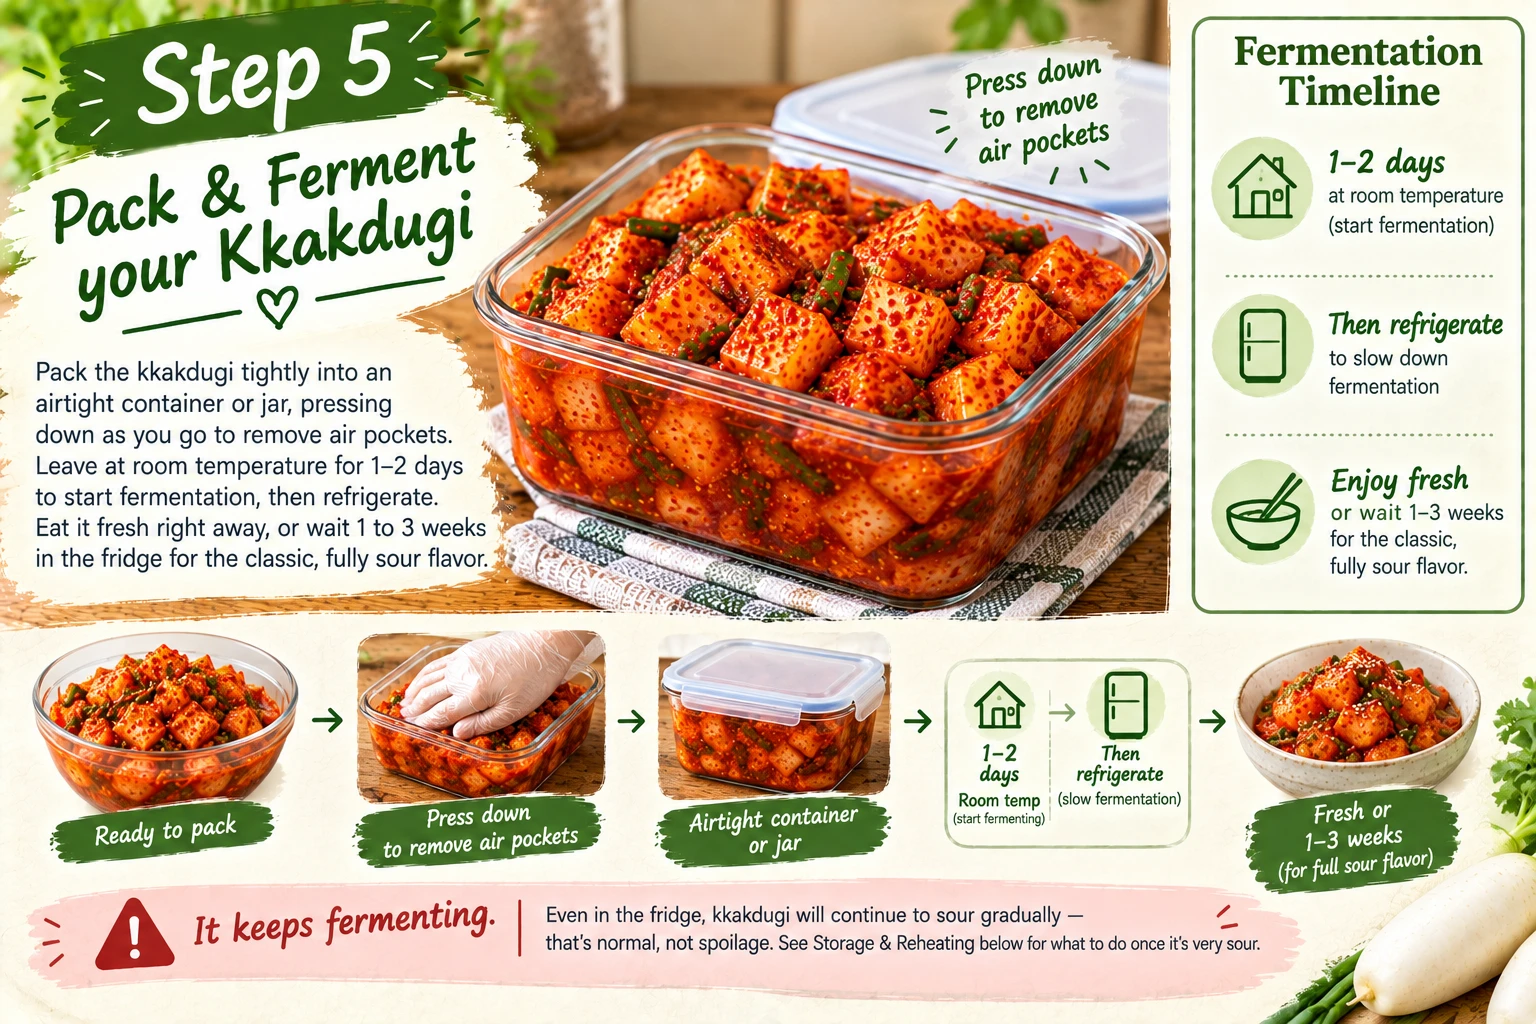
Pack the kkakdugi tightly into an airtight container or jar, pressing down as you go to remove air pockets. Leave at room temperature for 1–2 days to start fermentation, then refrigerate. Eat it fresh right away, or wait 1 to 3 weeks in the fridge for the classic, fully sour flavor.
Kkakdugi — Recipe Card
깍두기 · Fresh or Fully Fermented · 25 Minutes Active. Save this to Pinterest, print it, or copy it straight to your notes app.
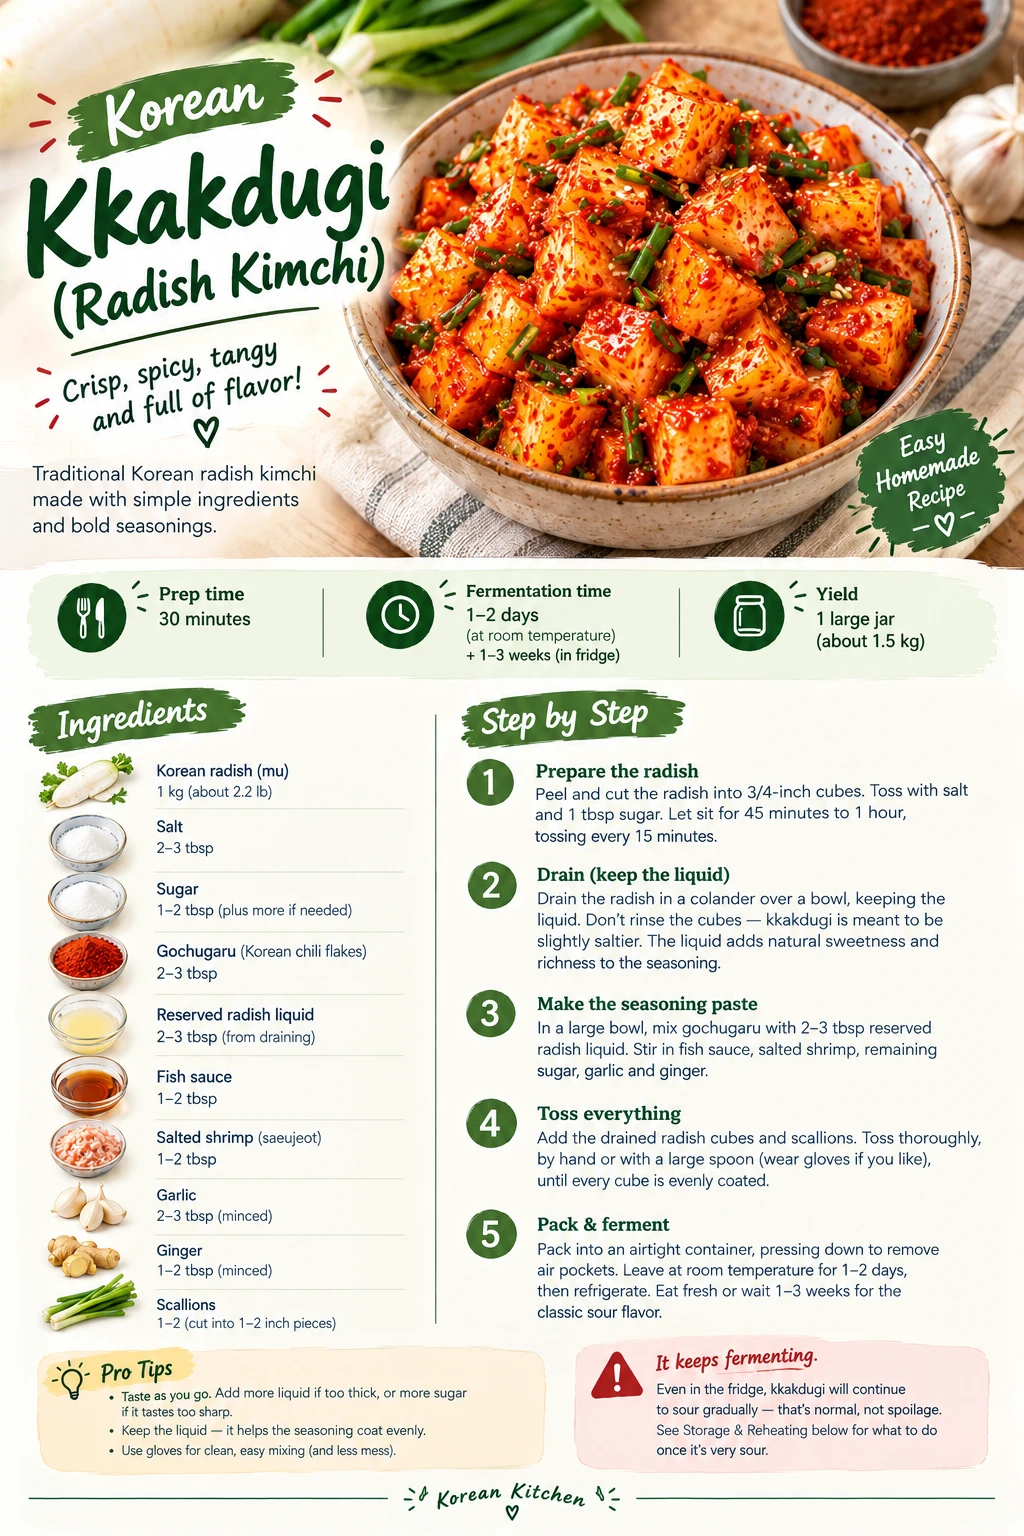
- 900g Korean radish (mu), cut into 3/4-inch cubes
- 2 tbsp coarse salt
- 1 tbsp sugar (salt cure)
- 1/3 cup gochugaru
- 2 tbsp fish sauce (or soy sauce)
- 1 tbsp salted shrimp, minced (optional)
- 1 tbsp sugar (seasoning)
- 4 cloves garlic, minced
- 1 tsp fresh ginger, minced
- 3 scallions, cut into 1-inch pieces
- 2–3 tbsp reserved radish liquid
- 1Cube radish, toss with salt and sugar, rest 45 min–1 hour.
- 2Drain over a bowl, keeping the liquid. Do not rinse.
- 3Bloom gochugaru in reserved liquid; stir in fish sauce, shrimp, sugar, garlic, ginger.
- 4Toss radish and scallions in the paste until evenly coated.
- 5Pack tightly. Rest 1–2 days at room temp, then refrigerate 1–3 weeks.
Per serving (6 servings total). Reviewed by Dr. Sarah Mitchell RD, PhD · Updated September 2, 2026
Ingredient Notes — What Each One Does and Why
A quick amount list only tells you how much. Here’s what each ingredient is actually doing, and where it’s safe to swap.
Where Kkakdugi Fits in the Kimchi Family
Kkakdugi is one of 18+ varieties covered on our pillar guide — here’s how it compares to two other non-cabbage relatives.


Pairing Guide — Kkakdugi
Its crunch and sweetness are built to stand up to rich, slow-simmered soups — this is where kkakdugi earns its reputation.


Storage, Shelf Life & Fixes
Quick summary: refrigerate in an airtight container, 1–2 days at room temp to start fermenting, then 1–3 weeks in the fridge for the classic sour flavor. For the full breakdown — exact shelf life, what to do if it’s too salty, and how to tell spoiled from just-sour — see the dedicated guide below.
How Kkakdugi Compares to Other Types
Figures below are drawn from our Types of Kimchi nutrition table, approximate per 100g serving.
| Variety | Calories | Sodium | Probiotic Load | Notes |
|---|---|---|---|---|
| Baechu Kimchi | ~15–23 kcal | ~450–750mg | High (long-fermented) | The most-studied variety in kimchi nutrition research. |
| Gat Kimchi | ~18–24 kcal | ~440–520mg | High once fully fermented (~2 weeks) | Regionally tied to Dolsan Island — see our full guide. |
| Dongchimi | ~8–14 kcal | Lowest of the common types | Moderate | Mostly water-based brine, so both figures run low. |
| Kkakdugi ← This page | ~26–32 kcal | ~480–560mg | High once fully fermented (1–3 weeks) | Slightly higher natural sugar content than most types, from the radish plus the salt-cure sugar. |
Looking to work more kimchi into your regular meals? See our 7-Day Kimchi Diet Plan or the more gradual 30-Day Kimchi Diet Plan.
What We Tested Before Writing This Guide
The salt cure timing is the one step that can’t be rushed or skipped — everything else (rinse, radish type, vegan swap, exact fermentation length) is a matter of preference, but under-curing the radish is the most common reason home versions come out watery or under-seasoned.
Kkakdugi FAQ — 10 Questions
Crunchy and juicy, with a sweet-savory-spicy balance that comes from the radish’s natural sugar meeting the salt cure and gochugaru. It’s less funky than a well-aged cabbage kimchi at first, and gets tangier the longer it ferments.
Korean radish (mu) is the traditional choice — it’s denser, sweeter, and less watery than daikon. Daikon can be substituted if Korean radish isn’t available, though the texture and flavor will be a little more watery and mild.
The sugar speeds up how quickly the radish releases liquid alongside the salt, and it balances raw radish’s natural bite. It also gives fermentation a little extra to work with once the kkakdugi is packed away.
No — most kkakdugi recipes skip rinsing and just drain the radish, since kkakdugi is meant to have a slightly more assertive saltiness than other kimchi types. The reserved liquid also gets reused in the seasoning paste instead of water.
Yes. Simply omit it, or add a little extra fish sauce in its place. For a fully vegan version, swap the fish sauce for soy sauce as well — see our dedicated vegan kkakdugi guide for exact swapped amounts.
A day or two at room temperature is enough to start fermentation and make it ready to eat fresh. For the deeper, classic sour flavor most people expect from kkakdugi, refrigerate it for 1 to 3 weeks.
Its crunchy texture and bright, slightly sweet bite contrast with rich, milky, slow-simmered soups the way a pickle cuts through fatty food — it’s the traditional side dish for seolleongtang, galbitang, and samgyetang for exactly this reason.
Both use Korean radish, but kkakdugi is cubed, coated in a red gochugaru-based paste, and eaten as a drier side dish. Dongchimi is sliced or left whole and fermented in a clear, unspiced water brine, eaten as a watery kimchi or used as a cold noodle-soup base.
A version made with radish that’s briefly boiled or blanched before seasoning, giving it a softer texture that’s easier to digest. It’s traditionally made for elderly family members or anyone who prefers a gentler texture.
Well-fermented kkakdugi should still be crunchy even when it tastes quite sour. If it turns soft or mushy, changes color unexpectedly, or develops mold or a genuinely rotten smell (different from a sharp, sour ferment smell), discard it.
Was this guide helpful?
Your feedback helps us improve KimchiGuide for everyone.
Explore More
More guides and recipes from KimchiGuide.
See how kkakdugi fits among 18+ other varieties.
Read the guide →A regionally-rooted, non-cabbage kimchi from Dolsan Island.
Get the recipe →The traditional stone pot for serving soups like seolleongtang.
Read the guide →A savory base worth knowing for kimchi and Korean soups alike.
Read the guide →Choosing the right tofu for sundubu jjigae and other stews.
Read the guide →
Ways to use kimchi once it’s fully aged.
Read the guide →In a hurry? See what’s actually worth buying.
Read the guide →Not making it yourself today? Here’s where to find it.
Read the guide →Two of the biggest store-bought brands, compared head to head.
Read the comparison →
What actually changes in flavor, texture and probiotics as kimchi ages.
Read the guide →

Freshly Cured or Fully Fermented — Which Do You Prefer?
Have you tried kkakdugi with seolleongtang, or made your own batch at home? Let us know in the comments.