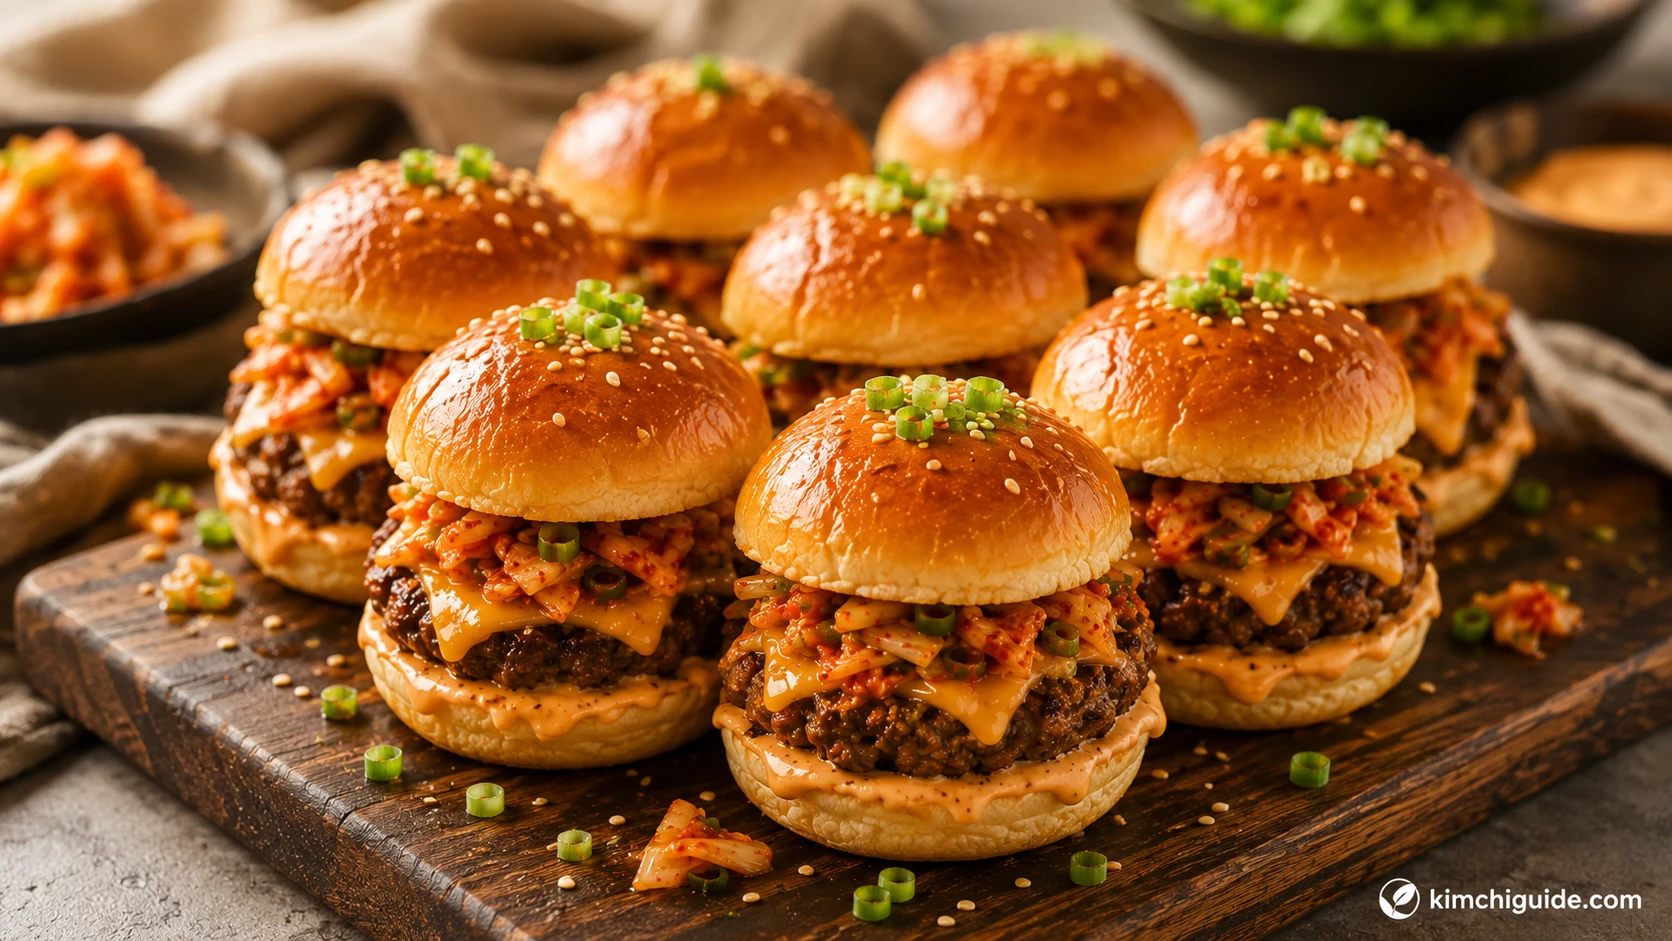
Kimchi Burger Sliders Recipe Bake-and-Cut vs Mini Patties, Tested
No slider recipe we found addresses kimchi at all. We tested the classic one-tray bake-and-cut method against individually formed mini patties, and adapted the cheese-barrier trick specifically for kimchi’s extra moisture — plus exactly how much slaw a 3-bite format can hold.


What Are Kimchi Burger Sliders?
Kimchi burger sliders are a party-format version of the classic kimchi burger — one tray of seasoned beef baked and cut into 8 squares instead of individually formed patties, topped with gochujang mayo and a scaled-down kimchi slaw on mini brioche buns. The three non-negotiables: bake and cut rather than forming individual patties for speed and consistency, use a cheese barrier on the bottom bun to fight kimchi’s moisture, and assemble close to serving time rather than hours ahead.
How to Make Kimchi Burger Sliders
Kimchi burger sliders take 35 minutes: press seasoned beef into a tray, bake, cut into squares, then build gochujang mayo and kimchi slaw while it bakes.
- Season: mix beef with garlic powder, salt, pepper.
- Press: into a parchment-lined tray, about 1cm thick.
- Sauce: whisk Kewpie mayo, gochujang, sesame oil, vinegar.
- Bake: 220°C for 12-15 minutes, cheese on top at the end.
- Cut & assemble: into 8 squares, build immediately.
What Every Slider Recipe Online Misses
We read the established slider recipes — Rada Cutlery, Budget Bytes, Whipped the Blog, Amy Casey Cooks, South Side Kitchen, and Food Network’s slider roundup. Zero results combine kimchi with the format at all. Here is the gap this guide closes.
| Feature / Information | Classic Slider Recipes | Kimchi Burger Recipes | This Guide |
|---|---|---|---|
| Kimchi combined with slider format | ✗ No kimchi angle at all | ✗ No slider version | ✓ First tested combination we found |
| Bake-and-cut vs mini patties tested for a wet topping | △ Uses one method, no kimchi test | ✗ Not applicable | ✓ Both tested against kimchi specifically |
| Cheese-barrier trick adapted for kimchi’s moisture | △ Trick exists for classic fillings | ✗ Not applicable | ✓ Re-tested and adapted for kimchi |
| Kimchi portion sizing for a 3-bite format | ✗ Not applicable | ✗ Not covered | ✓ Tested — 1 tbsp per slider |
| Make-ahead reliability specifically with kimchi | △ Make-ahead assumed to work | ✗ Not applicable | ✓ Tested — assemble close to serving |
| Recipe + FAQPage + ItemList schema together | ✗ None | △ Recipe schema only | ✓ All three, plus Article |
What Makes This Build Different
Four decisions separate a kimchi slider platter that holds up at a party from one that turns soggy on the table.
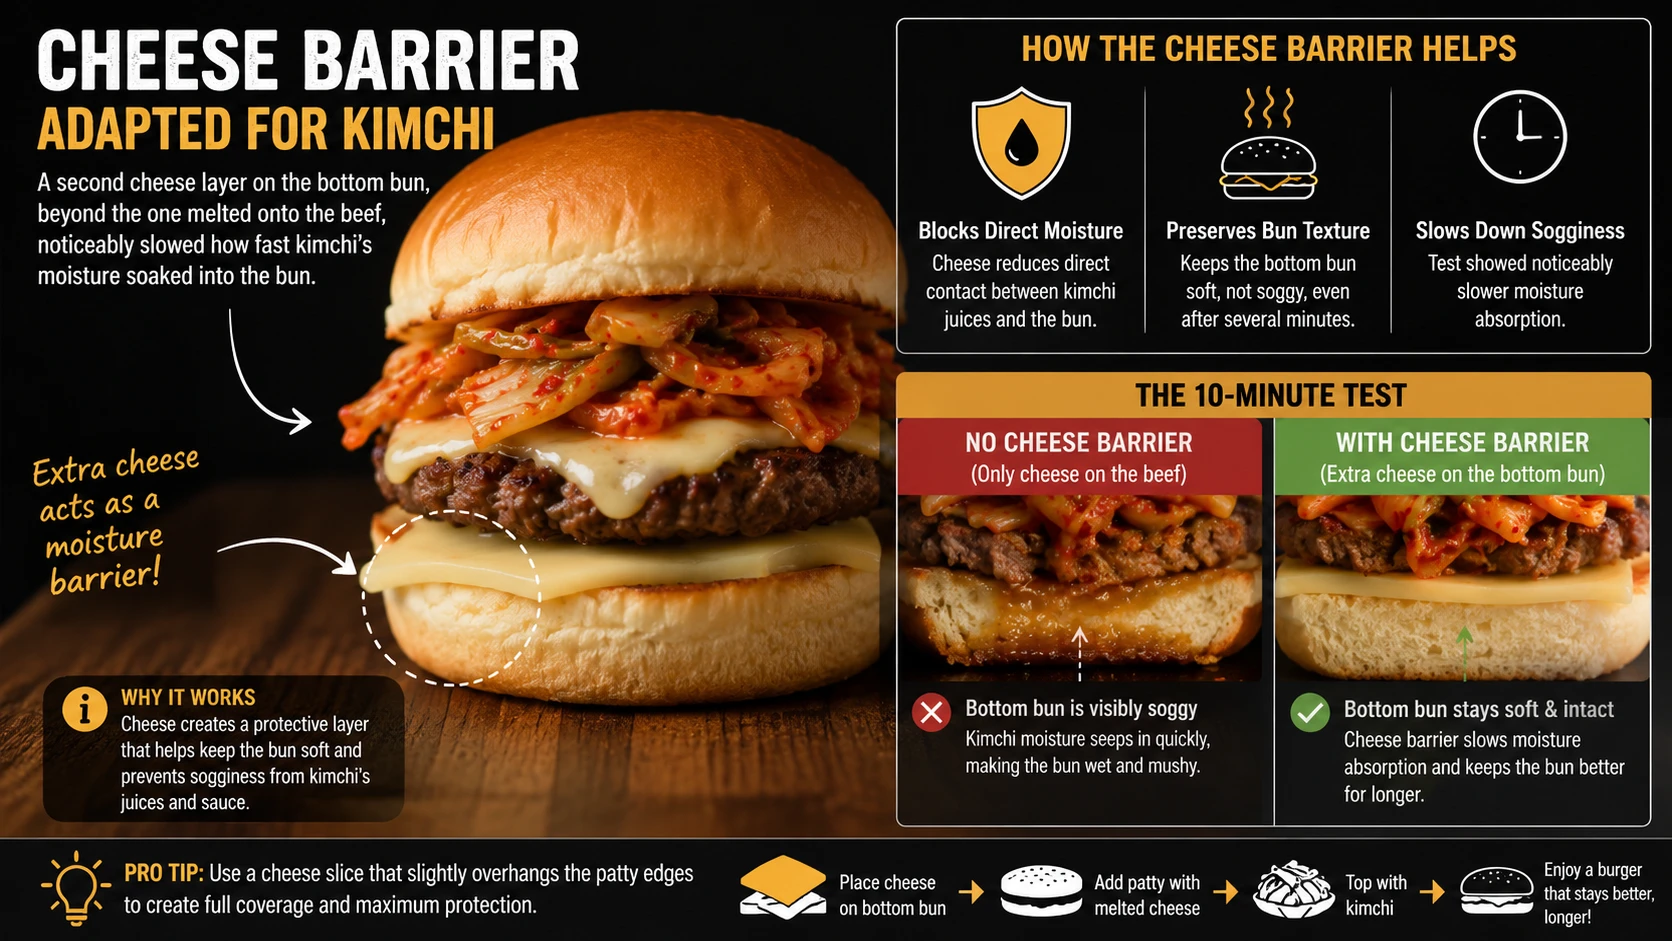
One tray, cut into 8 squares, was dramatically faster than forming and cooking 8 individual mini patties, with no meaningful texture difference once dressed.
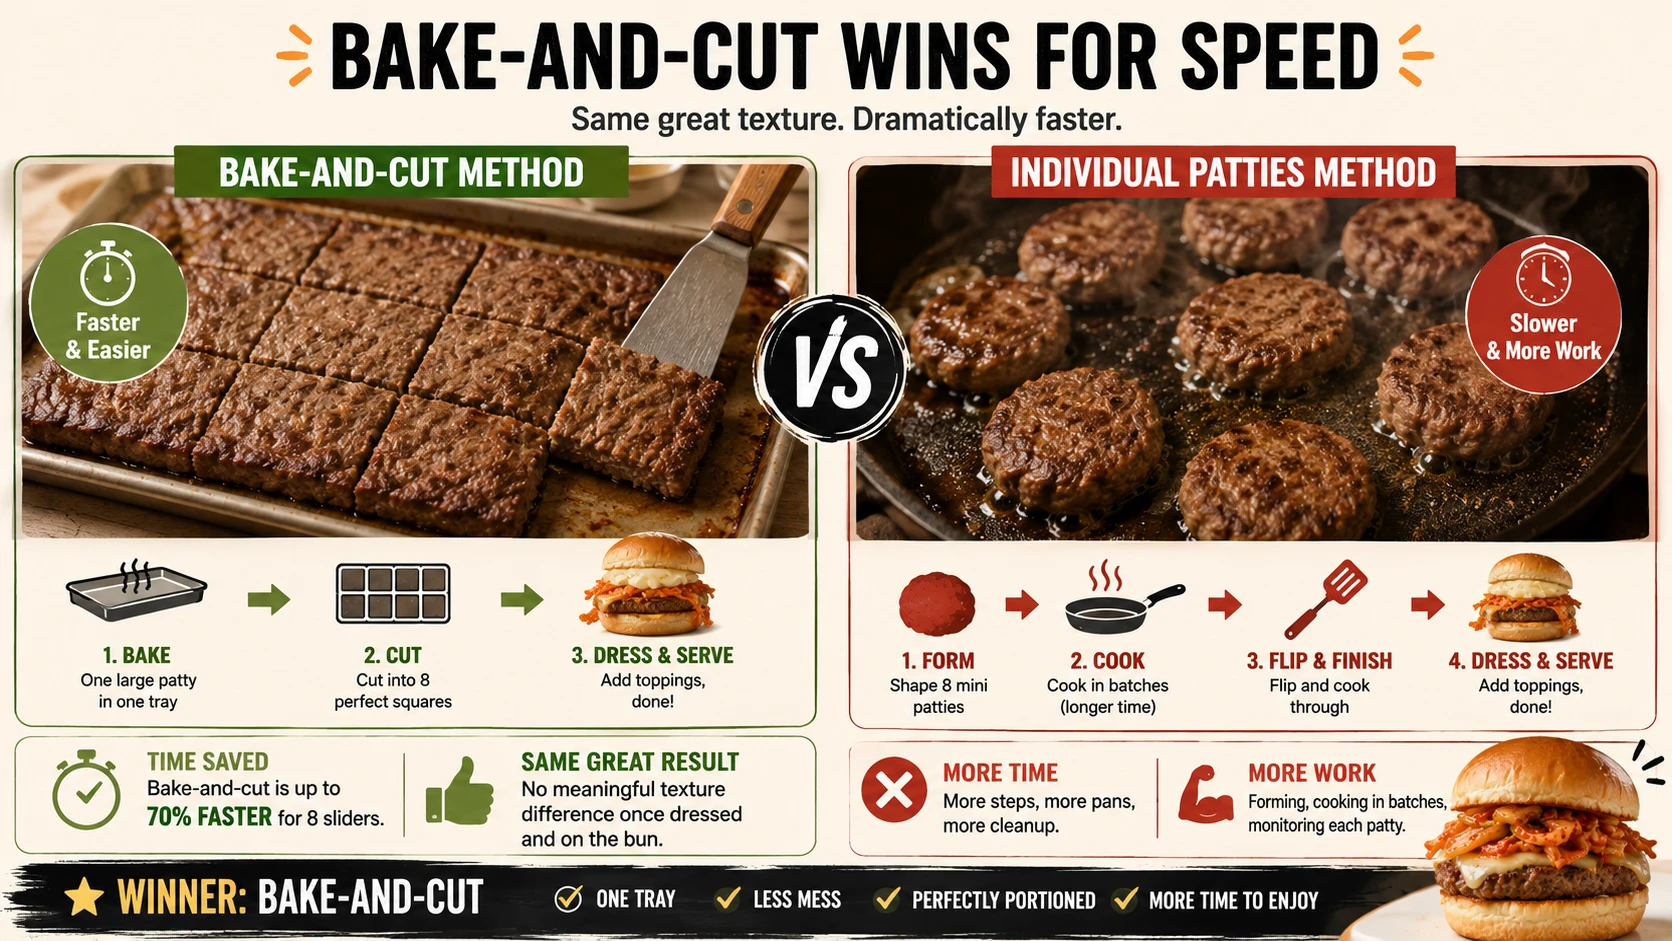
A second cheese layer on the bottom bun, beyond the one melted onto the beef, noticeably slowed how fast kimchi’s moisture soaked into the bun.
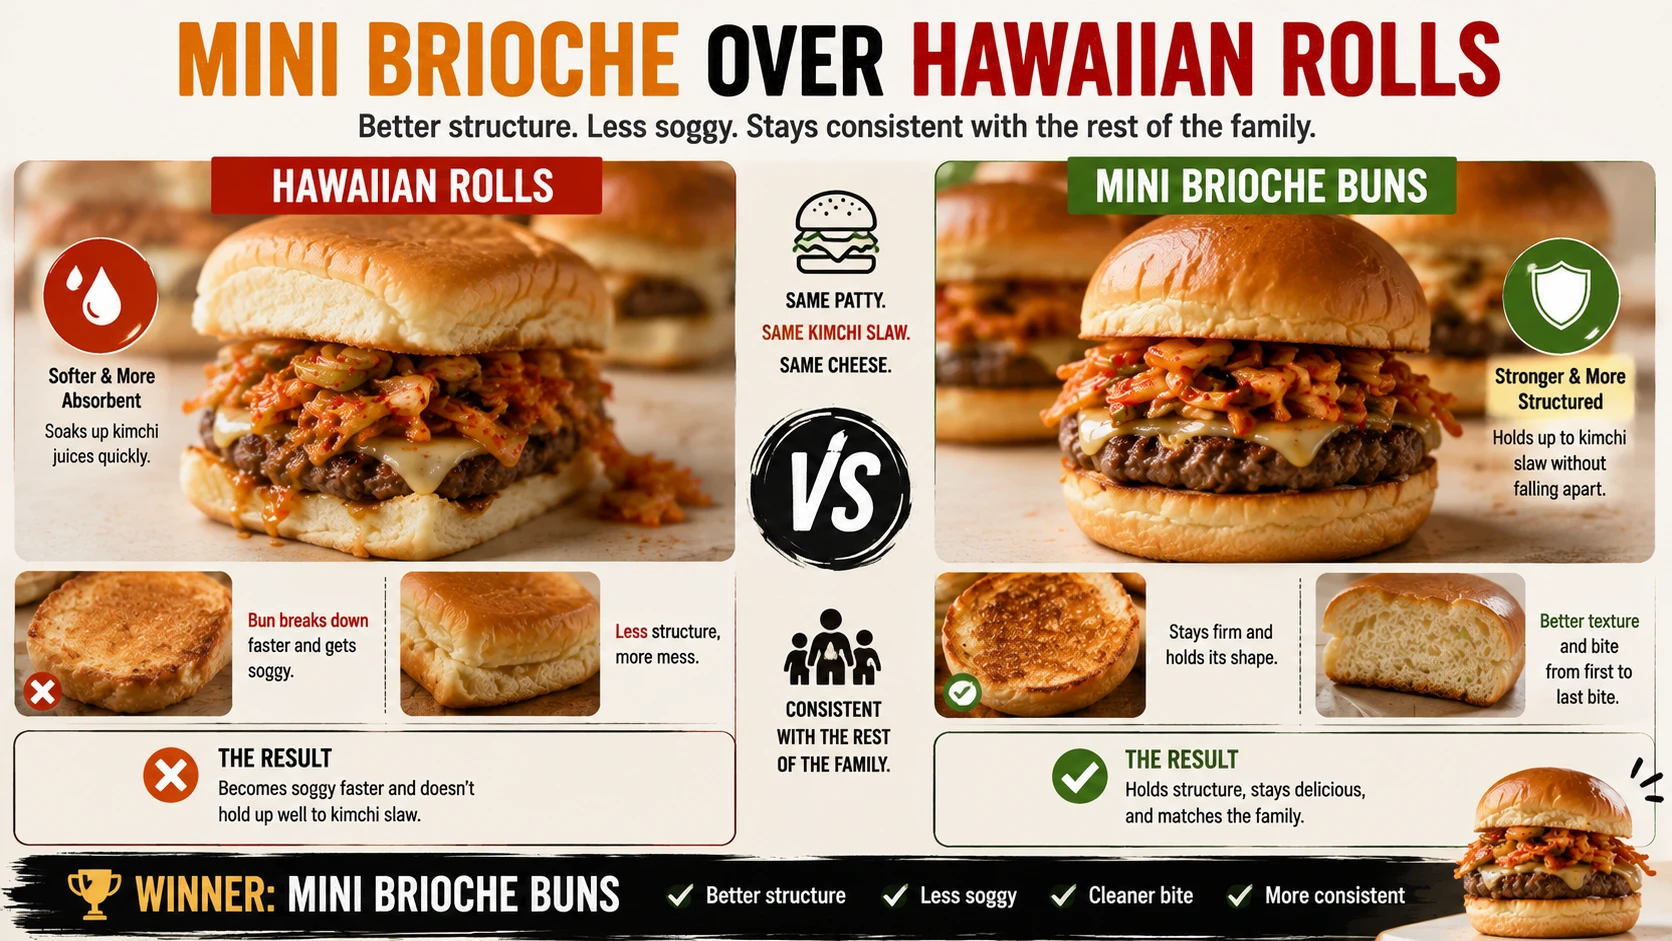
The classic Hawaiian roll is softer and more absorbent — mini brioche held its structure better against the kimchi slaw, consistent with the rest of the family.
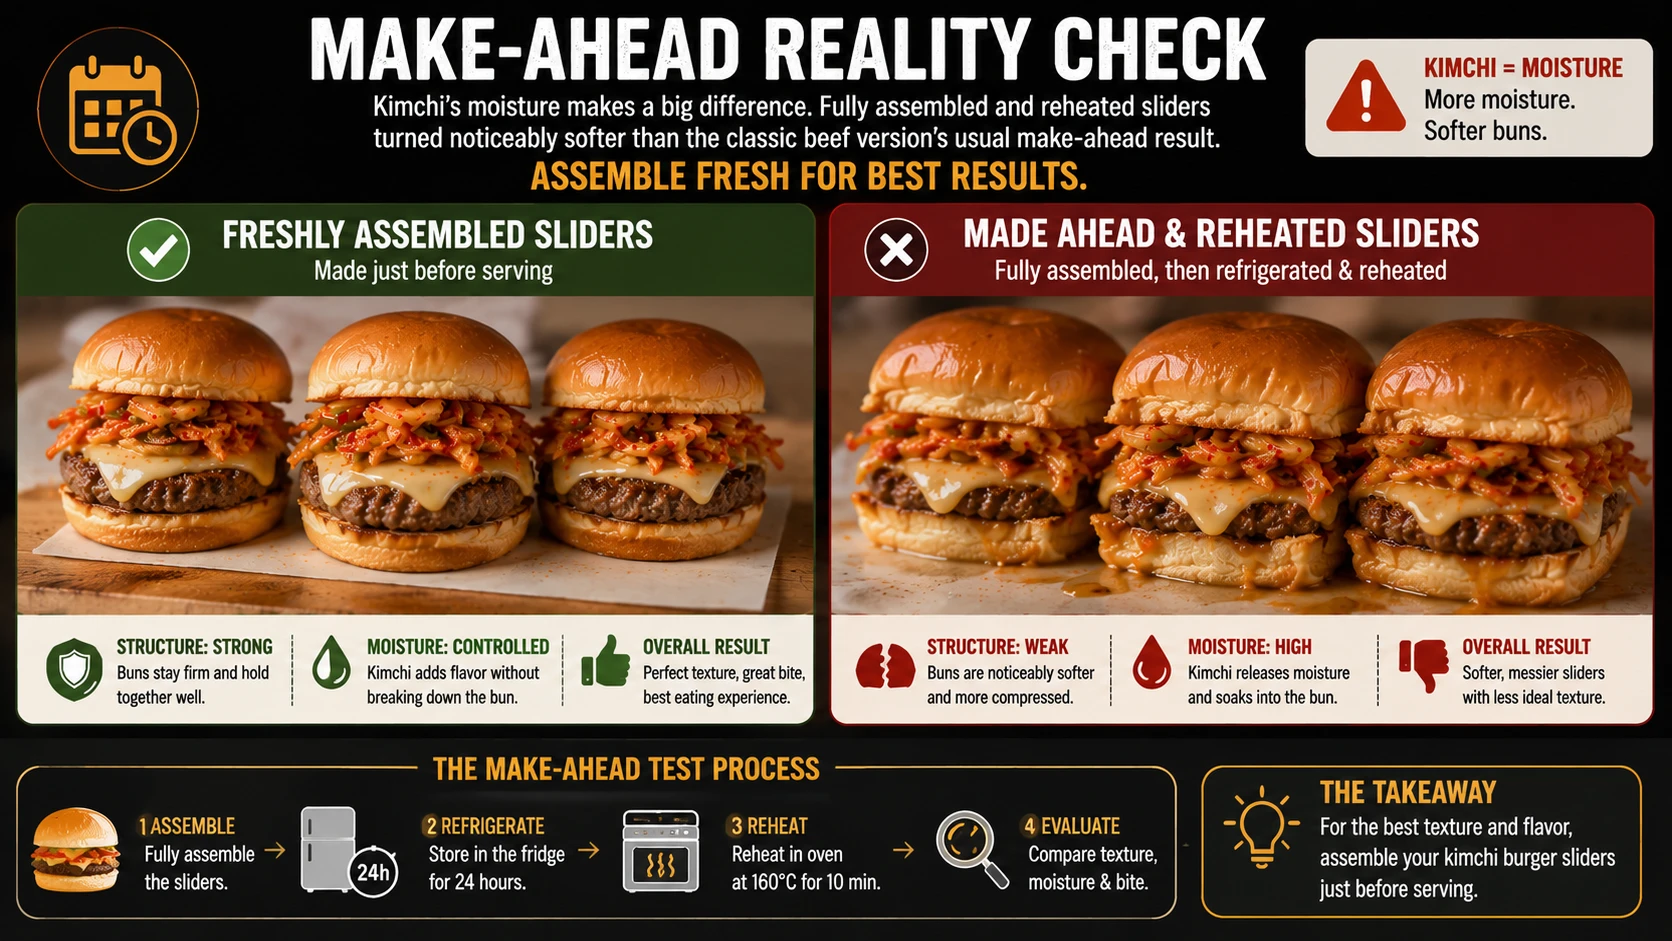
Fully assembled and reheated sliders turned noticeably softer than the classic beef version’s usual make-ahead result — kimchi’s moisture is the reason. Assemble fresh instead.
Key Terms — Language & Food Science Entities
Understanding these terms clarifies why the format-specific choices matter for a party platter build.
How Difficult Are Kimchi Burger Sliders?
This is one of the easiest builds in the whole kimchi burger family — the bake-and-cut method removes almost all of the technique a full-size smash burger needs.
← This Recipe
Which Kimchi Stage to Use — Visual Guide
In a bite this small, kimchi’s acidity has to do a lot of work in a little space — Stage 3 is the correct choice here too.

Tastes like spiced cabbage — in a small slider bite, this barely registers at all.
✗ Not Recommended
Acceptable if ripe kimchi is unavailable, but the small portion size means it barely comes through.
△ Acceptable
Full sour-umami complexity comes through clearly even in a single tablespoon per slider — the only stage strong enough for this small a portion.
★ Correct — the only real choice
Can overpower a slider-sized bite easily. Squeeze hard and use noticeably less than the full 1 tbsp per slider.
△ Usable — squeeze firstIngredients
Substitution Guide — What Works, What Doesn’t
| Ingredient | Best Substitute | Ratio | Gluten-Free | Taste/Texture Impact |
|---|---|---|---|---|
| Mini brioche buns | Hawaiian rolls | 1:1 | △ Check GF bun | Sweeter, softer, noticeably more absorbent against the kimchi slaw. |
| 80/20 beef mince | Ground turkey/chicken + 1 tbsp oil | 1:1 | ✓ | Leaner, needs the added oil to avoid drying out over the longer bake. |
| American cheese | Mild cheddar slice | 1:1 | ✓ | Slightly less smooth melt for the barrier layer. |
| Kewpie mayo | Hellmann’s + ½ tsp MSG + ½ tsp rice vinegar | Per 4 tbsp | ✓ | 60% match. Regular mayo alone reads flatter at party scale. |
| Gochujang | Sriracha (2 parts) + white miso (1 part) | Per 1½ tbsp | △ Check miso | Loses fermented sweetness, still good. |
How to Make Kimchi Burger Sliders
Seven steps built around the bake-and-cut method that makes this build fast enough for an actual party. Step 6, the cutting, is the only step with real technique, and it’s genuinely simple.
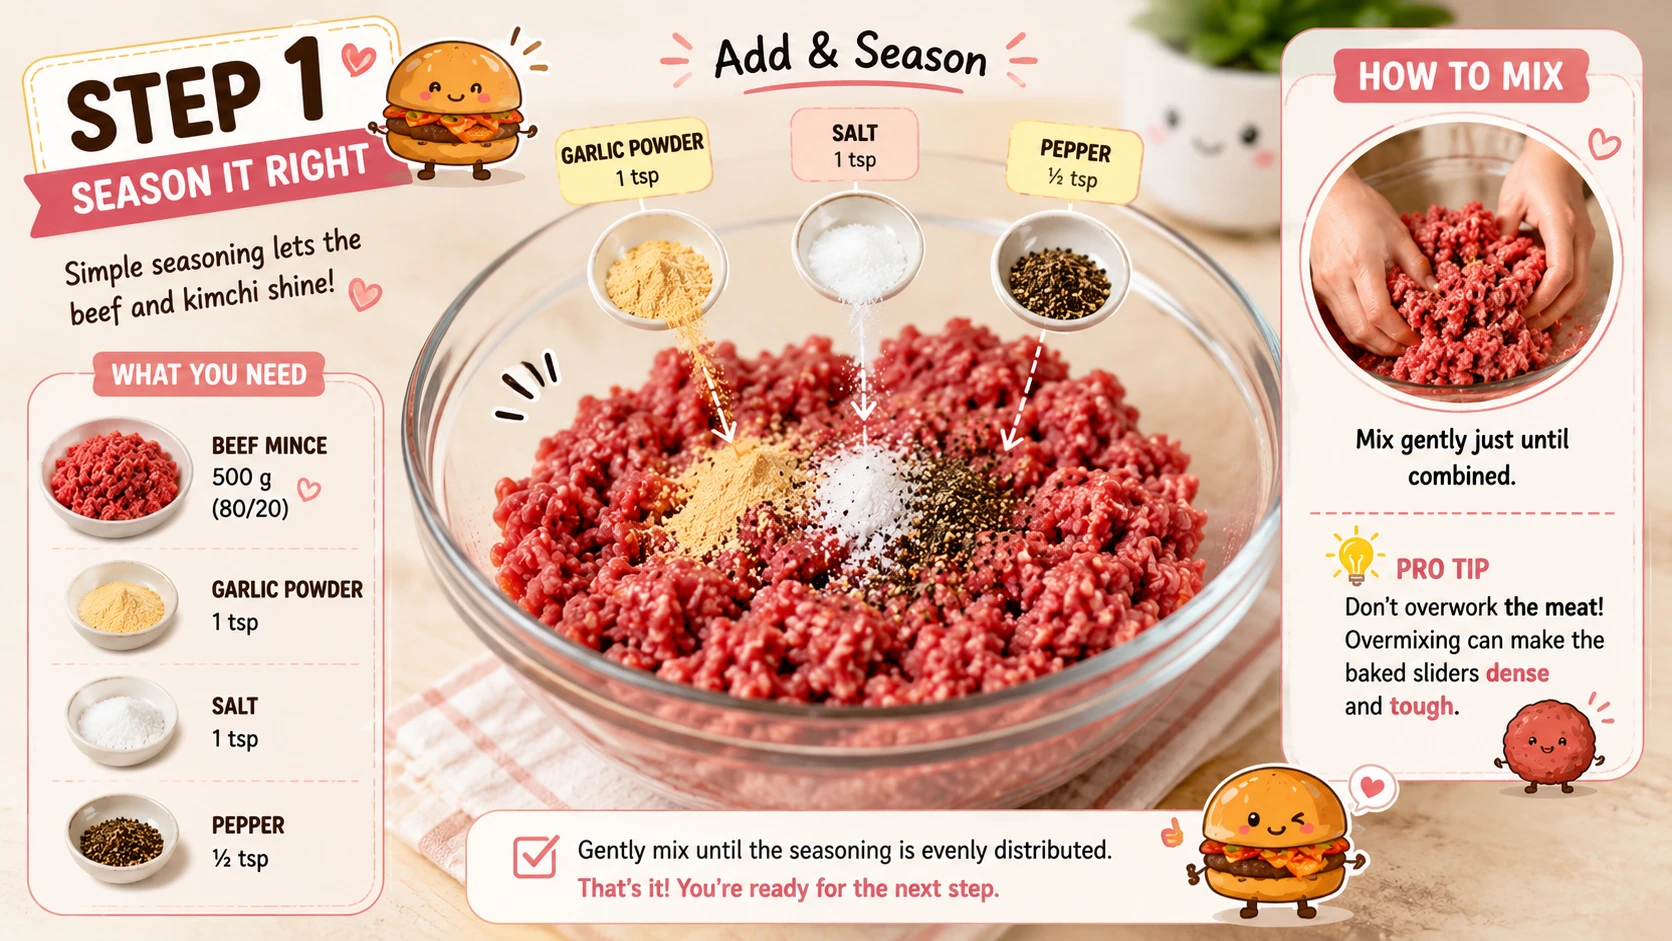
In a bowl, combine the beef mince with garlic powder, salt and pepper. Mix gently just until combined — as with any ground beef preparation, overworking it here will make the baked result denser and tougher than it needs to be.
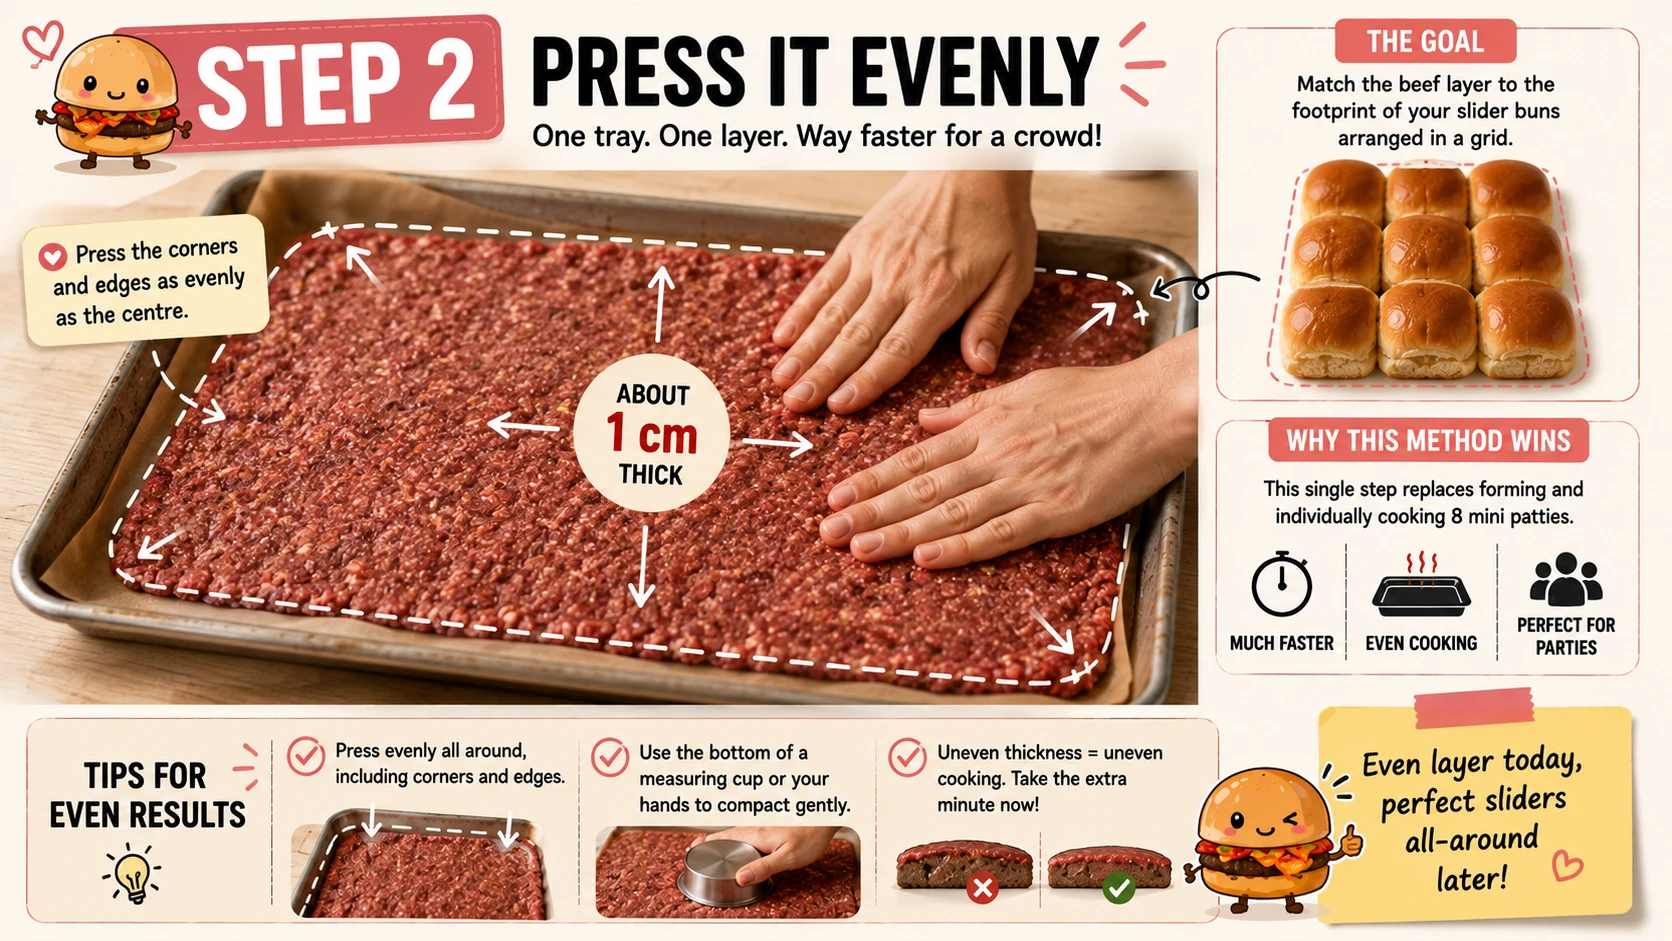
Line a baking tray with parchment paper and press the beef mixture evenly across it, about 1cm thick — roughly matched to the footprint of your slider buns arranged in a grid. This single step replaces forming and individually cooking 8 separate mini patties, which is the main reason this method is so much faster for a party quantity.
Take a moment to press the corners and edges as evenly as the centre. Uneven thickness here is the most common reason some squares end up overcooked while others are still underdone once you get to the cutting step.
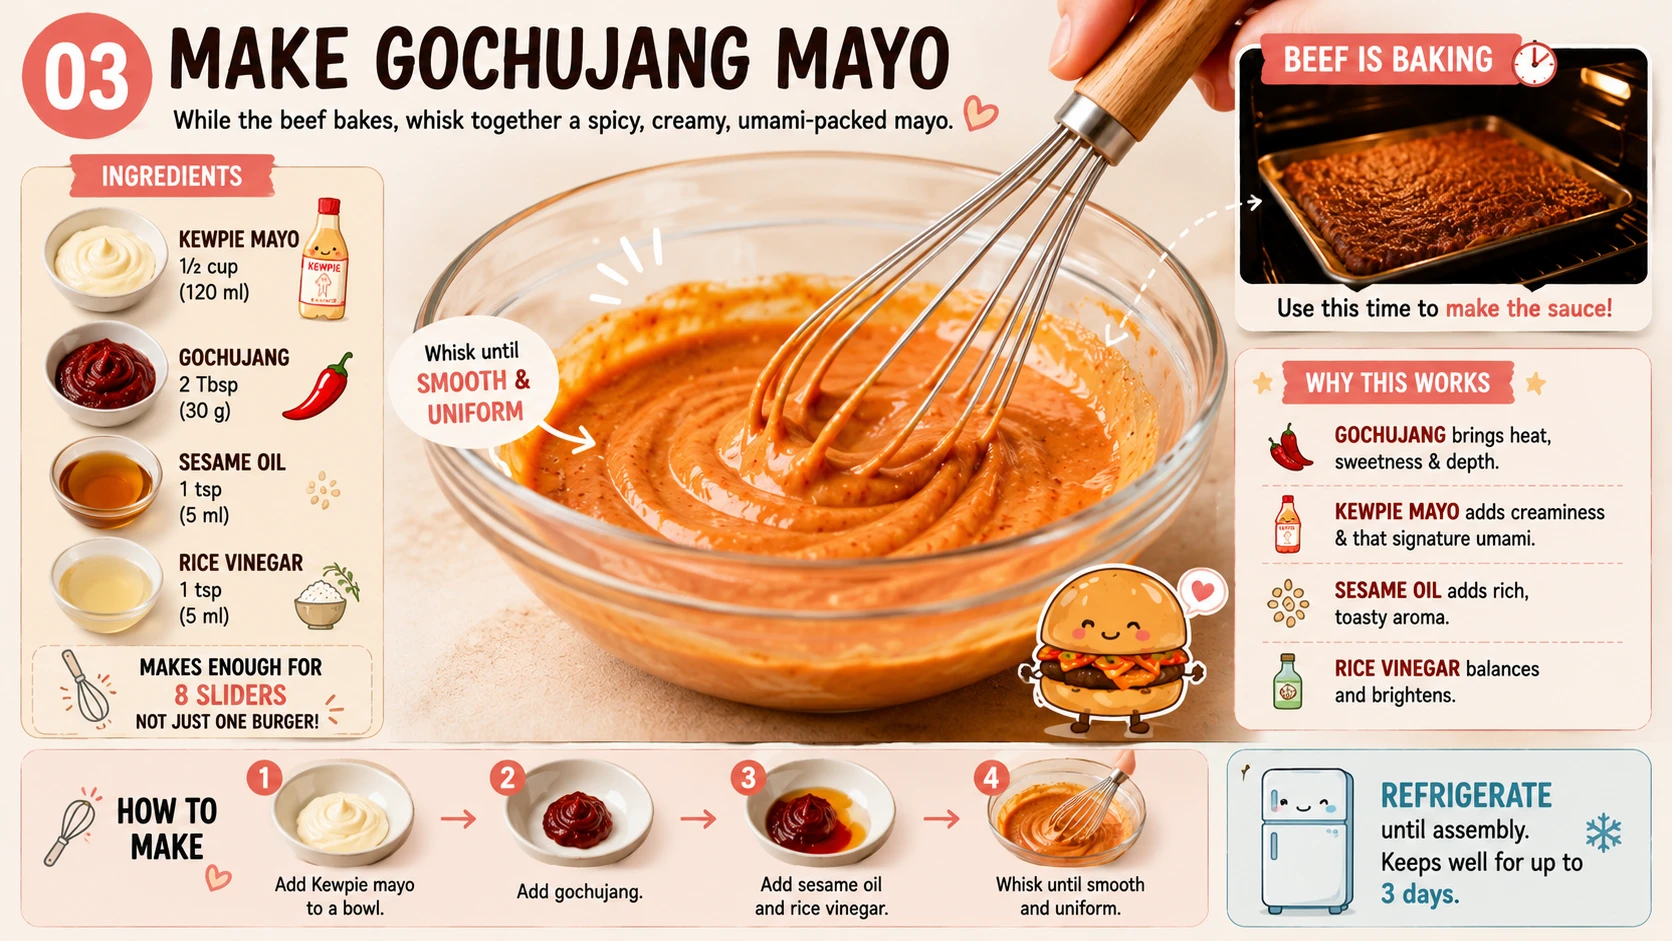
While the tray is in the oven, whisk Kewpie mayo, gochujang, sesame oil and rice vinegar together until uniform. This batch is scaled for 8 sliders rather than a single full-size burger. Refrigerate until assembly.
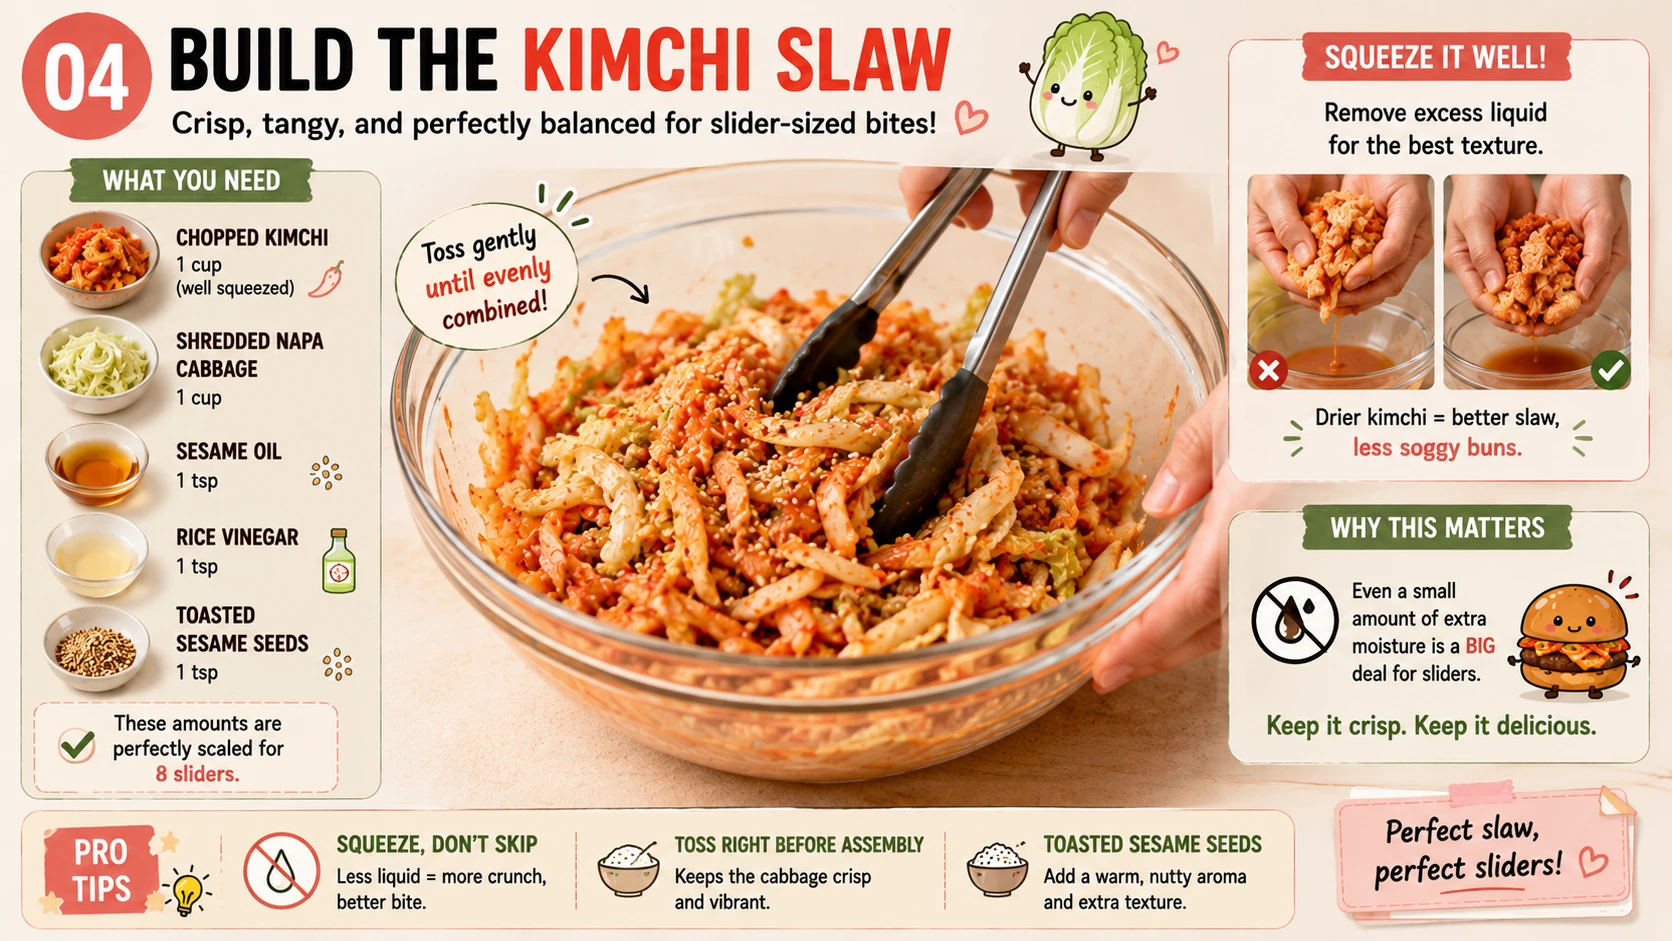
Squeeze excess liquid from the chopped kimchi thoroughly — more critical here than on any other build in this family, since even a small amount of extra moisture is proportionally larger against a slider-sized bun. Toss with shredded napa cabbage, sesame oil, rice vinegar and sesame seeds.
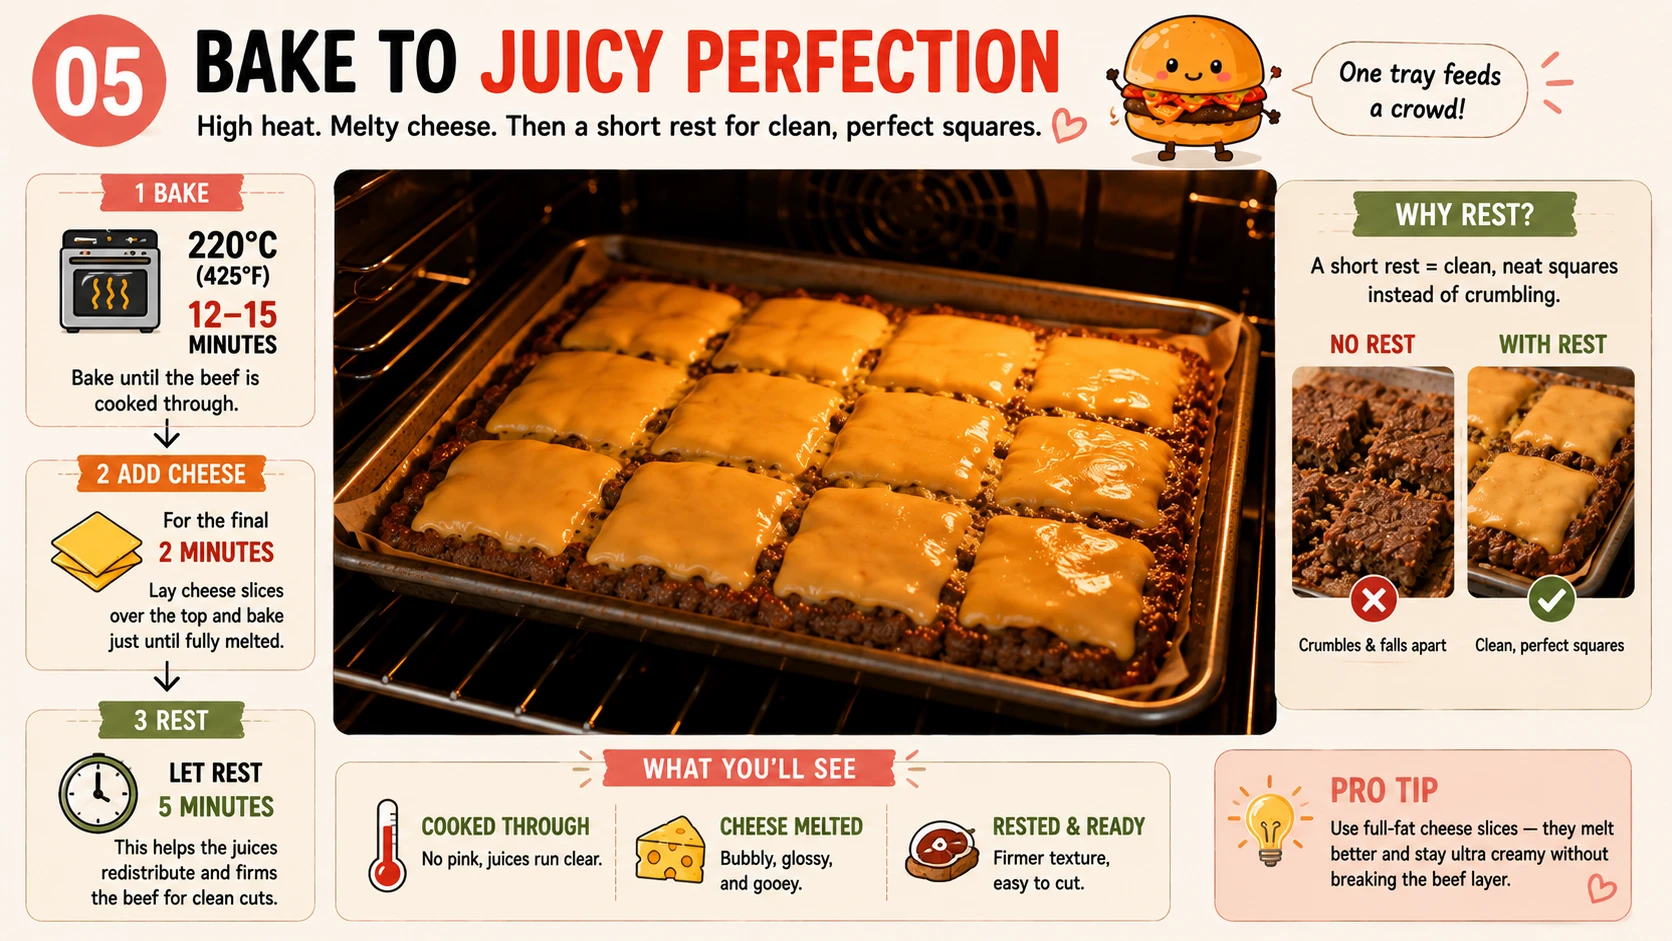
Bake at 220°C (425°F) for 12–15 minutes until cooked through. Lay the cheese slices over the top for the final 2 minutes of baking, just until fully melted. Let the tray rest for 5 minutes before cutting — this brief rest firms the beef enough to cut into clean squares rather than crumbling.
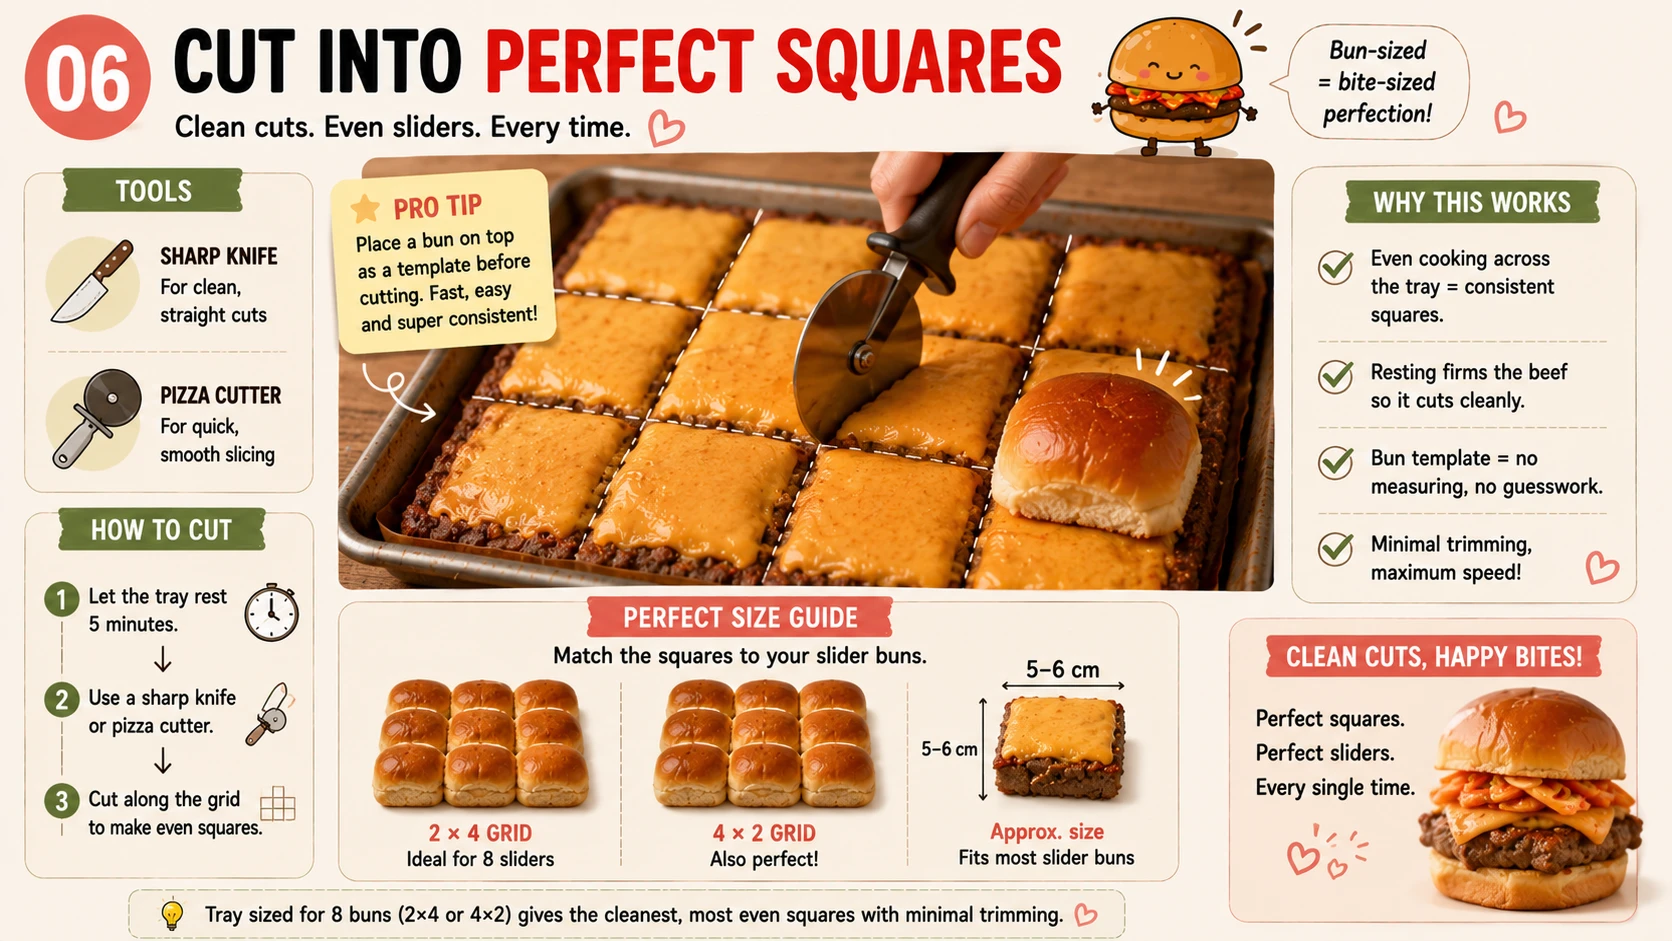
Using a sharp knife or a pizza cutter, cut the cheese-topped beef into squares sized to match your slider buns — laying an actual bun on top as a template before cutting makes this fast and consistent. A tray sized for 8 buns in a 2×4 or 4×2 grid usually gives clean, even squares with minimal trimming.
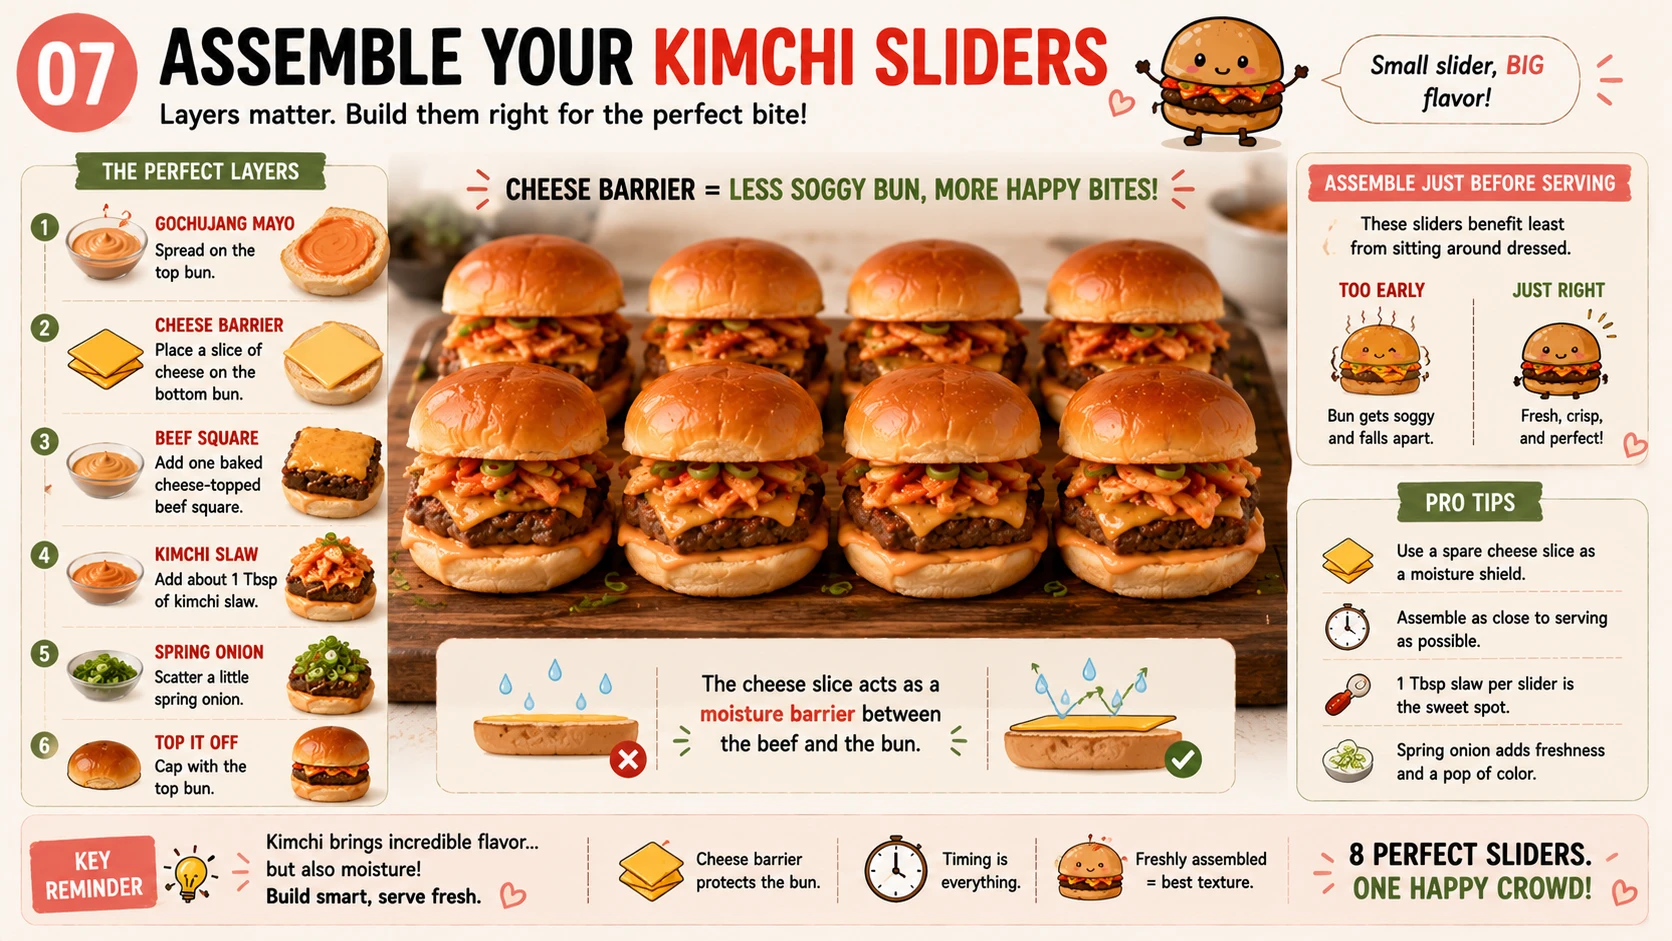
Spread gochujang mayo on the top bun halves. Place a spare slice of cheese directly on each bottom bun as a moisture barrier, then add a beef square, about 1 tablespoon of kimchi slaw, and a scatter of spring onion. Cap with the top bun.
Assemble all 8 sliders as close to serving as you reasonably can — of every build in this family, this is the one that benefits least from sitting around dressed, given how little bun surface area there is to absorb the kimchi’s moisture before it becomes noticeable.
Test Kitchen Results
Every variable was tested at least twice, specifically to see how a kimchi topping changes established slider techniques.
The tray method took roughly half the active hands-on time for 8 sliders, with no meaningful texture difference once both were dressed identically.
Bake-and-cut, for speedA single cheese layer (just on the beef) let kimchi moisture reach the bun noticeably faster than a double layer (beef plus bottom bun).
Double cheese barrierHawaiian roll’s softer, more absorbent crumb showed visible sogginess sooner than the denser mini brioche.
Mini brioche½ tbsp barely registered in a bite this small. 1 tbsp gave clear flavour and crunch. 2 tbsp overwhelmed the beef and made the sandwich harder to hold together.
1 tbsp per sliderFully assembled sliders reheated after an hour showed clearly softer buns than freshly assembled ones — kimchi’s moisture content is more aggressive than a typical slider filling.
Assemble fresh, prep components aheadCutting straight out of the oven caused more crumbling at the edges. A 5-minute rest gave clean, structurally sound squares.
Rest 5 minutes before cuttingParty-format sliders and full-size burgers fail in different ways, and kimchi makes that gap wider, not narrower. A trick that works fine for a beef-and-onion slider filling — like a single cheese barrier or a fully make-ahead assembly — needs re-testing once kimchi’s moisture is involved, because the margin for error shrinks along with the bite size.
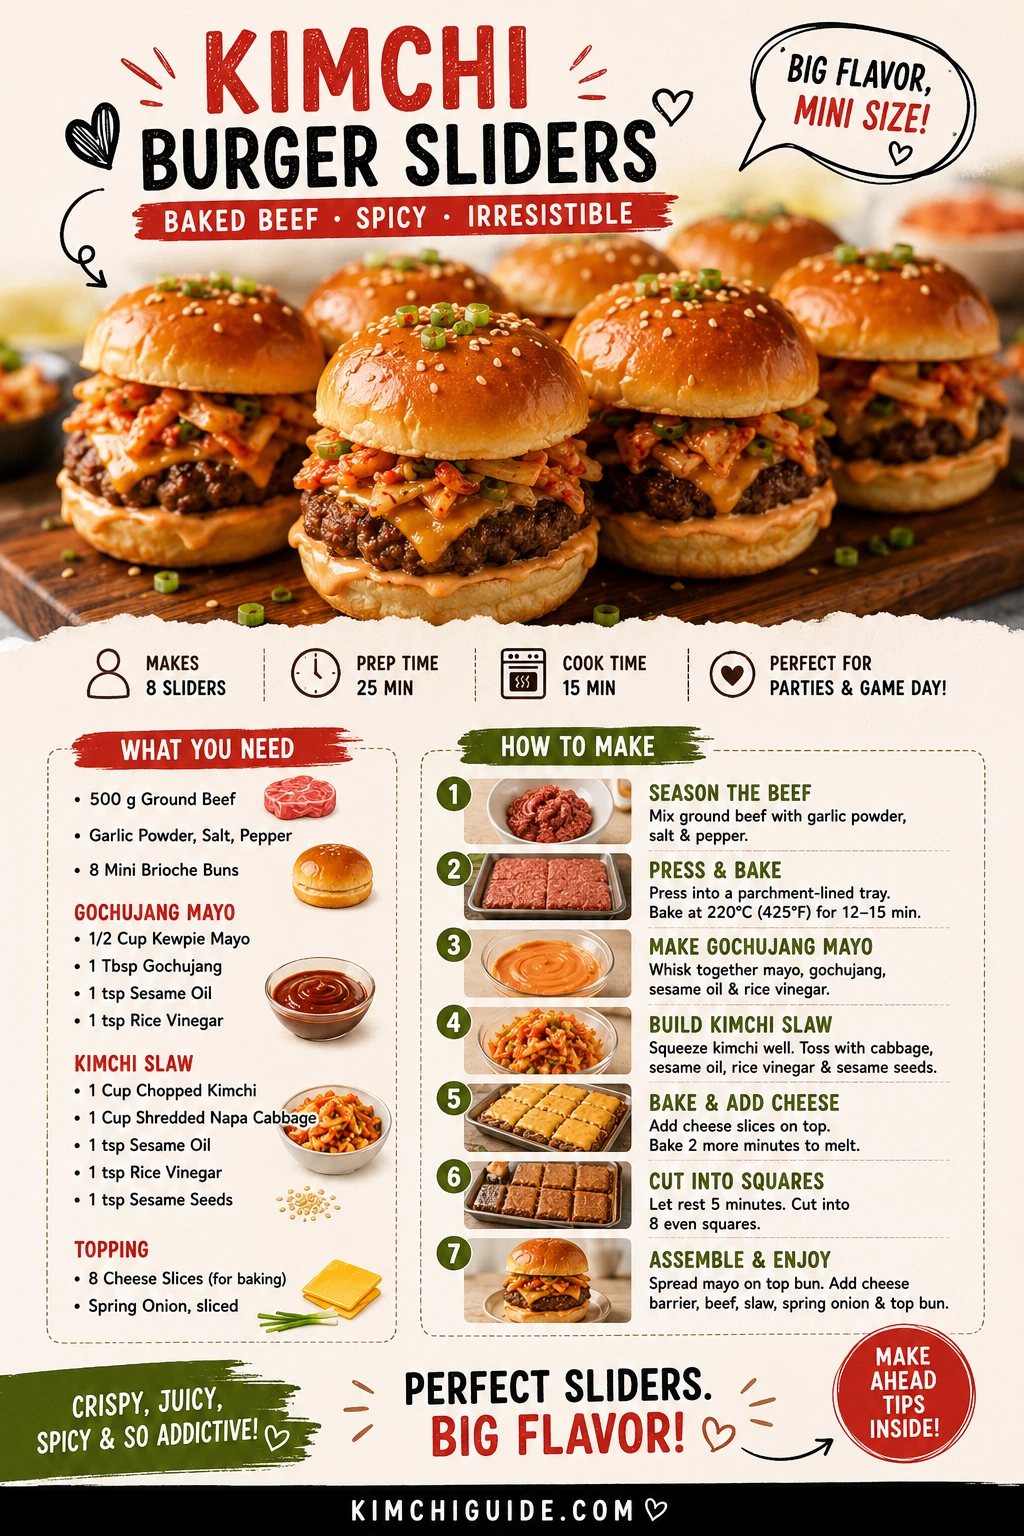
Kimchi Burger Sliders
Bake-and-cut beef · Gochujang mayo · Kimchi slaw · Makes 8 · 35 minutes
- 500g 80/20 beef mince
- 1 tsp garlic powder + salt and pepper
- 8 slices American cheese
- 8 mini brioche slider buns
- 1 tbsp melted butter, for brushing
- 4 tbsp Kewpie mayo + 1½ tbsp gochujang
- 1½ tsp sesame oil + 1½ tsp rice vinegar (split mayo/slaw)
- 150g ripe kimchi (Stage 3), chopped + squeezed dry
- 100g napa cabbage; 1 tsp sesame seeds; 2 spring onions
- 1Season beef with garlic powder, salt, pepper.
- 2Press evenly into a parchment-lined tray, 1cm thick.
- 3Whisk Kewpie mayo, gochujang, sesame oil, rice vinegar.
- 4Squeeze kimchi dry, build slaw with cabbage and sesame oil.
- 5Bake 220°C, 12-15 min. Cheese on top last 2 minutes. Rest 5 min.
- 6Cut into 8 squares sized to match your buns.
- 7Mayo on top bun, cheese barrier + beef + slaw on bottom. Serve immediately.
Per slider (8 sliders total). Reviewed by Dr. Sarah Mitchell RD, PhD · July 18, 2026
All 11 Kimchi Burger Builds
This is 1 of 11 builds in the KimchiGuide kimchi burger family. Classic recipe: Kimchi Burger Recipe →. Full comparison + origin story: Kimchi Burger Ultimate Guide →

The flagship. Smash patty, gochujang mayo, kimchi slaw. 520 cal.
Classic Recipe →
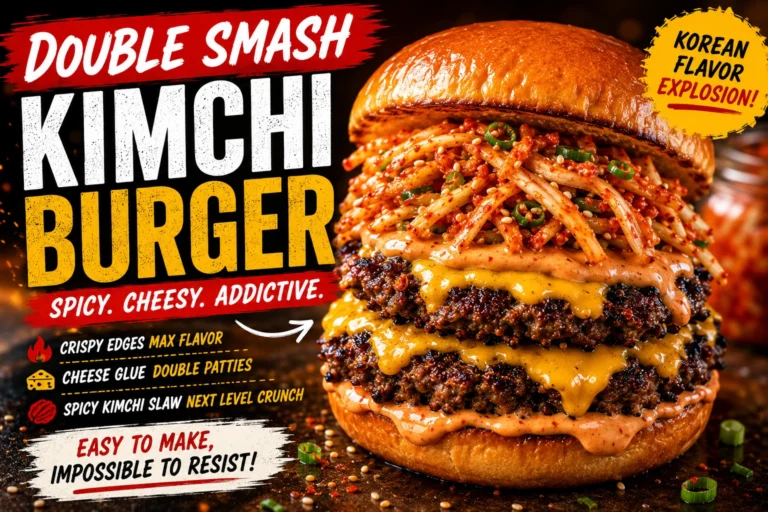
Two smashed patties, cheese glue, scaled toppings. 690 cal.
Double Smash →
Double-fried crispy fried thigh. Approx. 610 cal.
Chicken Burger →
Sweet soy marinated patty, kimchi mayo, pickled daikon. 560 cal.
Bulgogi Burger →
Black bean patty, vegan mayo, jeotgal-free kimchi. 420 cal.
Vegan Burger →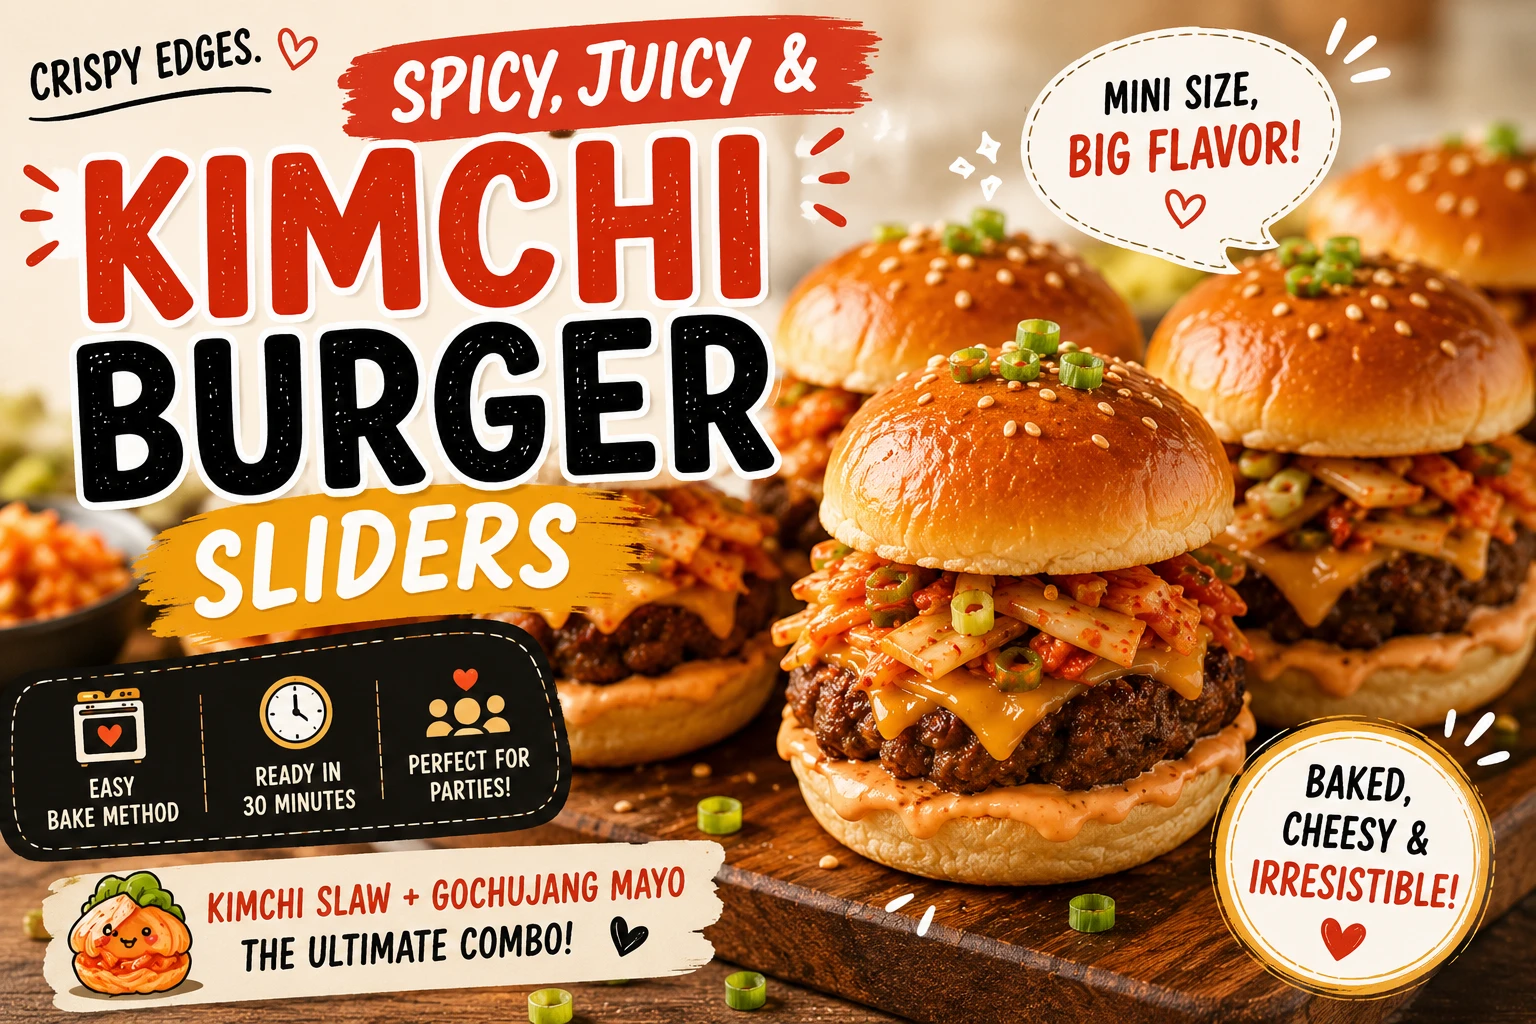
Bake-and-cut beef, scaled toppings, party format. 210 cal each.
Currently viewing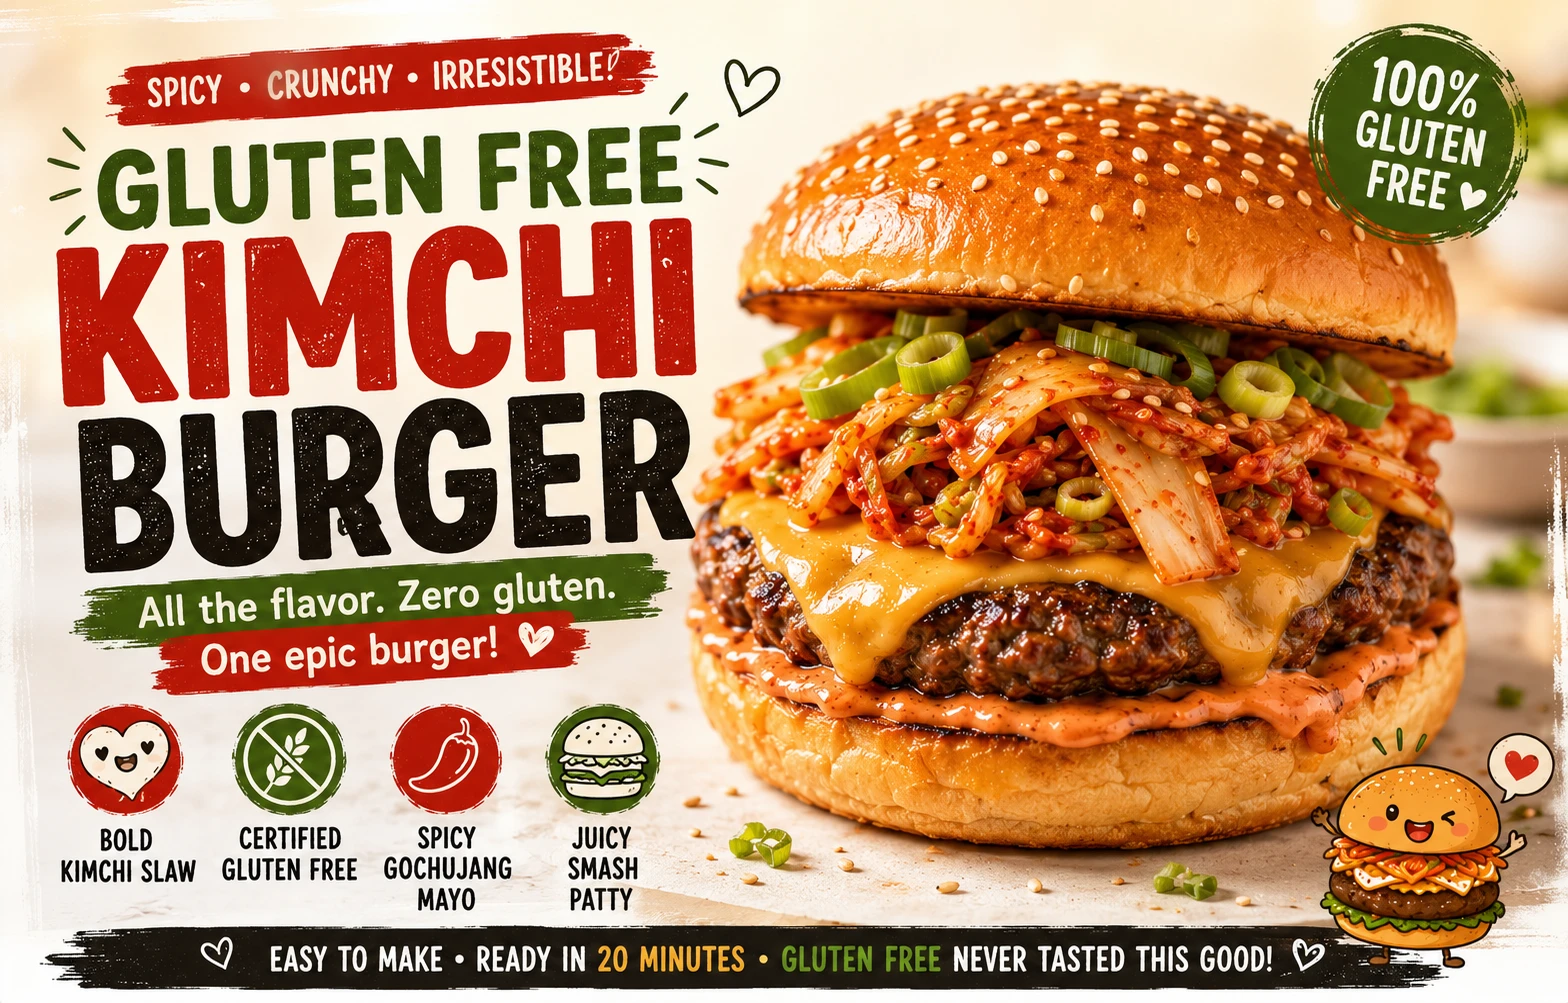
Certified GF brioche-style bun + GF gochujang. 520 cal.
GF Burger →
Lettuce-wrapped, no bun. Approx. 340 cal.
Burger Bowl →
Pressed sticky rice patties instead of bread — naturally GF. Approx. 480 cal.
Rice Burger →
Bodega-style chopped beef and cheese, kimchi folded in off heat. Approx. 590 cal.
Chopped Cheese →
All 11 builds, comparison table, origin story, FAQs.
Full Guide →Kimchi Burger Sliders — Pairing Guide
These pairings work well as an accompanying party spread alongside a slider platter.

A small board of pickled cucumber, radish, and carrot gives guests extra acidity to balance the richness across multiple sliders.

A shareable fries platter alongside the sliders keeps the whole spread easy to graze on at a party.

A warm, shareable dip-style side that fits naturally alongside a slider platter for a crowd.

Light, easy-drinking beer suited to a casual party format where guests are likely having more than one slider.
Storage and Reheating
Store the cut squares in an airtight container. Reheat gently in a low oven before assembling fresh.
Sealed container, clean spoon each time. Do not freeze — the emulsion separates on thawing.
Softens within 30 minutes of dressing. Pre-shred cabbage and squeeze kimchi ahead, combine just before serving.
Kimchi’s moisture makes pre-assembled, reheated sliders noticeably softer than fresh ones. Assemble as close to serving as practical instead.
Where This Build Sits Among All 11 Kimchi Burgers
| Build | Calories | Protein | Vegan? | Best For |
|---|---|---|---|---|
| Kimchi Burger Sliders (each) ← This page | 210 | 13g | No | Portion control, parties |
| Kimchi Burger Bowl | 340 | 27g | No (beef) | Low-carb, lettuce wrap |
| Vegan Black Bean | 420 | 18g | ✅ Fully vegan | Plant-based, egg-free |
| Kimchi Burger Recipe (Classic Smash) | 520 | 31g | No | The flagship recipe |
| Gluten-Free Version | 520 | 31g | No | Same build, GF bun/gochujang |
| Kimchi Bulgogi Burger | 560 | 29g | No | Sweeter, caramelised profile |
| Kimchi Chicken Burger | 610 | 34g | No | Crispy fried texture |
| Double Smash | 690 | 42g | No | Bigger appetite, more crust |
Kimchi Burger Sliders FAQ
Sourced from real competitor gaps and reader search behaviour, answered with the detail of someone who actually tested the party-format methods.
No slider recipe we found addresses kimchi at all. This recipe also tests the one-tray bake-and-cut method against individually formed mini patties, and adapts the classic cheese-barrier trick specifically for kimchi’s higher moisture content. See the full Kimchi Burger Guide for all 11 builds.
Bake one tray and cut it. It’s significantly faster for a party quantity, produces more consistent thickness across all sliders, and held up just as well against the kimchi toppings as individually formed patties in testing.
Both — melt one layer onto the beef as it finishes baking, and place a second slice directly on the bottom bun before the beef goes on. That second layer acts as a moisture barrier against the kimchi slaw’s liquid, adapting a trick used for classic sloppy sliders.
Mini brioche, for consistency with the rest of the kimchi burger family — its structure resists the kimchi slaw’s moisture better than the softer, more absorbent Hawaiian roll, though Hawaiian rolls remain a fine choice if their sweetness appeals to you more.
The beef can be baked and cut ahead, and the mayo and slaw can be prepped separately in advance, but full assembly should happen close to serving time — kimchi’s moisture content makes the classic make-ahead-and-reheat slider method less reliable than it is for a plain cheeseburger slider.
Yes, if the kimchi isn’t squeezed dry first. Squeezed kimchi behaves similarly to other slider toppings, but unsqueezed kimchi releases noticeably more liquid than typical slider fillings like sautéed beef and onion.
About 1 tablespoon of dressed slaw per slider was the tested sweet spot — enough for real flavour and crunch without the kimchi taking over a bite this small.
8 sliders from 500g of beef, sized to match standard mini slider buns. Scale the tray size and ingredient quantities proportionally for a larger batch.
Bake. The one-tray method that makes this recipe fast for a party specifically relies on oven baking; pan-frying works for individually formed mini patties but loses the main time-saving advantage of this build.
Keep the baked, cut beef squares warm in a low oven (around 90°C/200°F) separately from the assembled toppings, and build each slider just before guests arrive at the table — this keeps the bun and kimchi from softening while everything sits.
Yes. Ground turkey or chicken bakes well in the same one-tray method, though it benefits from 1 tbsp neutral oil mixed in to prevent the leaner meat from drying out over the longer bake time.
Stage 3, ripe kimchi aged 3–6 weeks, the same as the classic build. Its acidity is what keeps a bite this small from tasting one-note rich.
Yes. Use certified gluten-free mini buns and verify your gochujang brand carries a gluten-free certification. The beef, cheese, and kimchi are naturally gluten-free.
Squeeze the kimchi thoroughly, use the double cheese-barrier trick (one slice on the bun, one melted onto the beef), and brush the bun tops with melted butter before serving rather than after, which also helps seal the crumb slightly.
Yes. Bake and cut the beef squares up to a day ahead, refrigerate, and gently reheat in a low oven before assembling. The mayo keeps 7 days and the kimchi component can be pre-squeezed and stored dry, ready to dress just before serving.
The base recipe is medium heat. For a mixed crowd, consider serving the gochujang mayo on the side rather than pre-spread, so guests can control their own heat level slider by slider.
Same flavours — gochujang mayo, kimchi slaw, brioche — scaled down into an 8-slider party format using a one-tray bake-and-cut method instead of individually smashed patties. See the Kimchi Burger Recipe for the full-size classic version.
Approximately 210 calories with 13g protein per slider, making portion control genuinely easy compared to a full-size burger. Reviewed by Dr. Sarah Mitchell RD, PhD.
Freeze the baked, unassembled beef squares only, layered with parchment, for up to 2 months. Do not freeze fully assembled sliders — the kimchi slaw and mayo don’t freeze and thaw well, and the bun turns unpleasantly soft.
Assembling every slider hours ahead of time. Sliders in general, and kimchi sliders especially given the extra moisture, are best assembled as close to serving as practical, with components kept separate and warm until then.
Was this guide helpful?
Your feedback helps us improve KimchiGuide for everyone.
💬 Leave a Comment & Rating
Made these kimchi burger sliders? Tell us how the party platter went over and rate the recipe.