
Kimchi Burger: The Complete Guide All 11 Builds Compared Side by Side, Plus the Real Origin Story
This is the hub for every kimchi burger build on KimchiGuide — the classic smash, the gluten-free version, the no-bun bowl, the rice-bun format, the NYC-style chopped cheese, and everything in between. Use the picker tool below to find the build that matches what you’re actually looking for, or browse the full comparison table.

What Is a Kimchi Burger?
A kimchi burger is a Korean-American fusion dish built around three constants — a protein (usually a smashed beef patty), tangy fermented kimchi, and a gochujang-based sauce — assembled in whatever format suits the build. That might be a classic bun, a certified gluten-free bun, a pressed rice cake, a lettuce cup, or even a NYC-style hero roll. This guide covers all 11 builds KimchiGuide has tested, compared side by side, so you can find the one that matches your protein preference, dietary needs, or time budget.
How the 11 Kimchi Burger Builds Differ
Every build shares the same core: protein, kimchi, gochujang sauce. What changes is the protein (beef, chicken, black bean), the bun or format (bread, rice, lettuce, sub roll, or none), and the technique (smash, chop, fry, marinate).
- Protein swaps: chicken, bulgogi-marinated beef, or black bean patty.
- Format swaps: gluten-free bun, rice bun, no bun (bowl), sub roll.
- Portion swaps: full-size, party sliders, or double-stacked.
- Technique swaps: smash, continuous chop, double-fry, marinate-and-sear.
The Real Origin Story of the Kimchi Burger
The kimchi burger isn’t tied to one restaurant or a single invented moment — it’s a category that grew out of a broader food movement, and understanding that history explains why so many different versions of it exist today.

Korean-American fusion gained major national visibility through food trucks like Kogi BBQ in Los Angeles, which launched in 2008 pairing Korean flavors — including kimchi — with familiar American and Mexican formats like tacos and quesadillas.

As Korean fusion flavors became more mainstream, kimchi burgers started appearing on gastropub and casual restaurant menus across the U.S., typically pairing a beef patty with kimchi and a gochujang-based sauce — the same core structure this entire recipe family is built on.

As Korean pantry staples like gochujang and store-bought kimchi became easier to find outside Korean grocery stores, home cooking blogs began publishing kimchi burger recipes adapted for a standard home kitchen — no restaurant griddle required.

The kimchi burger is now a settled category with enough demand to support real variation — gluten-free, vegan, low-carb, party-format and format-bending versions like this site’s 11-build family, rather than a single fixed recipe.
Key Terms — Shared Across the Whole Family
These terms come up across every build in this recipe family — understanding them once here saves re-explaining them on each individual page.
Which Kimchi Stage to Use — Shared Across All 11 Builds
This is the one piece of guidance that doesn’t change no matter which build you make. Stage 3 is correct across the entire family.

Tastes like spiced cabbage, with almost no acidity — not recommended for any build in this family.
✗ Not Recommended
Acceptable across any build if ripe kimchi is unavailable, though flavour balance runs milder than tested.
△ Acceptable
The stage every one of the 11 builds in this family specifies — full sour-umami complexity that balances every version of this dish.
★ Correct — across all 11 builds
Can overpower any build at full strength. Squeeze thoroughly and use sparingly, or blend with a younger batch.
△ Usable — squeeze first
“The most useful thing about having 11 tested builds side by side isn’t finding ‘the healthiest one’ — it’s being able to match a build to your actual goal for that meal. Training for strength? The Double Smash has the protein. Watching carbs today? The Bowl is built for that. There’s no single best build, only the right one for what you need right now.”
Full Comparison Table — All 11 Builds
Sourced from each build’s own tested recipe card and nutrition breakdown. Click any row’s build name to jump to the full recipe.
| Build | Calories | Protein | Time | Difficulty | Diet | Best For |
|---|---|---|---|---|---|---|
| Kimchi Burger Recipe (Classic) | 520 | 31g | 30m | Easy | — | First-time cooks, the base technique |
| Double Smash Kimchi Burger | 690 | 42g | 40m | Intermediate | — | Bigger appetite, most protein |
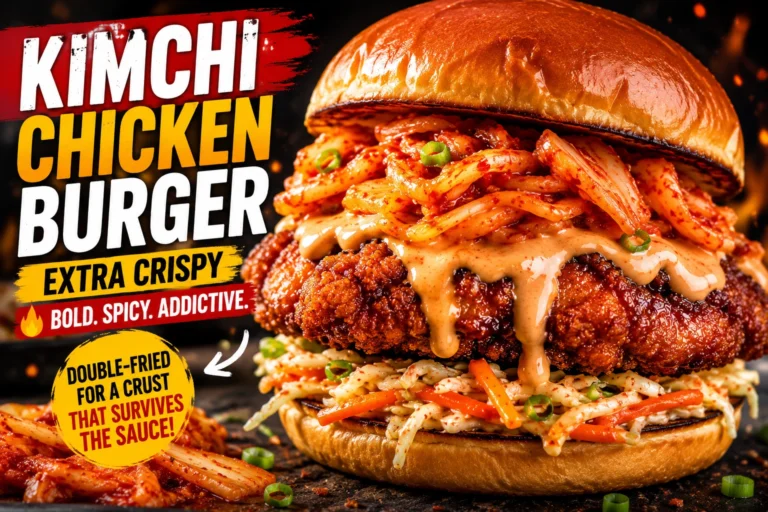
| Kimchi Chicken Burger | 610 | 34g | 45m | Intermediate | — | Crispy fried texture |
| Kimchi Bulgogi Burger | 560 | 29g | 40m | Easy | — | Sweeter, caramelised profile |
| Vegan Black Bean Kimchi Burger | 420 | 18g | 35m | Easy | Vegan | Plant-based, egg-free |
| Kimchi Cheeseburger Sliders (ea.) | 210 | 13g | 35m | Easy | — | Portion control, parties |
| Gluten-Free Kimchi Burger | 520 | 31g | 30m | Easy | GF | Celiac-conscious, wheat-free |
| Kimchi Burger Bowl | 340 | 27g | 30m | Easy | GF, Low-Carb | Low-carb, lettuce wrap, meal prep |
| Kimchi Rice Burger (Lotteria-Style) | 480 | 31g | 40m | Beginner | GF | Naturally gluten-free, rice-bun texture |
| Kimchi Chopped Cheese Burger | 590 | 33g | 25m | Beginner | — | Bodega-style, boldest and saltiest |
Every build shares the same core — protein, kimchi, gochujang sauce — so the differences that matter are calories, protein, and format. Use the picker tool above if you’d rather be pointed to one build directly instead of scanning the full table.
Every Build, One by One
All 10 recipe pages in this family, plus this hub. Click any card for the full tested recipe, technique breakdown, and FAQ.

The flagship. Smash patty, gochujang mayo, kimchi slaw. 520 cal.
Classic Recipe →
Two smashed patties, cheese glue, scaled toppings. 690 cal.
Double Smash →
Double-fried crispy fried thigh. Approx. 610 cal.
Chicken Burger →
Sweet soy bulgogi-marinated patty. Approx. 560 cal.
Bulgogi Burger →
Black bean patty, vegan mayo, jeotgal-free kimchi. 420 cal.
Vegan Burger →
3-bite party format, same ratios. Approx. 210 cal each.
Sliders →
Certified GF bun, GF gochujang, hidden-wheat checks. 520 cal.
Gluten-Free →
No bun, low-carb, lettuce-cup format. 340 cal.
Burger Bowl →
Pressed sticky rice patties instead of bread — naturally GF. Approx. 480 cal.
Rice Burger →
Bodega-style chopped beef and cheese, kimchi folded in off heat. Approx. 590 cal.
Chopped Cheese →Kimchi Burger vs Regular Burger
Before comparing the 11 builds against each other, it’s worth understanding what separates a kimchi burger as a category from the classic American burger most people picture first. The difference isn’t just a topping swap — the flavour-building logic underneath is genuinely different.
- Flavour base: ketchup, mustard, plain mayo
- Flavour goal: savoury, neutral — lets the beef lead
- Fermentation involved: none
- Typical toppings: lettuce, tomato, onion, pickle
- Texture profile: soft throughout, no acidity
- Flavour base: gochujang mayo, fermented kimchi
- Flavour goal: fermented sour-umami depth against rich fat
- Fermentation involved: central — Stage 3 lactic acid drives the whole dish
- Typical toppings: kimchi slaw, spring onion, sesame
- Texture profile: crisp acidity cutting through richness
Both categories share the same smash-patty foundation and cheese-melt technique — but a kimchi burger’s flavour comes from fermentation chemistry rather than condiment layering, which is why the kimchi’s fermentation stage matters more here than any sauce choice in a regular burger recipe.
Nutrition Comparison Chart
The same data as the comparison table above, shown by calorie count so the range across the family is easy to see at a glance.
Cost Per Serving Comparison
The shared pantry staples (kimchi, gochujang, Kewpie mayo) cost roughly the same across every build — cost differences come almost entirely from the protein, bun format, and portion size.
| Build | Relative Cost | Why |
|---|---|---|
| Kimchi Rice Burger | $ Low | Rice is inexpensive; no bun, cheese, or specialty condiment cost added. |
| Vegan Black Bean | $ Low | Canned black beans are the cheapest protein base in the entire family. |
| Kimchi Burger Bowl | $ Low | Same beef as classic, but no bun cost and cheese is optional. |
| Classic Smash | $$ Medium | Standard beef, bun, and cheese — the baseline cost for the family. |
| Kimchi Cheeseburger Sliders | $$ Medium | Same per-gram cost as classic, just portioned smaller across more pieces. |
| Kimchi Bulgogi Burger | $$ Medium | Marinade ingredients add a little over the classic build. |
| Kimchi Chopped Cheese | $$ Medium | Hero roll and extra cheese slices push it slightly above classic. |
| Kimchi Chicken Burger | $$ Medium | Chicken thigh plus frying oil volume adds a moderate cost. |
| Gluten-Free Kimchi Burger | $$$ Higher | Certified GF buns and certified GF gochujang both carry a specialty-ingredient premium. |
| Double Smash Kimchi Burger | $$$ Higher | Two full beef patties and two cheese slices roughly double the protein cost. |
Serving Size & Scaling Guide
Every recipe on this site is written for 2 servings by default. Scaling up works cleanly for the beef-and-kimchi ratio — the one thing to watch is your griddle size, since overcrowding is the single biggest reason home cooks lose the crust when doubling a batch.
| Servings | Beef | Kimchi | Gochujang | Griddle Size Needed |
|---|---|---|---|---|
| 1 (halve the recipe) | 150g | 75g | ½ tbsp | Small pan (8–9″) |
| 2 (as written) | 300g | 150g | 1 tbsp | Standard cast iron (10–11″) |
| 4 (double) | 600g | 300g | 2 tbsp | Large griddle (12″)+ — or cook in 2 batches |
| 6+ (triple or more) | 900g+ | 450g+ | 3 tbsp+ | Cook in batches — do not overcrowd one pan |
Toppings scale differently: cheese and mayo scale linearly per person (1 slice, 1.5 tbsp mayo per serving, etc.), but gochujang is usually fine scaled slightly under linear — its heat carries further than the beef-to-beef math suggests. Taste and adjust after combining rather than scaling exactly by the numbers above. Sliders and the Rice Burger are the two builds where portion count matters more than raw weight — see each page’s own scaling notes for exact piece counts.
Technique & Cooking Fat Comparison
Every build starts from the same smash-and-sear logic, but the actual technique branches out significantly by build — chopped instead of smashed, marinated instead of plain, pressed rice instead of bread. This table shows exactly what changes.
| Build | Core Technique | Format | Extra Step vs Classic |
|---|---|---|---|
| Classic | Single smash patty | Round bun | None — the baseline |
| Double Smash | Two smashed patties, cheese-glued | Round bun | Stack and glue two patties with melted cheese |
| Chicken | Double-fry, dredge and brine | Round bun | Brine, dredge, and fry twice for crunch |
| Bulgogi | Marinate, then sear | Round bun | Marinate 30 min to overnight before cooking |
| Vegan | Bind and pan-sear a black bean patty | Round bun | Bind patty with a tested binder ratio, sear both sides |
| Sliders | Mini smash patties | Mini bun | Scale ratios down, portion into smaller pieces |
| Gluten-Free | Single smash patty | Certified GF bun | Verify bun, gochujang and kimchi labels before shopping |
| Bowl | Smash, then chop after resting | No bun, lettuce optional | Chop patty into pieces, layer over a cabbage-cucumber base |
| Rice Burger | Smash patty + pressed rice cakes | Pressed rice buns | Press rice into cakes, chill 20 min, fry until crisp |
| Chopped Cheese | Continuous chop while cooking | Hero roll | Chop beef and onion together throughout cooking, fold cheese in hot |
Top Mistakes to Avoid — Across All 11
These five mistakes account for nearly every “why did my kimchi burger turn out wrong” question across the individual recipe pages — and every one of them applies regardless of which build you’re making.
Fix: Fresh kimchi lacks the lactic acid needed for the sour-umami balance every build is tested around — use kimchi aged at least 3 weeks.
Fix: Cast iron needs 2 full minutes on high heat before the beef goes in — a pan that isn’t smoking-hot can’t produce the crust every build depends on.
Fix: Overworked beef gets dense and tough. Portion it gently and get it onto the heat quickly, whether you’re smashing or chopping.
Fix: Excess kimchi liquid waterlogs a bun, softens a rice cake, or makes a bowl soupy — squeeze firmly before folding it into any build.
Fix: Each build has exactly one step where timing really matters — the rice cake chill, the off-heat kimchi fold, the GF bun’s lower toasting heat. Check that build’s own page before you start.
Tools & Equipment — What You Actually Need
A single cast iron griddle or heavy skillet covers all 11 builds — thermal mass is what allows a smash patty (or a rice cake, or chopped beef) to sear instead of steam. No wok, rice cooker, or other specialty equipment is strictly required anywhere in the family.
| Tool | Required For | Notes |
|---|---|---|
| Cast iron griddle / heavy skillet | All 11 builds | The one non-negotiable tool — retains heat for a proper crust. |
| Deep pot or heavy pan + frying thermometer | Chicken only | For the double-fry technique’s oil temperature control. |
| Round mold, ramekin, or jar lid | Rice Burger only | For pressing the rice into bun-shaped cakes. |
| Two spatulas (one works, two helps) | Chopped Cheese | One to press and chop, one to fold and turn. |
| Food processor or fork-mashing bowl | Vegan only | For binding the black bean patty mixture. |
| Meat thermometer | Chicken (recommended) | Confirms safe internal temperature through the double-fry. |
Shared Pantry Ingredients
These core ingredients appear in nearly every build on this page. Keep them stocked, along with Stage 3 kimchi ready to go, and you can make most of the 11 builds with just one extra grocery trip for the protein-specific ingredient.
Only the protein and bun format are build-specific: beef (most builds), chicken thigh, bulgogi marinade ingredients, or black beans for protein; and a round bun, certified GF bun, sticky rice, or hero roll depending on which format you’re making.
Where to Buy the Ingredients
Kimchi and gochujang have both become mainstream enough that a dedicated Asian grocery trip usually isn’t necessary anymore. If you’d rather make your own kimchi from scratch than buy a jar, How to Make Kimchi From Scratch → walks through the full process. If you’re buying, here’s where readers in our three biggest audiences typically find it.
Substitution Cross-Reference
Because every build on this page shares the same core structure, you rarely need an external substitute — the closest match is usually just a different build from this same family.
Beyond the 11 — Other Ways to Customize
The 11 builds on this page are the ones tested and fully documented on this site, but a kimchi burger is closer to a base technique than a locked recipe. If you’ve mastered any one of the 11 recipes above, these additional customizations use the exact same core.
A runny fried egg on top of the Classic or Double Smash build adds richness that plays well against the kimchi’s acidity — a common household addition, not a separate recipe.
Shiitake or cremini mushrooms sautéed separately and layered into any build add an umami boost — cook them apart from the kimchi so they don’t go soggy, the same logic as the Chopped Cheese’s off-heat fold.
A strip of crisped bacon works on nearly any build in this family — pair it with the Double Smash or Chopped Cheese for a genuinely indulgent version.
Skip the patty entirely and use the Chopped Cheese’s cheese-folding and off-heat kimchi technique inside a simple grilled cheese — a popular lighter riff readers have reported trying.
Meal-Prep & Storage Comparison — All 11
Not every build stores equally well. Builds with a crispy or fresh element lose more on reheating than builds where components can be kept separate and combined fresh.
| Build | Best For Meal Prep? | Why |
|---|---|---|
| Kimchi Burger Bowl | ✓ Best keeper | No bread to go soggy — store components separately, combine fresh. |
| Vegan Black Bean | ✓ Good | Patty reheats well in a pan; sauce and slaw keep 5–7 days separately. |
| Double Smash | ✓ Good | Patty reheats well; toast a fresh bun rather than reheating one. |
| Bulgogi | ✓ Good | Marinated patty reheats cleanly; make extra marinade ahead. |
| Chopped Cheese | △ Partial | Beef-cheese mixture reheats well; kimchi and roll must be added fresh. |
| Chicken | △ Partial | Reheat in an oven or air fryer to preserve crunch — microwaving ruins the crust. |
| Gluten-Free | △ Partial | Toast the GF bun fresh each time — it dries out faster than a regular bun. |
| Rice Burger | △ Partial | Rice cakes can be pressed ahead and chilled, but fry fresh just before serving. |
| Classic | △ Partial | Patty reheats fine; toast a fresh bun rather than microwaving one. |
| Sliders | ✗ Best fresh | Small portions dry out fastest of any build — best made and served the same day. |
Regional & Authenticity Spectrum
Not every build carries the same relationship to Korean cooking traditions. Some lean closer to Korean-American fusion staples; others are more recent Western adaptations. Neither end is “more correct” — understanding where each sits explains why they taste the way they do.
- Classic Smash
- Kimchi Bulgogi Burger
- Kimchi Burger Sliders
- Kimchi Rice Burger (Lotteria-style)
- Kimchi Chopped Cheese (NYC bodega format)
- Double Smash Kimchi Burger
- Gluten-Free Kimchi Burger
- Kimchi Burger Bowl (low-carb)
- Vegan Black Bean Kimchi Burger
- Kimchi Chicken Burger
The Classic, Bulgogi and Sliders builds are closest to what you’d expect from the Korean-American fusion food movement broadly. The Rice Burger and Chopped Cheese borrow entire formats from other food traditions — Japanese/Korean rice-burger chains and NYC bodega sandwiches respectively — and graft the kimchi burger’s core onto them. The Gluten-Free, Bowl, Vegan and Chicken builds exist primarily to meet a dietary need rather than to explore a new format, which is why they sit in the fusion column.
Glossary of Korean & Technical Terms
Every Korean or technical term used across this hub and the 10 recipe pages, in one place.
Difficulty Comparison — All 11
Most builds in this family sit at beginner-to-easy skill level. The only meaningful difference is whether a build needs a genuinely new technique — continuous chopping, rice-cake pressing, double-frying — versus following the same smash-and-assemble pattern as the classic recipe.
Classic, Bulgogi, Vegan, Sliders, GF, Bowl
Rice Burger, Chopped Cheese
Double Smash, Chicken
Rice Burger and Chopped Cheese each require exactly one genuinely new skill — pressing/chilling rice cakes, or continuous chopping — but no multi-step complexity beyond that. Double Smash and Chicken both involve more moving parts: stacking and gluing two patties, or managing a brine-dredge-double-fry sequence.
Spice Level Comparison — All 11
Gochujang quantity is similar across the base recipes, but richer, fattier builds coat the tongue and blunt perceived heat, while leaner or acidic builds let the full gochugaru heat come through more directly. Use this as a rough guide, not an exact science — your own kimchi’s heat level will shift these slightly either way.
Want it milder no matter which build you pick? Halve the gochujang in the mayo, or use Stage 2 young kimchi instead of Stage 3 — both work across every recipe on this page without changing the core technique. Want it hotter, especially for the Bowl or Classic where heat already comes through clearly? A teaspoon of gochugaru added to the patty intensifies the burn without diluting the sauce.
Pairing Guide
Korean home meals are traditionally built around banchan — small side dishes served alongside the main plate — and kimchi burgers pair naturally with the same logic. These four pairings work with every build on this page, regardless of protein or format.
Cold, crisp contrast that cuts through any of the richer builds — especially Double Smash or Chopped Cheese.
Stage 1 fresh kimchi alongside any build — two expressions of the same ingredient side by side.
A mild, warming broth contrast to the dense, rich patty — good with any of the 11.
Calorie-free, traditional way Korean households round out a meal — pairs with any build.
One-Page Comparison Cheat Sheet
Every number from this guide condensed into a single printable table — good for sticking on the fridge or keeping on your phone while grocery shopping.
| Build | Cal | Protein | Time | Cost | Difficulty |
|---|---|---|---|---|---|
| Sliders (1 pc) | 210 | 13g | 35m | $$ | Easy |
| Bowl | 340 | 27g | 30m | $ | Easy |
| Vegan | 420 | 18g | 35m | $ | Easy |
| Rice Burger | 480 | 31g | 40m | $ | Beginner |
| Classic | 520 | 31g | 30m | $$ | Easy |
| Gluten-Free | 520 | 31g | 30m | $$$ | Easy |
| Bulgogi | 560 | 29g | 40m | $$ | Easy |
| Chopped Cheese | 590 | 33g | 25m | $$ | Beginner |
| Chicken | 610 | 34g | 45m | $$ | Intermediate |
| Double Smash | 690 | 42g | 40m | $$$ | Intermediate |
Opens your browser’s print dialog — formatted to print cleanly without ads, buttons, or navigation.
Kimchi Burger Family FAQ
Questions about the whole family of builds — for build-specific questions, see the FAQ section on each individual recipe page.
A kimchi burger is a Korean-American fusion dish that pairs a beef, chicken or plant-based patty with kimchi and a gochujang-based sauce — usually on a bun, but this family of recipes also includes bowl, rice-bun and sandwich-format builds.
It grew out of the Korean-American fusion food movement that gained major visibility with food trucks like Kogi BBQ in Los Angeles starting in 2008, which paired Korean flavors with familiar American formats. Kimchi burgers followed a similar path onto gastropub menus and home cooking blogs through the 2010s. See The Real Origin Story above for the full timeline.
The Classic Smash build is the flagship recipe and the best starting point — it establishes the base technique every other variation in this family builds on.
The Kimchi Burger Bowl at approximately 340 calories per serving is the lowest full-portion build, since removing the bun removes the largest calorie source. The Sliders run lower per individual piece at roughly 210 calories, but that’s a smaller portion size.
The Double Smash Kimchi Burger, at approximately 42g of protein per serving, thanks to its two full beef patties.
The Gluten-Free Kimchi Burger (certified GF bun and gochujang) and the Kimchi Rice Burger (naturally gluten-free rice buns) are both built for this. The Kimchi Burger Bowl is also naturally gluten-free with no bun at all.
Yes — the Vegan Black Bean Kimchi Burger, built with a tested black bean patty, vegan mayo, and jeotgal-free (fish-sauce-free) kimchi.
The Kimchi Cheeseburger Sliders — a 3-bite party format built on the same ratios as the classic recipe, designed for serving a group.
The Kimchi Chopped Cheese runs the boldest and saltiest overall, thanks to the layered cheese, hero roll and bodega sauce. The Kimchi Bulgogi Burger leans sweeter and more caramelised rather than spicier.
The core pairing of protein, kimchi and a gochujang-based sauce stays constant, but the protein, bun format, and technique change across builds — from a beef smash patty on a bun, to no bun at all, to a completely different sandwich format like the chopped cheese.
Stage 3, ripe kimchi aged 3–6 weeks, is the recommended stage across every build in this family — it’s the stage that delivers the tested flavour balance in each recipe.
Yes — for example, the chopped-cheese technique or the rice-bun technique can both be adapted to the vegan black bean patty, or the bowl-format layering can be applied to the bulgogi build. Each page’s technique sections explain the underlying principles so they transfer.
The Kimchi Chopped Cheese, at roughly 25 minutes total, since there’s no patty-forming or bun-toasting step in the traditional sense — just continuous chopping on one griddle.
The Kimchi Rice Burger, due to the mandatory 20-minute chill for the pressed rice cakes, and the Kimchi Chicken Burger, due to the multi-step frying and dredging process.
It’s a genuine, sustained category within the broader Korean-American fusion food movement, appearing on restaurant and gastropub menus as well as home cooking sites for well over a decade rather than being a single passing trend.
Most do, with minor ratio adjustments per build, though a few — like the chopped cheese’s bodega mayo-ketchup-gochujang blend — use a deliberately different sauce suited to that build’s format.
The Classic Smash build or the Vegan Black Bean build — both use a single, forgiving technique without any format-specific complications like rice-bun pressing or continuous chopping.
Yes — all 11 builds are written by Ji-Young Park and nutritionally reviewed by Dr. Sarah Mitchell RD, PhD, following the same testing standards across the family.
This 11-build family covers the core format variations — protein swaps, bun swaps, and format swaps. Future additions would be noted here and reflected in the comparison table above.
Use the build-picker tool on this page — select your priority (lowest calorie, highest protein, gluten-free, vegan, low-carb, party-size, or boldest flavor) and it highlights the matching build from the full comparison table.
Was this guide helpful?
Your feedback helps us improve KimchiGuide for everyone.
💬 Leave a Comment
Tried more than one build from this family? Tell us which one was your favorite and why.