Kimchi Bibimbap How to Make the Perfect Korean Stone Bowl
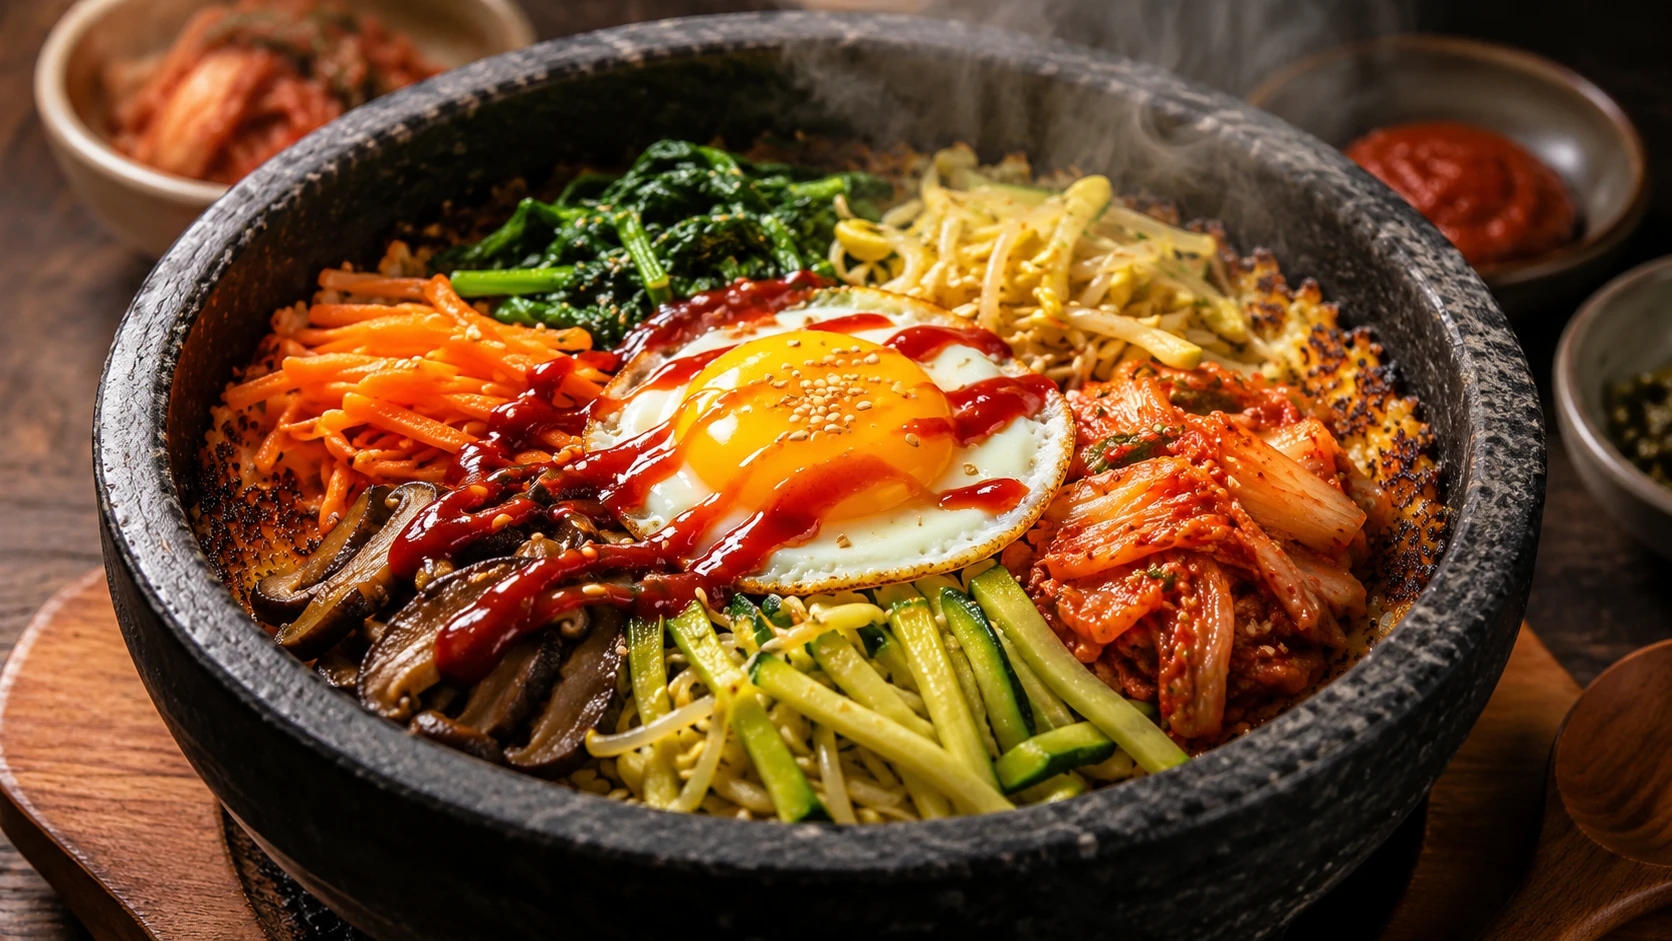
Rainbow vegetables. Sizzling stone bowl. The crispy nurungji rice crust no restaurant tutorial teaches you to replicate. Sautéed aged kimchi, individually seasoned namul, homemade gochujang sauce, and a runny egg — tested across 9 batches.


What Makes the Best Kimchi Bibimbap?
The best kimchi bibimbap requires three things most recipes skip: aged kimchi (at least 3 weeks old, not fresh), each vegetable seasoned individually in sesame oil rather than all together, and a properly preheated dolsot stone bowl that creates the signature crispy nurungji rice crust. This recipe covers all three — including how to get crispy rice in a cast iron pan if you don’t own a dolsot.
How to Make Kimchi Bibimbap — Quick Reference
The complete process from sauce to plate, in order, with timing for each stage.
- Make gochujang sauce — whisk gochujang, sesame oil, rice vinegar, sugar, water, garlic, sesame seeds. 3 minutes.
- Season namul vegetables separately — spinach, bean sprouts, zucchini, carrot, mushrooms each cooked and seasoned on their own. 15 minutes.
- Sauté the kimchi and cook meat — caramelise aged kimchi in sesame oil; stir-fry seasoned beef if using. 5 minutes.
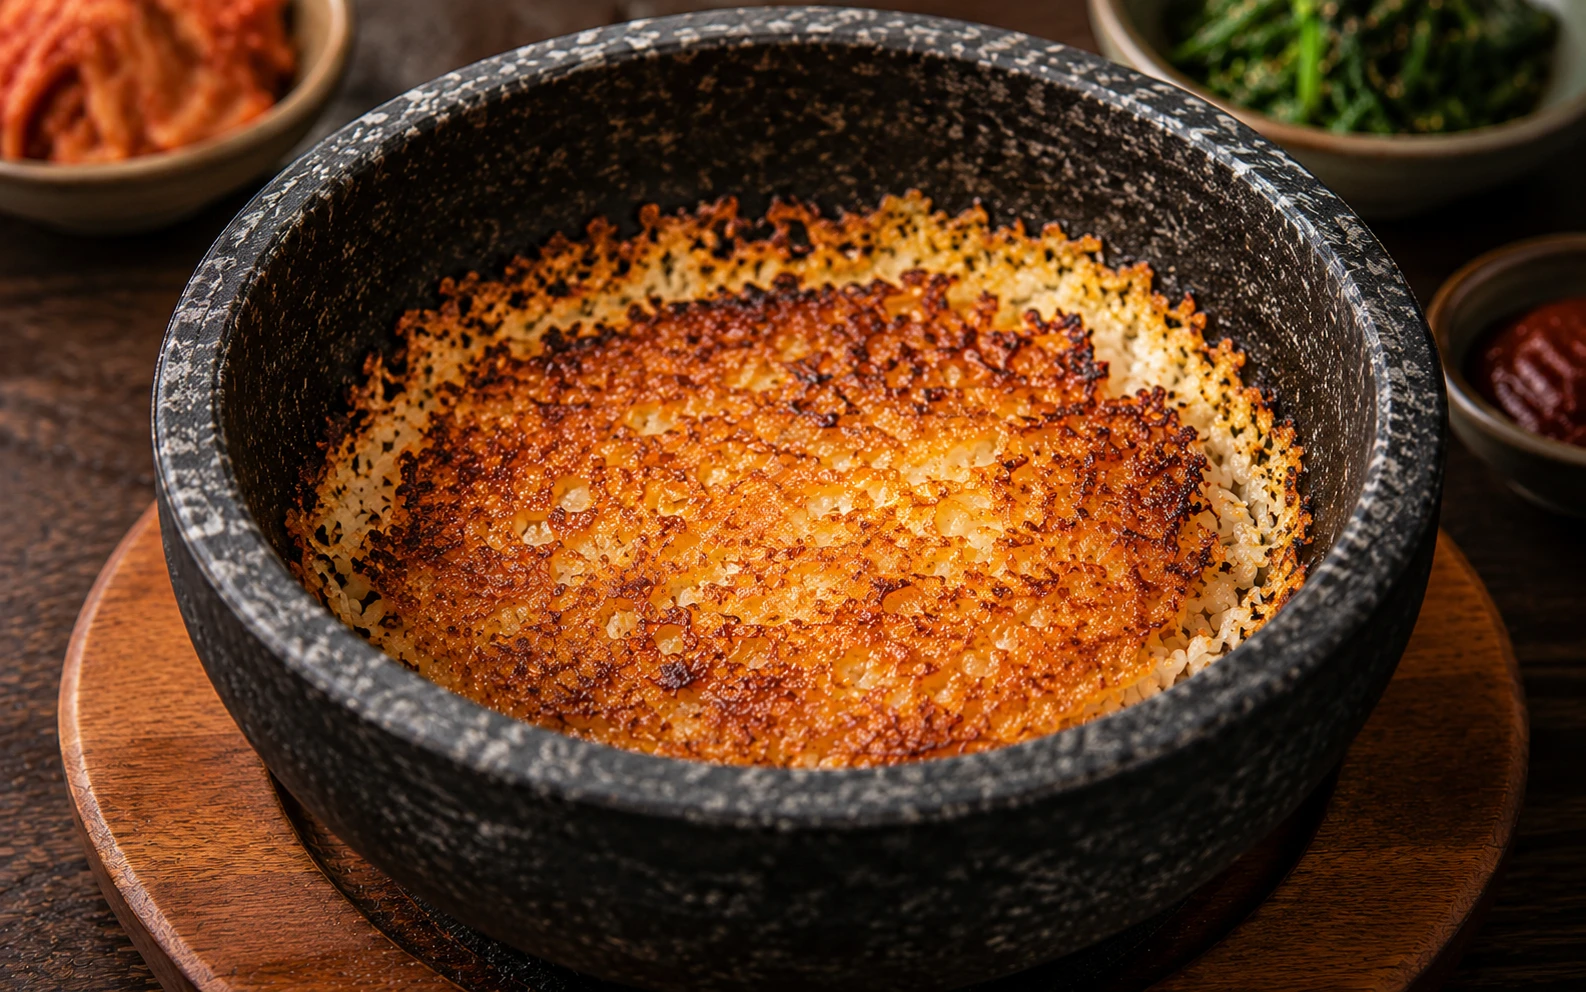
- Heat the dolsot and add rice — oil the stone bowl, preheat 3–4 min, add hot rice, press flat, cook 5–7 min for nurungji crust.
- Arrange toppings in rainbow sections — namul vegetables, kimchi, and meat arranged over the hot rice.
- Fry the egg and finish — sunny-side up with runny yolk, drizzle gochujang sauce, scatter sesame seeds, serve immediately.
Kimchi Bibimbap — Key Facts at a Glance
A structured summary of the core facts in this guide, verified by Ji-Young Park and reviewed by Dr. Sarah Mitchell RD, PhD.
What Makes This Kimchi Bibimbap Guide Different
Most bibimbap recipes skip the dolsot crispy-rice technique entirely, or use pre-made bottled sauce. This guide starts from scratch and tests every variable that determines whether the bowl tastes like Seoul or like a flat fusion café version.
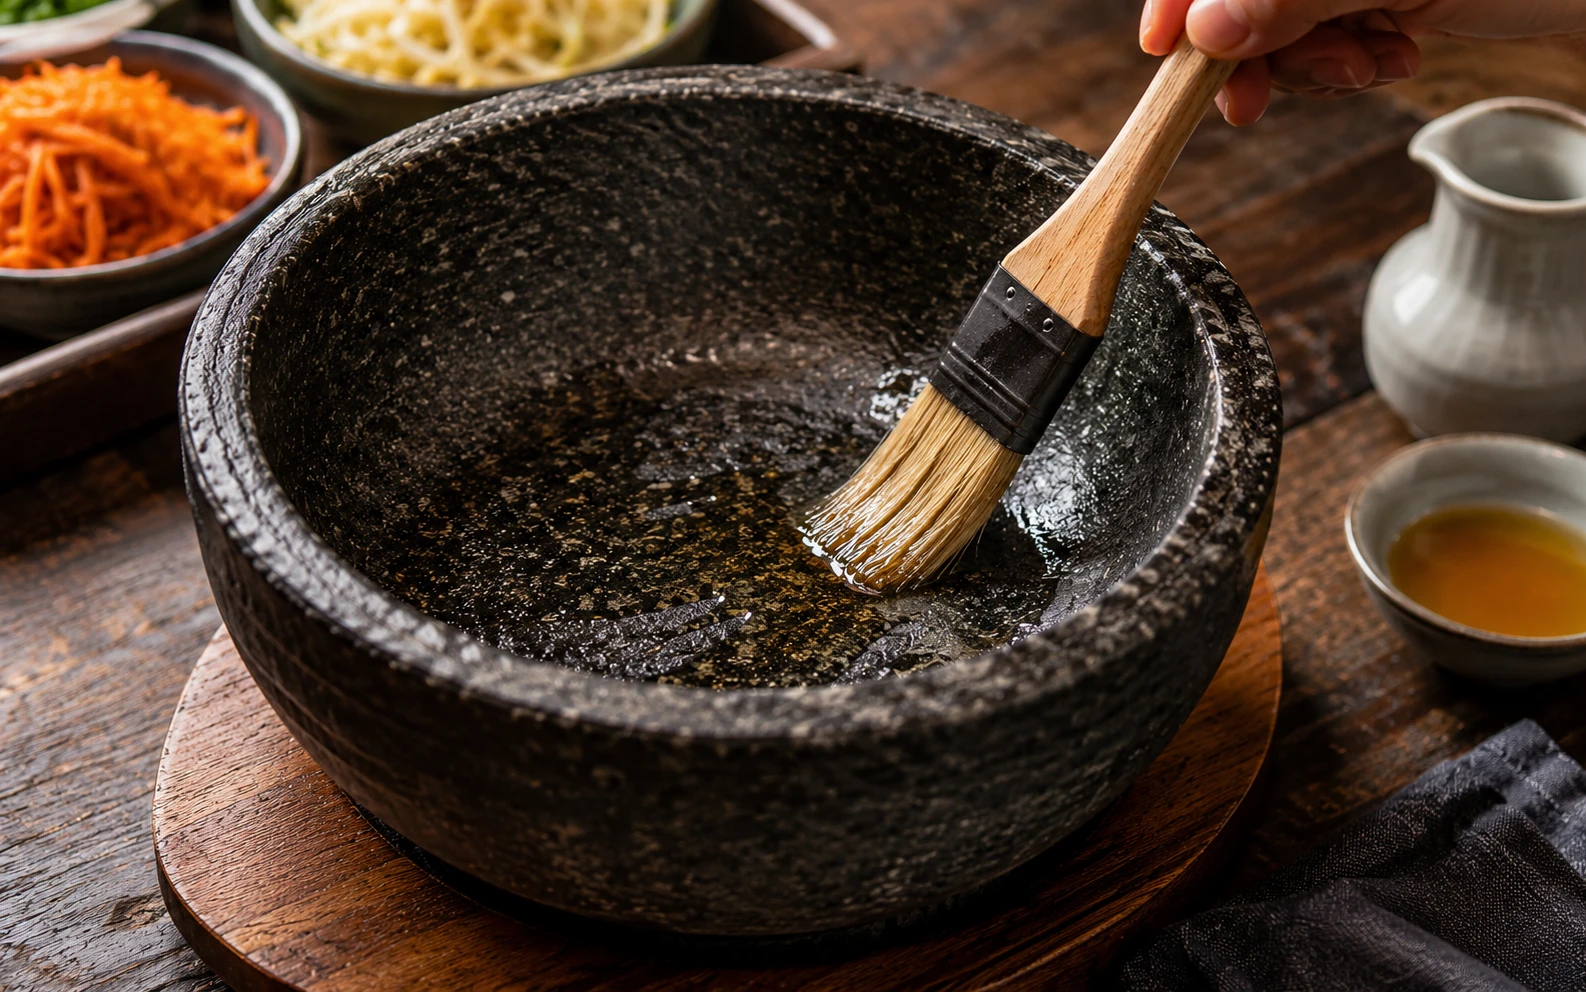
Exactly how to season, preheat, and use a stone bowl to create authentic nurungji — including the cast iron pan workaround for cooks without a dolsot.
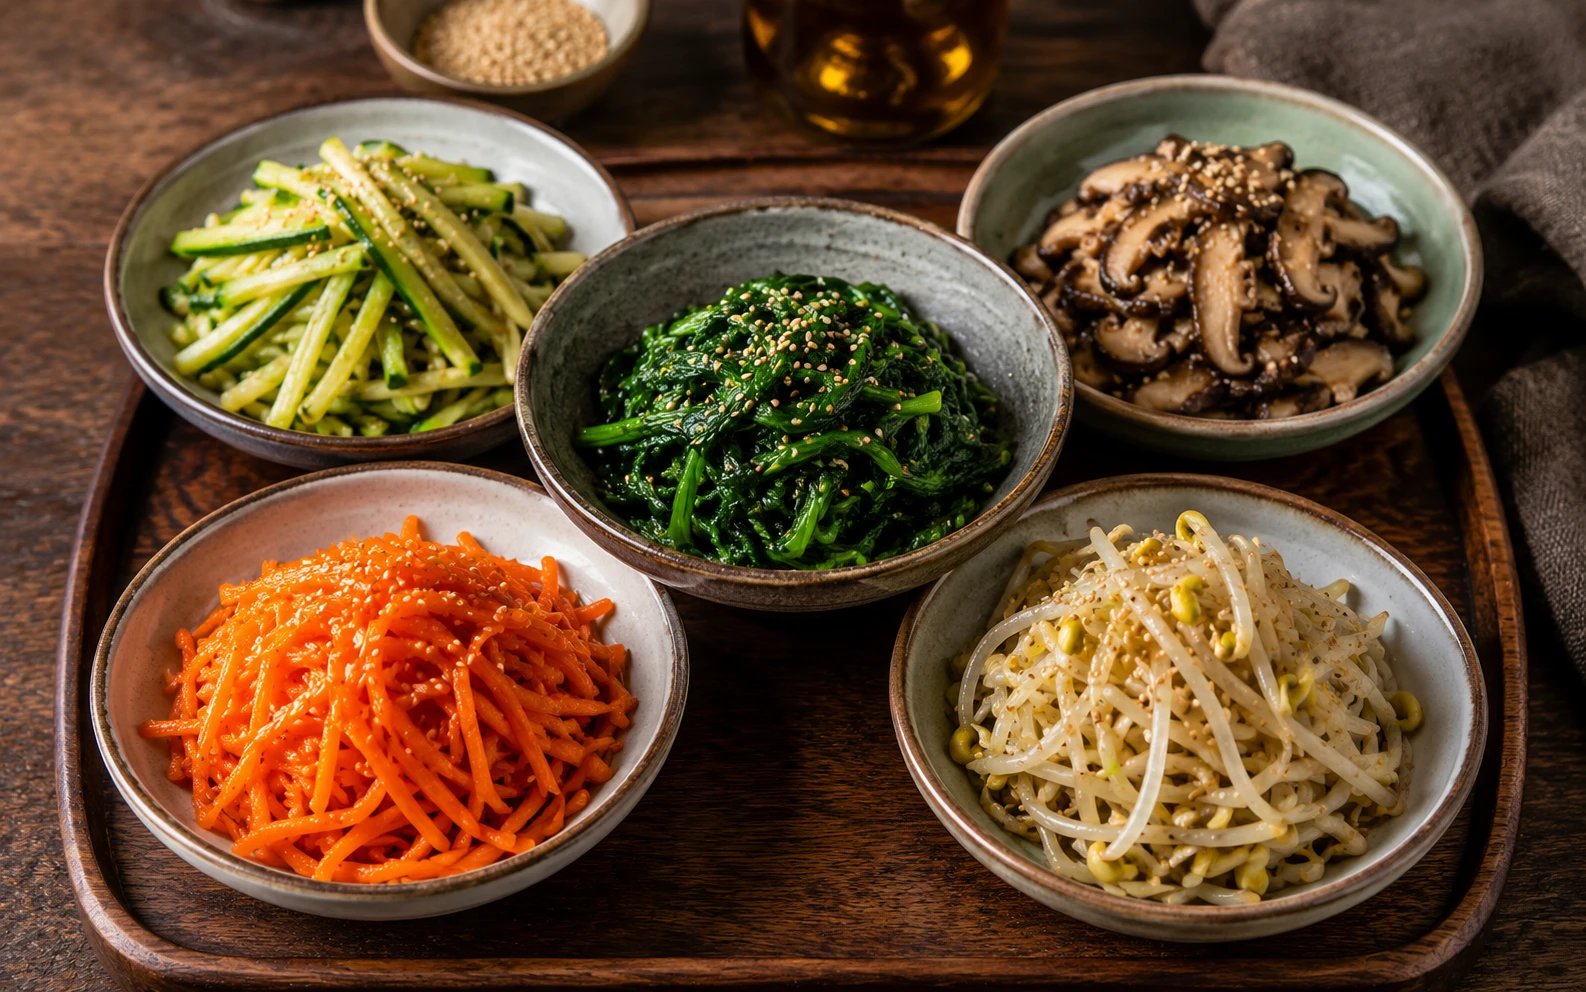
Every vegetable seasoned individually — the way every Korean grandmother does it, not all tossed together. This single technique separates good bibimbap from great bibimbap.
Dolsot vs cast iron vs regular bowl, fresh vs aged kimchi, bottled vs homemade sauce, and four different preheating times — every variable documented and ranked.
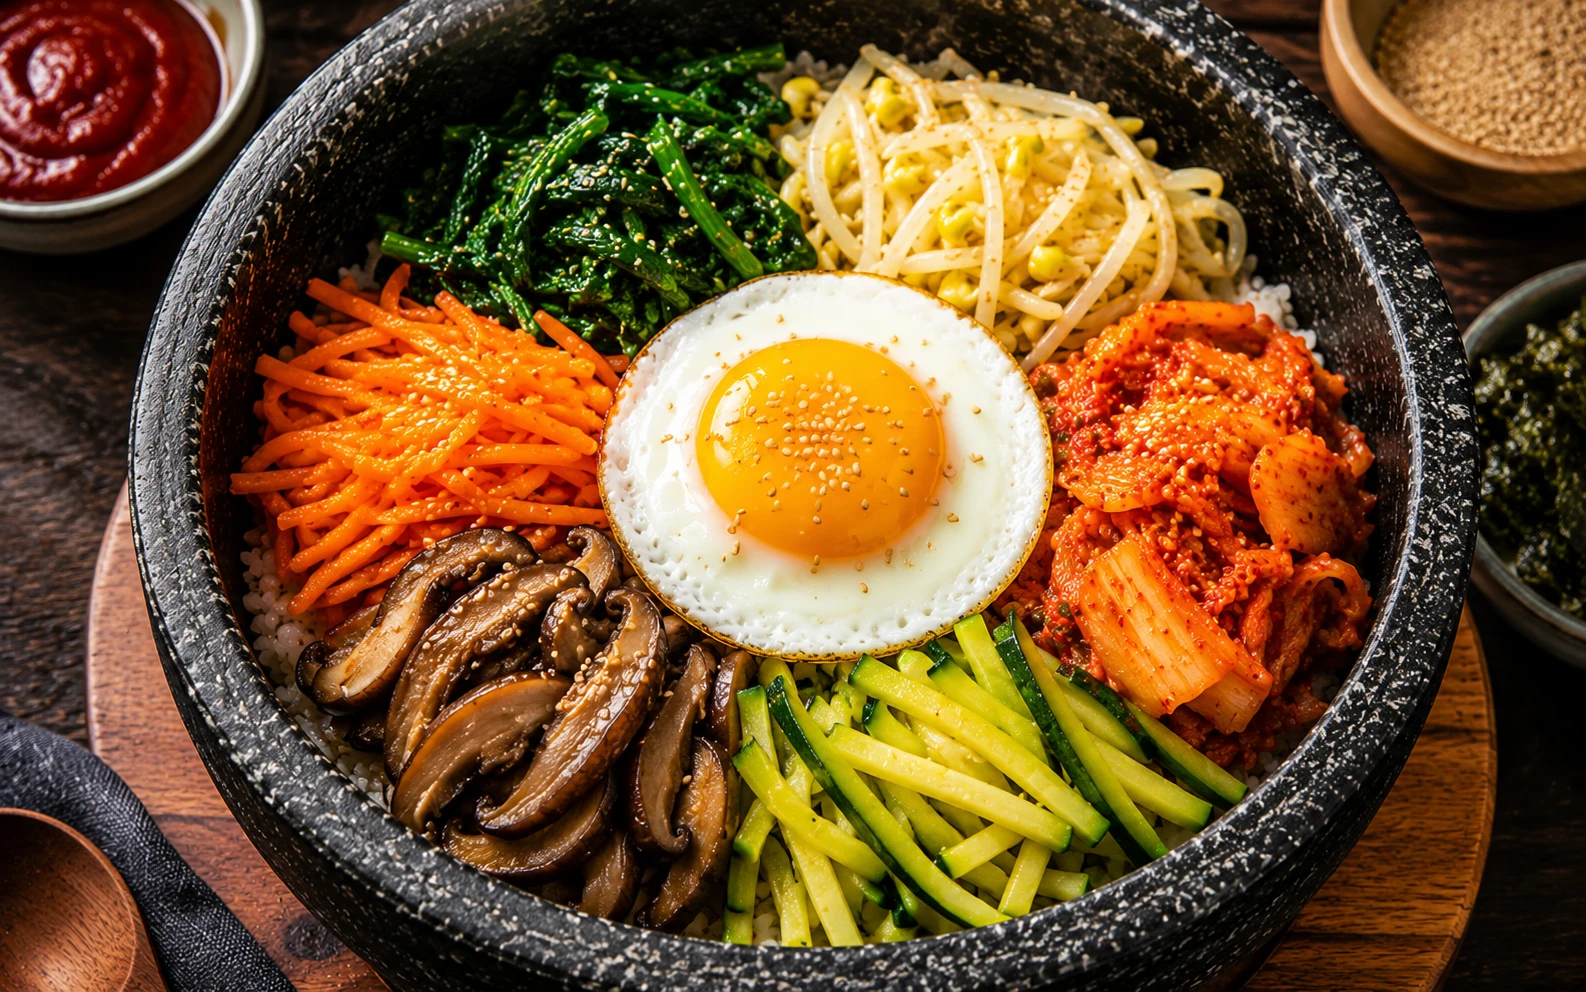
The traditional colour-wheel arrangement is practical, not just aesthetic — each section keeps flavours distinct until mixing. The exact plating technique used in Korean restaurants.
Difficulty Level — Kimchi Bibimbap
Kimchi bibimbap has more components than a basic rice bowl, but none of them are technically difficult. The challenge is organisation — preparing all namul components simultaneously so everything is hot when assembled.
← This Recipe
Which Kimchi to Use in Bibimbap
The gochujang sauce is already bold and sweet — you need aged, sour kimchi to cut through it and provide acidic contrast.
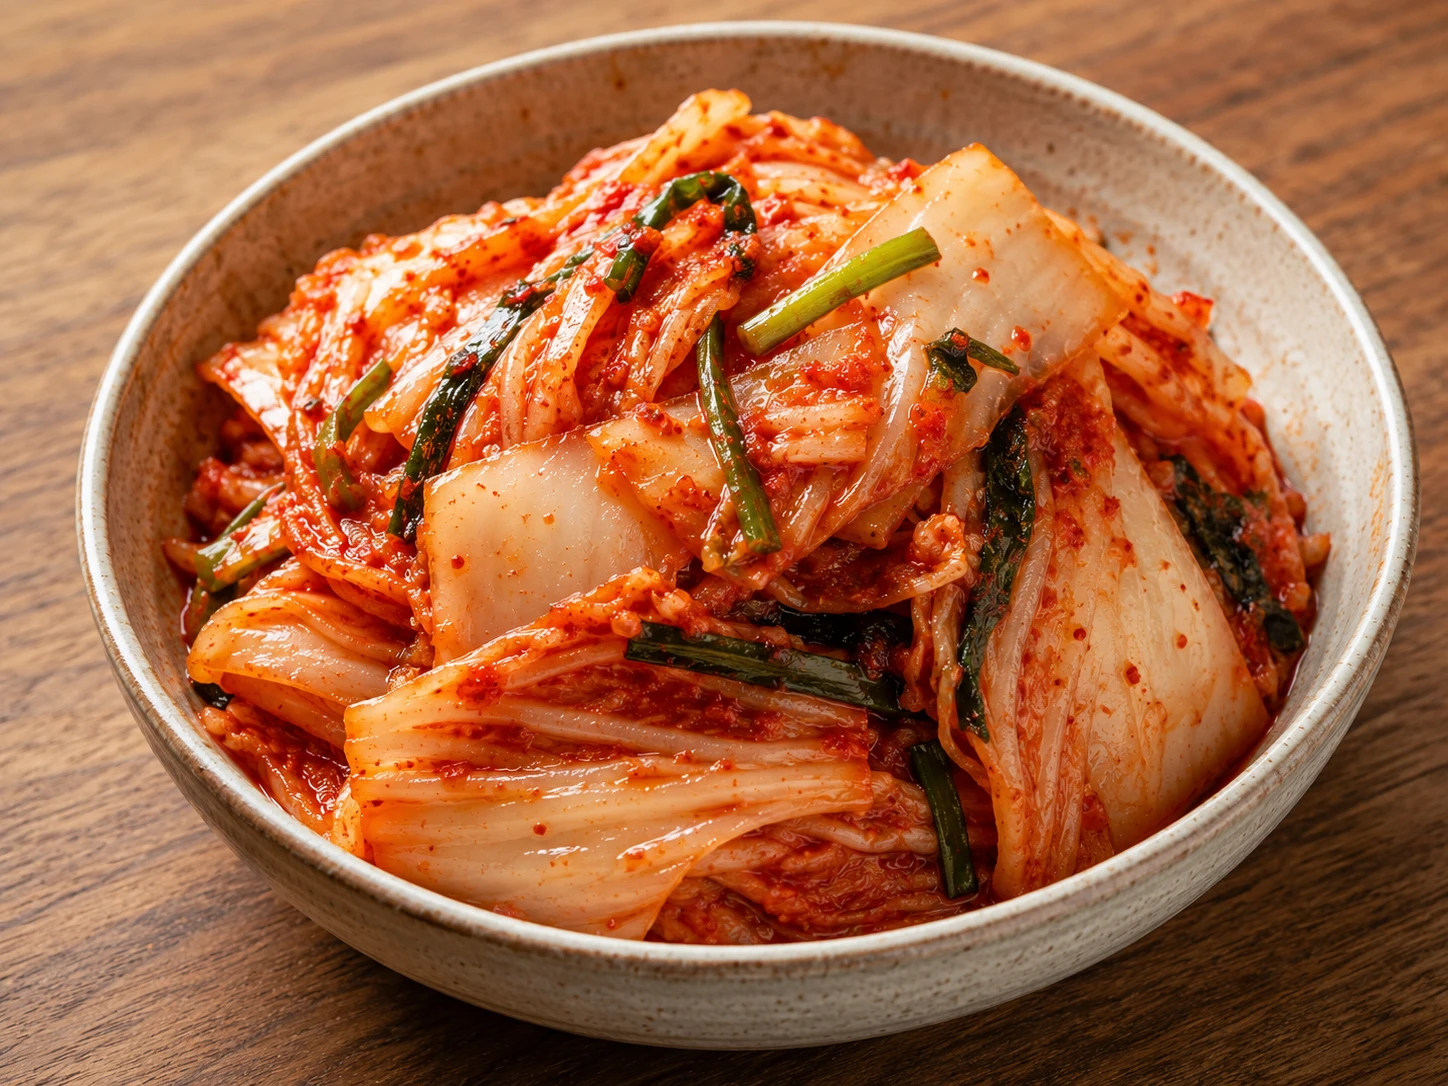
Too mild and watery for bibimbap — disappears into the bold gochujang sauce and makes the bowl taste one-dimensional.
✗ Avoid in bibimbap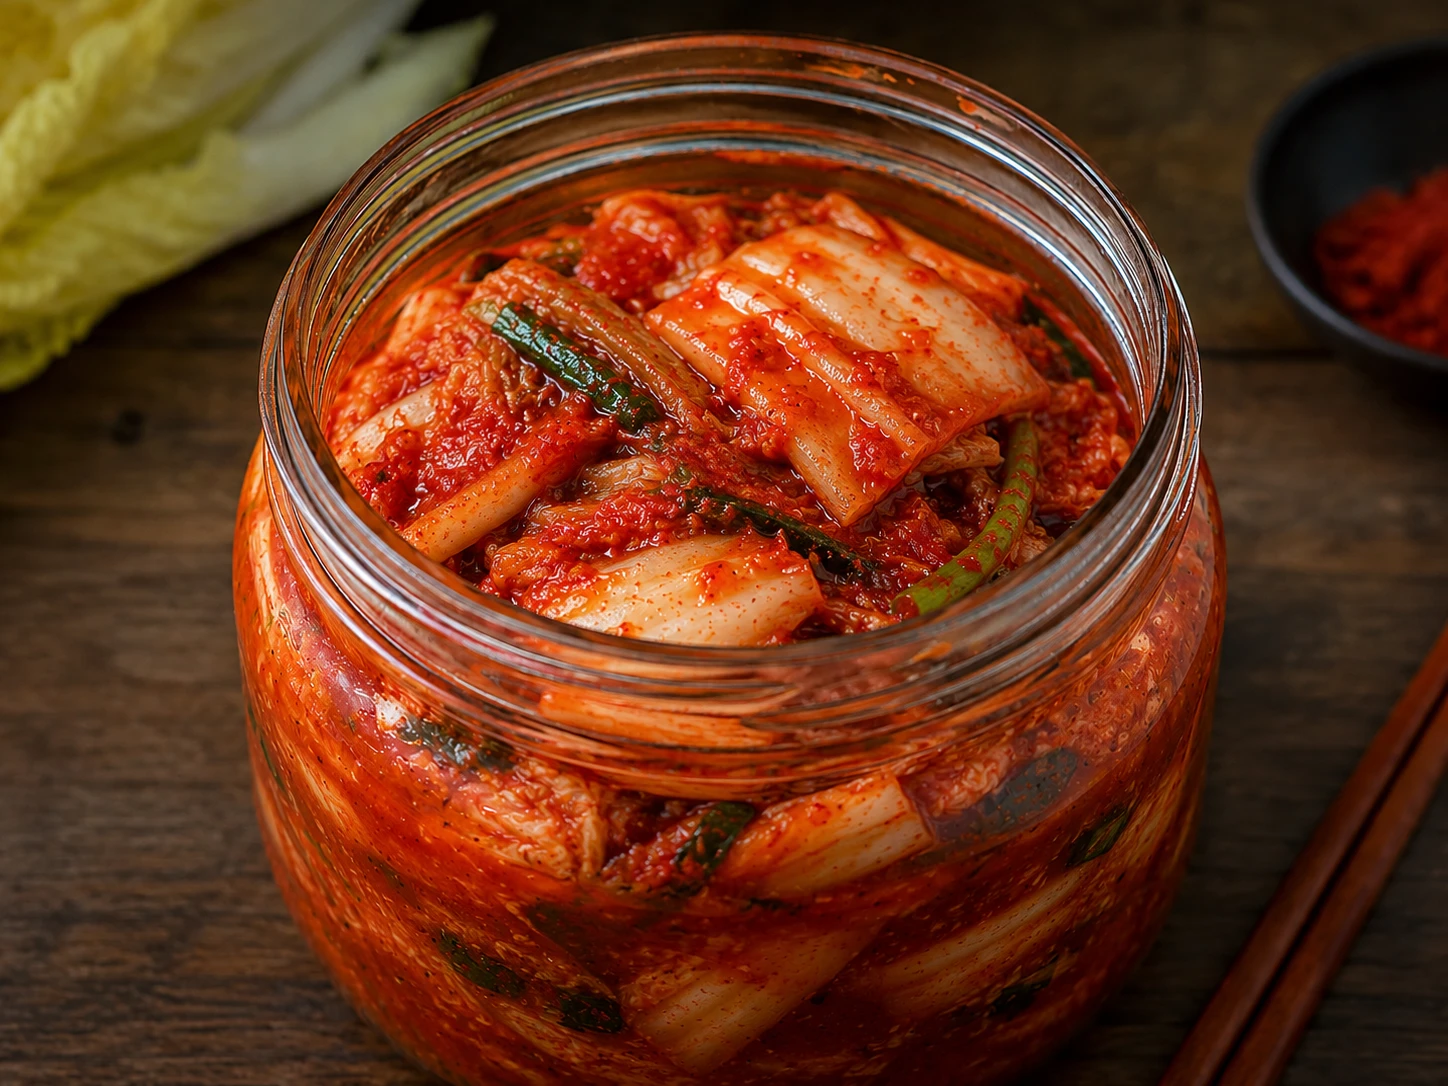
Acceptable as a last resort. Some tang developing. Boost flavour by sautéing with an extra small spoonful of gochujang.
△ Acceptable — boost flavour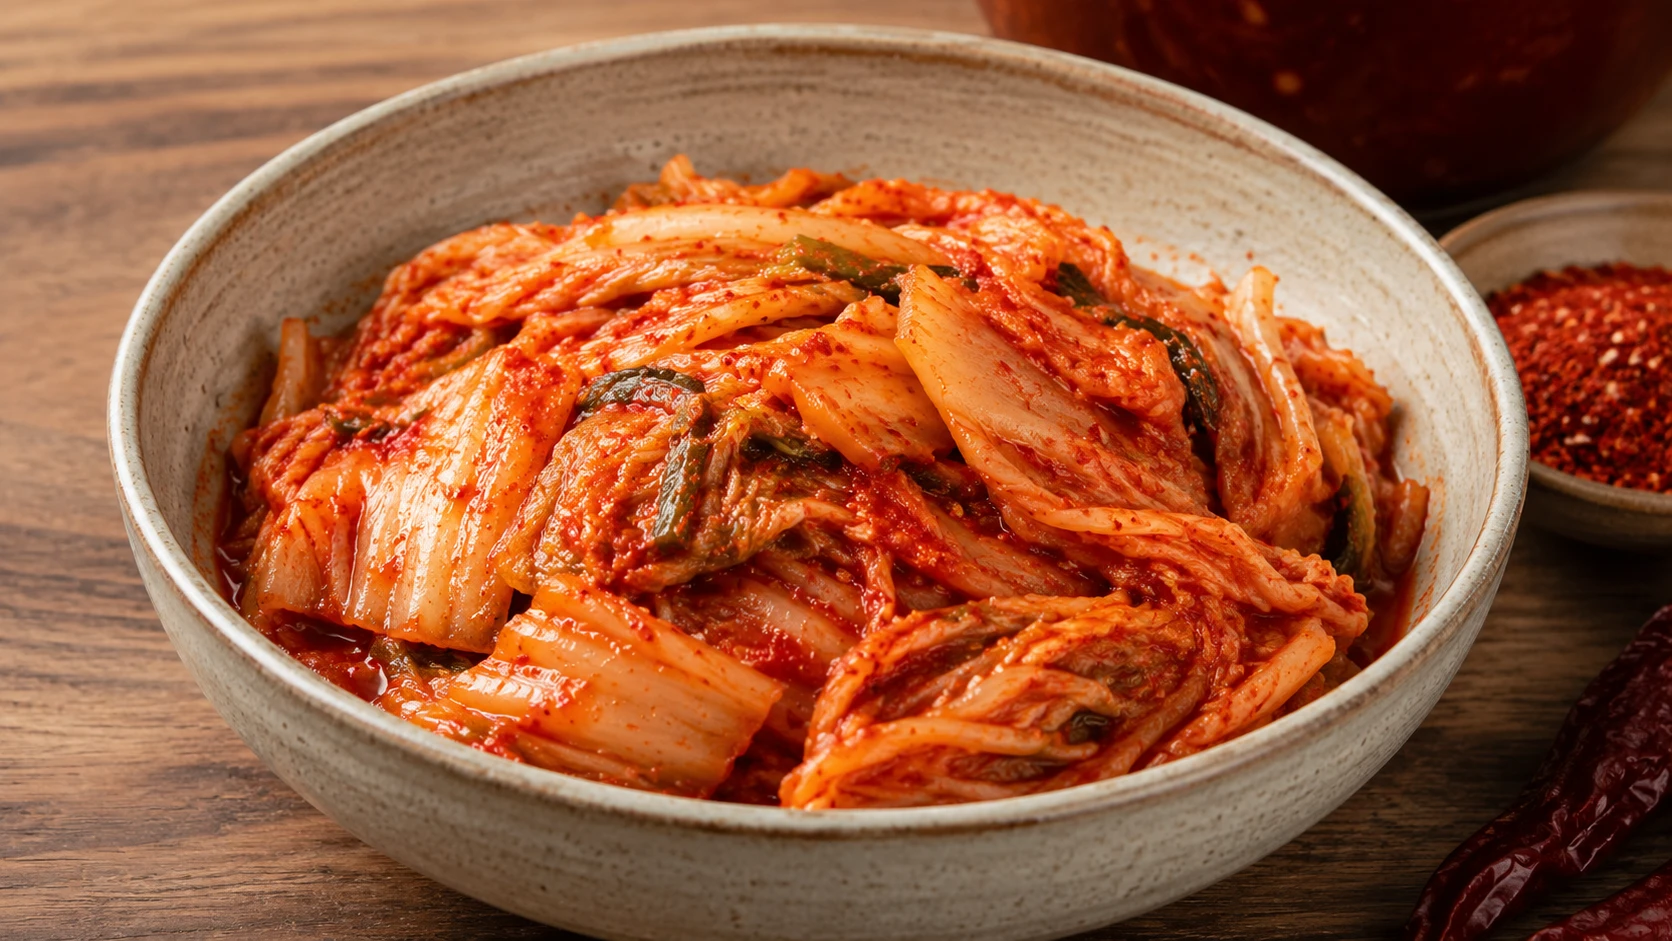
Deep tang that caramelises perfectly in sesame oil. Provides bold acidic contrast to the sweet gochujang sauce — the correct choice.
★ Correct for this recipe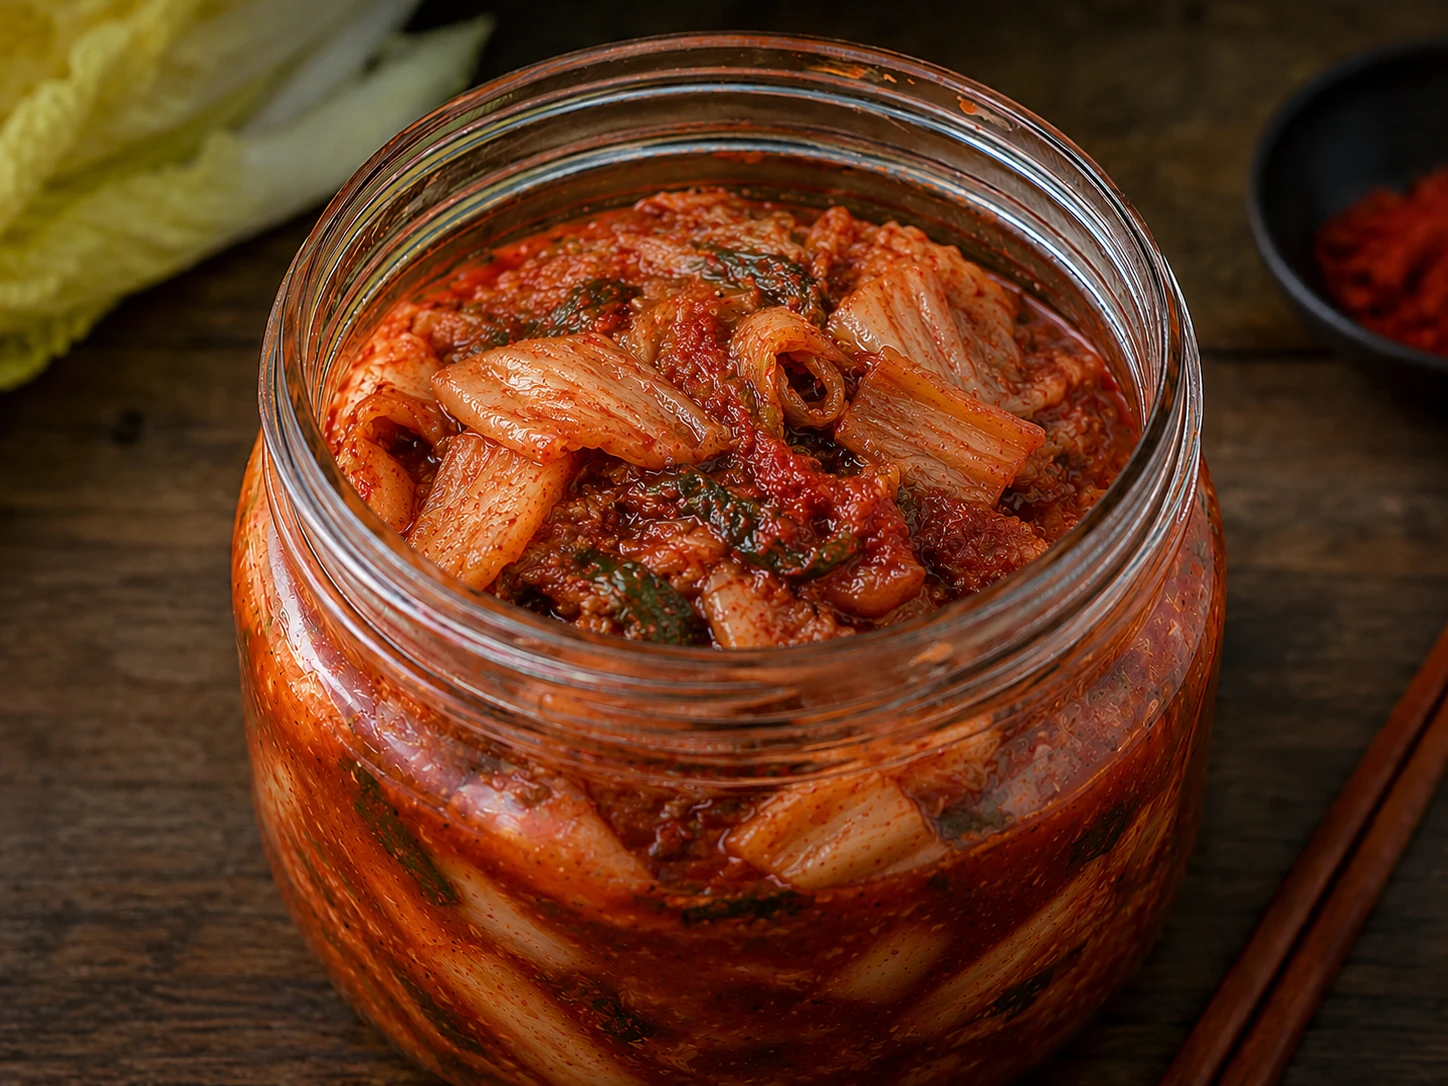
Very sour — excellent for those who love fermented funk in their bibimbap. Use a slightly smaller quantity to avoid overpowering the bowl.
△ Use a smaller quantityIngredients
Make ahead: this sauce keeps in the fridge for 2 weeks. Make a double batch.
Substitution Table
| Ingredient | Best Substitute | Effect | Vegan |
|---|---|---|---|
| Beef mince / bulgogi | Pan-fried firm tofu, edamame, or skip | Less umami; lighter bowl | ✅ |
| Fried egg | Soft-boiled egg or silken tofu | No yolk sauce; different texture | ✅ tofu only |
| Shiitake mushrooms | Oyster or cremini mushrooms | Less earthy; still excellent | ✅ |
| Bean sprouts | Thinly sliced cucumber or daikon | Different crunch; works well | ✅ |
| Gochujang sauce | Sriracha + white miso + sesame oil (2:1:1) | Sharper heat, less sweet | ✅ |
| Short-grain rice | Medium-grain rice (not long-grain) | Less sticky; reduced nurungji | ✅ |
| Dolsot stone bowl | Cast iron skillet for crispy rice | Excellent nurungji alternative | ✅ |
The Complete Dolsot Stone Bowl Guide — How to Get Crispy Nurungji
The dolsot stone bowl is what separates restaurant bibimbap from home bibimbap. The stone retains heat far beyond a ceramic bowl, continuing to cook the rice after it is served. The result is nurungji — a golden, crispy, slightly scorched rice layer at the bottom that is the most coveted part of the bowl in Korea.
Season the dolsot (new bowls only)
Brush interior with sesame oil. Heat empty on medium for 5 minutes. Cool completely. Repeat twice. This prevents cracking and builds a non-stick seasoning layer.
Oil the bowl before EVERY use
Brush sesame oil on all interior surfaces, including up the sides, before every use. This is the step most recipes skip — without it, the rice sticks and burns instead of crisping.
Preheat on medium heat — 3–4 minutes
Place the oiled dolsot on a medium burner. Heat for 3–4 minutes until very hot. Test by dropping one grain of rice in — it should sizzle loudly on contact.
Add rice, press gently, and listen
Add hot cooked rice to the hot bowl. Press into an even layer with the back of a spoon. Continue on medium heat for 5–7 minutes — listen for steady, gentle crackling, not violent burning.
Add toppings while rice crisps
While the rice forms its crust, quickly arrange vegetables, kimchi, and meat on top. The stone bowl stays hot for 20+ minutes — there is plenty of time.
No dolsot? Use a cast iron skillet
Add 1 tbsp sesame oil to a cold cast iron pan. Add rice, press flat. Heat on medium for 6–8 minutes until the bottom turns golden. Check with a spatula — it should release cleanly.
How to Make Kimchi Bibimbap — Full Restaurant-Style Method
Six steps. Each one matters. Do them in this order and everything will be hot and ready at the same moment.
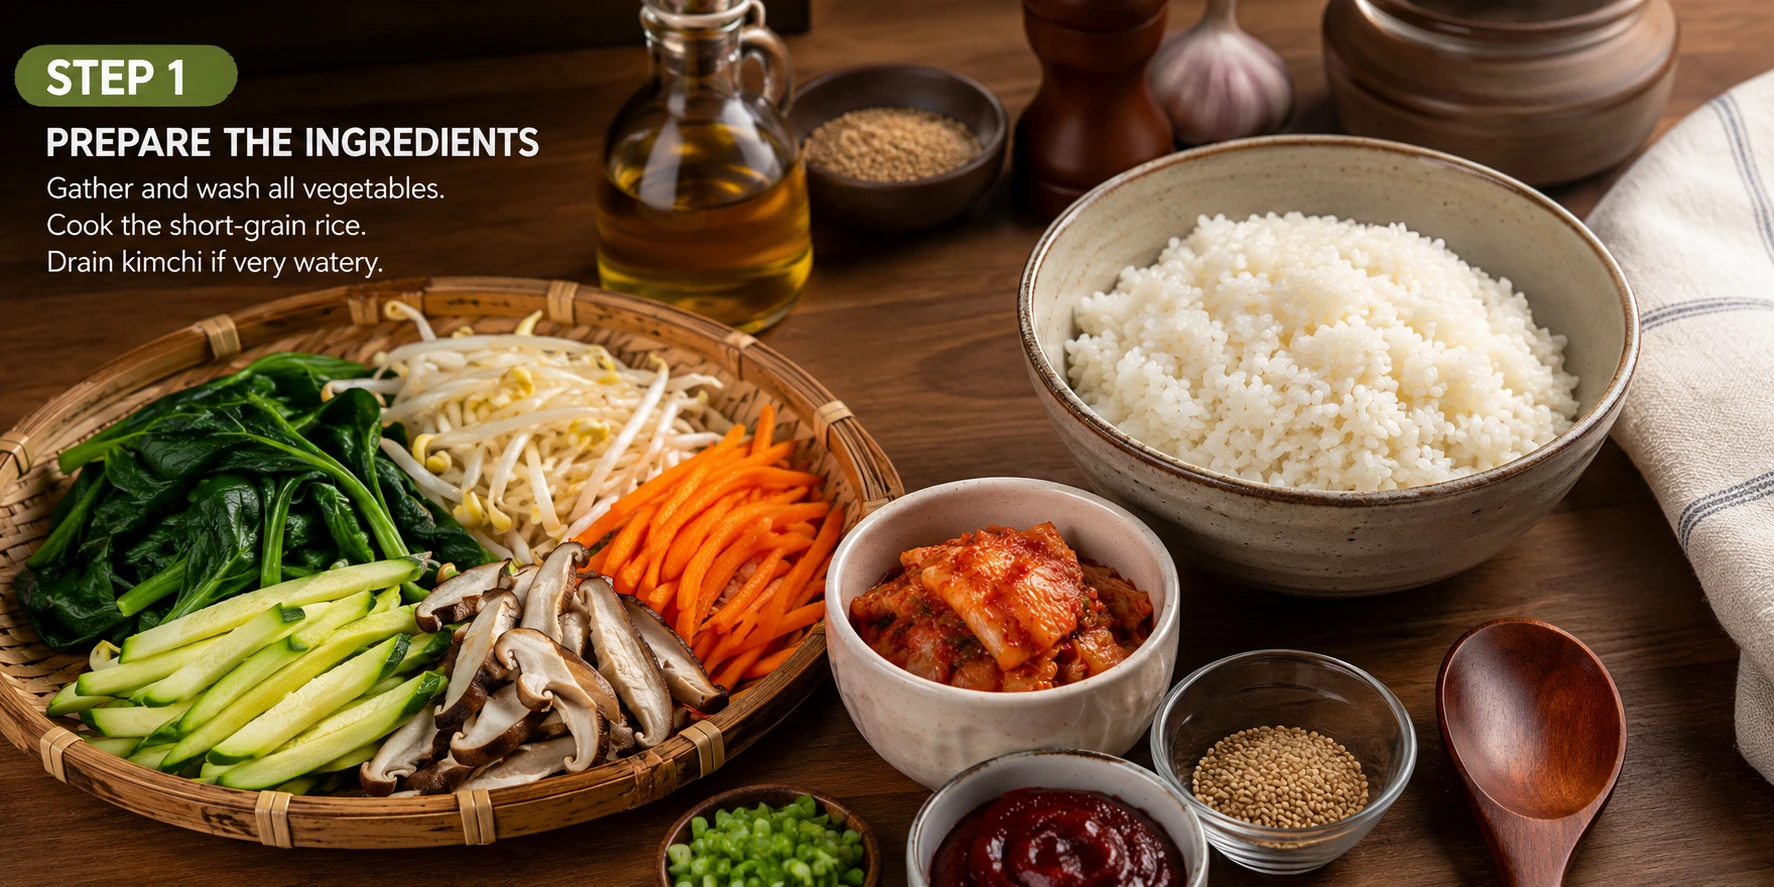
Lay out all your ingredients before you start — this recipe has multiple components and preparation is key. Rehydrate the dried shiitake mushrooms in warm water for 20 minutes. Cook and cool short-grain rice (or use day-old rice). Chop the aged kimchi roughly.
Then make the gochujang sauce: combine gochujang, sesame oil, rice vinegar, sugar, water, minced garlic, and toasted sesame seeds in a small bowl. Whisk until fully smooth — no lumps. Taste and adjust: more gochujang for heat, more honey for sweetness, more vinegar for tang. The sauce should be bold and balanced — spicy-sweet-sour in equal measure. This keeps refrigerated for 2 weeks — make double the batch.
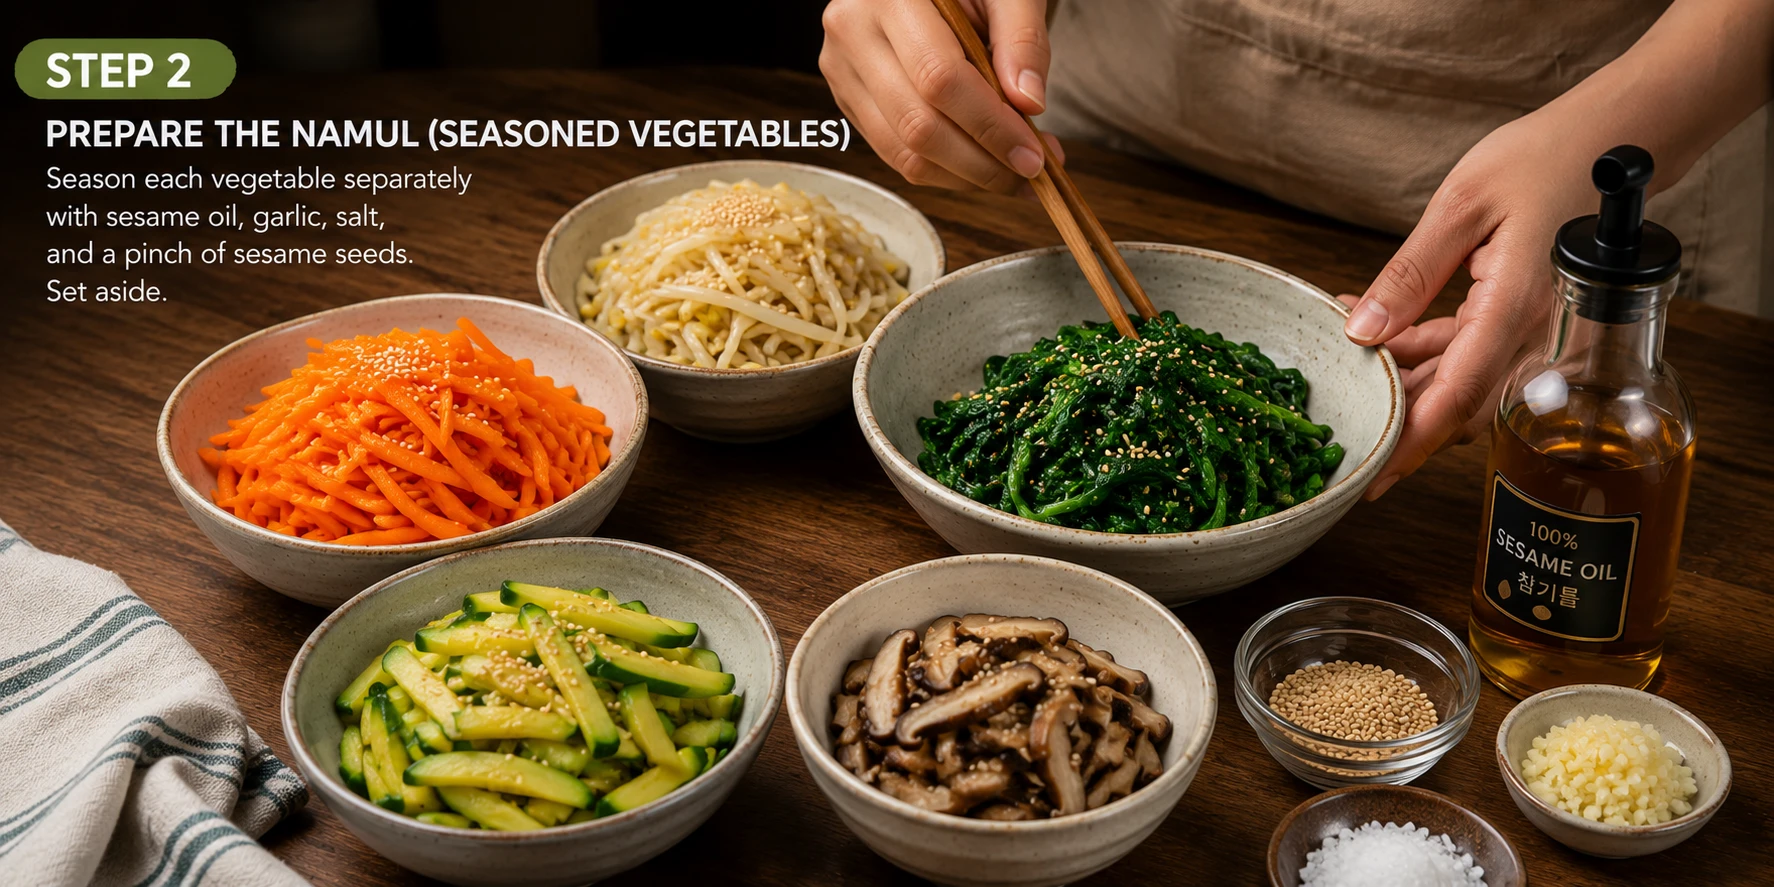
Each vegetable must be seasoned separately — this is the non-negotiable rule of good bibimbap. Cook in this order to avoid washing the pan between each:
- Spinach: Blanch 30 seconds in boiling water. Drain, squeeze bone-dry. Season with 1 tsp sesame oil, ½ tsp soy sauce, pinch of salt.
- Bean sprouts: Blanch 2 minutes. Drain, press dry. Season with 1 tsp sesame oil, pinch of salt, ½ tsp sesame seeds.
- Zucchini: Sauté julienned zucchini in 1 tsp sesame oil over medium-high for 2 minutes. Season with salt.
- Carrot: Sauté julienned carrot in 1 tsp sesame oil for 3 minutes until just tender. Season with salt.
- Mushrooms: Sauté sliced rehydrated shiitake in 1 tsp sesame oil for 3–4 minutes. Add ½ tsp soy sauce at the end.
- Kimchi: Squeeze brine. Sauté chopped aged kimchi in 1 tsp sesame oil for 2–3 minutes until caramelised.
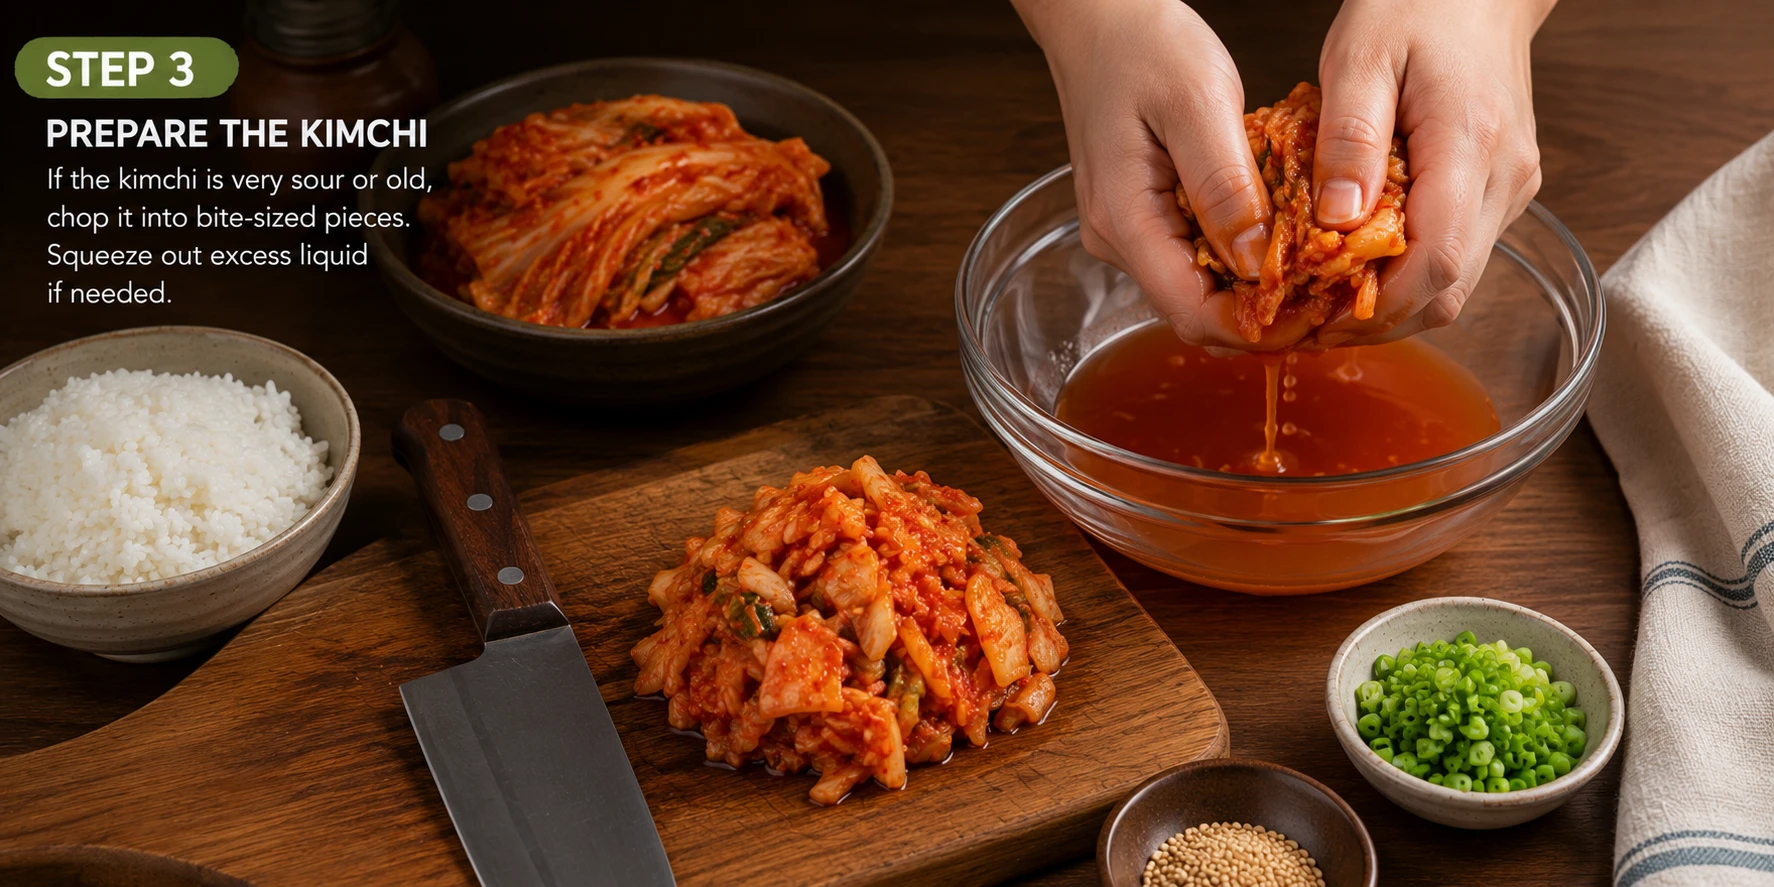
Squeeze the brine from the chopped aged kimchi into a bowl — reserve the juice. Sauté the kimchi in 1 tsp sesame oil over medium-high heat for 2–3 minutes until the edges caramelise and the colour deepens. This is the critical step — it removes excess moisture and concentrates the umami. Set aside.
If using beef: season beef mince with 1 tbsp soy sauce, 1 tsp sesame oil, 1 tsp sugar, and 1 minced garlic clove. Heat a pan over high heat until smoking. Add beef and spread flat — do not stir for 60 seconds to allow caramelisation on the bottom. Then stir-fry 2–3 minutes until cooked through and slightly charred. Set aside.
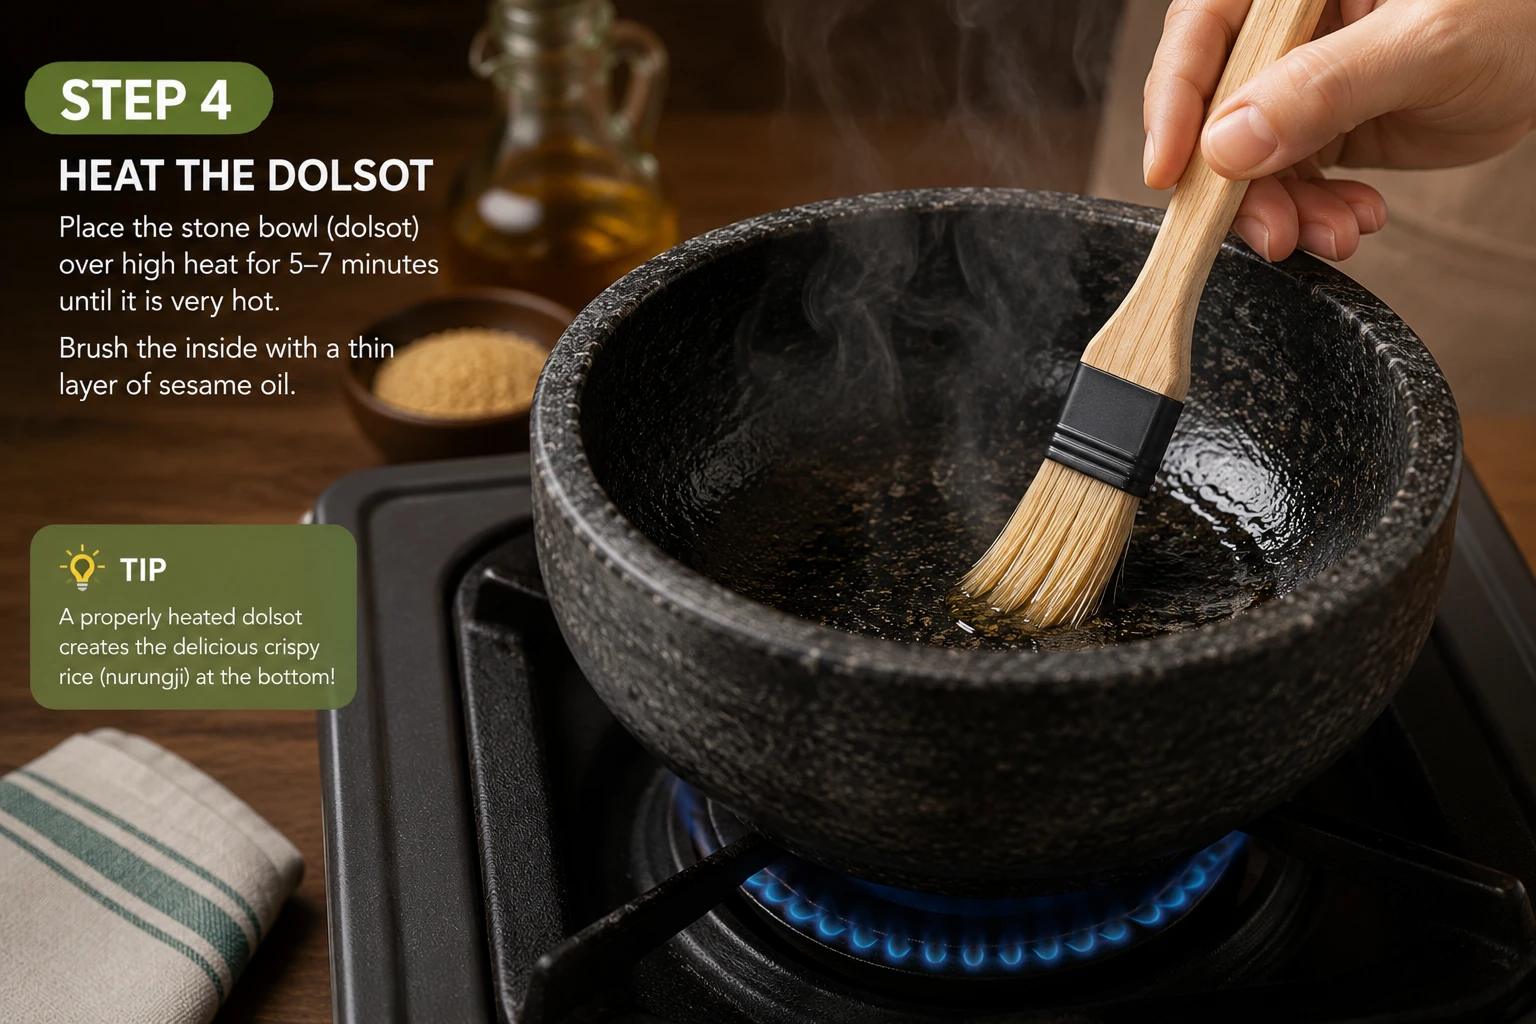
Brush sesame oil on all interior surfaces of the dolsot. Heat on medium for 3–4 minutes until a grain of rice sizzles loudly on contact. Add hot cooked rice (must be hot — not cold). Press gently into an even layer with the back of a spoon. You will hear immediate crackling. Continue on medium heat — the sound should be steady and consistent, not violent.
After 5–7 minutes, use a spoon to gently lift a small corner of the rice. The bottom should be golden yellow and release cleanly. If it is still white and sticking, give it another 2 minutes.
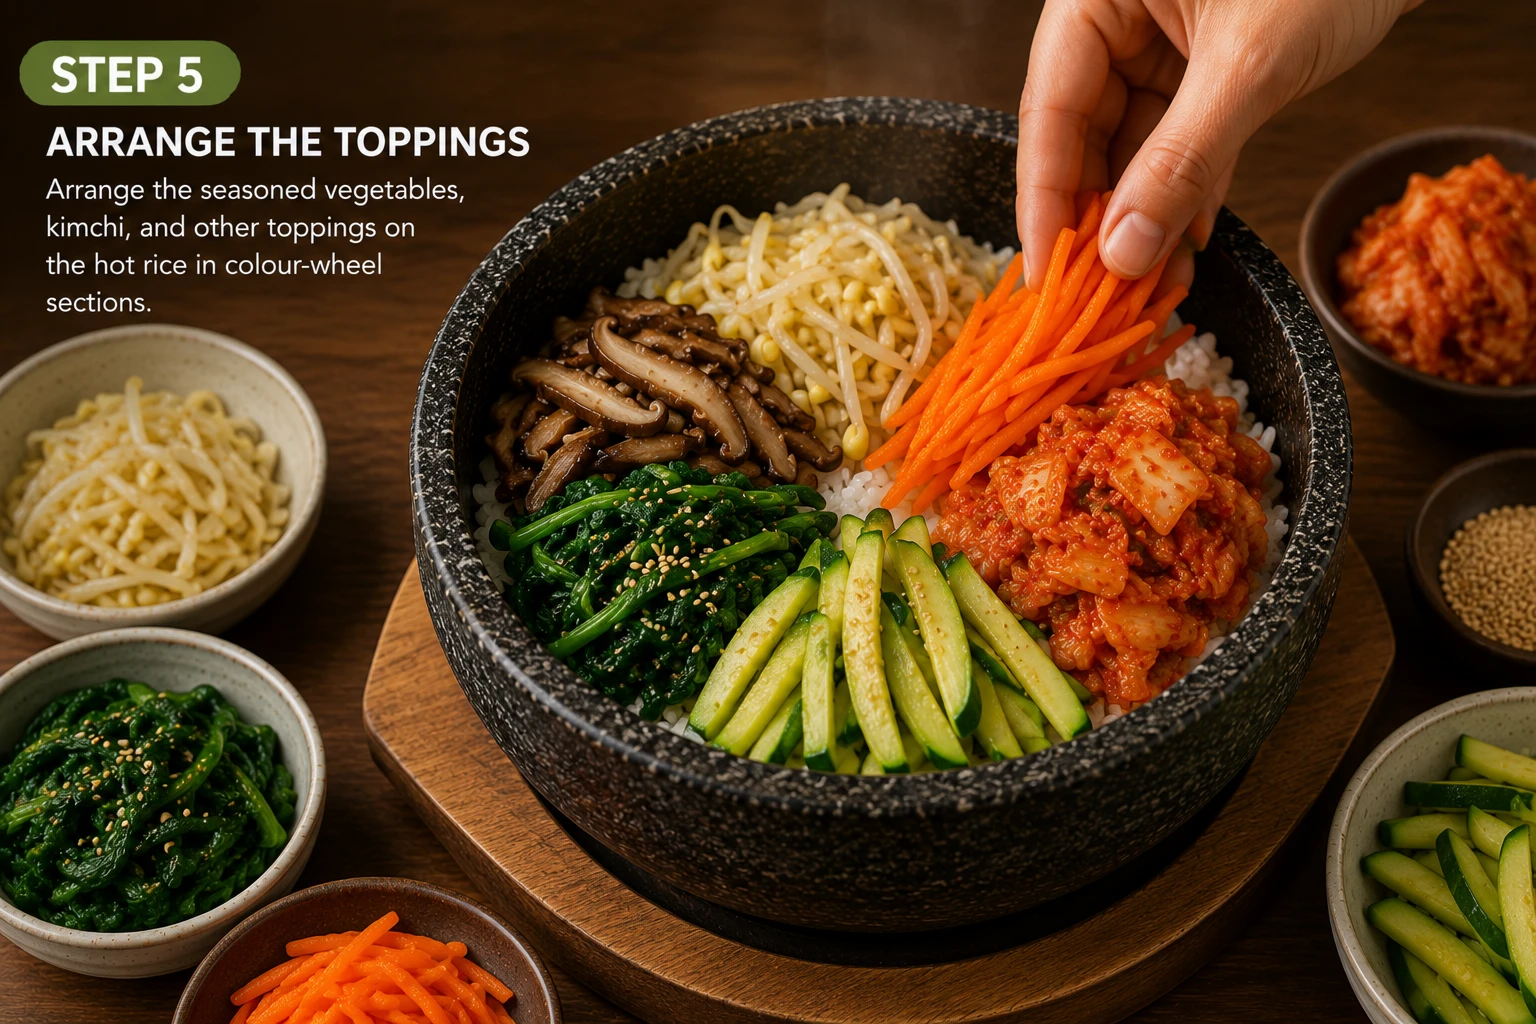
While the rice forms its crust, arrange toppings in separate sections on top — the traditional colour-wheel style. There is no fixed order but aim for: dark green spinach next to bright orange carrot, pale bean sprouts next to deep red kimchi, white zucchini next to dark brown mushrooms. The visual contrast makes bibimbap as much a feast for the eyes as the palate.
Add the cooked meat to the very centre. Leave a gap in the centre for the egg. The bowl is almost ready.
Fry the egg sunny-side up in a separate small pan over medium heat — 2 minutes until whites are fully set and yolk remains liquid. Slide into the centre gap of the bibimbap. Drizzle 1–2 tablespoons of gochujang sauce over the entire bowl. Scatter toasted sesame seeds. Serve the dolsot immediately, still sizzling, on a wooden board.
To eat: pierce the egg yolk first, then use a spoon to mix everything together vigorously until the rice, vegetables, kimchi, egg, and sauce are fully combined. Scrape the crispy nurungji from the bottom as you eat — it is the reward for all the preparation.
Test Kitchen Results — Key Variables
Dolsot produced the best nurungji by far. Cast iron came a close second — with the right technique it creates an excellent crispy crust. Regular bowl rated significantly lower — no crust, faster cooling, flatter flavour overall.
Winner: Dolsot Stone Bowl3–4 minutes was the sweet spot — enough for consistent nurungji without burning. 5 minutes caused burning on the first layer. 1–2 minutes produced little to no crust.
Winner: 3–4 MinutesBlind taste test: homemade gochujang sauce was preferred by every taster over three popular bottled brands. The primary difference was freshness of garlic and rice vinegar tang. Bottled sauces were flatter and sweeter.
Winner: Homemade SauceThe single biggest upgrade to kimchi bibimbap is seasoning each namul vegetable separately with individual amounts of sesame oil and salt. In blind taste tests, this produced a bowl rated dramatically higher than vegetables seasoned together — even with identical ingredients. The technique takes 10 extra minutes and is worth every second.
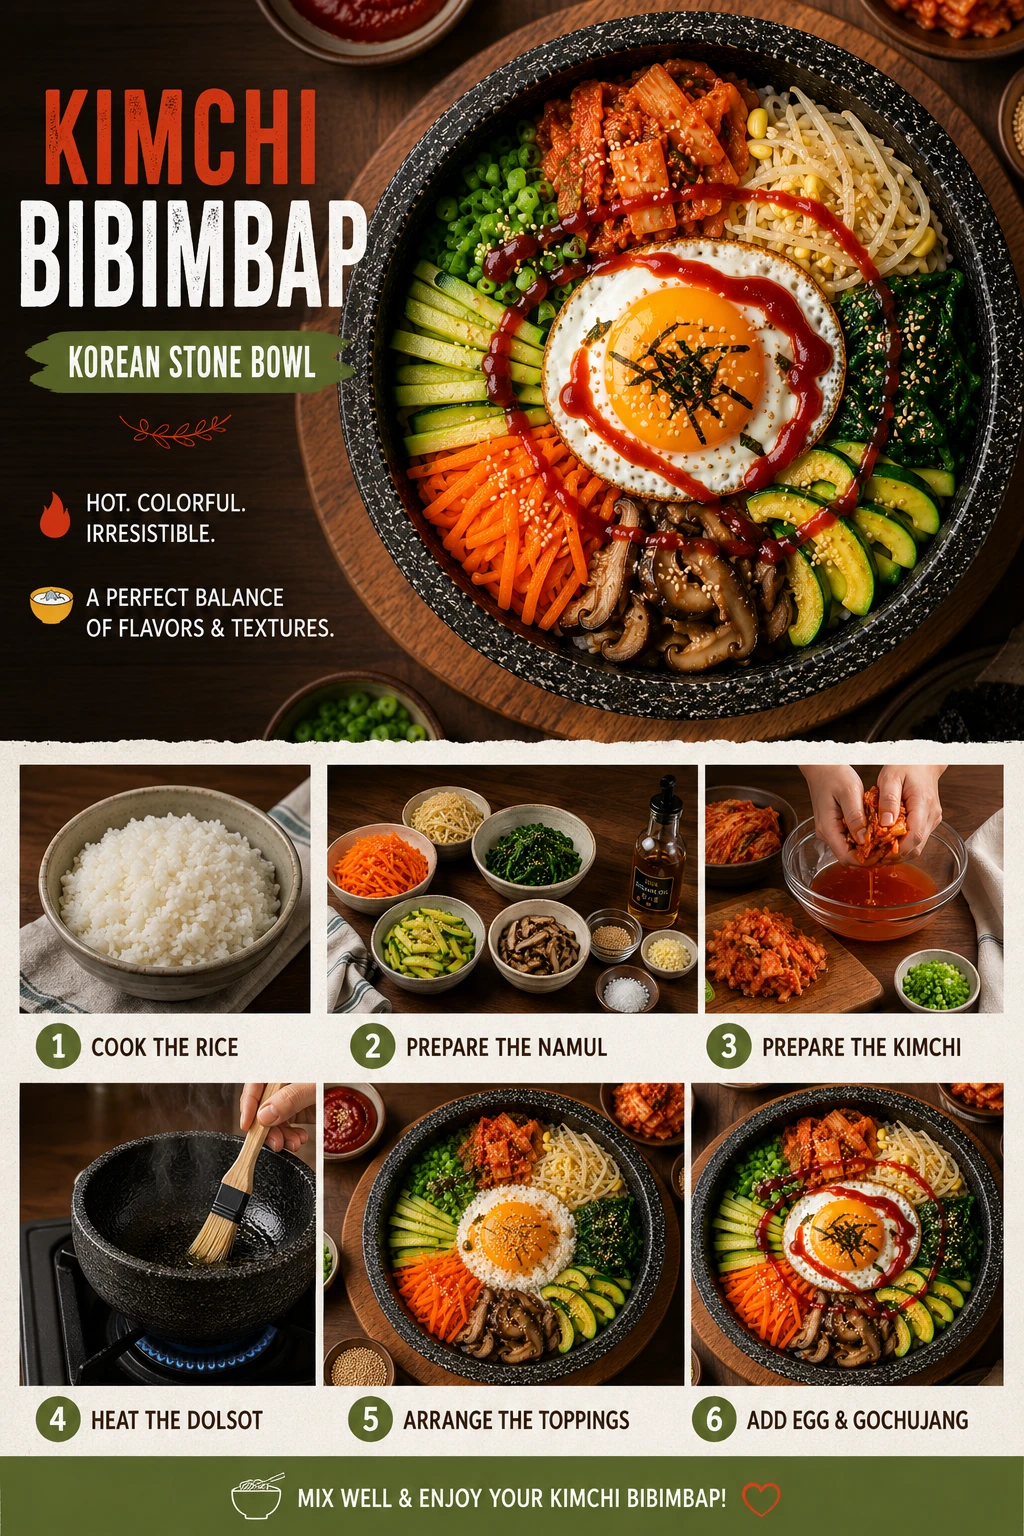
Kimchi Bibimbap (김치 비빔밥)
Dolsot stone bowl · Namul vegetables · Gochujang sauce · 45 minutes
- 2 cups cooked short-grain rice (hot)
- ¾ cup aged kimchi (Stage 3), chopped
- 2 large eggs
- 100g beef mince (optional)
- 1 zucchini + 1 carrot, julienned
- 100g spinach; 100g bean sprouts
- 4 dried shiitake, rehydrated
- 3 tbsp sesame oil (divided)
- 3 tbsp gochujang (for sauce)
- 2 tbsp toasted sesame seeds
- 1Make gochujang sauce: whisk gochujang, sesame oil, rice vinegar, sugar, water, garlic, sesame seeds.
- 2Season each namul separately in sesame oil + salt: spinach, bean sprouts, zucchini, carrot, mushrooms.
- 3Sauté kimchi in sesame oil 2–3 min. Cook beef (if using) in hot pan until caramelised, 3–4 min.
- 4Oil dolsot, heat 3–4 min on medium. Add hot rice, press flat. Cook 5–7 min until crackling and golden underneath.
- 5Arrange namul in colour-wheel sections over rice. Place meat in centre. Fry eggs sunny-side up; add to centre.
- 6Drizzle 2 tbsp gochujang sauce. Scatter sesame seeds. Serve sizzling. Mix everything vigorously before eating.
Per serving (2 servings total). Reviewed by Dr. Sarah Mitchell RD, PhD · June 30, 2026
5 Kimchi Bibimbap Variations
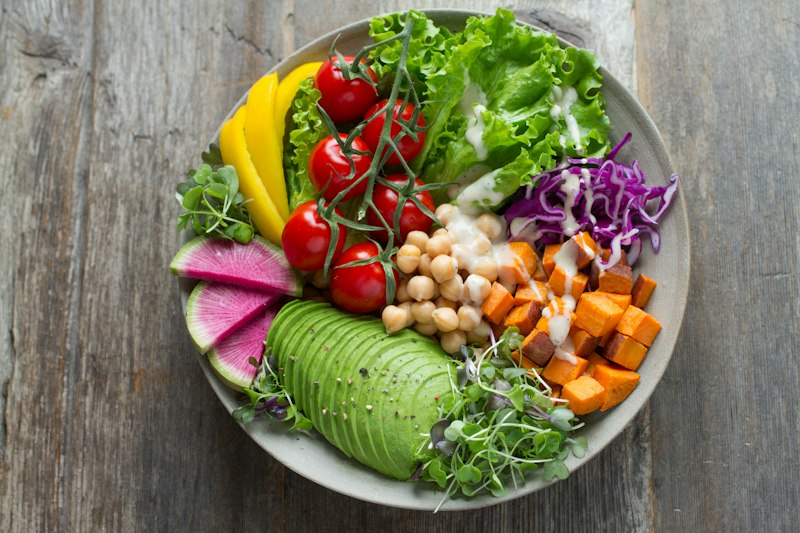 Vegan
Vegan
Replace eggs with pan-fried silken tofu (golden outside, creamy inside) and use vegan kimchi (no fish sauce). Every other component is already plant-based. Use tamari instead of soy sauce for fully gluten-free.
Changes: Skip beef and egg. Add 200g silken tofu, pan-fried in sesame oil. Use vegan kimchi. Add extra mushrooms for umami.
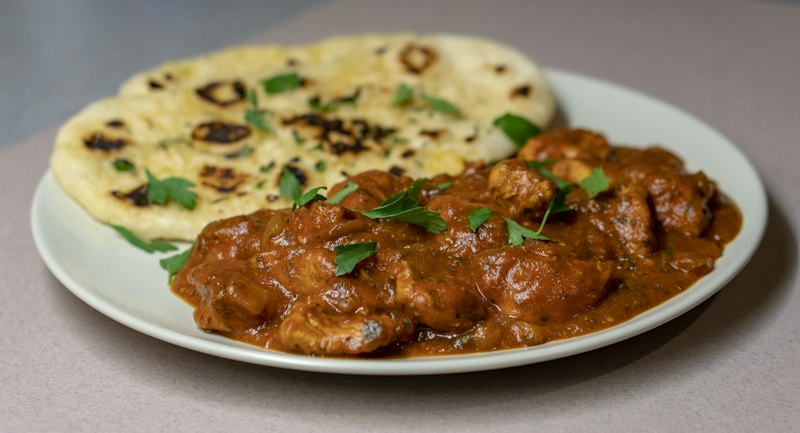 Coastal Korean
Tongyeong bibimbap from Korea’s southern coast traditionally uses seafood instead of beef. Sautéed squid, shrimp, or mixed seafood with sesame oil creates a lighter, brighter bowl with clean oceanic flavour.
Changes: Replace beef with 150g mixed seafood, quickly sautéed in sesame oil and garlic for 2–3 minutes. Do not overcook.
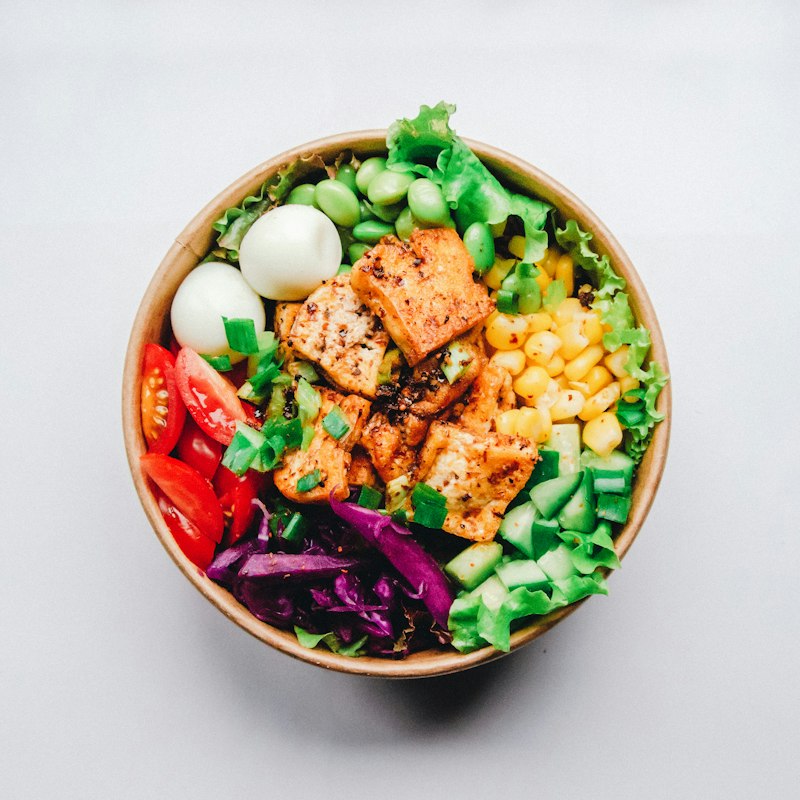 Health
Replace white rice with mixed grains (quinoa, farro, barley) for a nutty, higher-fibre base. The bold gochujang sauce and kimchi stand up to the earthier grain flavours.
Changes: Replace white rice with 2 cups cooked mixed grains. Everything else stays the same. Cannot achieve nurungji in a dolsot — use a regular bowl.
 No-Cook
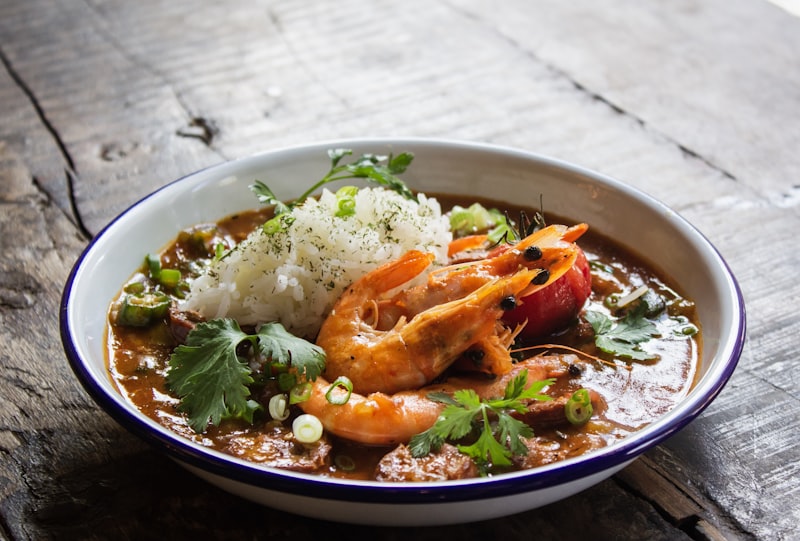
Hwe dup bap is a Korean raw fish rice bowl made with sashimi-grade fish instead of cooked protein. Add raw cucumber, perilla leaves, and raw kimchi instead of sautéed kimchi.
Changes: Use sashimi-grade salmon or tuna, sliced thin. No dolsot — serve in a regular bowl. Use raw kimchi. Add cucumber, perilla, avocado.
 Fusion
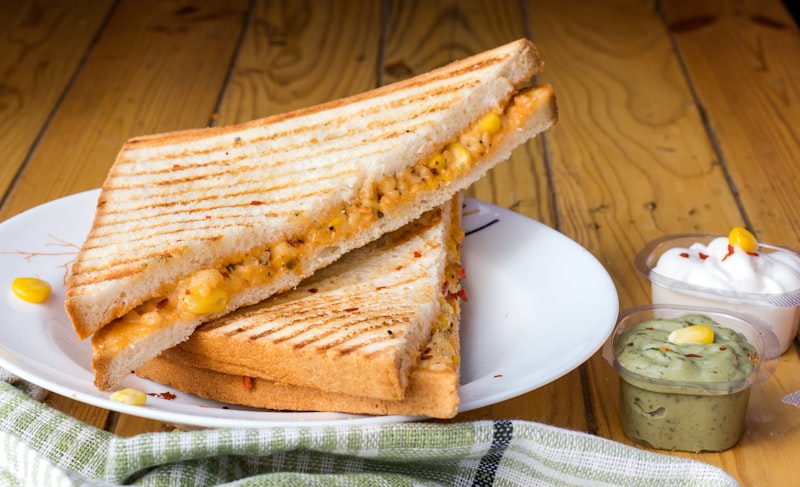
Adding a slice of mozzarella to the hot dolsot just before the egg — letting it melt from the bowl’s heat — creates a K-fusion version that is wildly popular with Western audiences. The cheese tempers the spice.
Changes: Add 40g sliced mozzarella on top of hot rice 1 minute before adding vegetables. Reduce gochujang sauce to 1 tbsp per bowl.
Pairing Guide — What Goes with Kimchi Bibimbap
Bibimbap is a complete meal in one bowl. In a Korean restaurant, it is always served with doenjang jjigae and 2–3 banchan (small side dishes).
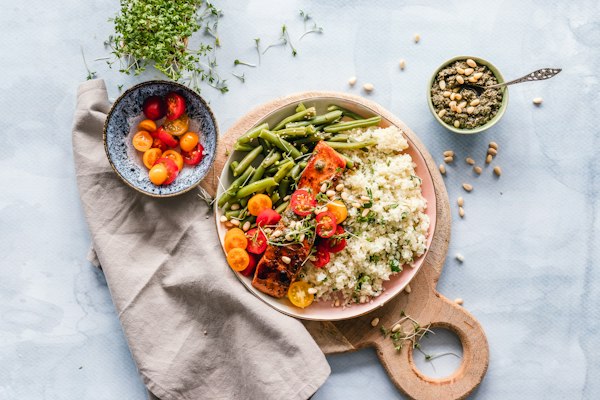
Fermented soybean paste soup is the classic Korean pairing — savoury, warming, and a perfect foil to spicy gochujang bibimbap.
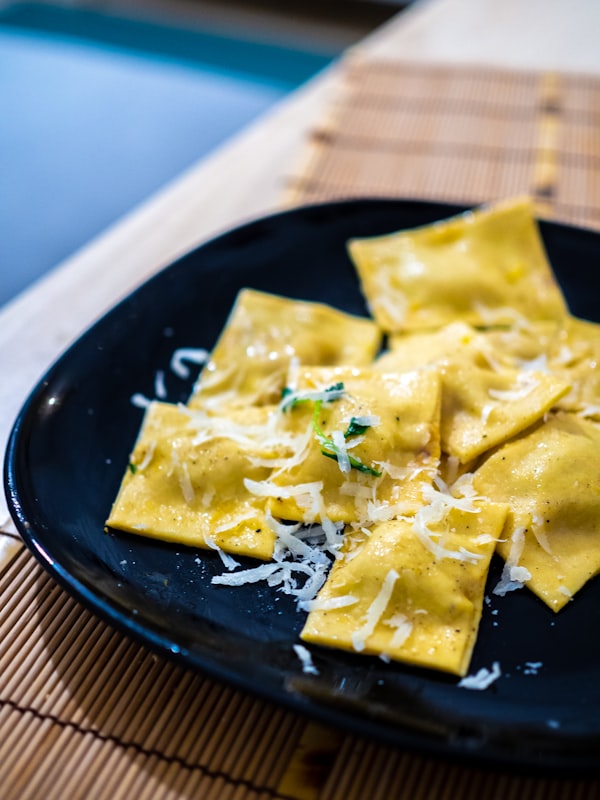
Thinly sliced cucumber with gochugaru, garlic, sesame. Cool, crunchy, cuts through the richness of the egg yolk.
A small dish of cold, raw aged kimchi on the side preserves probiotic benefits and adds textural contrast to the sautéed kimchi in the bowl.

Roasted barley tea is Korea’s default drink — nutty, caffeine-free, and perfect for washing down gochujang heat without clashing with the flavours.

Korea’s traditional milky rice wine is slightly sweet and fizzy — pairs beautifully with spicy bibimbap, slightly chilled in a traditional bowl-style cup.
A classic Korean rolled egg omelette with vegetables — mild, slightly sweet, a popular banchan alongside bibimbap at Korean home tables.
Looking for more Korean bowl ideas and pairing inspiration? Our Complete Kimchi Recipe Guide covers 50+ kimchi recipes across every style and occasion, and our Kimchi Rice Bowls Hub has six fully built rice bowl recipes with pairing guides for each one.
How to Store and Reheat Kimchi Bibimbap Components

Reheat namul vegetables and kimchi together in a pan over medium with 1 tbsp sesame oil and 1 tbsp water, covered, for 3–4 minutes. Reheat rice separately. Fry egg fresh. Assemble hot. This preserves texture and is the only method that tastes close to fresh.
Store each component separately in airtight containers. Gochujang sauce keeps 2 weeks refrigerated. Never store a fully assembled bowl — rice becomes mushy and the crust is lost entirely. Always reassemble fresh.

Cooked rice and sautéed kimchi freeze well for up to 1 month. Namul vegetables do not freeze well — they lose their crunch. Cook namul fresh from ingredients (15 min) rather than freezing. Thaw rice overnight in fridge or on microwave defrost.
Cover rice and toppings with a damp paper towel and microwave on high for 90 seconds. No nurungji possible. Fry a fresh egg separately — 2 minutes on the hob. Quality drop is noticeable but acceptable for a weekday lunch.
Is Kimchi Bibimbap Healthy? What the Science Says
Kimchi bibimbap is one of the most nutritionally complete Korean dishes. The diversity of vegetables alone — spinach (iron, vitamins A and K), carrot (beta-carotene), zucchini (vitamin C), bean sprouts (folate, vitamin C), and shiitake mushrooms (B vitamins, selenium) — delivers a remarkable range of micronutrients in a single bowl.
The aged kimchi component contributes Lactobacillus probiotic bacteria linked to improved gut microbiome diversity. A 2024 study in BMJ Open found that daily kimchi consumption was associated with reduced abdominal fat. The gochujang sauce also contributes capsaicin, which research in the journal Nutrients has linked to modest thermogenic (metabolism-boosting) effects.
Kimchi Bibimbap FAQ
Every common question about kimchi bibimbap — answered with the depth of someone who has tested this dish across 9 batches.
Kimchi bibimbap (김치 비빔밥) is a Korean rice bowl made with steamed short-grain rice topped with sautéed kimchi, seasoned vegetables (namul), a fried egg, and bold gochujang sauce. Bibimbap literally means mixed rice — everything is stirred together before eating. The dolsot version creates a signature crispy scorched rice crust called nurungji.
Regular bibimbap is served in a regular bowl at room temperature. Dolsot bibimbap is served in a preheated stone bowl that continues cooking the rice after it is served, creating a crunchy golden scorched rice crust called nurungji. Dolsot bibimbap is always served hotter with a textural contrast regular bibimbap cannot replicate.
No — excellent kimchi bibimbap can be made in a regular bowl, though it will miss the crispy nurungji rice crust. As an alternative, spread cooked rice in a cast iron skillet with sesame oil and cook over medium heat for 5–6 minutes before assembling toppings — this mimics the crispy bottom of dolsot bibimbap effectively.
Traditional kimchi bibimbap vegetables (namul) include blanched and seasoned spinach, sautéed zucchini, julienned carrot, rehydrated shiitake mushrooms, and bean sprouts. Each is seasoned separately with sesame oil, soy sauce, and salt. The kimchi replaces or supplements the vegetables — use aged, sautéed kimchi for the best flavour.
Bibimbap gochujang sauce (yangnyeom gochujang) combines gochujang paste with sesame oil, rice vinegar, sugar or honey, water, minced garlic, and toasted sesame seeds. The ratio is roughly 3 parts gochujang to 1 part each of sesame oil and vinegar. This sauce also works as a dipping sauce for Korean pancakes.
Yes — kimchi bibimbap works well without meat. Increase the kimchi quantity and add extra mushrooms for umami. The egg provides sufficient protein. For a vegan version, skip the egg and add pan-fried tofu or edamame, and use vegan kimchi made without fish sauce.
Break the egg yolk first and let it run over the rice, then use a spoon to mix everything together vigorously — rice, vegetables, kimchi, egg, and gochujang sauce — until fully combined. The mixing is not optional; it is what defines bibimbap. Eat immediately while the stone bowl is hot, and scrape the crispy nurungji from the bottom last.
Short-grain Japanese or Korean white rice is the correct rice for bibimbap. Its natural stickiness allows it to form the crispy nurungji crust in the stone bowl and to absorb sauces when mixed. Long-grain rice such as basmati or jasmine is too dry and will not form a proper crust.
Kimchi bibimbap is a nutritionally balanced meal. A serving provides approximately 580 calories with 24g protein, multiple vegetables delivering vitamins A, C, and K, probiotic-rich kimchi for gut health, and complex carbohydrates from rice. It is naturally dairy-free and can be made gluten-free with tamari instead of soy sauce.
Start with 1–2 tablespoons per serving and mix through — more can always be added. The sauce should coat the rice and vegetables without making the bowl soupy. For first-timers, use 1 tablespoon and serve extra on the side; for authentic Korean heat, 2–3 tablespoons is standard.
Aged kimchi (at least 3 weeks old) makes far better kimchi bibimbap than fresh kimchi. Aged kimchi has more complex acidity that balances the rich gochujang sauce and egg yolk. When sautéed in sesame oil, aged kimchi caramelises and develops deep umami that fresh kimchi cannot produce.
Nurungji (누룽지) is the crispy, golden, slightly scorched rice crust that forms at the bottom of a dolsot stone bowl. Brush the bowl with sesame oil, add hot cooked rice, and heat on medium for 5–7 minutes until crackling is audible and steam rises from the edges. The bottom becomes toasty and crunchy while the top stays fluffy.
Season a new dolsot by brushing the interior with sesame oil and heating it empty on medium heat for 5 minutes, then cooling completely — repeat 2–3 times before first use. Never add cold liquid to a hot dolsot, as it may crack. Hand wash with warm water only, no soap or dishwasher, and store dry.
The most authentic protein is bulgogi (marinated beef) or gochujang-seasoned ground beef. Other excellent options include crispy tofu for a vegan version, chicken breast marinated in soy sauce and sesame oil, or simply a soft-boiled egg as the only protein. Pork belly sliced thin and pan-fried until crispy is also popular in Korea.
Was this kimchi bibimbap guide helpful?
Your feedback helps us improve KimchiGuide for everyone.